Page 135 of 356
CD Adapter Kits
It is possible to use a CD adapter kit with your cassette
tape player after activating the bypass feature
on your
tape player.
To activate the bypass feature, the ignition must be on.
Turn your radio off. Press TAPEPLAY and hold for .
three seconds. After three seconds, the tape symbol
in the display will flash for two seconds indicating
the feature is active. Turn the radio on and insert
the adapter.
This override feature will remain active until
EJECT
is pressed.
.1 *
AM-FM Stereo with Cassette Tape Player
and Equalizer (Option)
Playing the Radio
VOL: Push this knob to turn the system on or off. Turn
it clockwise to increase volume and counterclockwise to
decrease volume.
RECALL: Press this button briefly to recall the station
being played or the clock display.
If you press the knob
when the ignition is off, the clock will show for a
few seconds.
'i-
3-13
ProCarManuals.com
Page 137 of 356

0 ElO: The tape is tight and the player can’t turn
the tape hubs.
Remove the tape. Hold the tape with
the open end down and try to turn the right hub
counterclockwise with a pencil. Turn the tape over and try to turn the right hub. If the hubs do not turn
easily, your tape may be damaged and should not be
used in the player. Try a new tape to make sure your
player is working properly.
Ell: The tape is broken.
E12: There is a communication problem between the
cassette mechanism and the radio.
PREV (1): Press this button or the SEEK down arrow to
search for the previous selection on the tape. Your tape
must have at least three seconds of silence between each
selection for PREV or SEEK to work. The tape direction
arrow blinks during PREV or SEEK operation. Press
PREV or the SEEK down
arrow to stop searching. The
sound is muted during PREV or SEEK operation.
NEXT (2): Press this button or the SEEK up arrow to
search for the next selection on the tape. If you hold the
button or press it more
than once, the player will
continue moving forward through the tape. Your tape
must have at least three seconds
of silence between each
selection for NEXT
or SEEK to work. The tape
direction arrow blinks during NEXT or SEEK operation.
Press PREV or the SEEK up arrow to stop searching.
The sound is muted during NEXT or SEEK operation.
PROG (3): Press this button to play the other side of
the tape.
I
00 (4): Press this button to reduce background noise.
Note ,that the double-D symbol will appear on the
display.
Dolby Noise Reduction is manufactured under a license
from Dolby Laboratories Licensing Corporation. Dolby
and the double-D symbol are trademarks of Dolby
Laboratories Licensing Corporation.
REV (5): Press this button to reverse the tape rapidly.
Press
it again to return to playing speed. The radio will
play the last-selected station while the tape reverses.
You may select stations during REV operation by using
SEEK or TUNE.
ProCarManuals.com
Page 139 of 356

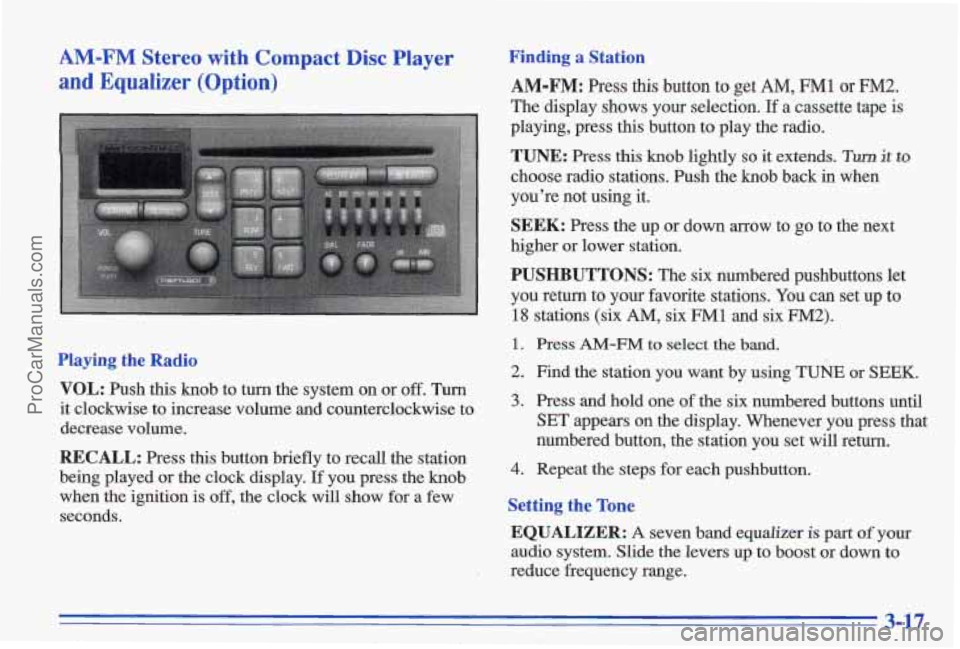
AM-FM Stereo with Compact Disc Player
and Equalizer (Option)
Playing the Radio
VOL: Push this knob to turn the system on or off. Turn
it clockwise to increase volume and counterclockwise to
decrease volume.
RECALL: Press this button briefly to recall the station
being played or the clock display.
If you press the knob
when the ignition is off, the clock will show for a few
seconds.
Finding a Station
AM-FM: Press this button to get AM, FM1 or FM2.
The display shows your selection. If a cassette tape is
playing, press this button
to play the radio.
TUNE: Press this knob lightly so it extends. Turn it to
choose radio stations. Push the knob back in when
you’re not using it.
SEEK: Press the up or down arrow to go to the next
higher or lower station.
PUSHBUTTONS: The six numbered pushbuttons let
you return to your favorite stations.
You can set up to
18 stations (six AM, six FM1 and six FM2).
1. Press AM-FM to select the band.
2. Find the station you want by using TUNE or SEEK.
3. Press and hold one of the six numbered buttons until
SET appears on the display. Whenever you press that
numbered button, the station you set will return.
4. Repeat the steps for each pushbutton.
Setting the Tone
EQUALIZER: A seven band equalizer is part of your
audio system. Slide the levers up to boost or down to
reduce frequency range.
3-17
ProCarManuals.com
Page 160 of 356

An emergency like this requires close attention and a
quick decision.
If you are holding the steering wheel at
the recommended 9 and' 3 o'clock positions, you can
turn it a full 180 degrees very quickly without removing
either hand. But you have to act ,fast, steer quickly, and
just as quickly straighten the wheel once
you have.
avoided the object.
,(
The fact that such emergency situations are always
possible is a good reason to practice defensive driving at
all times and wear safety belts properly.
..._ - '
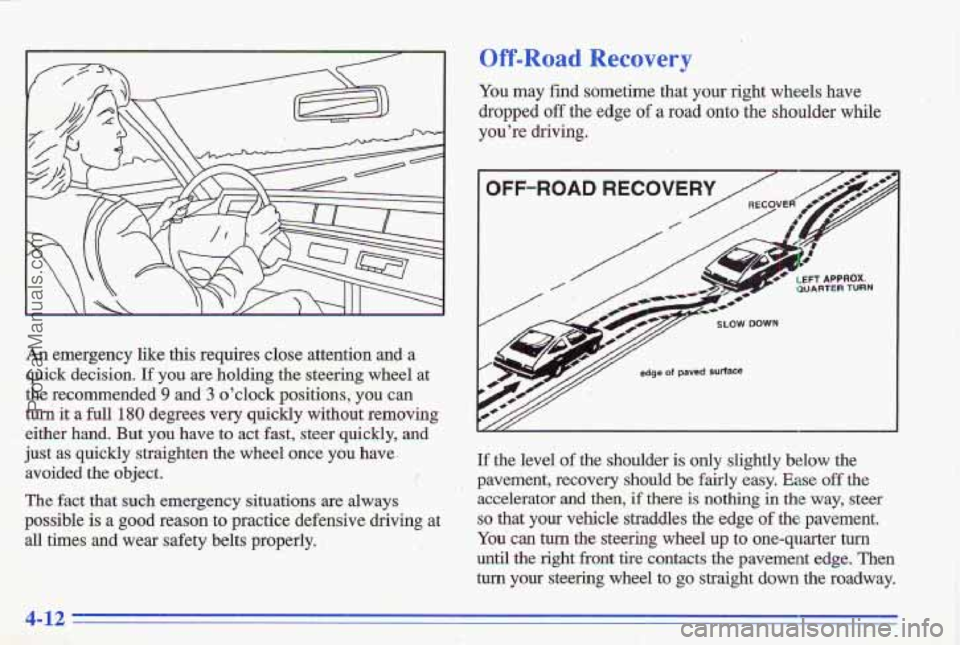
Off-Road Recovwy ,. t
', %
You may find sometime that your right wheels have
dropped
off the edge of a road onto the shoulder while
you're
driving.
OFF-RUAD RECOVERY
/- / ,zl I I
-/// edge of paved surface
I
If the level of the shoulder is only slightly below the
pavement, recovery should
be fairly easy. Ease off the
accelerator
and then, if there is nothing in the way, steer
so that your vehicle straddles the edge of the pavement.
You can turn the steering wheel up to one-quarter turn
until the right front tire contacts the pavement edge. Then
turn your steering wheel to go straight down the roadway.
4-12
ProCarManuals.com
Page 212 of 356
Removing the Spare Tire and Tools
The following steps will tell you how to use the jack and
change a tire, The
eaubhent
vou’ll AI
need is in the t&. Pull
the carpeting from the
floor of the tnxnk. Turn the
center retainer nut on the
compact spare cover
c’ounterclockwise to
remove it.
Lift
and remove the cover. See “Compact Spare Tire”
later in this section for more information about the
compact
spare.
ProCarManuals.com
Page 213 of 356
Turn the wing nut
counterclockwise and
remove it. Then lift
off
the spacer and remove
the spare tire.
Remove the
jack and wheel wrench from the trunk. Your
vehicle’s jack
and wheel wrench are stored in a foam
tray.
Remove the band around the jack.
’ I *,
’. .
The tools you’ll be using include the jack (A) and wheel
wrench
(B).
5-23
ProCarManuals.com
Page 215 of 356
NOTICE:
Raising your vehicle with the jack improperly
positioned will damage the vehicle or
may allow
the vehicle to fall off the jack. Be sure to fit the
jack lift head into the proper location before
raising your vehicle.
I NOTICE:
I
Do not jack or lift vehicle using the oil pan. Pans
could crack and begin to leak fluid. 4. Raise the vehicle by rotating the wheel wrench
clockwise. Raise the vehicle far enough off the
ground so there is enough room for the spare tire
to fit.
5. Remove all of the wheel nuts.
5-25
ProCarManuals.com
Page 217 of 356
I A CAUTION:
Never use oil or grease on studs or nuts. If you
do, the nuts might come loose. Your wheel could fall off, causing a serious accident.,
% '
j !. ', . , , ,.
8. Replace the wheel nuts
with the rounded end
o'f
the nuts toward the
wheel. Tighten each nut
by hand until the wheel
is held against the hub.
i L
9. Lower the vehicle by rotating the wheel wrench
counterclockwise. Lower the jack completely.
ProCarManuals.com