1996 Oldsmobile Cutlass Supreme air condition
[x] Cancel search: air conditionPage 106 of 356

Air Bag Readiness Light
There is an air bag readiness light on the instrument
panel, which. shows AIR BAG or the air bag symbol.
The system checks the air bag’s electrical system for
malfunctions. The light tells you if there is an electrical
problem. The system check includes the air bag sensors,
the air bag modules, the wiring and the crash sensing
and diagnostic module. For more information on
the air
! bag system, see “Air Bag” in the Index.
You will see this light flash
for a few seconds when you
turn your ignition to RUN or START. Then the light
should go out. This means
the system is ready.
If the air bag readiness light doesn’t come on when you
start your vehicle, or stays
on, or comes on when you
are driving, your air bag system may not work properly.
Have your vehicle serviced right away.
Charging ‘System Light
The charging system light
will come on briefly when
you turn on the ignition, as
a check to show you it’s
working. Then it should
go out.
.If it stays on, or comes on while you are driving,
you
may have a problem with the charging system. It could
indicate that you have a loose drive belt or another
electrical problem. Have it checked right away. Driving
while this light is on could drain your battery.
If you must drive a short distance with the light on, be
certain to turn off all your accessories, such as the radio
and air conditioner.
Page 111 of 356
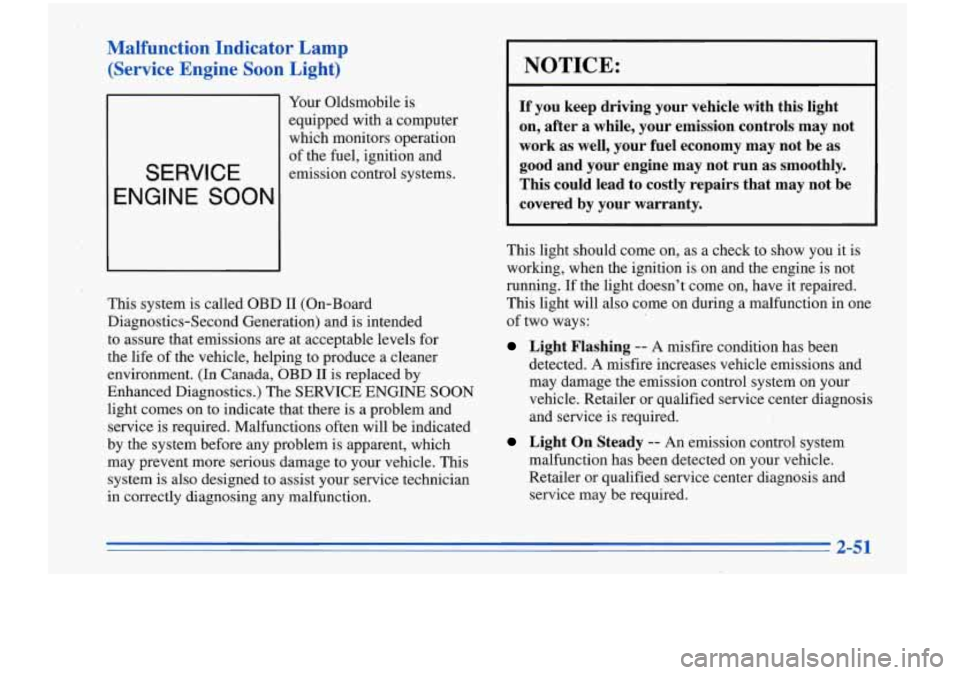
Malfunction Indicator Lamp (Service Engine Soon Light)
I
SERVICE
ENGINE SOON
Your Oldsmobile is
equipped with a computer
which monitors operation
of the fuel, ignition and
emission control systems.
This system is called OBD
I1 (On-Board
Diagnostics-Second Generation) and is intended
to assure that emissions
are at acceptable levels for
the life of the vehicle, helping to produce a cleaner
environment. (In Canada,
OBD I1 is replaced by
Enhanced Diagnostics.) The SERVICE ENGINE SOON
light comes on to indicate that there is a problem and
service
is required. Malfunctions often will be indicated
by the system before any problem is apparent, which
may prevent more serious damage to your vehicle. This
system is also designed to assist your service technician
in correctly diagnosing any malfunction.
NOTICE:
If you keep driving your vehicle with this light
on, after a while, your emission controls may not
work as well, your fuel economy may not be as
good and your engine may not run as smoothly.
This could lead to costly repairs that may not be
covered by your warranty.
This light should come on, as a check to show you it is
working, when the ignition is on and the engine is not
running. If the light doesn’t come on, have it repaired.
This light will also come on during a malfunction in one
of two ways:
Light Flashing -- A misfire condition has been
detected.
A misfire increases vehicle emissions and
may damage the emission control system on your
vehicle. Retailer or qualified service center diagnosis
and service is required.
Light On Steady -- An emission control system
malfunction has been detected on your vehicle.
Retailer or qualified service center diagnosis and
service may be required.
2-51
Page 112 of 356

0 Reduce vehicle speed.
0 Avoid hard accelerations.
Avoid steep uphill grades.
I 0 If towing a trailer, reduce the amount of cargo being
hauled as soon as it is possible.
If the lightstops flashing and remains,on steady, see “If
the Light
Is On Steady” following.
If
the light continues to flash, when it is safe to do so,
stop the vehicle. Put your vehicle in PARK (P). Turn the
key off, wait at least
10 seconds and restart the engine.
~ If the light remains on steady, see “If the Light Is On
Steady” following. If the light is still flashing, follow
the
1 previous steps, and drive the vehicle to your retailer or
qualified service center for service.
1
If the Light Is On Steady
You may be able to correct the emission system
malfunction by considering the.following:
Did you just put fuel into your vehicle?
If
so, reinstall the fuel cap, making sure to fully install
the cap. The diagnostic system can determine if the fuel
cap has been left
off or improperly installed. This will
allow fuel to .evap.orate into the atmosphere. A few
driving trips should turn the light
off.
Did you just drive through a deep puddle of water?
If
so, your electrical system may be wet. The condition
will usually be corrected when the electrical system
dries out. A few driving trips should turn the light
off.
Are you low on fuel?
As your engine starts to run out of fuel, your engine may
not
run as efficiently as designed since small amounts of
air are sucked into the fuel line causing a misfire.
The
system can detect this. Adding fuel should correct this
condition. Make sure to install the fuel cap properly. It
will take a few driving trips to turn the light off.
Page 119 of 356

Section 3 Comfort Controls and Audio Systems
F- -- -I
In this section you’ll find out how to operate the comfort
control and audio systems offered with your Oldsmobile.
Be sure to read about
the particular systems supplied with
your vehicle.
Comfort Controls
Air Conditioning with Electronic Controls
With this system, you can control the heating, cooling
and ventilation in your vehicle. The system works best
if
you keep your windows closed while using it.
Fan Knob
The left knob selects the force of air you want. To turn
the fan off, turn the knob to OFF. The fan must be on to
run the air conditioning compressor.
Temperature Knob
The center knob changes the temperature of the air
coming through the system. Turn this knob toward red (clockwise) for warmer air. Turn it toward blue
(counterclockwise) for cooler air.
Mode Knob
The right knob has several settings to control the
direction of airflow. For each setting, set the temperature
to a comfortable setting.
3-1
Page 120 of 356

MAX: This setting recirculates much of the air inside
your vehicle and sends it through the instrument panel
outlets.
The air conditioning compressor will run
automatically in this setting unless the outside
temperature is below
40°F (4.5 "C). (Even when the
compressor is running, you can control the temperature.)
,+ e
fl VENT This setting brings in outside air and
directs
it through the instrument panel outlets.
+fl BI-LEVEL: This setting brings in outside air and
directs it two ways. Half
of the air is directed through
the instrument panel outlets. Most of the remaining air is
directed through the floor ducts and a little to the defrost
and side window vents.
+H FLOOR: This setting sends most of the air
through the ducts near the floor. The rest comes
out of
the defroster and side window vents.
+e
e
w.
+' DEFOG: This setting allows half of the air to go
to the
floor ducts and half to the defrost and: side
window vents.
DEFROST This setting directs most of the air
through the defrost and side window vents. Some
of
the air goes to the floor ducts. The air conditioning
compressor will run automatically in
this setting unless
the outside temperature is below
40°F (4.5"C).
(Even when the compressor is running, you can control
the temperature.)
Air Conditioning Compressor Button
Press the A/C button to operate the air conditioning
compressor.
The indicator light above the button will
glow when the button
is pressed. You don't have to
press the button to run the compressor in
MAX
or DEFROST.
Page 121 of 356

Air Conditioning
On very hot days, open the windows long enough to’let
hot, inside air escape. This reduces the time the
compressor has to run, which should help fuel economy.
For quick cool-down on very hot days, use
MAX with
the temperature knob all
the way in the blue area. If this
setting is used for long periods of time, the air in your
vehicle may become too
dry.
For normal cooling on hot days, use VENT with the
temperature knob in the blue area and the A/C button
pushed in. The system will bring in outside air and
cool it.
On cool but sunny days, the sun may warm your upper
body, but your lower body may not be warm enough.
You can use BI-LEVEL with the temperature knob set
for comfort and the A/C button pushed in. The system
will bring in outside air and direct it to your upper body,
while sending slightly warmed air
to your lower body.
You may notice this temperature difference more at
some times than others.
Heating
On cold days, use FLOOR with the temperature knob all
the way in the red area. The system will bring in outside
air, heat it and send it to the floor ducts.
If your vehicle has an engine coolant heater, you can use
it to help your system provide warm air faster when it’s
cold outside (0°F (-18°C) or lower). An engine coolant
heater warms the coolant your engine and heating
system use to provide heat. See “Engine Coolant
Heater” in the Index.
Ventilation
For mild outside temperatures when little heating or
cooling is needed, use VENT to direct outside air
through your vehicle. Your vehicle also has the
flow-through ventilation system described later in
this section.
Defogging and Defrosting
Your system has two settings for clearing the front and
side windows. To defrost the windows quickly, use
DEFROST with the temperature knob all the way in the
red area. To warm passengers while keeping the
windows clean, use DEFOG.
3-3
Page 122 of 356

Air Conditioning with Automatic and
-Auxiliary Temperature Control
With this system, you set a temperature. You can then
either let the system adjust airflow and force to maintain
. the temperature, or you can manually adjust the flow
and force. The system works best if you keep your
windows closed while using it.
Fan Knob
The left knob selects the force of air you want when the
system
is not in AUTO. The display will show the
speed. To turn the system off,'push the
knob. ,
Driver Temperature Knob
The right knob sets the temperature for the entire system
when the light on the PASS button isn't lit. If the light is
lit, the knob sets the temperature for the driver. Turn the
knob toward red (clockwise) to raise the temperature.
Turn it toward blue (counterclockwise) to lower the
temperature.
The display will show your selection for a
few seconds, then the outside temperature will show. If
you push the knob, the system will control the fan speed
and airflow. AUTO will show on the display.
3-4
Page 123 of 356

Passenger Temperature Knob
The knob on the
passenger's door adjusts
the air temperature
on
the passenger's side so
it is warmer or colder
than the temperature set.
by the driver.
Push the PASS button on the system face
so the light
on it is lit. Turn the knob on the door toward red
(clockwise) to raise the temperature. Turn it toward blue
(counterclockwise) to lower the temperature.
Mode Buttons
The center panel has several settings to control the direction \
of airflow when the system is not in AUTO. The indicator
light on the button will glow when the button is pressed.
RECIRC: This setting can recirculate either the air
inside of your vehicle or outside air and send it through
the instrument panel outlets. Press this button once and
it will recirculate outside air. Press it again and it will
recirculate the air inside
of your vehicle. This setting is
available in LOWER, DEFOG, UPPER and BI-LEV.
UPPER: This setting brings in outside air and directs it
through the instrument panel outlets.
BI-LEV: This setting brings in the outside air and
directs it two ways. Half of the air is directed through
the instrument panel outlets. Most of the remaining air is
directed through the floor ducts and
a little to the defrost
and side window vents.
LOWER: This setting sends most of the air through the
ducts near the floor. The rest comes out of the defrost
and side window vents.
DEFOG: This setting allows half of the air to go to the
floor ducts and half to the defrost and side window vents.
DEF: This setting directs most of the air through the
defrost and side window vents. Some of the air goes to
the floor ducts. The air conditioning compressor will run
automatically in this setting unless the outside
temperature is below 40°F (4.5"C).
Automatic Control
For the most efficient operation, you should press the knob
and set the system temperature. The system will select the
best fan speed and airflow settings to keep you comfortable.
The
air conditioning compressor will run if the outside
temperature is above 40°F
(4.5 "C). You may notice a delay
of three to four minutes before the fan comes on.
3-5