1996 NISSAN QUEST battery
[x] Cancel search: batteryPage 146 of 235

Freeing a frozen door lock
To prevent a door lock from freezing, apply
de-icer or glycerin to it through the key hole.
If the lock becomes frozen, heat the key
before inserting it into the key hole.
Anti-freeze
In the winter when it is anticipated that the
temperature will drop below 32ÉF (0ÉC),
check anti-freeze (ethylene glycol base) to
assure proper winter protection. For details,
see ``Engine cooling system'' in the ``Do-it-
yourself operations'' section.
Battery
If the battery is not fully charged during
extremely cold weather conditions, the bat-
tery fluid may freeze and damage the bat-
tery. To maintain maximum efficiency, the
battery should be checked regularly. For
details, see ``Battery'' in the ``Do-it-yourself
operations'' section.
Draining of coolant water
If the vehicle is to be left outside without
anti-freeze, drain the cooling system by
opening the drain valves located under the
radiator and on the engine block. Refillbefore operating the vehicle. See ``Chang-
ing engine coolant'' in the ``Do-it-yourself
operations'' section.
Tire equipment
1. The SUMMER tires are of a tread design
to provide superior performance on dry
pavement. However, the performance of
these tires is substantially reduced in
snowy and icy conditions. If you operate
your vehicle on snowy or icy roads, NIS-
SAN recommends using MUD & SNOW
or ALL SEASON tires on all four wheels.
Please consult your NISSAN dealer for
the tire type, size, speed rating and avail-
ability information.
2. For additional traction on icy roads, stud-
ded tires may be used. However, some
provinces and states prohibit their use.
Check local, state and provincial laws
before installing studded tires.
Skid and traction capabilities of studded
snow tires, on wet or dry surfaces, may
be poorer than that of non-studded snow
tires.
3. Snow chains may be used if desired.
Make sure they are of proper size for the
tires on your vehicle and are installedaccording to the chain manufacturer's
suggestions. In addition, drive at a re-
duced speed, otherwise, your vehicle
may be damaged and/or vehicle handling
and performance may be adversely af-
fected.
Tire chains
Use of tire chains may be prohibited accord-
ing to location. Check the local laws before
installing tire chains. When installing tire
chains, make sure they are of proper size
for the tires on your vehicle and are installed
according to the chain manufacturer's sug-
gestions.Use only SAE Class ``S'' chains.
Other types may damage your vehicle. Use
chain tensioners when recommended by
the tire chain manufacturer to ensure a tight
fit. Loose end links of the tire chain must be
secured or removed to prevent the possibil-
ity of whipping action damage to the fenders
or undercarriage. If possible, avoid fully
loading your vehicle when using tire chains.
In addition, drive at a reduced speed. Do not
exceed maximum speed suggested by
chain manufacturer. Otherwise, your ve-
hicle may be damaged and/or vehicle han-
dling and performance may be adversely
affected.
COLD WEATHER DRIVING
CAUTIONS
4-15
ZX
Page 154 of 235

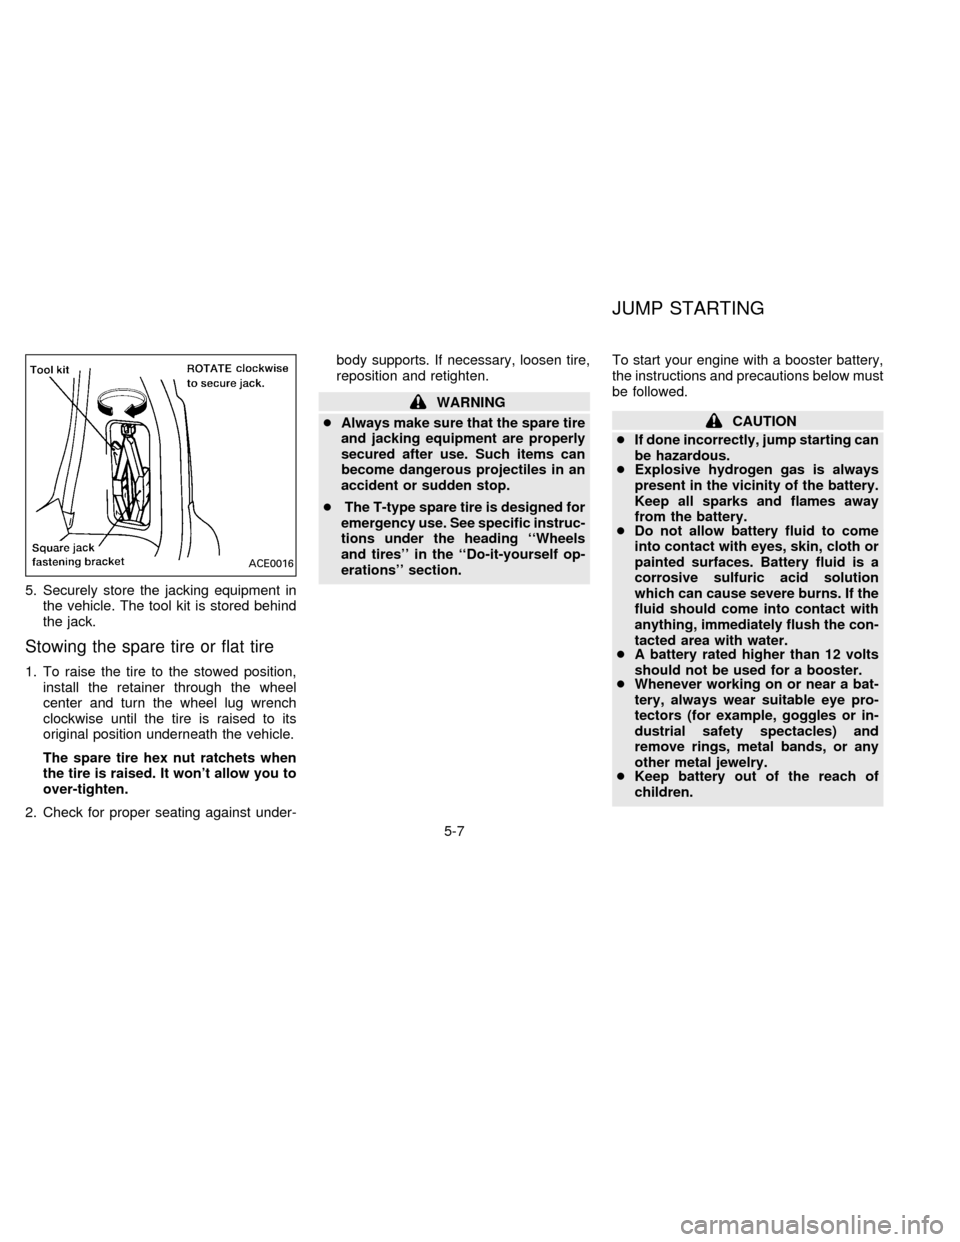
5. Securely store the jacking equipment in
the vehicle. The tool kit is stored behind
the jack.
Stowing the spare tire or flat tire
1. To raise the tire to the stowed position,
install the retainer through the wheel
center and turn the wheel lug wrench
clockwise until the tire is raised to its
original position underneath the vehicle.
The spare tire hex nut ratchets when
the tire is raised. It won't allow you to
over-tighten.
2. Check for proper seating against under-body supports. If necessary, loosen tire,
reposition and retighten.
WARNING
cAlways make sure that the spare tire
and jacking equipment are properly
secured after use. Such items can
become dangerous projectiles in an
accident or sudden stop.
cThe T-type spare tire is designed for
emergency use. See specific instruc-
tions under the heading ``Wheels
and tires'' in the ``Do-it-yourself op-
erations'' section.To start your engine with a booster battery,
the instructions and precautions below must
be followed.
CAUTION
cIf done incorrectly, jump starting can
be hazardous.
cExplosive hydrogen gas is always
present in the vicinity of the battery.
Keep all sparks and flames away
from the battery.
cDo not allow battery fluid to come
into contact with eyes, skin, cloth or
painted surfaces. Battery fluid is a
corrosive sulfuric acid solution
which can cause severe burns. If the
fluid should come into contact with
anything, immediately flush the con-
tacted area with water.
cA battery rated higher than 12 volts
should not be used for a booster.
cWhenever working on or near a bat-
tery, always wear suitable eye pro-
tectors (for example, goggles or in-
dustrial safety spectacles) and
remove rings, metal bands, or any
other metal jewelry.
cKeep battery out of the reach of
children.
ACE0016
JUMP STARTING
5-7
ZX
Page 155 of 235

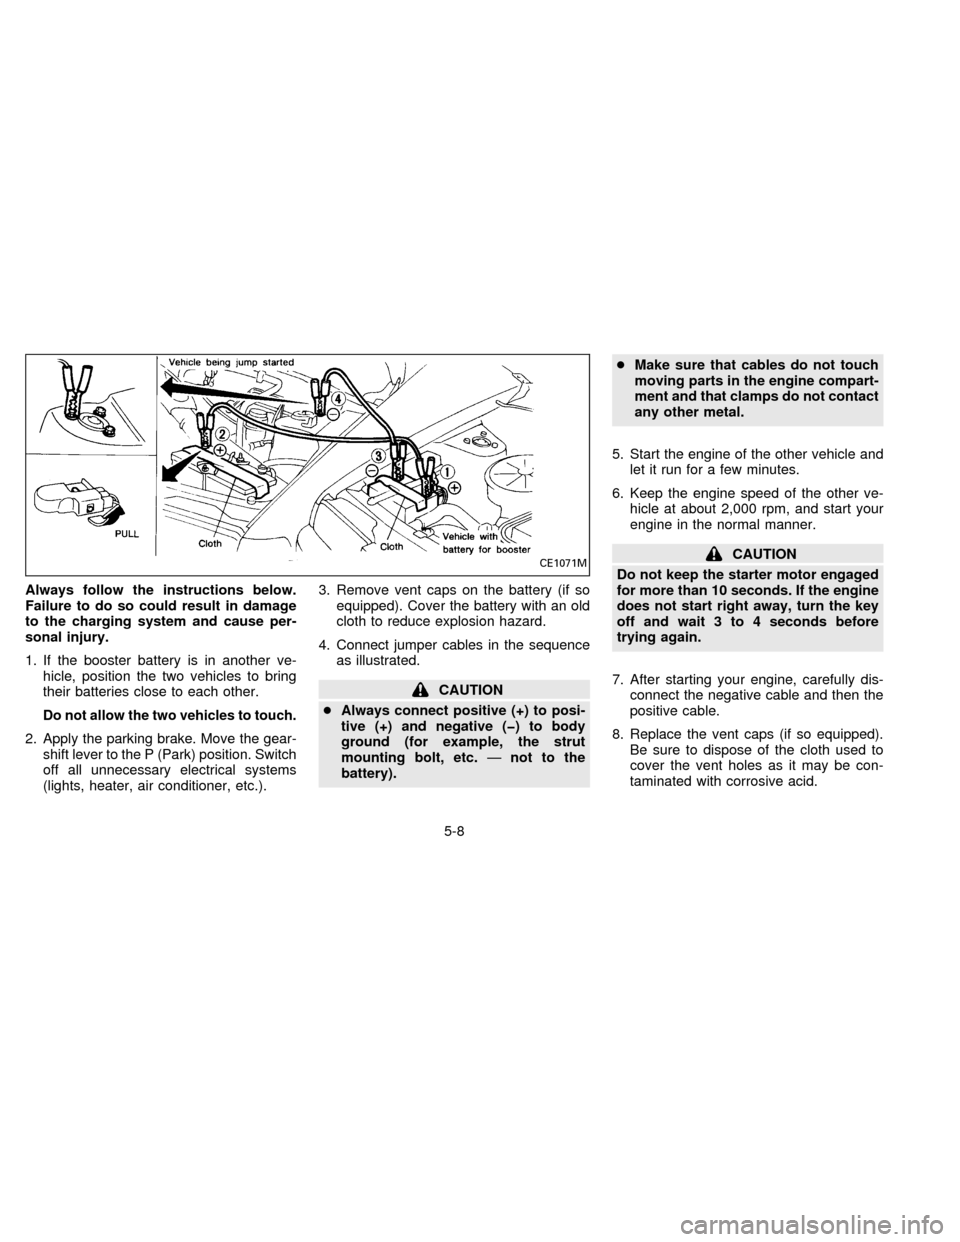
Always follow the instructions below.
Failure to do so could result in damage
to the charging system and cause per-
sonal injury.
1. If the booster battery is in another ve-
hicle, position the two vehicles to bring
their batteries close to each other.
Do not allow the two vehicles to touch.
2. Apply the parking brake. Move the gear-
shift lever to the P (Park) position. Switch
off all unnecessary electrical systems
(lights, heater, air conditioner, etc.).3. Remove vent caps on the battery (if so
equipped). Cover the battery with an old
cloth to reduce explosion hazard.
4. Connect jumper cables in the sequence
as illustrated.
CAUTION
cAlways connect positive (+) to posi-
tive (+) and negative (þ) to body
ground (for example, the strut
mounting bolt, etc.Ðnot to the
battery).cMake sure that cables do not touch
moving parts in the engine compart-
ment and that clamps do not contact
any other metal.
5. Start the engine of the other vehicle and
let it run for a few minutes.
6. Keep the engine speed of the other ve-
hicle at about 2,000 rpm, and start your
engine in the normal manner.
CAUTION
Do not keep the starter motor engaged
for more than 10 seconds. If the engine
does not start right away, turn the key
off and wait 3 to 4 seconds before
trying again.
7. After starting your engine, carefully dis-
connect the negative cable and then the
positive cable.
8. Replace the vent caps (if so equipped).
Be sure to dispose of the cloth used to
cover the vent holes as it may be con-
taminated with corrosive acid.CE1071M
5-8
ZX
Page 168 of 235

7 Do-it-yourself operations
Maintenance precautions ..................................... 7-2
Engine compartment check locations .................. 7-3
Engine cooling system ......................................... 7-4
Engine oil ............................................................ 7-5
Automatic transmission fluid ................................ 7-8
Power steering fluid.............................................. 7-9
Brake fluid .......................................................... 7-10
Window washer fluid .......................................... 7-10
Battery ................................................................ 7-11
Drive belts .......................................................... 7-12Spark plug replacement ..................................... 7-12
Air cleaner housing filter .................................... 7-13
Wiper blades ...................................................... 7-14
Parking brake check........................................... 7-16
Brake pedal ........................................................ 7-16
Brake booster ..................................................... 7-17
Fuses .................................................................. 7-17
Fusible links........................................................ 7-18
Light bulbs .......................................................... 7-19
Wheels and tires ................................................ 7-24
ZX
Page 169 of 235

When performing any inspection or mainte-
nance work on your vehicle, always take
care to prevent serious accidental injury to
yourself or damage to the vehicle. The
following are general precautions which
should be closely observed.
cPark the vehicle on a level surface,
apply the parking brake securely and
block the wheels to prevent the ve-
hicle from moving. Move the gearshift
lever to neutral (N).
cBe sure the ignition key is OFF when
performing any replacement or repair.
cDo not work under the hood while the
engine is hot. Turn off the engine and
wait until it cools down.
cBe sure to turn the ignition key to the
OFF or LOCK position. When the igni-
tion key is in the ON or ACC position,
the cooling fan may start to operate
suddenly even when the engine is not
running.
cIf you must work with the engine run-
ning, keep your hands, clothing, hair
and tools away from moving fans,
belts and any other moving parts.cIt is advisable to remove ties and any
jewelry, such as rings, watches, etc.
before working on your vehicle.
cIf you must run the engine in an en-
closed space such as a garage, be
sure there is proper ventilation for
exhaust gases.
cNever get under the vehicle while it is
supported only by a jack. If it is nec-
essary to work under the vehicle, sup-
port it with safety stands.
cKeep smoking materials, flame and
sparks away from fuel and the battery.
cNever connect or disconnect either
the battery or any transistorized com-
ponent connector while the ignition is
on.
cOn gasoline engine models with the
multiport fuel injection (MFI) system,
the fuel filter or fuel lines should be
serviced by a NISSAN dealer because
the fuel lines are under high pressure
even when the engine is off.
cFailure to follow these or other com-
mon sense guidelines may lead to
serious injury or vehicle damage.cImproperly disposed motor oil and/or
other vehicle fluids can hurt the envi-
ronment. Always conform to local
regulations for disposal of vehicle
fluid.
This ``Do-it-yourself operations'' section
gives instructions regarding only those
items which are relatively easy for an owner
to perform.
You should be aware that incomplete or
improper servicing may result in operating
difficulties or excessive emissions, and
could affect your warranty coverage.If in
doubt about any servicing, have it done
by your NISSAN dealer.
MAINTENANCE
PRECAUTIONS
7-2
ZX
Page 178 of 235

cKeep the battery surface clean and dry.
Any corrosion should be washed off with
a solution of baking soda and water.
cMake certain the terminal connections
are clean and securely tightened.
cIf the vehicle is not to be used for 30 days
or longer, disconnect the negative (þ)
battery terminal cable to prevent dis-
charge.
WARNING
Do not expose the battery to flames or
electrical sparks. Hydrogen gas gener-
ated by battery action is explosive. Do
not allow battery fluid to contact your
skin, eyes, fabrics, or painted surfaces.
After touching a battery or battery cap,
do not touch or rub your eyes. Thor-
oughly wash your hands. If the acid
contacts your eyes, skin or clothing,
immediately flush with water for at
least 15 minutes and seek medical at-
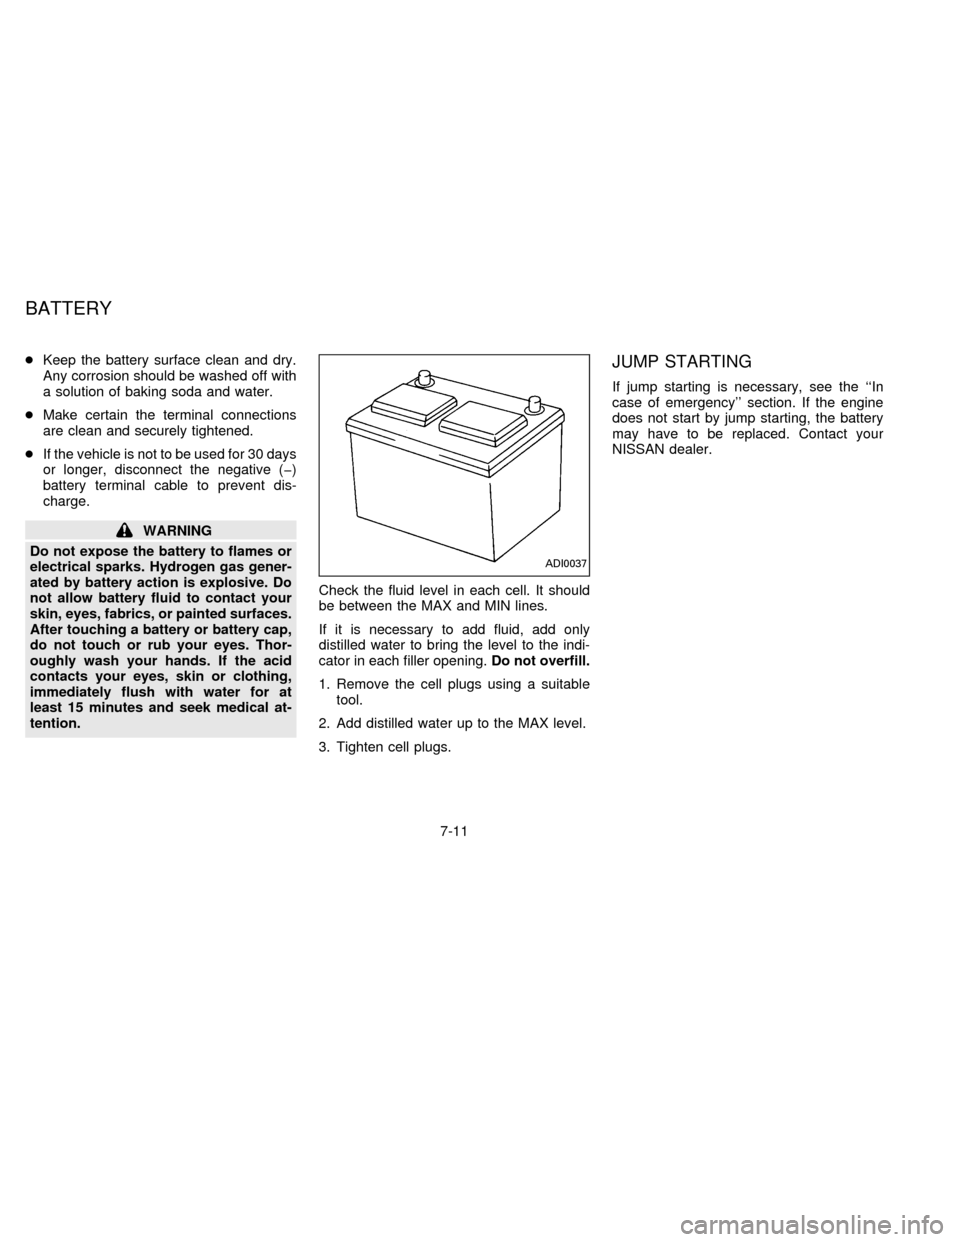
tention.Check the fluid level in each cell. It should
be between the MAX and MIN lines.
If it is necessary to add fluid, add only
distilled water to bring the level to the indi-
cator in each filler opening.Do not overfill.
1. Remove the cell plugs using a suitable
tool.
2. Add distilled water up to the MAX level.
3. Tighten cell plugs.
JUMP STARTING
If jump starting is necessary, see the ``In
case of emergency'' section. If the engine
does not start by jump starting, the battery
may have to be replaced. Contact your
NISSAN dealer.
ADI0037
BATTERY
7-11
ZB13-DX
Page 187 of 235

Hold the plastic base when handling
the bulb. Never touch the glass enve-
lope.
Removing the headlight bulb
1. Disconnect the negative battery cable.
2. Disconnect the electrical connector from
the rear end of the bulb.
3. Turn the bulb retaining ring counterclock-
wise until it is free from the headlight
reflector, then remove it.
4. Remove the headlight bulb by pulling
straight rearward. Do not shake or rotate
the bulb when removing it.
Replacing the headlight bulb
1. Insert the bulb into the headlight reflector
with the flat side of the plastic base facing
upward.
2. Install the bulb retaining ring and turn it
clockwise until it stops.
3. Push the electrical connector into the
bulb plastic base until it snaps and stops.
CAUTION
DO NOT TOUCH THE BULB.
cUse the same number and wattage
as originally installed:
Wattage 55/65
Bulb no. 9007
cAiming is not necessary after replac-
ing the bulb. When aiming adjust-
ment is necessary, contact your NIS-
SAN dealer.
cDo not leave the bulb out of the
headlight reflector for a long period
of time as dust, moisture, and smoke
may enter the headlight body and
affect the performance of the head-
light.
7-20
ZB13-DX
Page 201 of 235

steep hill with only the parking brake ap-
plied.
Automatic transmission ``Park'' mecha-
nismÐ On a fairly steep hill check that your
vehicle is held securely with the selector
lever in the P (Park) position without apply-
ing any brakes.
UNDER THE HOOD AND
VEHICLE
The maintenance items listed here should
be checked periodically, for example, each
time you check the engine oil or refuel.
Windshield washer fluid* ÐCheck that
there is adequate fluid in the tank.
Engine coolant level*Ð Check the cool-
ant level when the engine is cold.
Radiator and hosesÐ Check the front of
the radiator and clean off any dirt, insects,
leaves, etc., that may have accumulated.
Make sure the hoses have no cracks, de-
formation, rot, or loose connections.
Brake fluid level*Ð Make sure the brake
fluid level is between the MAX and MIN
lines on the reservoir.
Battery*Ð Check the fluid level in eachcell. It should be between the MAX and MIN
lines.
Engine drive belts*Ð Make sure no belts
are frayed, worn, cracked or oily.
Engine oil level*Ð Check the level after
parking the vehicle on a level surface and
turning off the engine.
Power steering fluid level* and linesÐ
Check the level when the fluid is cold and
the engine is turned off. Check the lines for
proper attachment, leaks, cracks, etc.
Automatic transmission fluid level*Ð
Check the level after putting the selector
lever in P (Park) with the engine idling.
Exhaust systemÐ Make sure there are no
cracks, holes, loose joints or supports. If the
sound of the exhaust seems unusual or
there is a smell of exhaust fumes, immedi-
ately have the exhaust system inspected by
a qualified individual. (See the carbon mon-
oxide warning in the ``Starting and driving''
section.)
UnderbodyÐ The underbody is frequently
exposed to corrosive substances such as
those used on icy roads or to control dust. It
is very important to remove these sub-stances, otherwise rust forms on the floor
pan, frame, fuel lines and around the ex-
haust system. At the end of winter, the
underbody should be thoroughly flushed
with plain water, being careful to clean
those areas where mud and dirt may accu-
mulate. See the ``Appearance and interior
care'' section for additional information.
Fluid leaksÐ Check under the vehicle for
fuel, oil, water or other fluid leaks after the
vehicle has been parked for a while. Water
dripping from the air conditioner after use is
normal. If you should notice any leaks or if
gasoline fumes are evident, check for the
cause and have it corrected immediately.
8-4
ZX