1996 NISSAN PATHFINDER belt
[x] Cancel search: beltPage 73 of 223

ing bolt which provides the straightest installa-
tion of the top strap.
Child restraint anchor points are designed
to withstand only those loads imposed by
correctly fitted child restraints. Under no
circumstances are they to be used for adult
seat belts or harnesses.
Anchor point locations
Anchor point attaching bolts are located under
the carpet of the rear luggage area floor.
Your NISSAN dealer can assist you with the
installation of your child restraint.
The anchor bolt should be installed at all
times to prevent the possibility of ex-
haust fumes entering the passenger
compartment through the holes.
SPA0393
2-34
Z01.2.1/R50-DX
Page 74 of 223
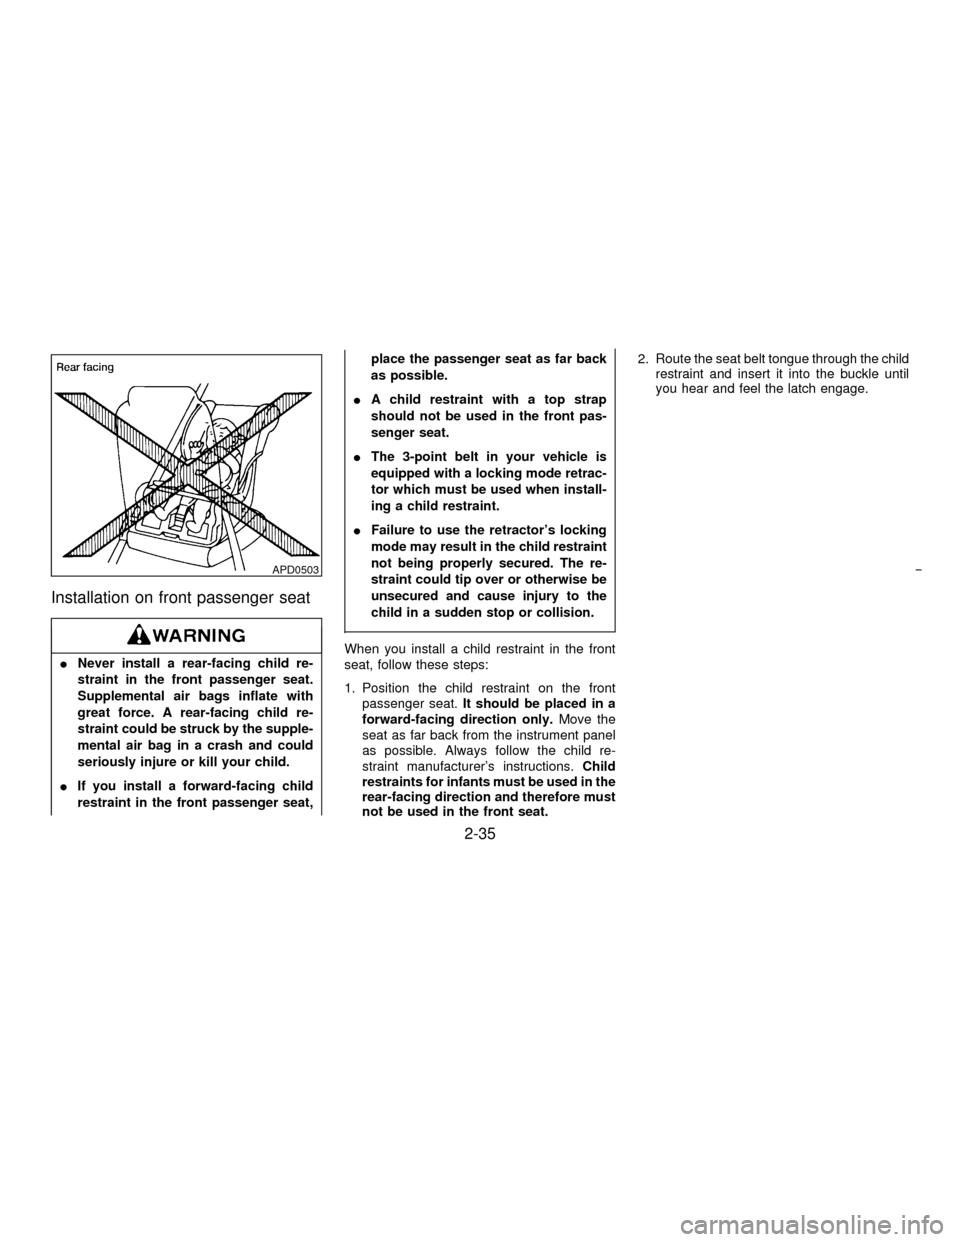
Installation on front passenger seat
INever install a rear-facing child re-
straint in the front passenger seat.
Supplemental air bags inflate with
great force. A rear-facing child re-
straint could be struck by the supple-
mental air bag in a crash and could
seriously injure or kill your child.
IIf you install a forward-facing child
restraint in the front passenger seat,place the passenger seat as far back
as possible.
IA child restraint with a top strap
should not be used in the front pas-
senger seat.
IThe 3-point belt in your vehicle is
equipped with a locking mode retrac-
tor which must be used when install-
ing a child restraint.
IFailure to use the retractor's locking
mode may result in the child restraint
not being properly secured. The re-
straint could tip over or otherwise be
unsecured and cause injury to the
child in a sudden stop or collision.When you install a child restraint in the front
seat, follow these steps:
1. Position the child restraint on the front
passenger seat.It should be placed in a
forward-facing direction only.Move the
seat as far back from the instrument panel
as possible. Always follow the child re-
straint manufacturer's instructions.Child
restraints for infants must be used in the
rear-facing direction and therefore must
not be used in the front seat.2. Route the seat belt tongue through the child
restraint and insert it into the buckle until
you hear and feel the latch engage.
APD0503
2-35
Z01.2.1/R50-DX
Page 75 of 223
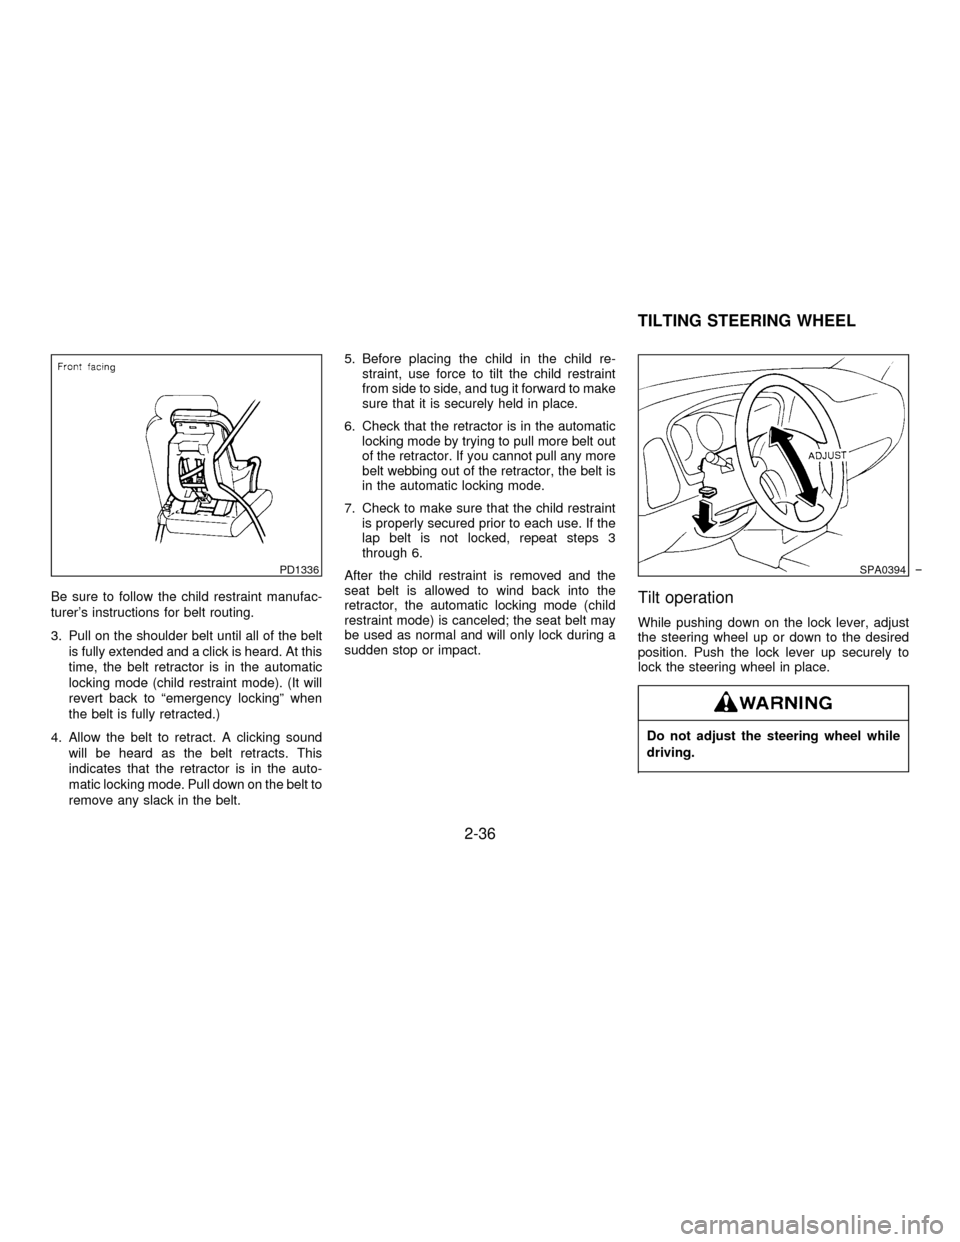
Be sure to follow the child restraint manufac-
turer's instructions for belt routing.
3. Pull on the shoulder belt until all of the belt
is fully extended and a click is heard. At this
time, the belt retractor is in the automatic
locking mode (child restraint mode). (It will
revert back to ªemergency lockingº when
the belt is fully retracted.)
4. Allow the belt to retract. A clicking sound
will be heard as the belt retracts. This
indicates that the retractor is in the auto-
matic locking mode. Pull down on the belt to
remove any slack in the belt.5. Before placing the child in the child re-
straint, use force to tilt the child restraint
from side to side, and tug it forward to make
sure that it is securely held in place.
6. Check that the retractor is in the automatic
locking mode by trying to pull more belt out
of the retractor. If you cannot pull any more
belt webbing out of the retractor, the belt is
in the automatic locking mode.
7. Check to make sure that the child restraint
is properly secured prior to each use. If the
lap belt is not locked, repeat steps 3
through 6.
After the child restraint is removed and the
seat belt is allowed to wind back into the
retractor, the automatic locking mode (child
restraint mode) is canceled; the seat belt may
be used as normal and will only lock during a
sudden stop or impact.Tilt operation
While pushing down on the lock lever, adjust
the steering wheel up or down to the desired
position. Push the lock lever up securely to
lock the steering wheel in place.
Do not adjust the steering wheel while
driving.
PD1336SPA0394
TILTING STEERING WHEEL
2-36
Z01.2.1/R50-DX
Page 109 of 223
Failure to operate this vehicle in a safe and
prudent manner may result in loss of control or
an accident. Be alert and drive defensively at
all times. Obey all traffic regulations. Avoid
excessive speed, high speed cornering, or
sudden steering maneuvers, because these
driving practices could cause you to lose con-
trol of your vehicle.As with any vehicle, a
loss of control could result in a collision
with other vehicles or objects, or cause the
vehicle to rollover, particularly if the loss of
control causes the vehicle to slide side-
ways.Be attentive at all times, and avoid
driving when tired. Never drive when under
the influence of alcohol or drugs (including
prescription or over-the-counter drugs which
may cause drowsiness). Always wear your
seat belt as outlined in the ªSeat Beltsº section
of this manual, and also instruct your passen-
gers to do so.
Alcohol in the blood stream reduces
coordination, delays reaction time and
impairs judgement. Driving after drink-
ing alcohol increases the likelihood of
being involved in an accident injuring
yourself and others. Additionally, if you
are injured in the accident alcohol can
increase the severity of injury.
Nissan is committed to safe driving. But, you
must choose not to drive under the influence of
alcohol. Every year thousands of people are
injured or killed in alcohol related accidents.
Although the local laws vary on what is con-
sidered to be legally intoxicated, the fact is that
alcohol affects all people differently and most
people underestimate the effects of alcohol.
Remember, drinking and driving don't mix!
And that's true for drugs too (over the counter,
prescription, and illegal drugs). Don't drive if
your ability to operate your vehicle is impaired
by alcohol, drugs, or some other physical
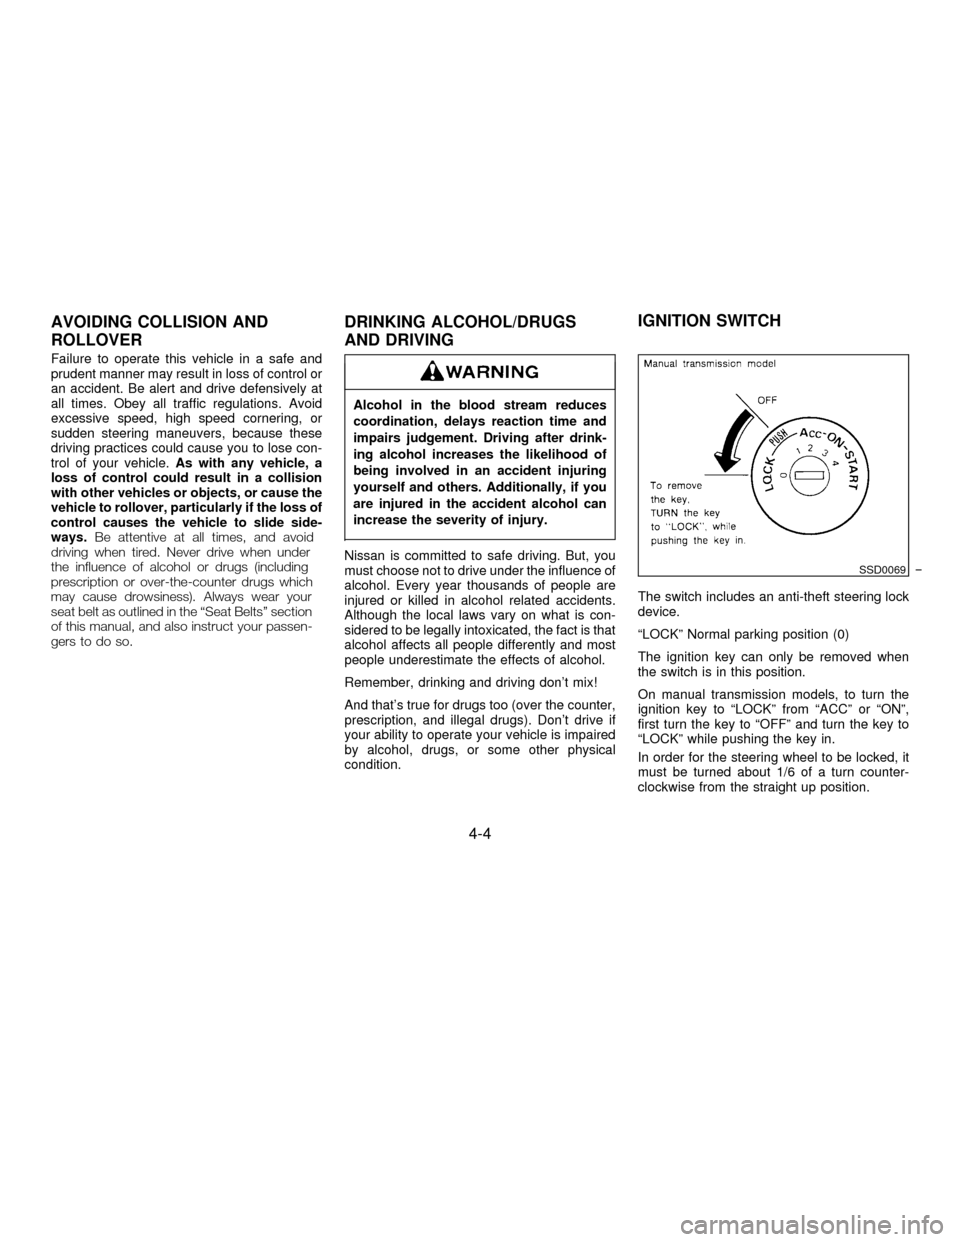
condition.The switch includes an anti-theft steering lock
device.
ªLOCKº Normal parking position (0)
The ignition key can only be removed when
the switch is in this position.
On manual transmission models, to turn the
ignition key to ªLOCKº from ªACCº or ªONº,
first turn the key to ªOFFº and turn the key to
ªLOCKº while pushing the key in.
In order for the steering wheel to be locked, it
must be turned about 1/6 of a turn counter-
clockwise from the straight up position.SSD0069
AVOIDING COLLISION AND
ROLLOVERDRINKING ALCOHOL/DRUGS
AND DRIVINGIGNITION SWITCH
4-4
Z01.2.1/R50-DX
Page 111 of 223
ªOFFº (1)
The engine can be turned off without locking
the steering wheel.
ªACCº (Accessories) (2)
This position activates electrical accessories
such as the radio when the engine is not
running.
ªONº Normal operating position (3)
This position turns on the ignition system and
the electrical accessories.
ªSTARTº (4)
This position activates the starter motor, start-
ing the engine.IMake sure the area around the vehicle is
clear.
ICheck fluid levels such as engine oil, cool-
ant, brake and clutch fluid, window washer
fluid as frequently as possible, at least
whenever you refuel.
ICheck to be sure that all windows and light
lenses are clean.
IVisually inspect tires for their appearance
and condition. Also check tires for proper
inflation.
ILock all doors.
IPosition seat and adjust head restraints.
IAdjust inside and outside mirrors.
IFasten seat belts and ask all passengers to
do likewise.
ICheck the operation of warning lights when
key is turned to the ªON (3)º position.The automatic transmission in your vehicle is
electronically controlled by a microcomputer to
produce maximum power and smooth opera-
tion.
Shown on the following pages are the recom-
mended operating procedures for this trans-
mission. Follow these procedures for maxi-
mum vehicle performance and driving
enjoyment.
Starting the vehicle
IAfter starting the engine, fully depress the
foot brake pedal and push the selector lever
button before shifting the selector lever to
the ªDº, ªRº, ª2º or ª1º position. Be sure the
vehicle is fully stopped before attempting to
shift the selector lever.
This automatic transmission is designed
so that the foot brake pedal MUST be de-
pressed before shifting from ªPº to any
drive position while the ignition switch is
ªONº.
The shift lever cannot be moved out of ªPº
and into any of the other gear positions if
the ignition key is turned to ªLOCKº or if
the key is removed from the switch.
When the battery charge is low, the shift
lever can be moved if the ignition switch is
in the ªACCº position.
BEFORE STARTING THE ENGINE
DRIVING WITH AUTOMATIC
TRANSMISSION
4-6
Z01.2.1/R50-DX
Page 125 of 223
DRIVING SAFETY PRECAUTIONS
Your NISSAN is designed for both normal and
off-road use. However, avoid driving in deep
water or mud as your NISSAN is mainly de-
signed for leisure use, unlike a conventional
off-road vehicle.
Remember that two-wheel drive models are
less capable than four-wheel drive models for
rough road driving and extrication when stuck
in deep snow or mud, or the like.
Please observe the following precautions:
IDrive carefully when off the road and
avoid dangerous areas. Always wear
your seat belts to help keep you and
your passengers in position when
driving over rough terrain.
IDo not drive across steep slopes.
Instead drive either straight up or
straight down the slopes. Off-road
vehicles can tip over sideways much
more easily than they can forward or
backward.
IMany hills are too steep for any ve-
hicle. If you drive up them, you maystall. If you drive down them, you may
not be able to control your speed. If
you drive across them, you may roll
over.
IStay alert when driving to the top of a
hill. At the top there could be a drop-
off or other hazard that could cause
an accident.
IIf your engine stalls or you cannot
make it to the top of a steep hill, never
attempt to turn around. Your vehicle
could tip or roll over. Always back
straight down in reverse gear. Never
back down in neutral (N) or with the
clutch depressed, using only the
brake, as this could cause loss of
control.
IHeavy braking going down a hill
could cause your brakes to overheat
and fade, resulting in loss of control
and an accident. Apply brakes lightly
and use a low gear to control your
speed.
IUnsecured cargo can be thrown
around when driving over rough ter-
rain. Properly secure it so that it willnot be thrown forward and cause in-
jury to you or your passengers.
IAvoid raising the center of gravity by
loading things on the roof or equip-
ping the vehicle with tires larger than
specified in this manual. This could
cause your vehicle to rollover. Put
heavy loads in the cargo area as far
forward and as low as possible.
IDo not grip the inside or spokes of
the steering wheel when driving off-
road. The steering wheel could jerk
and injure your hands. Instead drive
with your fingers and thumbs on the
outside of the rim.
IBefore operating vehicle, ensure that
the driver and all passengers have
their seat belts fastened.
IAlways drive with the floor mats in
place as the floor may become very
hot. Particular care should be taken if
you are barefoot.
ILower your speed when encounter-
ing strong crosswinds. With its
higher center of gravity, your NISSAN
is more affected by gusty side winds.
4-20
Z01.2.1/R50-DX
Page 128 of 223
IHEADED UPHILL OR DOWNHILL, NO
CURB:q3
Turn the wheels toward the side of the road
so the vehicle will move away from the
center of the road if it moves.
4. Turn the ignition key to the ªLOCKº position
and remove the key.
INever leave children unattended in
the vehicle.
INever leave the engine running while
vehicle is unattended.
IDriving with vacuum assisted brake:
The brake booster aids braking by using
engine vacuum. If the engine stops, you
can stop the vehicle by depressing the
brake pedal. However, greater foot pres-
sure on the brake pedal will be required to
stop the vehicle and the stopping distance
will be longer.
IDriving with the power assisted steer-
ing:
The power assisted steering is designed to
use a hydraulic pump, driven by the engine,
to assist steering.
If the engine stops or drive belt breaks, you
will still have control of the vehicle. How-
ever, much greater steering effort is
needed, especially in sharp turns or at low
speeds.
IWet brakes:
When the vehicle is washed or driven
through water, the brakes may get wet. As
a result, your braking distance will be longer
and the vehicle may pull to one side during
braking.
To dry brakes, drive the vehicle at a safe
speed while lightly pressing the brake pedal
to heat-up the brakes. Do this until thebrakes return to normal. Avoid driving the
vehicle at high speeds until the brakes
function correctly.
IAvoid resting your foot on the brake pedal
while driving. This will overheat the brakes,
wear out the brake linings and pads faster
and reduce gas mileage.
ITo help save the brakes and to prevent the
brakes from overheating, before going
down a slope or long grade, reduce speed
and downshift to a lower gear.
IWhile driving on a slippery surface, be
careful when braking, accelerating or down-
shifting. Abrupt braking actions or sudden
acceleration could cause the wheels to
skid.
PRECAUTIONS WHEN DRIVING
4-23
Z01.2.1/R50-DX
Page 142 of 223
If your vehicle is overheating indicated by an
extremely high temperature gauge reading, or
if you feel a lack of engine power, detect
abnormal noise, etc., take the following steps:
To avoid the danger of being burned,
never remove the radiator cap while the
engine is still hot. When the radiator cap
is removed, pressurized hot water will
spurt out, possibly causing serious
injury.
1. Move the vehicle safely off the road, apply
the parking brake and move the gearshift
lever to the neutral position (automatic
transmission to ªPº).
Do not stop the engine.
2. Turn off the air conditioner switch. Open all
the windows, move the heater or air condi-
tioner temperature control to ªmaximum
hotº and fan control to ªhigh speedº.
3. Get out of the vehicle. Look and listen for
steam or coolant escaping from the radiator
before opening the hood. Wait until no
steam or coolant can be seen before pro-
ceeding.4. Open the engine hood.
If steam or water is coming from the
engine, stand clear to prevent getting
burned.
5. If engine overheating is caused by climbing
a long hill on a hot day, run the engine at a
fast idle (approximately 1,500 rpm) until the
temperature gauge indication returns to
normal.
6. Visually check drive belts for damage or
looseness. Also check if the cooling fan is
running. The radiator hoses and radiator
should not leak water.
IBe careful not to allow your hands,
hair or clothing to come into contact
with, or to get caught in, the running
fan or belts.
IIf coolant is leaking, the cooling fan
belt is missing or loose or the cooling
fan does not run, stop the engine.
7. After the engine cools down, check the
coolant level in the reservoir tank with the
engine running. Add coolant to the reservoir
tank if necessary. Have your vehicle re-
paired at the nearest NISSAN dealer.
IF YOUR VEHICLE OVERHEATS
5-9
Z01.2.1/R50-DX