1996 NISSAN MAXIMA seat adjustment
[x] Cancel search: seat adjustmentPage 12 of 197

Do not continue driving if the belt is
loose, broken or missing.
Door open warning light
This light comes on when any of the doors are
not closed securely while the ignition key is
ªONº.
Seat belt warning light and
buzzer
The light and buzzer remind you to fasten seat
belts. The light illuminates whenever the igni-
tion key is turned to ªONº, and will remain
illuminated until the driver's seat belt is fas-
tened. At the same time, the buzzer will sound
for about six seconds unless the driver's seat
belt is securely fastened.
Refer to ªSeat beltsº in the ªPre-driving checks
and adjustmentsº section for precautions on
seat belt usage.
Air bag warning light
When the ignition key is in the ªONº or
ªSTARTº position, the air bag light will illumi-
nate for about 7 seconds and then turn off.This means the system is operational.
If any of the following conditions occur, the air
bag needs servicing and your vehicle must be
taken to your nearest authorized NISSAN
dealer.
1. The air bag light does not come on for 7
seconds and then go off as described
above.
2. The air bag light flashes intermittently or
remains on.
3. The air bag light does not come on at all.
Unless checked and repaired, the Supplemen-
tal Restraint System may not function properly.
For additional details on the Air Bag System,
see Section 2.
Low washer fluid warning
light
This light comes on when the washer tank fluid
is at a low level. Add washer fluid as neces-
sary. See the ªDo-it-yourself operationsº sec-
tion.
orBrake warning light
This light functions for both the parking brake
and the foot brake systems.Parking brake indicator
The light comes on when the parking brake is
applied.
Low brake fluid warning
The light warns of a low brake fluid level. If the
light comes on while the engine is running with
the parking brake not applied, stop the vehicle
and perform the following:
1. Check the brake fluid level. Add brake fluid
as necessary. See ªBrake and clutch fluidº
in the ªDo-it-yourself operationsº section.
If the level is below the MINIMUM mark
on the brake fluid reservoir, do not drive
until the brake system has been
checked at a NISSAN dealer.
2. If the brake fluid level is correct:
Have the warning system checked by a
NISSAN dealer.
IEven if you judge it to be safe, have
your vehicle towed because driving it
1-7
Z01.2.1/A32-DX
Page 30 of 197

2 Pre-driving checks and adjustments
Key ............................................................................ 2-2
Door locks ................................................................. 2-2
Multi-remote control system ...................................... 2-5
Hood release ............................................................. 2-8
Glove box lock .......................................................... 2-8
Trunk lid lock ............................................................. 2-9
Fuel filler lid lock ..................................................... 2-10
Seats ....................................................................... 2-12
Supplemental restraint system
(Air bag system) ...................................................... 2-17
Caution and warning labels..................................... 2-21
Air bag warning light ............................................... 2-21
Seat belts ................................................................ 2-23
Child restraints for infants and small children......... 2-29
Tilting steering wheel .............................................. 2-35
Outside mirror remote control ................................. 2-36
Foldable outside mirrors.......................................... 2-36
Inside mirror ............................................................ 2-36
Z01.2.1/A32-DX
Page 41 of 197
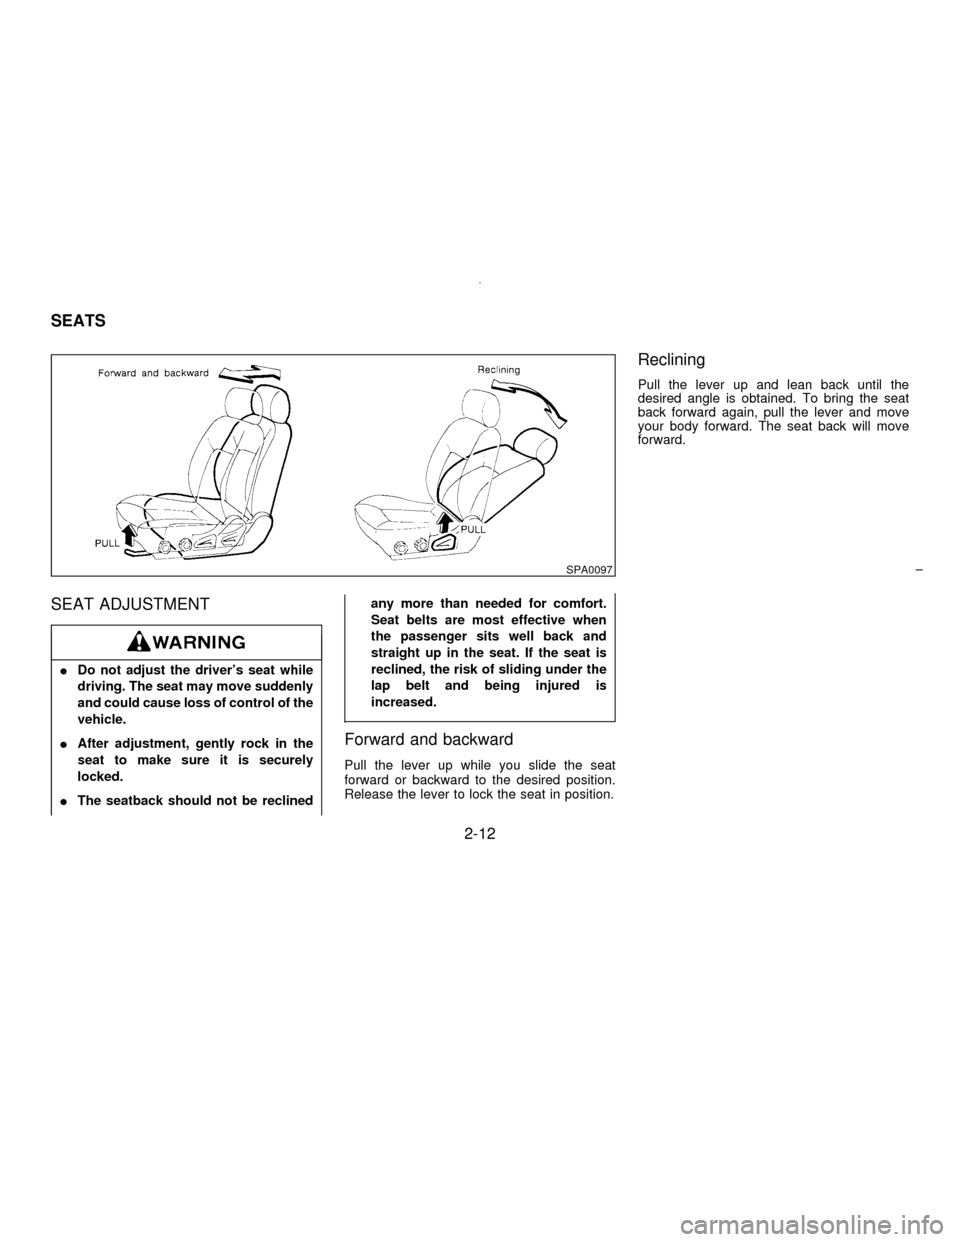
SEAT ADJUSTMENT
IDo not adjust the driver's seat while
driving. The seat may move suddenly
and could cause loss of control of the
vehicle.
IAfter adjustment, gently rock in the
seat to make sure it is securely
locked.
IThe seatback should not be reclinedany more than needed for comfort.
Seat belts are most effective when
the passenger sits well back and
straight up in the seat. If the seat is
reclined, the risk of sliding under the
lap belt and being injured is
increased.
Forward and backward
Pull the lever up while you slide the seat
forward or backward to the desired position.
Release the lever to lock the seat in position.
Reclining
Pull the lever up and lean back until the
desired angle is obtained. To bring the seat
back forward again, pull the lever and move
your body forward. The seat back will move
forward.
SPA0097
SEATS
2-12
Z01.2.1/A32-DX
Page 44 of 197
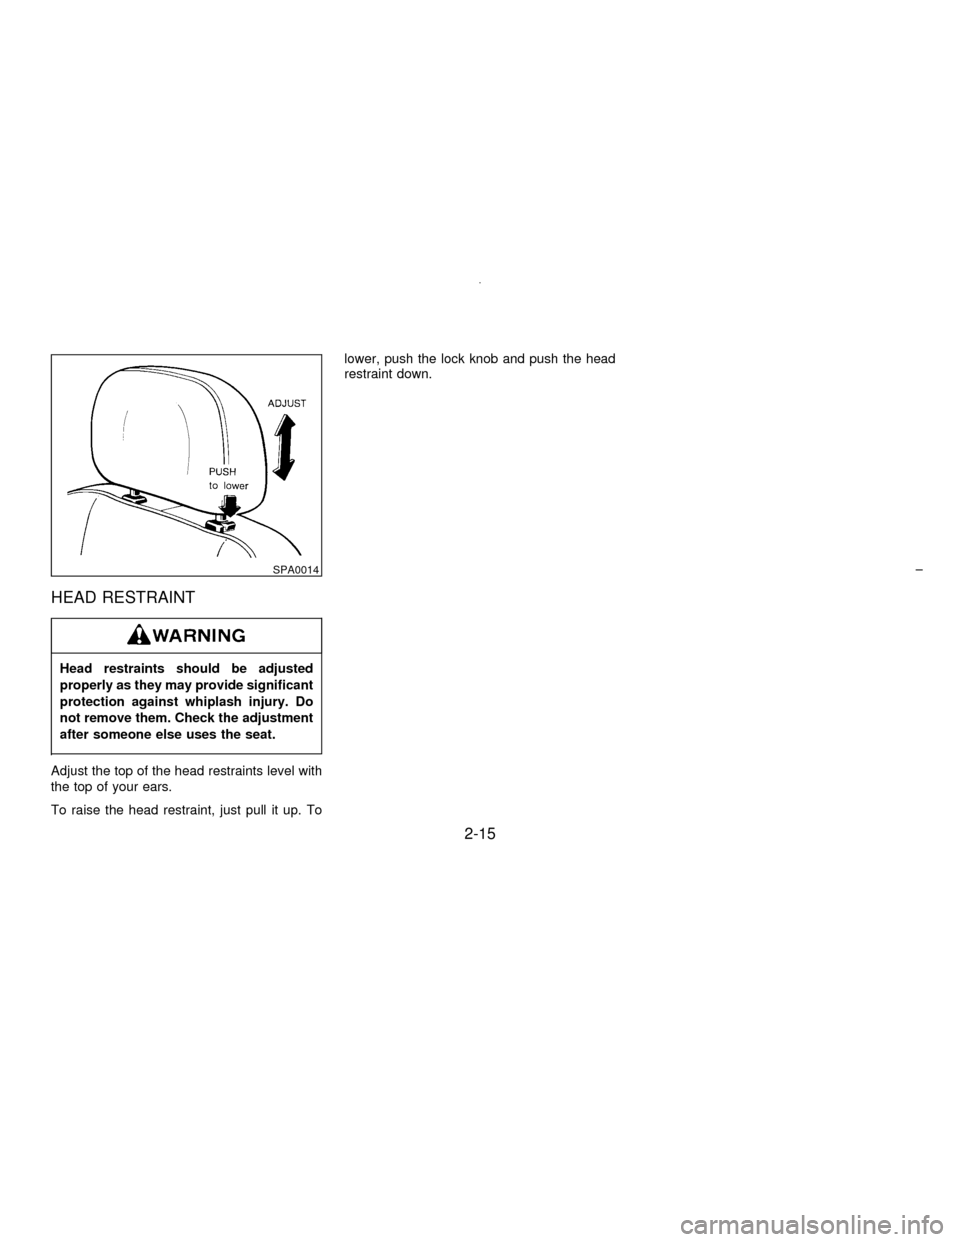
HEAD RESTRAINT
Head restraints should be adjusted
properly as they may provide significant
protection against whiplash injury. Do
not remove them. Check the adjustment
after someone else uses the seat.
Adjust the top of the head restraints level with
the top of your ears.
To raise the head restraint, just pull it up. Tolower, push the lock knob and push the head
restraint down.
SPA0014
2-15
Z01.2.1/A32-DX
Page 55 of 197
3-point seat belts have a cinching mechanism
for child seat installation. It is referred to as the
automatic locking mode.
When the cinching mechanism is activated the
seat belt cannot be withdrawn again until the
seat belt tongue is detached from the buckle
and fully retracted. Refer to ªChild restraints for
infants and small childrenº later in this section
for more information.
IThe automatic locking mode should
be used only for child seat installa-
tion. During normal seat belt use by a
passenger, the locking mode should
not be activated. If it is activated it
may cause uncomfortable seat belt
tension.
Unfastening the belts
To unfasten the belt, press the button on the
buckle. The seat belt will automatically retract.
Checking seat belt operation
(3-point type with retractor)
Your seat belt retractors are designed to lock
belt movement using two separate methods:
1) When the belt is pulled quickly from the
retractor.
2) When the vehicle slows down rapidly.
You can check their operation as follows:
IGrasp the shoulder belt and pull quickly
forward. The retractor should lock and re-
strict further belt movement.
If the retractor does not lock during this check
or if you have any questions about belt opera-
tion, see your NISSAN dealer.
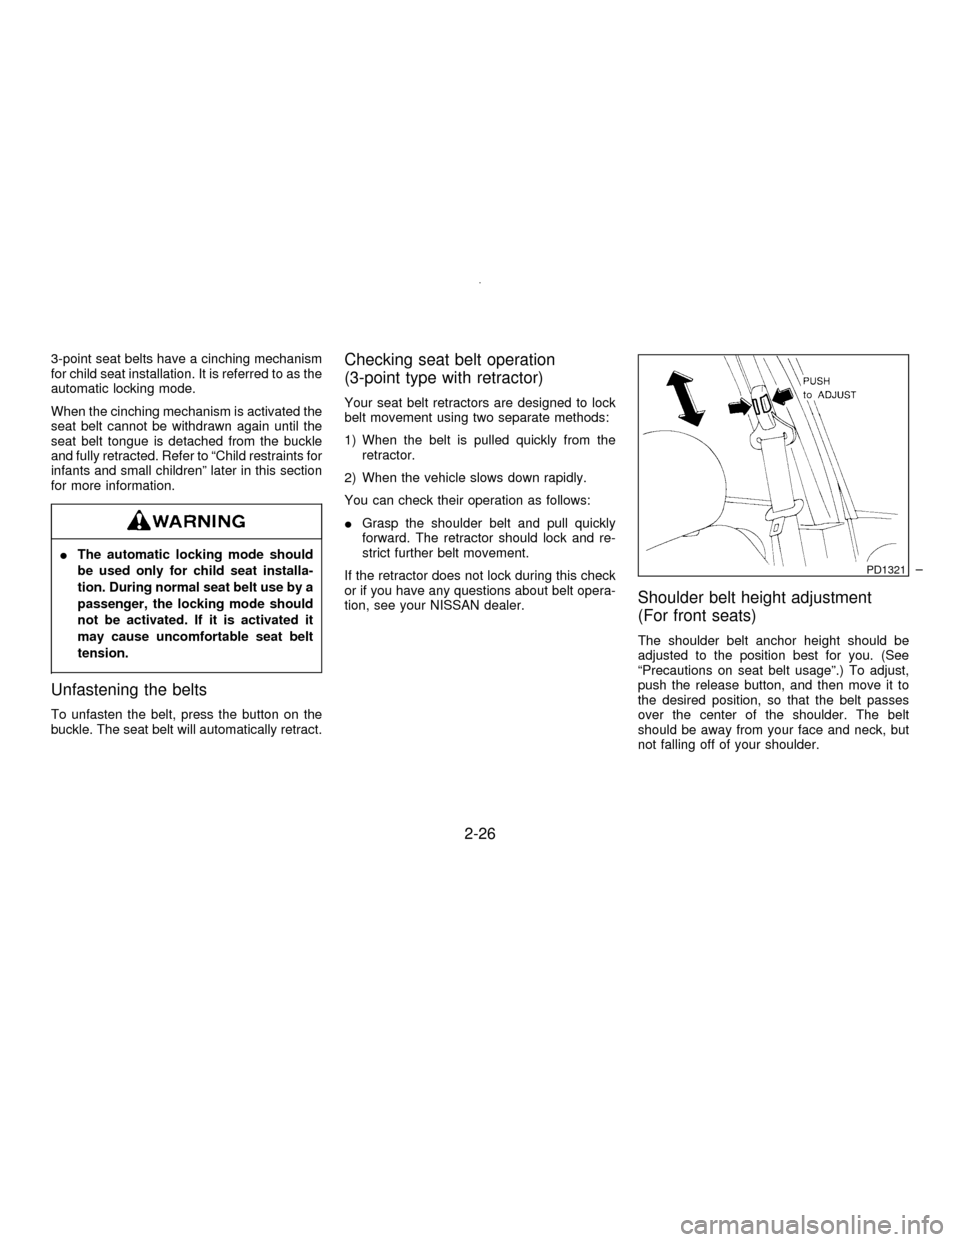
Shoulder belt height adjustment
(For front seats)
The shoulder belt anchor height should be
adjusted to the position best for you. (See
ªPrecautions on seat belt usageº.) To adjust,
push the release button, and then move it to
the desired position, so that the belt passes
over the center of the shoulder. The belt
should be away from your face and neck, but
not falling off of your shoulder.
PD1321
2-26
Z01.2.1/A32-DX
Page 56 of 197
After adjustment, release the button and
move it up and down to make sure the
shoulder belt anchor is securely fixed in
position.
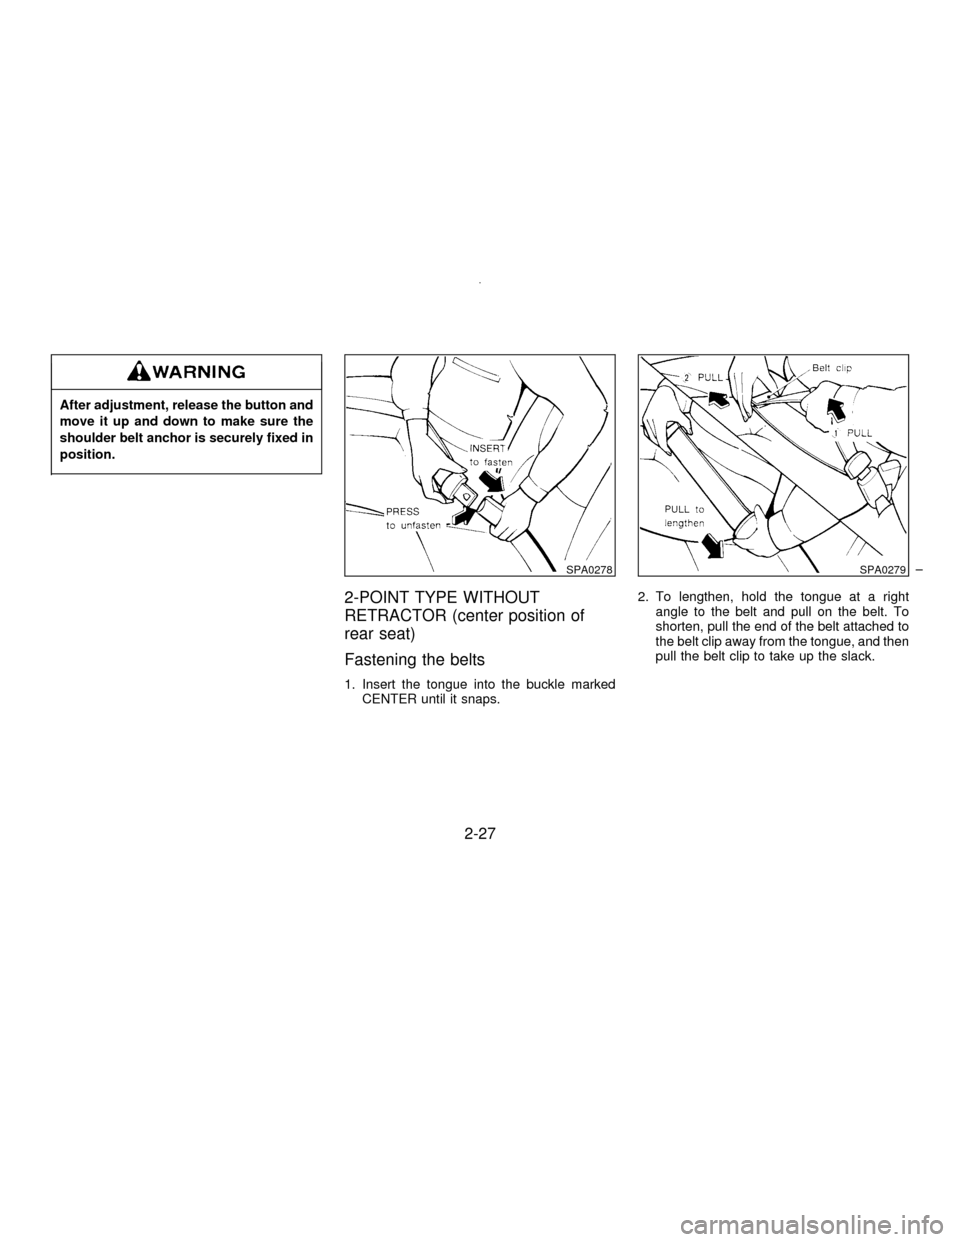
2-POINT TYPE WITHOUT
RETRACTOR (center position of
rear seat)
Fastening the belts
1. Insert the tongue into the buckle marked
CENTER until it snaps.2. To lengthen, hold the tongue at a right
angle to the belt and pull on the belt. To
shorten, pull the end of the belt attached to
the belt clip away from the tongue, and then
pull the belt clip to take up the slack.
SPA0278SPA0279
2-27
Z01.2.1/A32-DX
Page 58 of 197

SEAT BELT MAINTENANCE
ITo clean the belt webbings,apply a mild
soap solution or any solution recommended
for cleaning upholstery or carpets. Then
brush the webbing, wipe it with a cloth and
allow it to dry in the shade. Do not allow the
belts to retract until they are completely dry.
IPeriodically check to see that the belt
and the metal componentssuch as buck-
les, tongues, retractors, flexible wires and
anchors work properly. If loose parts, dete-
rioration, cuts or other damage on the web-
bing is found, the entire belt assembly
should be replaced.Infants and small children should al-
ways be placed in an appropriate child
restraint while riding in the vehicle. Fail-
ure to use a child restraint can result in
serious injury or death.
Children and infants should never be
carried on your lap. It is not possible for
even the strongest adult to resist the
forces of a severe accident. The child
could be crushed between the adult and
parts of the vehicle. Also, do not put the
same seat belt around both your child
and yourself. In general, child restraints
are designed to be installed with a lap
belt or the lap portion of a three-point
type seat belt.
Nissan recommends that the child re-
straint be installed in the rear seat. Ac-
cording to accident statistics, children
are safer when properly restrained in the
rear seat than in the front seat.
An improperly installed child restraint
could lead to serious injury or death in
an accident.
Child restraints specially designed for infants
and small children are offered by several
manufacturers. When selecting any child re-
straint, keep the following points in mind:
1) Choose only a restraint with a label certify-
ing that it complies with Federal Motor
Vehicle Safety Standard 213 or Canadian
Motor Vehicle Safety Standard 213.
2) Place your child in the child restraint and
check the various adjustments to be sure
the child restraint is compatible with your
child. Always follow all recommended pro-
cedures.
3) Check the child restraint in your vehicle to
be sure it is compatible with the vehicle's
seat belt system.
INever install a rear-facing child re-
straint in the front seat. A rear-facing
child restraint must only be used in
the rear seat. See ªInstallation on
front passenger seatº for details.
IFollow all of the child restraint manu-
facturer's instructions for installation
and use. When purchasing a child
restraint, be sure to select one which
will fit your child and vehicle. It may
CHILD RESTRAINTS FOR
INFANTS AND SMALL CHILDREN
2-29
Z01.2.1/A32-DX
Page 59 of 197
not be possible to properly install
some types of child restraints in your
vehicle.
Improper use of a child restraint can
result in increased injuries for both
the infant or child and other occu-
pants in the vehicle.
IWhen your child restraint is not in
use, store it in the trunk or keep it
secured with a seat belt to prevent it
from being thrown forward in case of
a sudden stop or accident.
IAfter attaching a child restraint, test
the restraint before you place the
child in it. Tilt it from side to side. Try
to tug it forward and check to see if
the belt holds it in place. If the re-
straint is not secure, tighten the belt
as necessary, or put the restraint in
another seat and test it again.
IIf the child restraint is not anchored
properly, the risk of a child being
injured in a collision or a sudden stop
greatly increases.
IAdjustable seatbacks should be posi-
tioned to fit the child restraint, but asupright as possible.
IRemember that a child restraint left in
a closed vehicle can become very
hot. Check the seating surface and
buckles before placing your child in
the child restraint.
IAll U.S. states and provinces of
Canada require that infants and small
children be restrained in approved
child restraints at all times while the
vehicle is being operated.
IFor a front facing child restraint, if the
seat position where it is installed has
a 3-point type lap/shoulder belt,
check to make sure the shoulder belt
does not go in front of the child's face
or neck. If it does, put the shoulder
belt behind the child restraint.
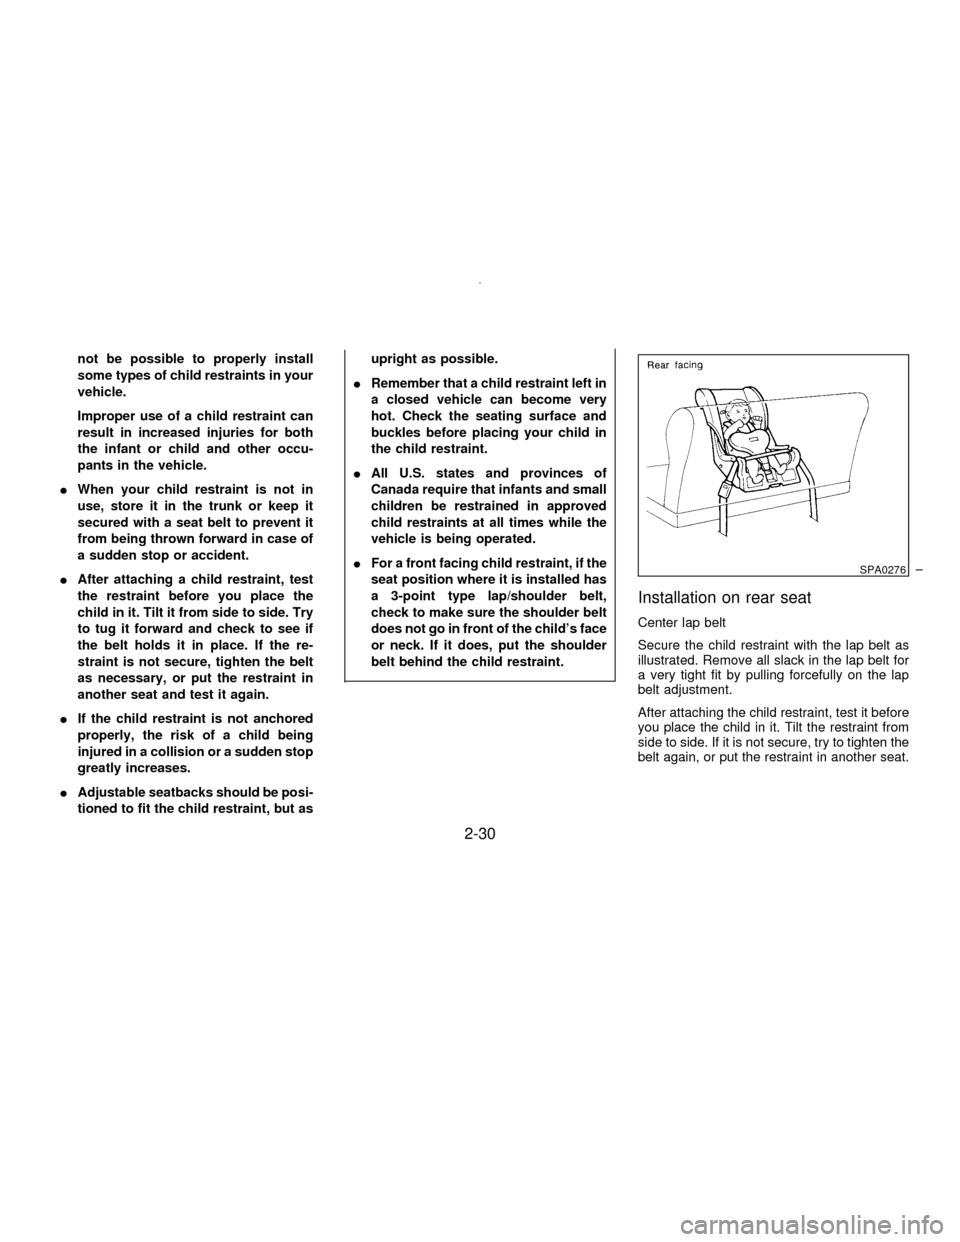
Installation on rear seat
Center lap belt
Secure the child restraint with the lap belt as
illustrated. Remove all slack in the lap belt for
a very tight fit by pulling forcefully on the lap
belt adjustment.
After attaching the child restraint, test it before
you place the child in it. Tilt the restraint from
side to side. If it is not secure, try to tighten the
belt again, or put the restraint in another seat.
SPA0276
2-30
Z01.2.1/A32-DX