1996 NISSAN FRONTIER tow
[x] Cancel search: towPage 12 of 198
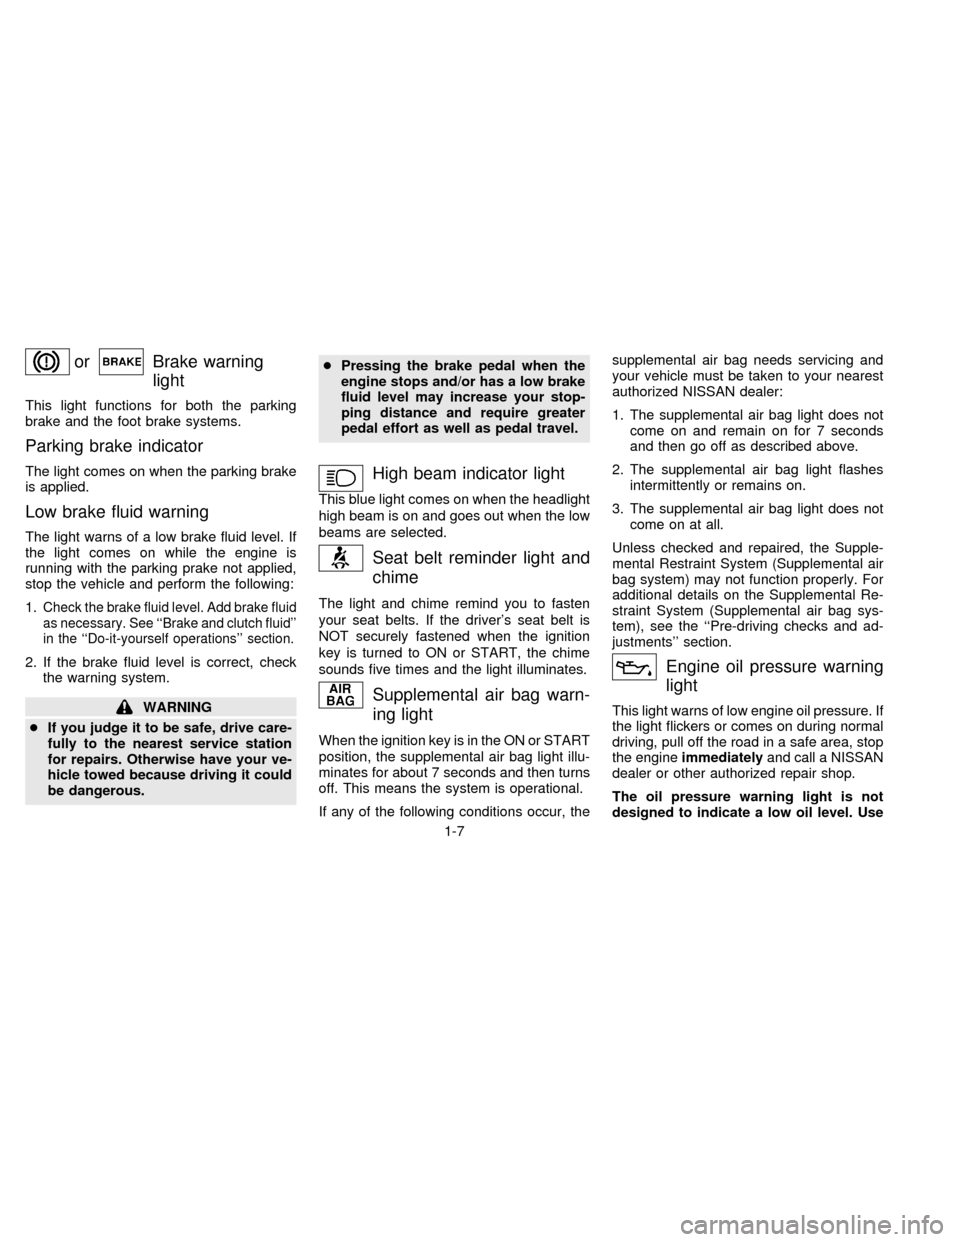
orBrake warning
light
This light functions for both the parking
brake and the foot brake systems.
Parking brake indicator
The light comes on when the parking brake
is applied.
Low brake fluid warning
The light warns of a low brake fluid level. If
the light comes on while the engine is
running with the parking prake not applied,
stop the vehicle and perform the following:
1.
Check the brake fluid level. Add brake fluid
as necessary. See ``Brake and clutch fluid''
in the ``Do-it-yourself operations'' section.
2. If the brake fluid level is correct, check
the warning system.
WARNING
cIf you judge it to be safe, drive care-
fully to the nearest service station
for repairs. Otherwise have your ve-
hicle towed because driving it could
be dangerous.cPressing the brake pedal when the
engine stops and/or has a low brake
fluid level may increase your stop-
ping distance and require greater
pedal effort as well as pedal travel.
High beam indicator light
This blue light comes on when the headlight
high beam is on and goes out when the low
beams are selected.
Seat belt reminder light and
chime
The light and chime remind you to fasten
your seat belts. If the driver's seat belt is
NOT securely fastened when the ignition
key is turned to ON or START, the chime
sounds five times and the light illuminates.
Supplemental air bag warn-
ing light
When the ignition key is in the ON or START
position, the supplemental air bag light illu-
minates for about 7 seconds and then turns
off. This means the system is operational.
If any of the following conditions occur, thesupplemental air bag needs servicing and
your vehicle must be taken to your nearest
authorized NISSAN dealer:
1. The supplemental air bag light does not
come on and remain on for 7 seconds
and then go off as described above.
2. The supplemental air bag light flashes
intermittently or remains on.
3. The supplemental air bag light does not
come on at all.
Unless checked and repaired, the Supple-
mental Restraint System (Supplemental air
bag system) may not function properly. For
additional details on the Supplemental Re-
straint System (Supplemental air bag sys-
tem), see the ``Pre-driving checks and ad-
justments'' section.
Engine oil pressure warning
light
This light warns of low engine oil pressure. If
the light flickers or comes on during normal
driving, pull off the road in a safe area, stop
the engineimmediatelyand call a NISSAN
dealer or other authorized repair shop.
The oil pressure warning light is not
designed to indicate a low oil level. Use
1-7
ZX
Page 14 of 198
Overdrive off indicator light
(If so equipped)
This light comes on when the overdrive
switch is pushed to the OFF position.
Key reminder chime
The chime sounds when the driver side
door is opened if the key is left in the ignition
switch. Take the ignition key when you
leave the vehicle.
Light reminder chime
A chime sounds if the driver's door is
opened with the light switch on unless the
ignition key is in the ON position. Turn the
light switch off when you leave the vehicle.
Brake pad wear warning
The disc brake pads have audible wear
warnings. When a brake pad requires re-
placement, it makes a high pitched scraping
sound when the vehicle is in motion whether
or not the brake pedal is depressed. Have
the brakes checked as soon as possible if
the warning sound is heard.
Malfunction indicator light
(MIL)
If the Malfunction indicator light comes onsteady or blinks while the engine is running,
it may indicate a potential emission control
problem.
The Malfunction indicator light will come on
in one of two ways:
cMalfunction indicator light on steady - An
emission control system malfunction has
been detected. Have the vehicle in-
spected by an authorized NISSAN
dealer. You do not need to have your
vehicle towed to the dealer.
cMalfunction indicator light blinking - An
engine misfire has been detected which
may damage the emission control sys-
tem. To reduce or avoid emission control
system damage:
cdo not drive at speeds above 45 MPH
(72 km/h).
cavoid hard acceleration or decelera-
tion.
cavoid steep uphill grades.
cif possible, reduce the amount of cargo
being hauled or towed.
The malfunction indicator light may stop
blinking and come on steady.
Have the vehicle inspected by an autho-
rized NISSAN dealer. You do not need tohave your vehicle towed to the dealer.
CAUTION
cContinued vehicle operation without
having the emission control system
checked and repaired as necessary
could lead to poor driveability, re-
duced fuel economy, and possible
damage to the emission control sys-
tem, which may affect your warranty
coverage.
Some conditions may cause the malfunction
indicator light to come on steady or blink.
Examples are as follows:
cvehicle ran out of fuel, which caused the
engine to misfire.
cfuel filler cap was left off or improperly
installed, allowing fuel to evaporate into
the atmosphere.
If you suspect that you experienced one or
both of the above conditions, drive the ve-
hicle to an authorized NISSAN dealer and
have the vehicle inspected. Avoid any un-
necessary diagnosis during the service by
informing the dealer of the conditions listed
above that may have cccurred.
1-9
ZX
Page 15 of 198
Lighting
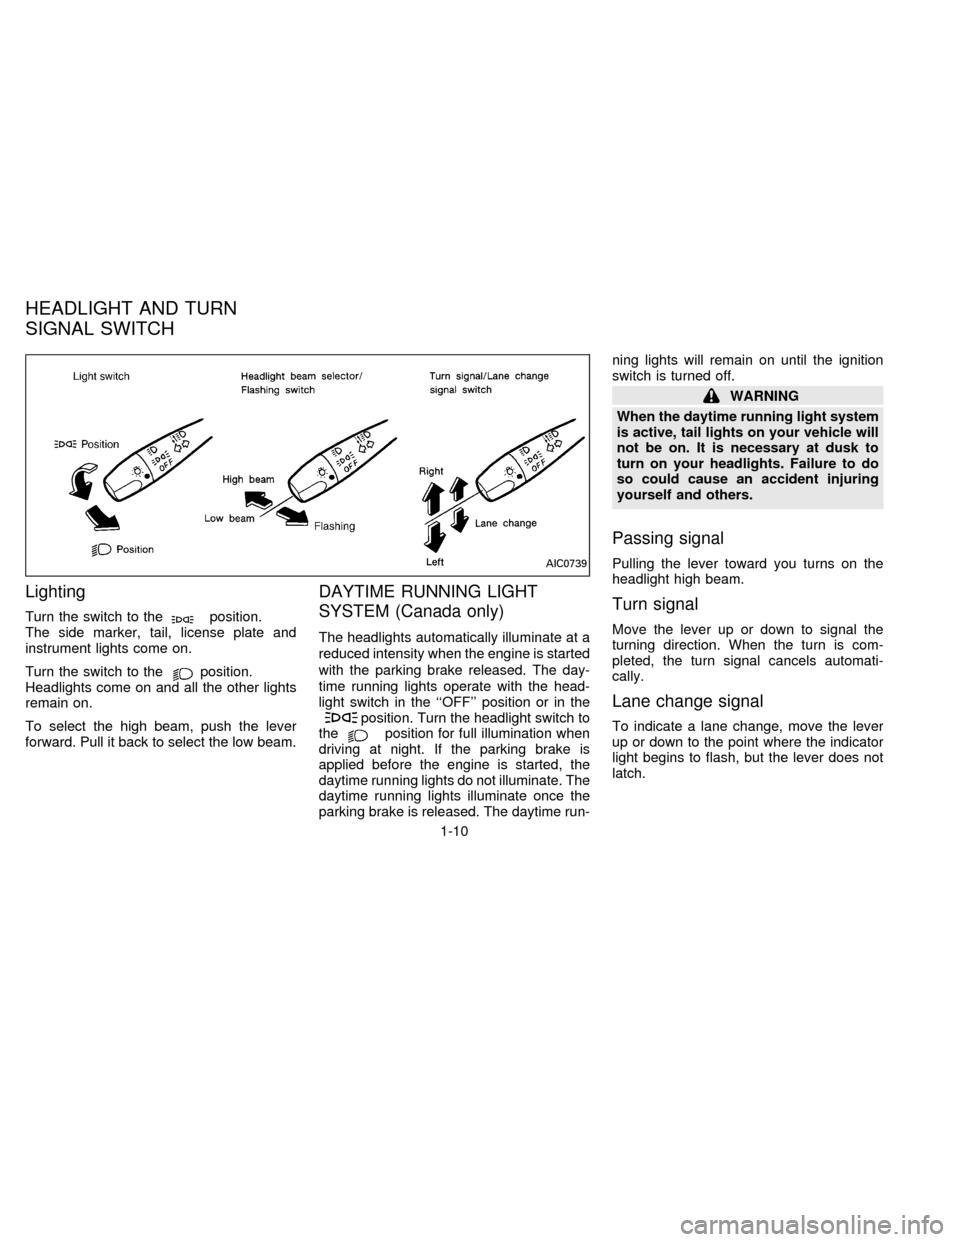
Turn the switch to theposition.
The side marker, tail, license plate and
instrument lights come on.
Turn the switch to the
position.
Headlights come on and all the other lights
remain on.
To select the high beam, push the lever
forward. Pull it back to select the low beam.
DAYTIME RUNNING LIGHT
SYSTEM (Canada only)
The headlights automatically illuminate at a
reduced intensity when the engine is started
with the parking brake released. The day-
time running lights operate with the head-
light switch in the ``OFF'' position or in the
position. Turn the headlight switch to
theposition for full illumination when
driving at night. If the parking brake is
applied before the engine is started, the
daytime running lights do not illuminate. The
daytime running lights illuminate once the
parking brake is released. The daytime run-ning lights will remain on until the ignition
switch is turned off.
WARNING
When the daytime running light system
is active, tail lights on your vehicle will
not be on. It is necessary at dusk to
turn on your headlights. Failure to do
so could cause an accident injuring
yourself and others.
Passing signal
Pulling the lever toward you turns on the
headlight high beam.
Turn signal
Move the lever up or down to signal the
turning direction. When the turn is com-
pleted, the turn signal cancels automati-
cally.
Lane change signal
To indicate a lane change, move the lever
up or down to the point where the indicator
light begins to flash, but the lever does not
latch.
AIC0739
HEADLIGHT AND TURN
SIGNAL SWITCH
1-10
ZX
Page 16 of 198
The ignition switch must be in the ACC or
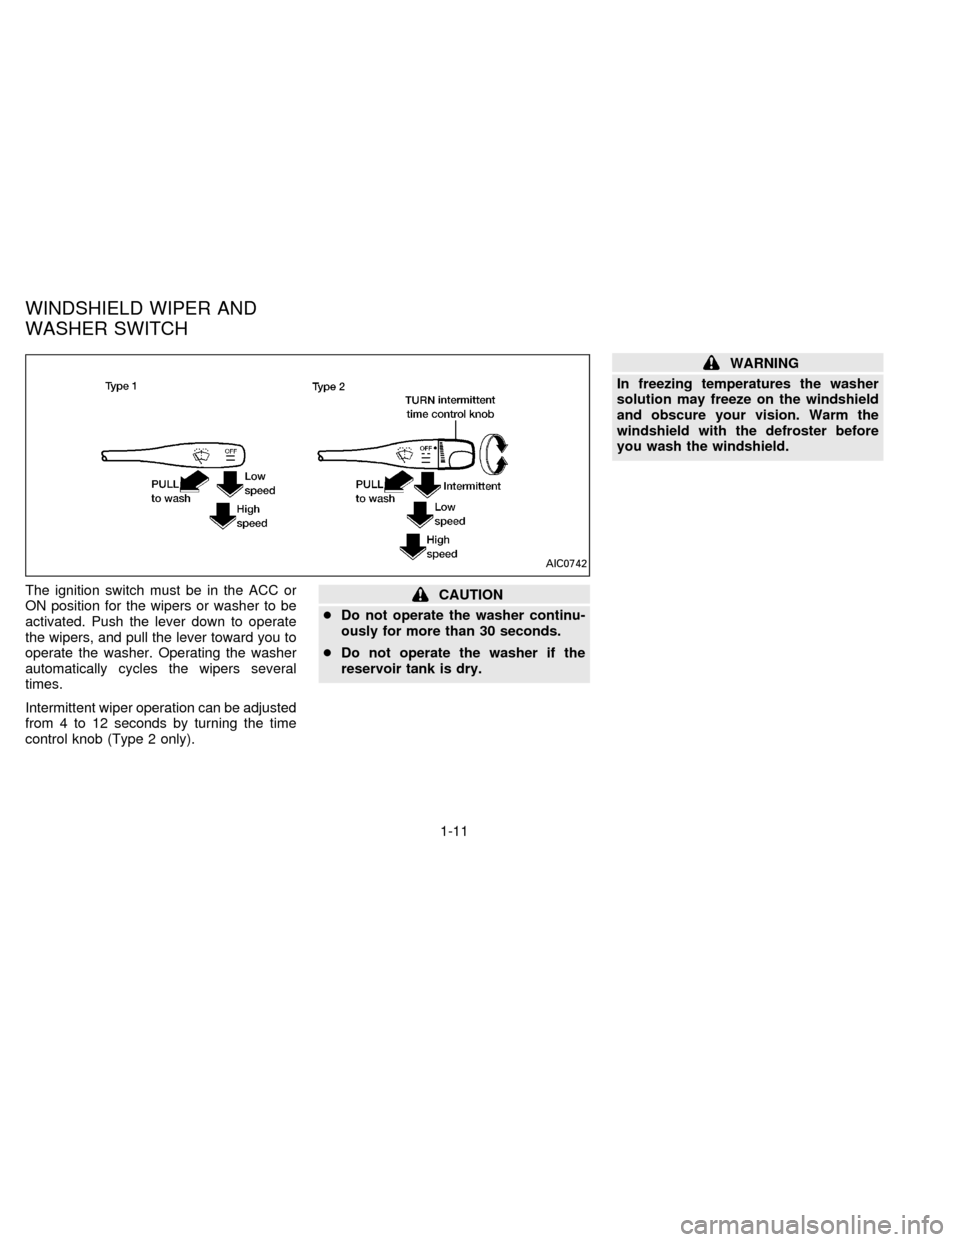
ON position for the wipers or washer to be
activated. Push the lever down to operate
the wipers, and pull the lever toward you to
operate the washer. Operating the washer
automatically cycles the wipers several
times.
Intermittent wiper operation can be adjusted
from 4 to 12 seconds by turning the time
control knob (Type 2 only).CAUTION
cDo not operate the washer continu-
ously for more than 30 seconds.
cDo not operate the washer if the
reservoir tank is dry.
WARNING
In freezing temperatures the washer
solution may freeze on the windshield
and obscure your vision. Warm the
windshield with the defroster before
you wash the windshield.
AIC0742
WINDSHIELD WIPER AND
WASHER SWITCH
1-11
ZX
Page 27 of 198
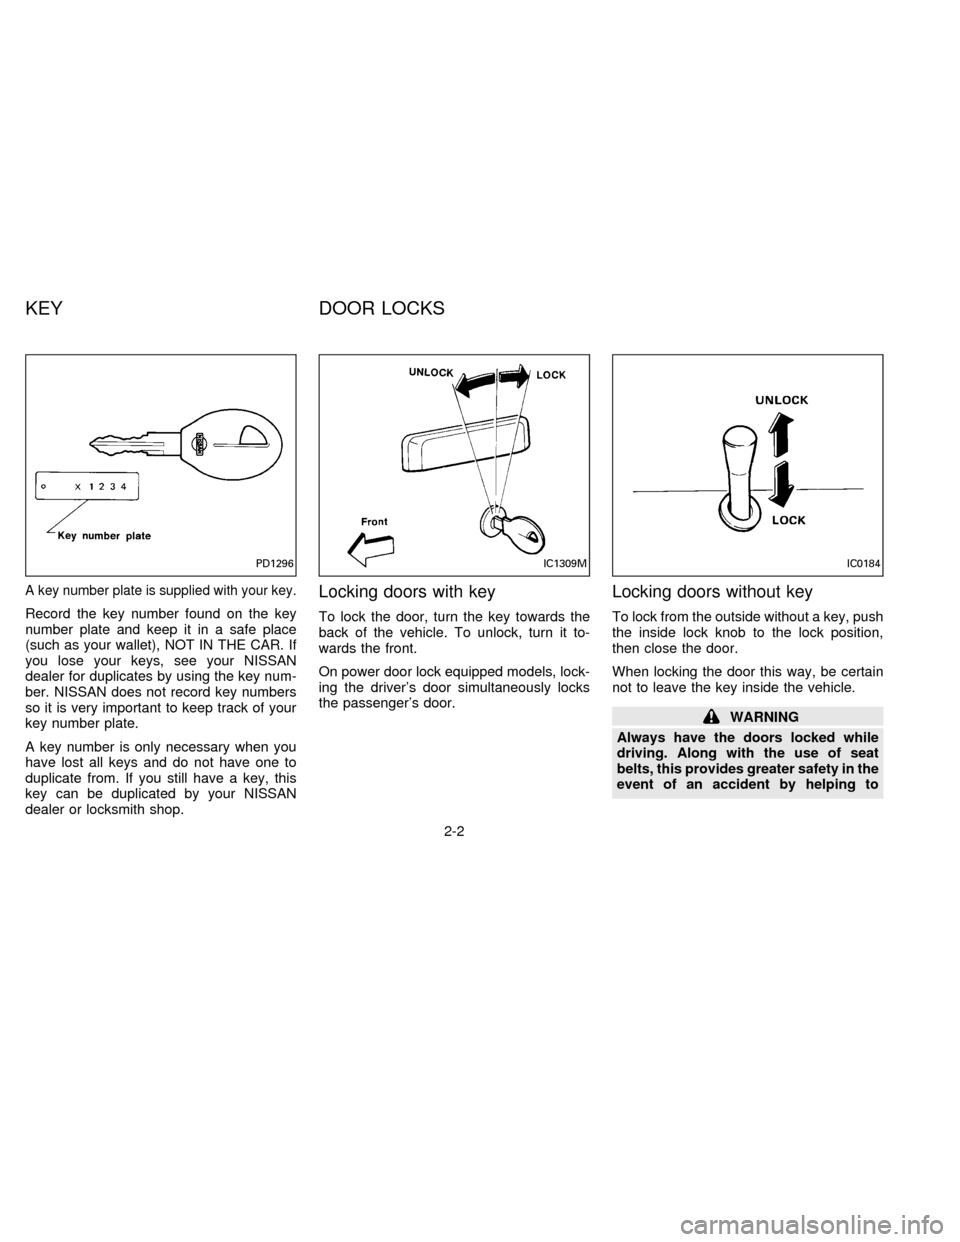
A key number plate is supplied with your key.
Record the key number found on the key
number plate and keep it in a safe place
(such as your wallet), NOT IN THE CAR. If
you lose your keys, see your NISSAN
dealer for duplicates by using the key num-
ber. NISSAN does not record key numbers
so it is very important to keep track of your
key number plate.
A key number is only necessary when you
have lost all keys and do not have one to
duplicate from. If you still have a key, this
key can be duplicated by your NISSAN
dealer or locksmith shop.
Locking doors with key
To lock the door, turn the key towards the
back of the vehicle. To unlock, turn it to-
wards the front.
On power door lock equipped models, lock-
ing the driver's door simultaneously locks
the passenger's door.
Locking doors without key
To lock from the outside without a key, push
the inside lock knob to the lock position,
then close the door.
When locking the door this way, be certain
not to leave the key inside the vehicle.
WARNING
Always have the doors locked while
driving. Along with the use of seat
belts, this provides greater safety in the
event of an accident by helping to
PD1296IC1309MIC0184
KEY DOOR LOCKS
2-2
ZX
Page 28 of 198
prevent persons from being thrown
from the vehicle. This also helps keep
children and others from unintention-
ally opening the doors, and will help
keep out intruders.
POWER DOOR LOCK
(If so equipped)
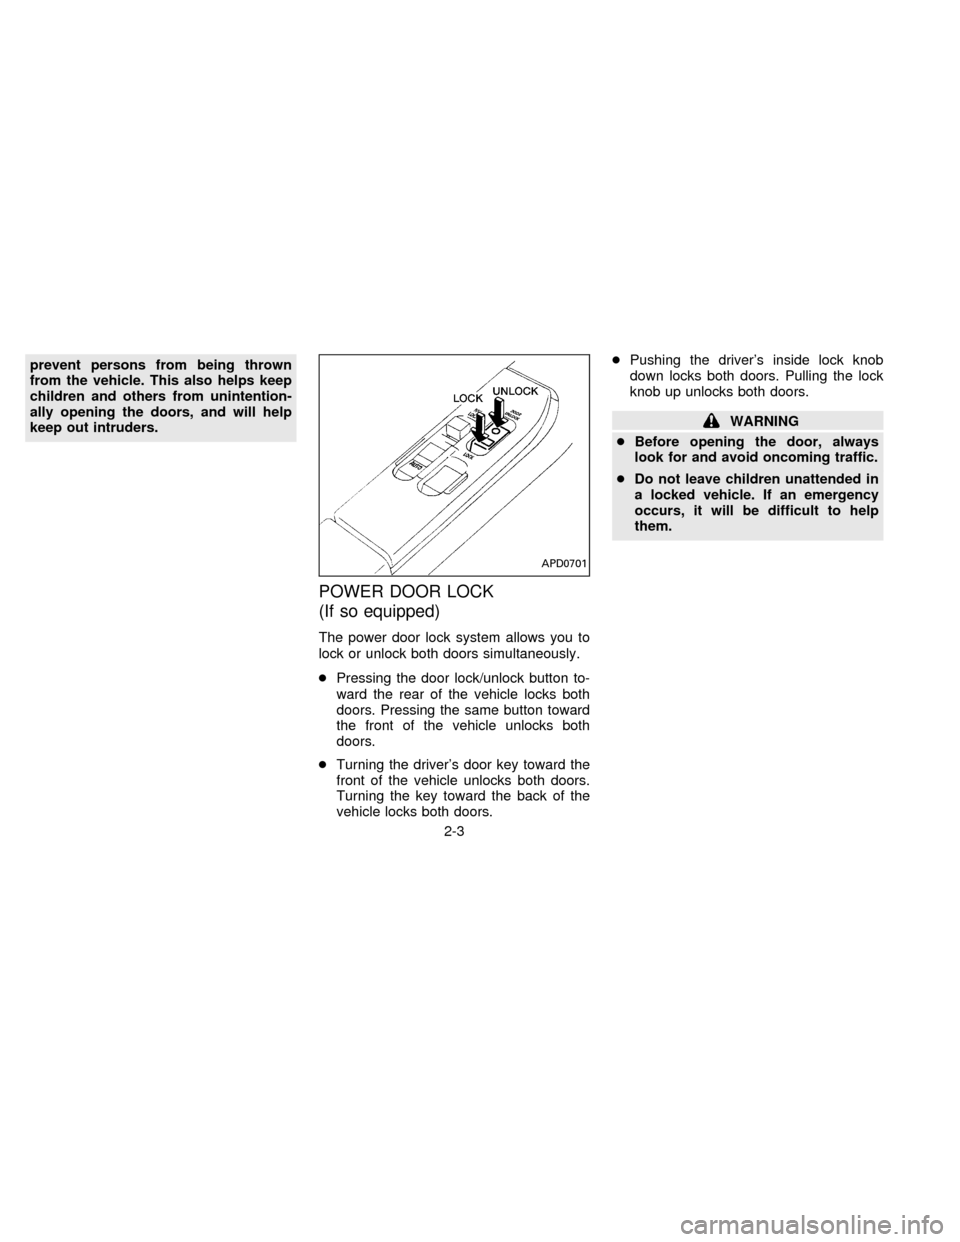
The power door lock system allows you to
lock or unlock both doors simultaneously.
cPressing the door lock/unlock button to-
ward the rear of the vehicle locks both
doors. Pressing the same button toward
the front of the vehicle unlocks both
doors.
cTurning the driver's door key toward the
front of the vehicle unlocks both doors.
Turning the key toward the back of the
vehicle locks both doors.cPushing the driver's inside lock knob
down locks both doors. Pulling the lock
knob up unlocks both doors.
WARNING
cBefore opening the door, always
look for and avoid oncoming traffic.
cDo not leave children unattended in
a locked vehicle. If an emergency
occurs, it will be difficult to help
them.
APD0701
2-3
ZX
Page 44 of 198
belts are most effective when the pas-
senger sits well back and straight up in
the seat. If the seat is reclined, the risk
of sliding under the lap belt and being
injured is increased.
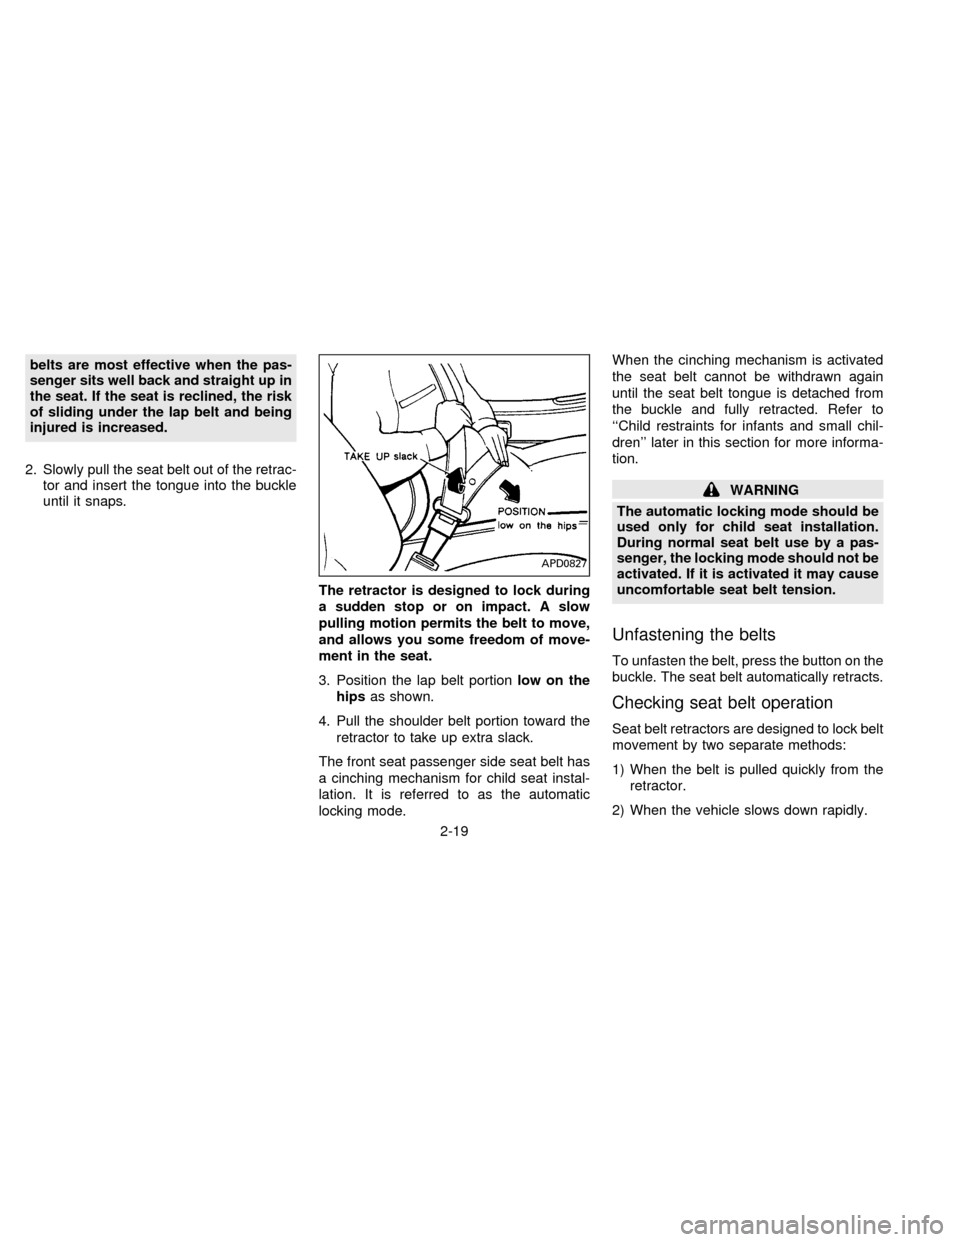
2. Slowly pull the seat belt out of the retrac-
tor and insert the tongue into the buckle
until it snaps.
The retractor is designed to lock during
a sudden stop or on impact. A slow
pulling motion permits the belt to move,
and allows you some freedom of move-
ment in the seat.
3. Position the lap belt portionlow on the
hipsas shown.
4. Pull the shoulder belt portion toward the
retractor to take up extra slack.
The front seat passenger side seat belt has
a cinching mechanism for child seat instal-
lation. It is referred to as the automatic
locking mode.When the cinching mechanism is activated
the seat belt cannot be withdrawn again
until the seat belt tongue is detached from
the buckle and fully retracted. Refer to
``Child restraints for infants and small chil-
dren'' later in this section for more informa-
tion.
WARNING
The automatic locking mode should be
used only for child seat installation.
During normal seat belt use by a pas-
senger, the locking mode should not be
activated. If it is activated it may cause
uncomfortable seat belt tension.
Unfastening the belts
To unfasten the belt, press the button on the
buckle. The seat belt automatically retracts.
Checking seat belt operation
Seat belt retractors are designed to lock belt
movement by two separate methods:
1) When the belt is pulled quickly from the
retractor.
2) When the vehicle slows down rapidly.
APD0827
2-19
ZX
Page 66 of 198

Adjusting tone quality and sound
balance
To adjust BASS, TREB (treble), FADER,
and BAL (balance) the control knobs must
be released from their stowed positions.
Pushing the knobs once moves them to the
released position.
In the released position, the knobs control
tone quality. Turn the control knobs to ad-
just BASS and TREB to the most pleasing
level.
From the released position, the knobs must
be pulled out in order to control FADER andBAL. FADER adjusts the sound level be-
tween the front and rear speakers, and BAL
adjusts the sound level between the right
and left speakers.
Once sound quality is set to the desired
levels, return the control knobs to the
stowed position by pushing them in com-
pletely and releasing.
CASSETTE TAPE OPERATION
Turn the ignition key to ACC or ON, then
lightly insert the cassette tape into the tape
door.
The cassette tape automatically pulls into
the player. The word TAPE and an arrow
indicating tape side illuminates in the dis-
play window.
Do not force the cassette tape into the
tape door.
Pressing strongly could cause player
damage.
AHA0522AIC0709
3-13
ZX