Page 5 of 320

Introductory InformationFord's Commitment to You
At Ford Motor Company, excellence is the
continuous commitment to achieve the best result
possible. It is dedication to learning what you want,
determination to develop the right concept, and
execution of that concept with care, precision, and
attention to detail. In short, excellence means being
the standard by which others are judged.
Our Guiding Principles Quality comes first. For your satisfaction, the
quality of our products and services must be our
number one priority. You are the focus of everything we do. Our
work must be done with you in mind, providing
better products and services than our
competition. Continuous improvement is essential to our
success. We must strive for excellence in
everything we do: in our products - in their safety
and value - and in our services, our human relations,
our competitiveness, and our profitability. Employee involvement is our way of life. We are
a team. We must treat one another with trust and
respect. Dealers and suppliers are our partners. We must
maintain mutually beneficial relationships with
dealers, suppliers, and our other business
associates. Integrity is never compromised. Our conduct
worldwide must be pursued in a manner that is
socially responsible and commands respect for its
integrity and for its positive contributions to
society
1
Page 20 of 320

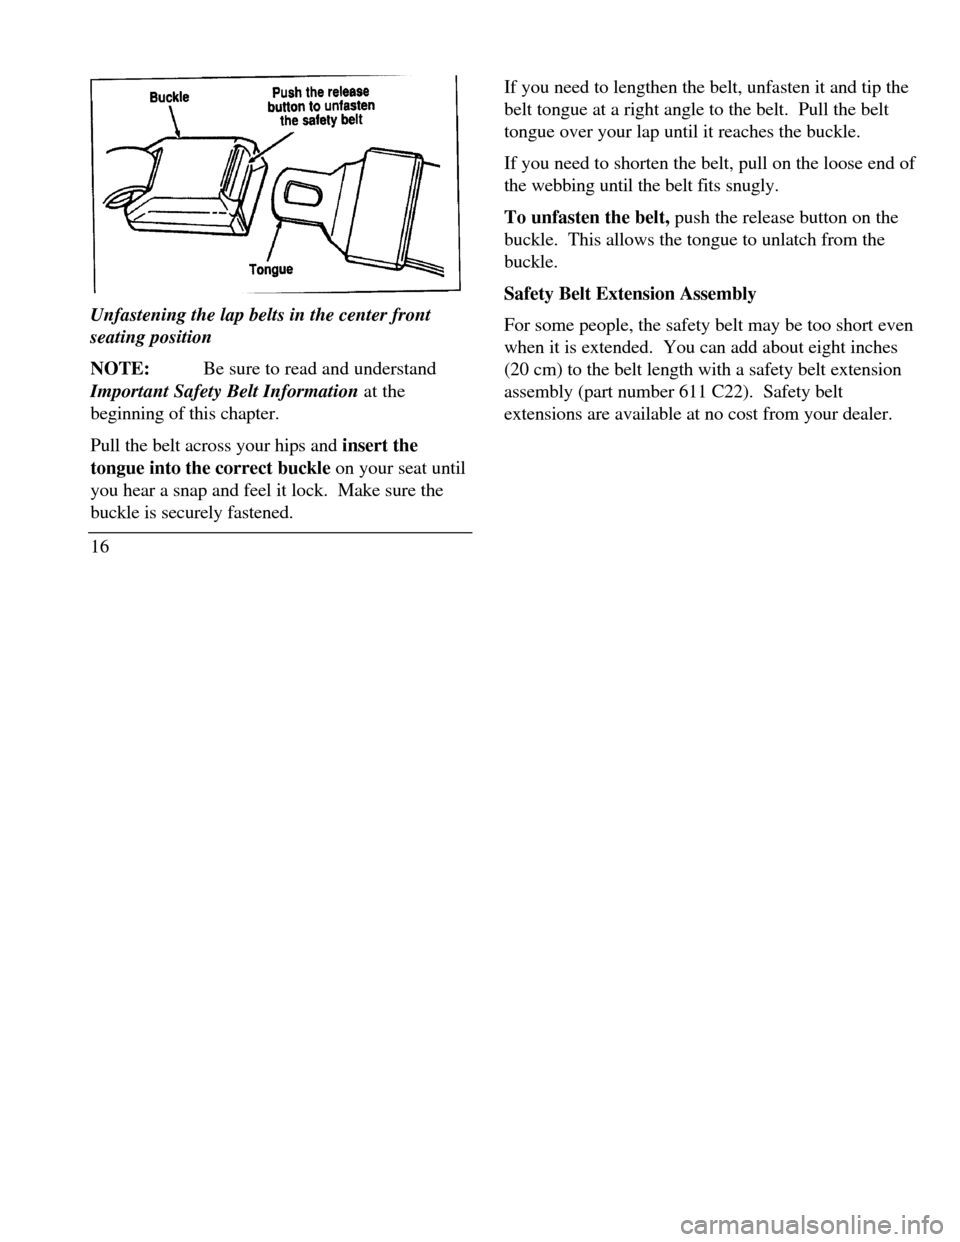
Unfastening the lap belts in the center front
seating position
NOTE:Be sure to read and understand
Important Safety Belt Information at the
beginning of this chapter.
Pull the belt across your hips and insert the
tongue into the correct buckle on your seat until
you hear a snap and feel it lock. Make sure the
buckle is securely fastened.
16If you need to lengthen the belt, unfasten it and tip the
belt tongue at a right angle to the belt. Pull the belt
tongue over your lap until it reaches the buckle.
If you need to shorten the belt, pull on the loose end of
the webbing until the belt fits snugly.
To unfasten the belt, push the release button on the
buckle. This allows the tongue to unlatch from the
buckle.
Safety Belt Extension Assembly
For some people, the safety belt may be too short even
when it is extended. You can add about eight inches
(20 cm) to the belt length with a safety belt extension
assembly (part number 611 C22). Safety belt
extensions are available at no cost from your dealer.
Page 30 of 320

/!\ WARNINGPassengers should not be allowed to ride inthe cargo area. Persons not riding in a seatwith a fastened seat belt are much more likelyto suffer serious injury in a collision. Cargoshould always be secured to prevent it fromshifting and causing damage to the vehicle orharm to passengers.When possible, put children in the rear seat, of
your vehicle. Accident statistics suggest that
children are safer when properly restrained in the
rear seating positions than in the front seating
positions.
26/!\ WARNINGCarefully follow all of the manufacturer'sinstructions included with the safety seat youput in your vehicle. if you do not install and usethe safety seat properly, the child may beinjured in a sudden stop or collision./!\ WARNINGSafety belts and seats can become hot in avehicle that has been closed up in sunnyweather; they could bum a small child. Checkseat covers and buckles before you place a childanywhere near them./!\ WARNINGNever leave a child unattended in your vehicle.
Page 31 of 320

Safety Seats for Children
Use a safety seat that is recommended for the size
and weight of the child. Always follow the safety
seat manufacturer's instructions when installing
and using the safety seat.
Ford recommends the use of a child safety seat
having a top tether strap. Install the child safety
seat in a seating position which is capable of
providing a tether anchorage. For more
information on top tether straps see Attaching
Safety Seats With Tether Straps in this chapter.
When installing a child safety seat, be sure to use
the correct safety belt buckle for that seating
position, and make sure the tongue is securely
fastened in the buckle./!\WARNINGREAR-FACING INFANT SEATSSHOULD NEVER BE USED IN THEFRONT SEAT. REAR-FACING INFANTSEATS MUST ALWAYS BE PLACED INTHE REAR SEAT. Failure to follow theseinstructions could result in serious injury.When using forward-facing child seats inthe front seat, always move the passengerseat as far back from the instrument panelas possible. Failure to follow thesewarnings could result in injury to thechild.All child restraint systems are designed to be
secured in vehicle seats by lap belts or by the lap
portion of a lap-shoulder belt.
27
Page 32 of 320
/!\WARNINGIf you do not properly secure the safetyseat, the child occupying the seat may beinjured during a collision or sudden stop.An unsecured safety seat could also injureother passengers./!\WARNINGCarefully follow all of the manufacturer'sinstructions included with the safety seatyou put in your vehicle. If you do notinstall and use the safety seat properly, thechild may be injured in a sudden stop orcollision.28/!\WARNINGAlways keep the buckle release buttonpointing upward and away from the childseat, with the tongue between the child seatand the release button as shown in thefollowing illustration.
Page 35 of 320
Routing the lap/shoulder belt4. Insert the belt tongue into the proper buckle
for that seating position until you hear and feel
the latch engage. See Figure 3. Make sure
tongue is latched securely to buckle by pulling
on tongue.
31
Page 39 of 320
7.Before placing the child in the child seat,
forcibly tilt the seat from side to side and in
forward directions to make sure that the seat is
securely held in place. See Figure 7.Checking that the seat is secure
35
Page 41 of 320

9. Check to make sure that the child seat is
properly secured prior to each use. If the
retractor is not locked, repeat steps 6 through
8.
NOTE:To remove the retractor from
automatic lock mode, allow seat belt to retract fully
to its stowed position and the retractor will
automatically switch back to the vehicle sensitive
locking mode for normal adult usage.
Installing a Child Safety, Seat at the
Front Center Seating Position with
Adjustable Lap Belt-
1.Lengthen the lap belt. To lengthen the belt,
hold the tongue so that its bottom is
perpendicular to the direction of webbing
while sliding the tongue up the webbing.
2. Place the child safety seat in the center seating
position.3.Route the tongue and webbing through the
child seat according to the child seat
manufacturer's instructions.
4. Insert the belt tongue into the proper buckle
for the center seating position until you hear
a snap and feel it latch. Make sure the
tongue is m securely fastened to the buckle
by pulling on tongue.
5. Push down on the child seat while pulling on
the loose end of the lap belt webbing to
tighten the belt.
6. Before placing the child into the child seat,
forcibly tilt the child seat from side-to-side
and in forward directions to ensure that the
seat is held securely in place. If the child seat
moves excessively, repeat steps 5 through 6,
or properly install the child seat in a different
seating position.
37