Page 148 of 240

Engine Oil
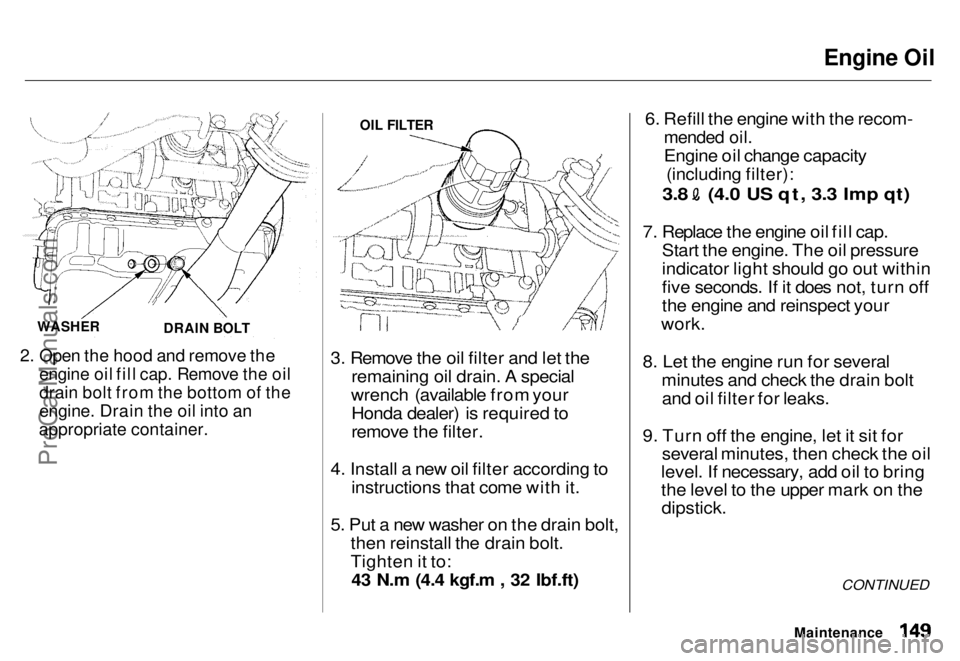
2. Open the hood and remove the
engine oil fill cap. Remove the oil
drain bolt from the bottom of the
engine. Drain the oil into an
appropriate container.
3. Remove the oil filter and let the
remaining oil drain. A special
wrench (available from your Honda dealer) is required to
remove the filter.
4. Install a new oil filter according to instructions that come with it.
5. Put a new washer on the drain bolt, then reinstall the drain bolt.
Tighten it to:43 N.m (4.4 kgf.m , 32 Ibf.ft) 6. Refill the engine with the recom-
mended oil.
Engine oil change capacity
(including filter):
3.8 (4.0 US qt, 3.3 Imp qt)
7. Replace the engine oil fill cap. Start the engine. The oil pressure
indicator light should go out within
five seconds. If it does not, turn off
the engine and reinspect your
work.
8. Let the engine run for several minutes and check the drain boltand oil filter for leaks.
9. Turn off the engine, let it sit for several minutes, then check the oil
level. If necessary, add oil to bring
the level to the upper mark on the
dipstick.
CONTINUED
Maintenance
WASHER
DRAIN BOLT OIL FILTER
ProCarManuals.comMain Menu s t Table of Contents
Page 151 of 240
Cooling System
Do not add any rust inhibitors or
other additives to your car's cooling
system. They may not be compatible
with the coolant or engine compo-
nents.
Replacing Engine Coolant
The cooling system should be completely drained and refilled with
new coolant according to the time
and distance recommendations in
the maintenance schedule. Only use recommended antifreeze.
Draining the coolant requires access
to the underside of the car. Unless
you have the tools and knowledge,
you should have this maintenance done by a skilled mechanic. 1. Start the engine. Turn the heater
temperature control dial to
maximum heat and turn off the
engine. Open the hood. Make sure
the engine and radiator are cool to
the touch.
2. Remove the radiator cap. 3. Loosen the drain plug on the
bottom of the radiator. The
coolant will drain through the
splash guard. Remove the drain
bolt from the engine block.
Maintenance DRAIN BOLT
DRAIN PLUGProCarManuals.comMain Menu s t Table of Contents
Page 152 of 240

Cooling System
RESERVE TANK
RESERVE
TANK CAP
HOLDER
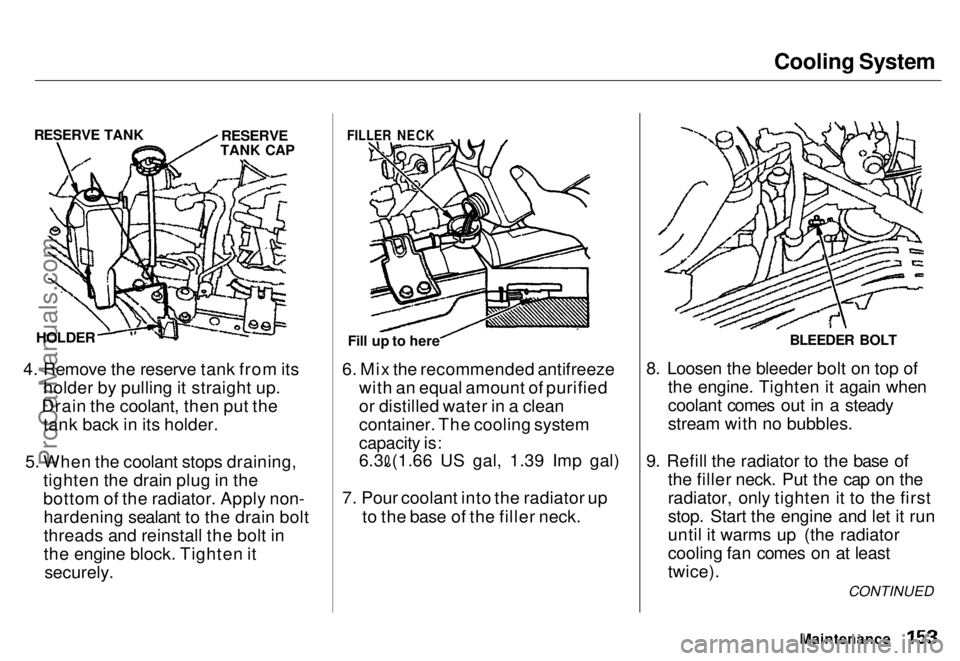
4. Remove the reserve tank from its holder by pulling it straight up.
Drain the coolant, then put the tank back in its holder.
5. When the coolant stops draining, tighten the drain plug in the
bottom of the radiator. Apply non-hardening sealant to the drain bolt
threads and reinstall the bolt in
the engine block. Tighten it securely.
FILLER NECK
Fill up to here
6. Mix the recommended antifreeze with an equal amount of purified
or distilled water in a clean
container. The cooling system
capacity is:6.3 (1.66 US gal, 1.39 Imp gal)
7. Pour coolant into the radiator up
to the base of the filler neck. BLEEDER BOLT
8. Loosen the bleeder bolt on top of the engine. Tighten it again when
coolant comes out in a steady
stream with no bubbles.
9. Refill the radiator to the base of the filler neck. Put the cap on the
radiator, only tighten it to the first
stop. Start the engine and let it run
until it warms up (the radiator
cooling fan comes on at least
twice).
MaintenanceCONTINUED
ProCarManuals.comMain Menu s t Table of Contents