1996 CHEVROLET TAHOE ECU
[x] Cancel search: ECUPage 113 of 403
Downloaded from www.Manualslib.com manuals search engine Cargo Tie Downs
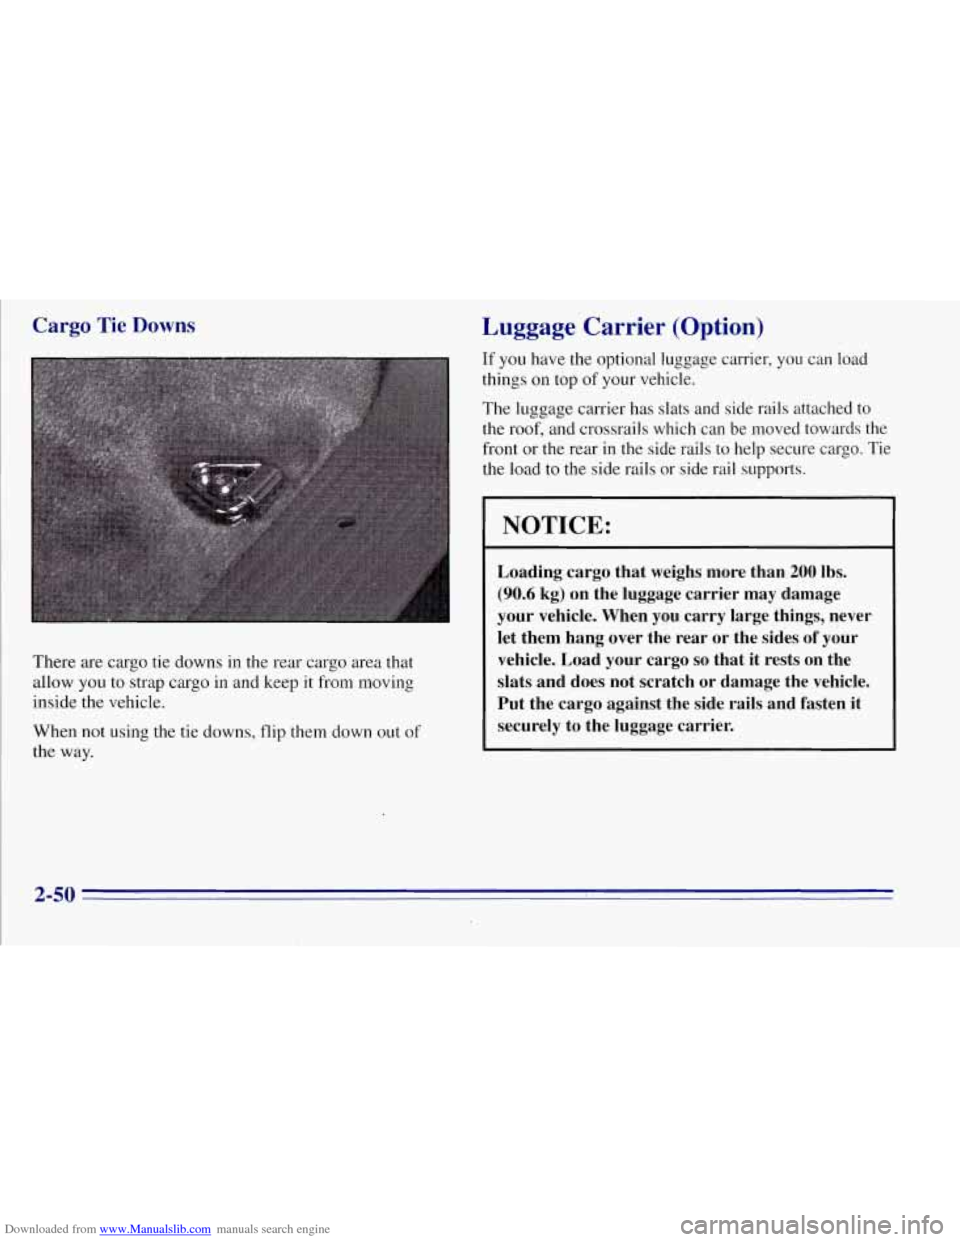
There are cargo tie downs in the rear cargo area that
allow you to strap cargo in and keep it from moving
inside the vehicle.
When not using the tie downs, flip them down out
of
the way.
Luggage Carrier (Option)
If you have the optional luggage carrier, you can load
things on top of your vehicle.
The luggage carrier has slats and side rails attached
to
the roof, and crossrails which tan be moved towards the
front or the rear in the side rails to help secure cargo. Tie
the load to the side rails or side rail supports.
NOTICE:
Loading cargo that weighs more than 200 lbs.
(90.6 kg) on the luggage carrier may damage
your vehicle. When you carry large things, never
let them hang over the rear or the sides
of your
vehicle. Load your cargo
so that it rests on the
slats and does not scratch or damage the vehicle.
Put the cargo against the side rails and fasten it
securely to the luggage carrier.
2-50 ,
Page 114 of 403
Downloaded from www.Manualslib.com manuals search engine Don’t exceed the maximum vehicle capacity when
loading your vehicle. For more information on vehicle
capacity and loading, see “Loading Your Vehicle” in
the Index.
To prevent damage or loss of cargo as you’re driving,
check now and then to make sure the luggage carrier and
cargo are still securely fastened.
Be sure the cargo is properly loaded.
0
0
If small heavy objects are placed on the roof, place
the load in the area over the rear wheels (behind the
rear side door on Suburbans).
If you need to, cut a
piece of
3/8 inch plywood to fit inside the crossrails
and side rails to spread the load.
If plywood is used,
tie it to the side rail supports..
Tie the load to the crossrails or the side rail supports.
Use the crossrails only to keep the load from sliding.
0 If you need to carry long items, move the crossrails
as far apart as they will go. Tie the load to the
crossrails and the side rails or side rail supports. Also
tie the load to the bumpers.
Do not tie the load so
tightly that the crossrails or side rails are damaged.
0 After moving the crossrails, be sure to tighten all the
slider screws.
Your vehicle has a Center High-Mounted Stoplamp
(CHMSL) located above the tailgate glass or above the
rear load doors.
If items are loaded on the roof of the vehicle, as in a
luggage carrier, care should be taken not to block or
damage the CHMSL unit.
Page 149 of 403

Downloaded from www.Manualslib.com manuals search engine Playing a Compact Disc in the Single Remote
Disc Player
If you have this option, you can play one compact disc
(CD)
at a time.
To load a CD into the player, hold the disc with the label
side up and insert it carefully into the player
(approximately half way). The disc will automatically
be pulled into the player. If the radio is
off and the
ignition is on when a CD is inserted, the radio will turn
on and begin playing the CD. It is possible to load and
unload CD’s with the ignition off. To load a disc with
the ignition off, press the EJECT button on the remote
player and then insert the disc.
To remove the disc, press
the EJECT button and remoye the disc from the player.
A disc that has been ejected but is still sitting in the
remote CD player will be pulled back into the player
after approximately
30 seconds. This protects the disc
and player from damage. The disc will not start playing.
To remove the disc, press the EJECT button and remove
the disc from the player.
All
of the compact disc functions are controlled by the
radio buttons except for EJECT. When a disc is in the
player, a CD symbol will appear on the display. When a
disc is playing, the letters CD
will appear next to the CD
symbol in the bottom left corner. The track number will
also be displayed.
If the disc comes back out and
ERR appears on the
display, it could be that:
0 The disc is upside down.
It is dirty, scratched or wet.
There’s too much moisture in the air. (Wait about an
hour and try again.)
0 You are driving on a very rough road.
Please contact your dealer if any error recurs or cannot
be corrected.
Page 155 of 403
Downloaded from www.Manualslib.com manuals search engine Theft-Deterrent Feature
THEFTLOCK is designed to discourage theft of your
radio. It works by using a secret code to disable all radio
functions whenever battery power is removed.
The THEFTLOCK feature for the radio may be used or
ignored. If ignored, the system plays normally and the
radio is
not protected by the feature. If THEFTLOCK is
activated, your radio will
not operate if stolen.
When THEFTLOCK is activated, the radio will display
LOC
to indicate a locked condition anytime battery
power is removed. If your battery loses power for any
reason, you must unlock the radio with the secret code
before
it will operate.
Activating the Theft-Deterrent Feature
The instructions which follow, explain how to enter your
secret code to activate the THEFTLOCK system. It is
recommended that you read through all nine steps
before starting the procedure.
NOTE: If you allow more than 15 seconds to elapse
between any steps, the radio automatically reverts
to
time and you must start the procedure over at Step 4.
1.
2.
3.
4.
5.
6.
9.
Write down any three or four-digit number from
000 to 1999 and keep it in a safe place separate from
the vehicle.
Turn the ignition to the ACCESSORY or
RUN position.
Turn the radio off.
Press the
1 and 4 buttons together. Hold them down
until --- shows on the display. Next you will use the
secret code number which you have written down.
Press MN and
000 will appear on the display.
Press MN again
to make the last two digits agree
with your code.
Press
HR to make the first one or two digits agree
with your code.
Press AM-FM after you have confirmed that the
code matches
the secret code you have written down.
The display
will show REP to let you know that you
need to repeat Steps 5 through 7 to confirm your
secret code.
Press AM-FM and this time the display will show
SEC
to let you know that your radio is secure. The
indicator by the volume control will begin flashing
when the ignition
is turned off.
3-24
Page 156 of 403
Downloaded from www.Manualslib.com manuals search engine Unlocking the Theft-Deterrent Feature After a
Power Loss
Enter your secret code as follows; pause no more than
15 seconds between steps:
1.
2.
3.
4.
5.
LOC appears when the ignition is on.
Press MN and
000 will appear on the display.
Press MN again to make the last two digits agree
with your code.
Press
HR to make the first one or two digits agree
with your code.
Press AM-FM after yod have confirmed that
the
code matches the secret code you have written down.
The display will show
SEC, indicating the radio is
now operable and secure.
If
you enter the wrong.code eight times, INOP will
appear on the display.
You will have to wait an hour
with the ignition on before
you can try again. When you
try again, you will only have three chances to enter the
correct code before INOP appears.
If you lose or forget your code, contact your dealer.
Disabling the Theft-Deterrent Feature
Enter your secret code as follows; pause no more than
15 seconds between steps:
1.
2.
3.
4.
5.
6.
7.
Turn the ignition to the ACCESSORY or
RUN position.
Turn the radio off.
Press the
1 and 4 buttons together. Hold them down
until SEC shows on the display.
Press MN and
000 will appear on the display.
Press MN again
to make the last two digits agree
with your code.
Press .HR to make the first one or two digits agree
with your code.
Press AM-FM after you have confirmed that the
code matches the secret code you have written down.
The display will show
---, indicating that the radio is
no longer secured.
If the code entered is incorrect, SEC will appear on the
display. The radio 'will remain secured until the correct
code is entered.
When battery power is disconnected from a secured
radio, the radio won't turn
on and LOC will appear on
the display.
Page 157 of 403
Downloaded from www.Manualslib.com manuals search engine To unlock a secured radio, see “Unlocking the
Theft-Deterrent Feature After a Power
Loss” earlier in
this section.
Understanding Radio Reception
FM Stereo
FM stereo will give you the best sound. But FM signals
will reach only about
10 to 40 miles (16 to 65 krn). Tall
buildings or hills can interfere with
FM signals, causing
the sound to come and go.
AM
The range for most AM stations is greater than for FM,
especially at night. The longer range, however, can
cause stations to interfere with each other. AM can pick
’ up noise from things like storms and power lines. Try
reducing the treble
to reduce this noise if you ever get it.
Tips About Your Audio System
Hearing damage from loud noise is almost undetectable
until it
is too late. Your hearing can adapt to higher
volumes
of sound. Sound that seems normal can be loud
and harmful
to your hearing. Take precautions by
adjusting the volume control on your radio to a safe
sound level before your hearing adapts to it. To
help avoid hearing loss or damage:
Adjust the volume control to the lowest setting.
Increase volume slowly until you hear comfortably
and clearly.
NOTICE:
Before you add any sound equipment to your
vehicle
-- like a tape player, CB radio, mobile
telephone or two-way radio
-- be sure you can add
what you want.
If you can, it’s very important to
do it properly. Added sound equipment may
interfere with the operation of your vehicle’s
engine, Delco radio
or other systems, and even
damage them. Your vehicle’s systems may interfere
with the operation
of sound equipment that has
been added improperly.
So, before adding sound equipment, check with
your dealer and be sure to check Federal rules
I covering mobile radio and telephone units.
3-26
Page 173 of 403
Downloaded from www.Manualslib.com manuals search engine Off-Road Driving with Your
Four-Wheel-Drive Vehicle
This off-road guide is for vehicles that have
four-wheel drive.
Also, see “Anti-Lock Brakes’’ in the Index.
If your vehicle doesn’t have four-wheel drive, you
shouldn’t drive off-road unless you’re on a level,
solid surface.
Off-road driving can be great fun. But
it does have
some definite hazards. The greatest
of these is the
terrain itself.
“Off-roading” means you’ve left the great North
American road system behind. Traffic lanes aren’t
marked. Curves aren’t banked. There are no road signs.
Surfaces can be slippery, rough, uphill or downhill. In
short, you’ve gone right back
to nature.
Off-road driving involves some new skills. And that’s
why it’s very important that you read this guide. You’ll
find many driving tips and suggestions. These’will help
make your off-road driving safer and more enjoyable.
Before You Go Off-Roading
There are some things to do before you go out. For
example, be sure
to have all necessary maintenance and
service work done. Check to make sure all underbody
shields
(if so equipped) are properly attached. Be sure
you read all the information about your
four-wheel-drive vehicle in this manual. Is there enough
fuel? Is the spare tire fully inflated? Are the fluid levels
up where they should be? What are
the local laws that
apply to off-roading where you’ll be driving? If
you
don’t know, you should check with law enforcement
people in the area. Will you be on someone’s private
land? If
so, be sure to get the necessary permission.
Loading’ Your Vehicle for Off-Road Driving
There are some important things to remember about
how to load your vehicle.
0 The heaviest things should be on the load floor and
forward
of your rear axle. Put heavier items as far
forward as you can.
Be sure the load is secured properly, so driving on
the off-road terrain doesn’t toss things around.
4-14
Page 174 of 403

Downloaded from www.Manualslib.com manuals search engine Environmental Concerns
Cargo on the load floor piled higher than
the seatbacks can be thrown forward
during a sudden stop. You or your
passengers could be injured. Keep cargo
below the top of the seatbacks.
0 Unsecured cargo on the load floor can be
tossed about when driving over rough
terrain. You or your passengers can be
struck by flying objects. Secure the
cargo properly.
0 Heavy loads on the roof raise the vehicle’s
center of gravity, making it more likely to
roll over. You can be seriously or fatally
injured if the vehicle rolls over. Put heavy
loads inside the cargo area, not on the roof.
Keep cargo in the cargo area as
far forward
and low as possible.
You’ll find other important information in this manual.
See “Vehicle Loading,” “Luggage Carrier” and “Tires”
in the Index. Off-road
driving can provide wholesome and satisfying
recreation. However, it also raises environmental
concerns.
GM recognizes these concerns and urges
every off-roader to follow these basic rules for
protecting the environment:
0
0
0
0
Always use established trails, roads and areas that
have been specially set aside for public off-road
recreational driving; obey all posted regulations.
Avoid any driving practice that could damage the
environment
-- shrubs, flowers, trees, grasses -- or
disturb wildlife (this includes wheel-spinning,
breaking down trees or unnecessary driving through
streams or over soft ground).
Always carry a litter bag
-- make sure all refuse is
removed from any campsite before leaving.
Take extreme care with open fires (where permitted),
camp stoves and lanterns.
Never park your vehicle over dry grass or other
combustible materials that could catch fire from the
heat
of the vehicle’s exhaust system.
4-15