1996 CHEVROLET CORVETTE display
[x] Cancel search: displayPage 141 of 386
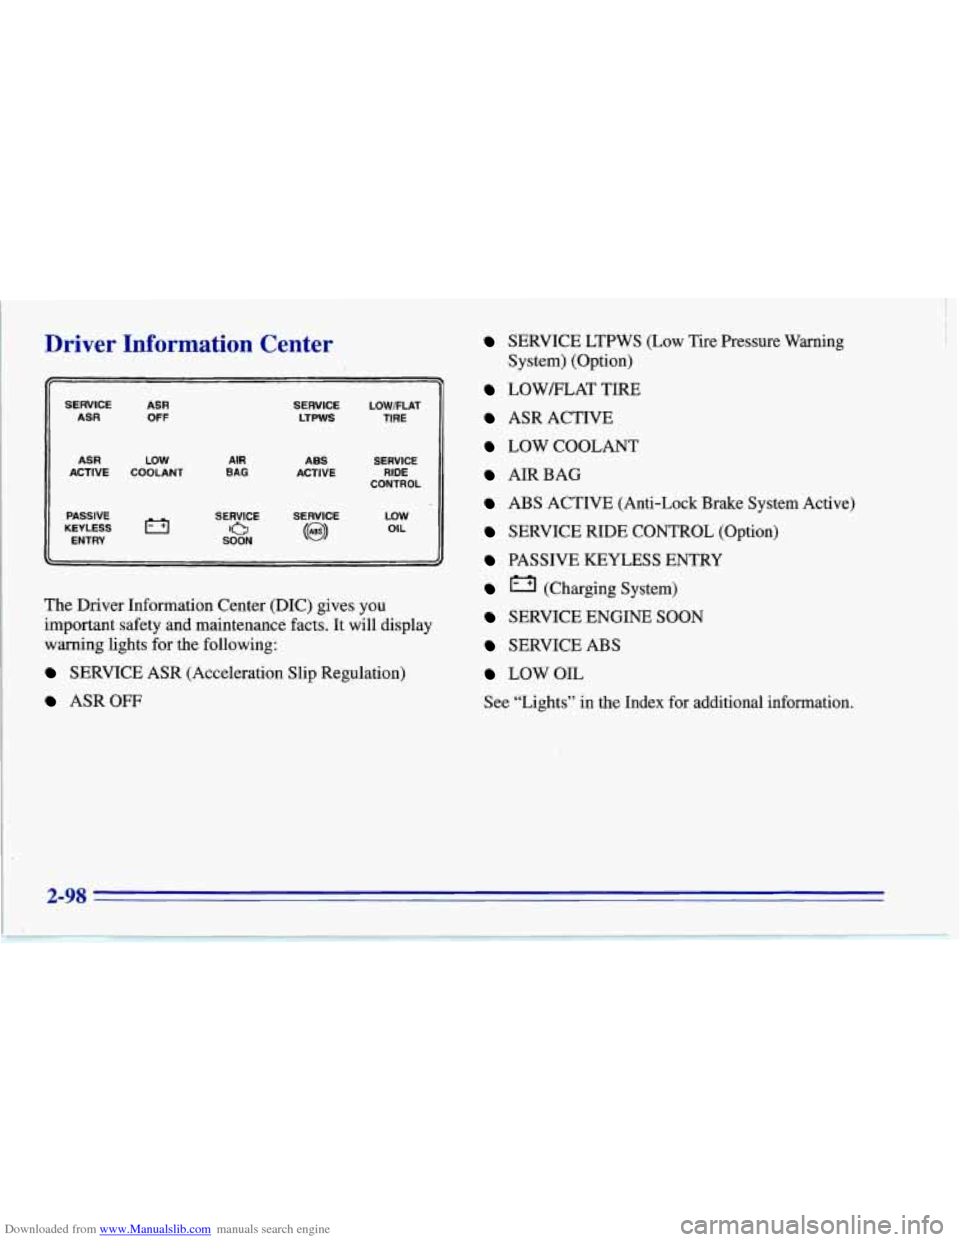
Downloaded from www.Manualslib.com manuals search engine Driver Information Center
SERVICE ASR ASR OFF
ASR LOW ACTIVE COOLANT
PASSIVE
KEYLESS
ENTRY
AIR BAG
SERVICE LOWFLAT LTPWS TIRE
ABS SERVICE CONTROL
ACTIVE
RIDE
SERVICE
SERVICE
0 SOON (63)
LOW OIL
The Driver
Information Center (DIC) gives you
important safety and maintenance facts. It will display
warning lights for the following:
SERVICE ASR (Acceleration Slip Regulation)
ASROW
SERVICE LTPWS (Low Tire Pressure Warning
LOWELAT TIRE
ASR ACTIVE
LOW COOLANT
AIRBAG
ABS ACTIVE (Anti-Lock Brake System Active)
SERVICE RIDE CONTROL (Option)
PASSIVE KEYLESS ENTRY
(Charging System)
SERVICE ENGINE SOON
SERVICE ABS
LOWOIL
See “Lights” in the Index for additional information.
System) (Option)
2-98
Page 145 of 386
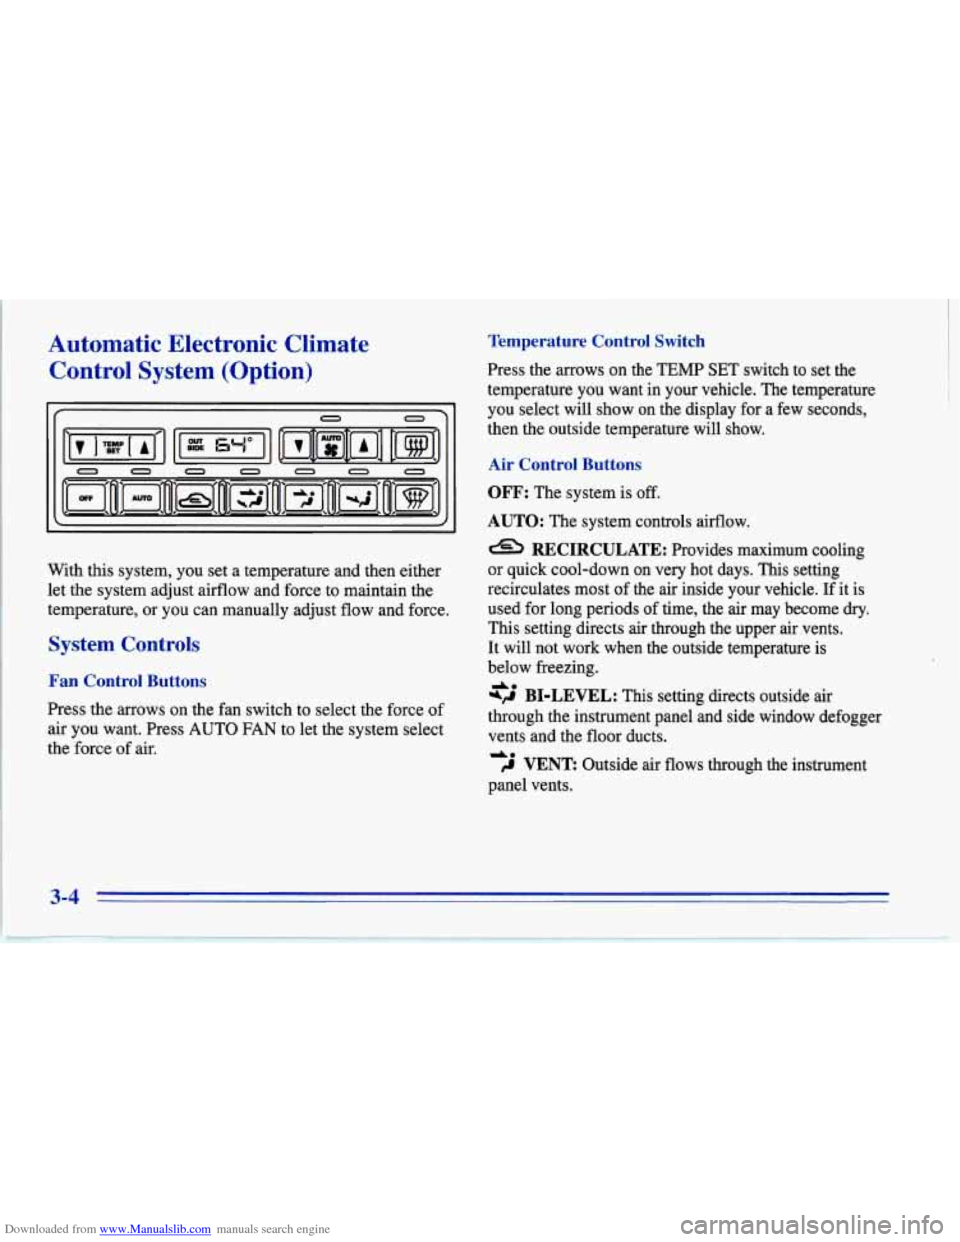
Downloaded from www.Manualslib.com manuals search engine Automatic Electronic Climate Control System (Option)
If 0
0
0 0 0 0 0 0
With this system, you set a temperature and then either
let the system adjust aifflow and force to maintain the
temperature, or you can manually adjust flow and force.
System Controls
Fan Control Buttons
Press the arrows on the fan switch to select the force of
air you want. Press AUTO FAN to let the system select
the force of air.
Temperature Control Switch
Press the mows on the TEMP SET switch to set the
temperature you want in your vehicle. The temperature
you select will show on the display for a few seconds,
then the outside temperature will show.
Air Control Buttons
OFF: The system is off.
AUTO: The system controls aifflow.
a RECIRCULATE: Provides maximum cooling
or quick cool-down on very hot days. This setting
recirculates most
of the air inside your vehicle. If it is
used for long periods of time, the air may become
dry.
This .setting directs air through the upper air vents.
It will not work when the outside temperature is
below freezing.
*fl BI-LEVEL: This setting directs outside air
through the instrument panel and side window defogger
vents and the floor ducts.
,d VENT: Outside air flows through the instrument
A.
d.
panel vents.
3-4
Page 146 of 386
Downloaded from www.Manualslib.com manuals search engine wJ HEATER: This setting directs all of the air
through the floor ducts.
DEFROST This setting directs most of the
air through the windshield defroster and side window
defogger vents and some
of the'air through the
floor ducts.
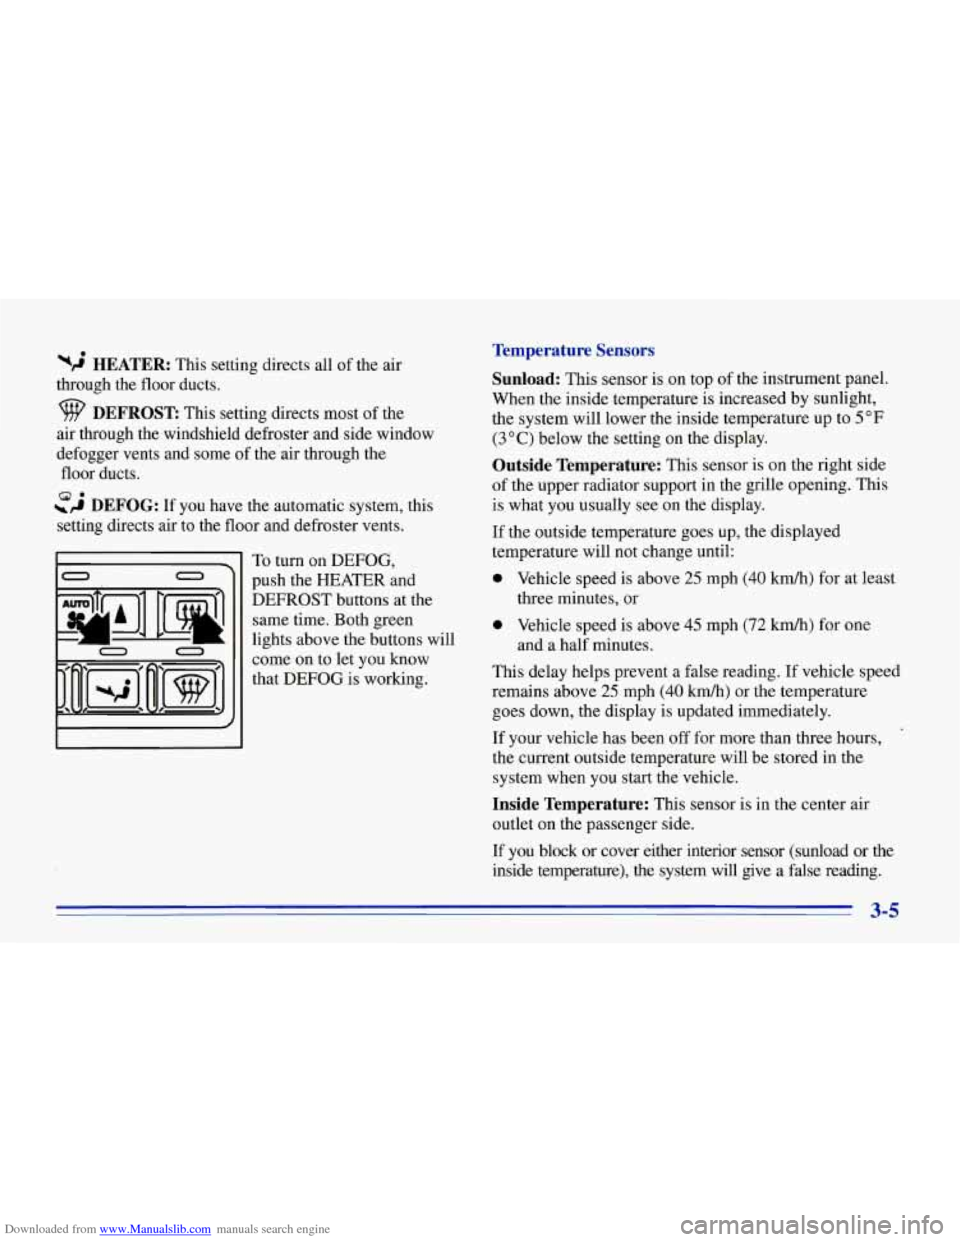
~,4 DEFOG: If you have the automatic system, this
setting directs air to the floor and defroster vents. 8.
To turn on DEFOG,
push the HEATER and
DEFROST buttons at the same time. Both green
lights above the buttons will
come on to let you know
that DEFOG is working.
Temperature Sensors
Sunload:
This sensor is on top of the instrument panel.
When the inside temperature is increased by sunlight,
the system will lower the inside temperature up to 5
OF
(3 O C) below the setting on the display.
Outside Temperature: This sensor is on the right side
of the upper radiator support in the grille opening. This
is what you usually see on the display.
If the outside temperature goes up, the displayed
temperature will not change until:
0 Vehicle speed is above 25 mph (40 km/h) for at least
0 Vehicle speed is above 45 mph (72 km/h) for one
This delay helps prevent a false reading. If vehicle speed
remains above 25 mph
(40 kmh) or the temperature
goes down, the display is updated immediately.
If your vehicle has been off for more than three hours,
the current outside temperature will be stored in the
system when you start the vehicle.
three minutes, or
and a half minutes.
Inside Temperature: This sensor is in the center air
outlet on the passenger side.
I€ you block or cover either interior sensor (sunload or the
inside temperature), the system will give a false reading.
3-5
Page 152 of 386
Downloaded from www.Manualslib.com manuals search engine AM-FM Stereo with Cassette Tape Player
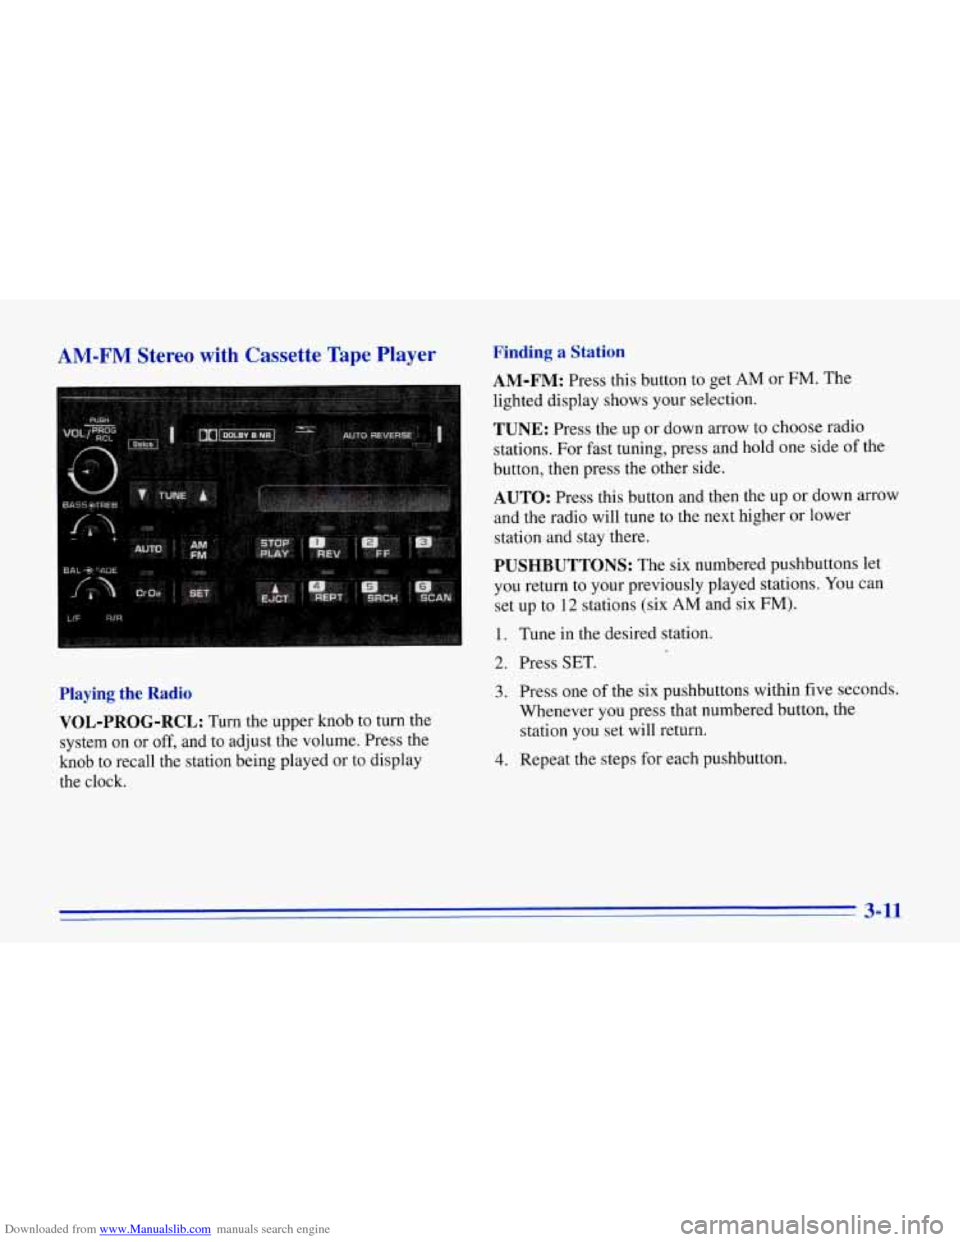
Playing the Radio VOL-PROG-RCL:
Turn the upper knob to turn the
system on
or off, and to adjust the volume. Press the
knob to recall the station being played or to display
the clock.
Finding a Station
AM-FM: Press this button to get AM or FM. The
lighted display shows your selection.
TUNE: Press the up or down arrow to choose radio
stations. For fast tuning, press and hold one side
of the
button, then press the other side.
AUTO: Press this button and then the up or down arrow
and the radio will tune to the next higher
or lower
station and stay there.
PUSHBUTTONS: The six numbered pushbuttons let
you return to your previously played stations.
You can
set up to
12 stations (six AM and six FM).
1. Tune in the desired station.
2. Press SET.
3. Press one of the six pushbuttons within five seconds.
Whenever you press that numbered button, the
station you set will return.
4. Repeat the steps for each pushbutton.
3-11
Page 154 of 386
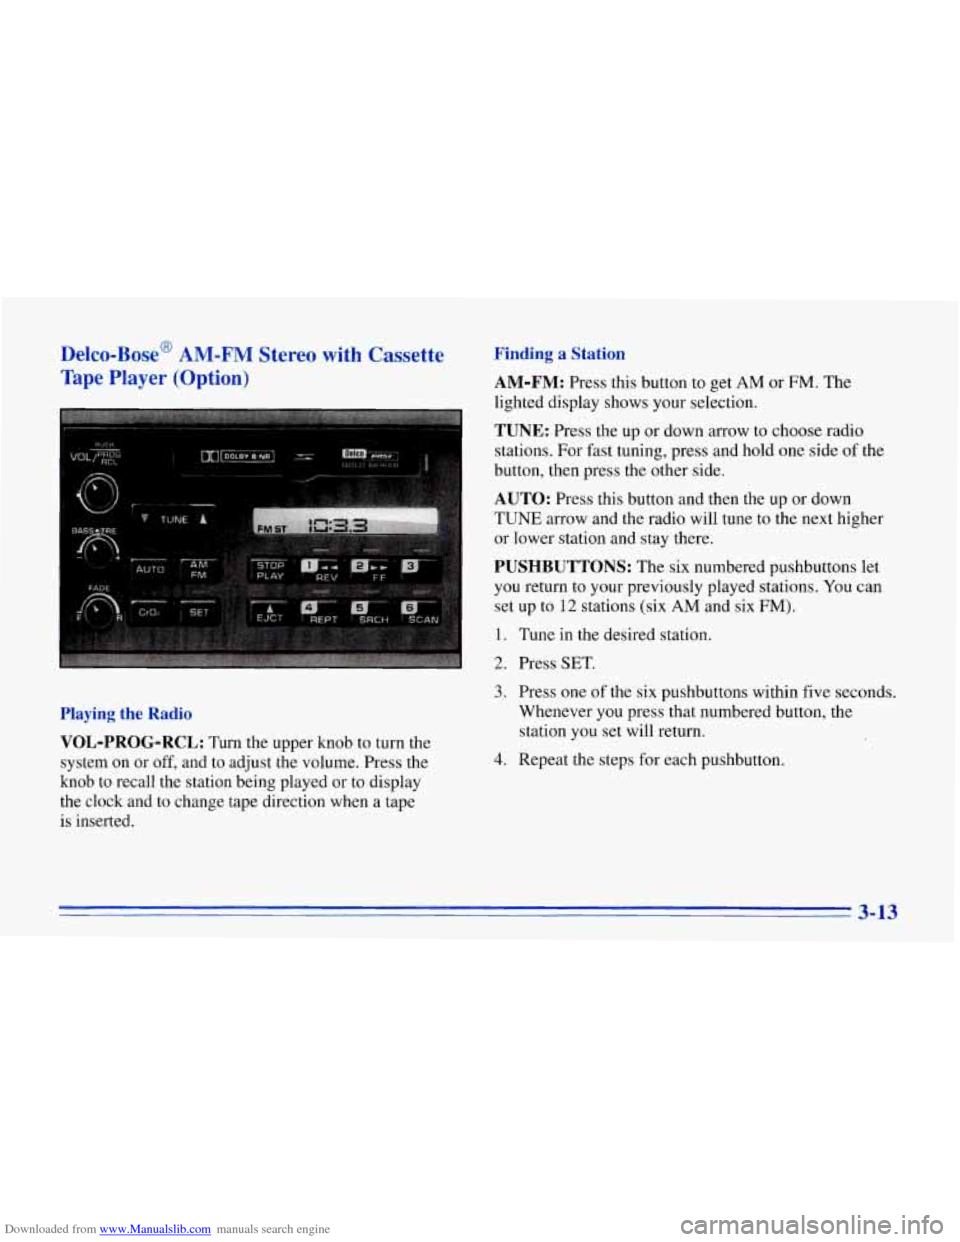
Downloaded from www.Manualslib.com manuals search engine Delco-Bose' AM-FM Stereo with Cassette
Tape Player
(Option)
Finding a Station
AM-FM:
Press this button to get AM or FM. The
lighted display shows your selection.
TUNE: Press the up or down arrow to choose radio
stations. For fast tuning, press and hold one side of the
button, then press the other side.
AUTO: Press this button and then the up or down
TUNE arrow and the radio will tune to the next higher
or lower station and stay there.
PUSHBUTTONS: The six numbered pushbuttons let
you return to your previously played stations. You can
set up to
12 stations (six AM and six FM).
1. Tune in the desired station.
2. Press SET.
Playing the Radio
VOL-PROG-RCL:
Turn the upper knob to turn the
system on or
off, and to adjust the volume. Press the
knob to recall the station being played or to display
the clock and to change tape direction when a tape
is inserted.
3. Press one of the six pushbuttons within five seconds.
Whenever you press that numbered button, the
station you set will return.
4. Repeat the steps for each pushbutton.
3-13
Page 156 of 386
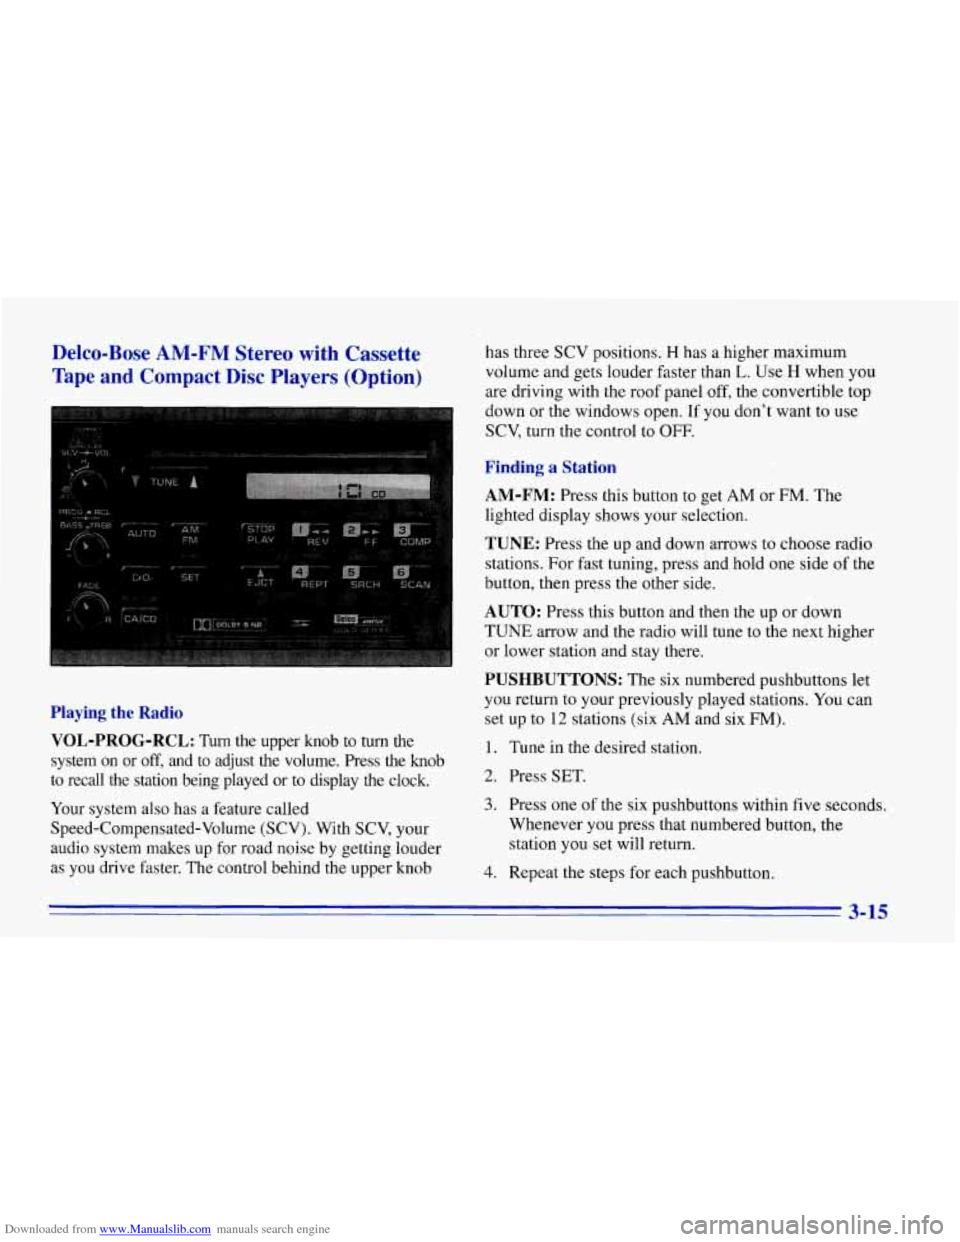
Downloaded from www.Manualslib.com manuals search engine Delco-Bose AM-FM Stereo with Cassette
Tape
and Compact Disc Players (Option)
Playing the Radio
VOL-PROG-RCL:
Turn the upper knob to turn the
system on or
off, and to adjust the volume. Press the knob
to recall the station being played or to display the clock.
Your system also has a feature called
Speed-Compensated-Volume (SCV). With SCV, your
audio system makes up for road noise by getting louder
as you drive faster. The control behind the upper knob has three
SCV positions.
H has a higher maximum
volume and gets louder faster than
L. Use H when you
are driving with the roof panel off, the convertible top
down or the windows open. If you don't want to use
SCV, turn the control to OFF.
Finding a Station
AM-FM:
Press this button to get AM or FM. The
lighted display shows your selection.
TUNE: Press the up and down arrows to choose radio
stations. For fast tuning, press and hold one side of the
button, then press the other side.
AUTO: Press this button and then the up or down
TUNE arrow and the radio will tune to the next higher
or lower station and stay there.
PUSHBUTTONS: The six numbered pushbuttons let
you return to your previously played stations.
You can
set up to
12 stations (six AM and six FM).
1. Tune in the desired station.
2. Press SET.
3. Press one of the six pushbuttons within five seconds.
Whenever
you press that numbered button, the
station you
set will return.
4. Repeat the steps for each pushbutton.
3-15
Page 158 of 386
Downloaded from www.Manualslib.com manuals search engine Playing a Compact Disc
Don’t use the mini-discs (three-inch singles). They
will eject, and they won’t play. Use only full-size
compact discs.
With the audio system on, insert a disc into the slot with
the label side up. CD will appear on the display and
track one will begin to play.
If both a tape and a compact
disc are loaded into the system, press CNCD to select
the one you want.
If the disc comes back
out and ERR appears on the
display, it could be that:
0 The disc is upside down.
0 It is dirty, scratched or wet.
There’s too much moisture in the air. (Wait about an
hour and try again.)
You are driving on a very rough road.
0 The temperature is too hot or too cold.
RCL: Press this button to see what track is playing.
Press it again within five seconds to
see how long it has
been playing, the elapsed time (EL TIME).
REV: Press and hold this button to return to a
previously played passage rapidly. The decreasing
elapsed time will show on the display.
FF: Press and hold this button to fast forward or
advance through passages. The increasing elapsed time
will show on the display.
REPT: Press this button to go to the beginning of the
current track after eight seconds or more of play. After
eight seconds or less of play, the player will return to the
beginning of the previous track.
SRCH: Press this button to go to the beginning of the
next track.
SCAN: Press this button to listen to the first eight
seconds of each track. Press it again to stop scanning.
COMP: Press this button to make loud and soft passages
more nearly equal
in volume. Press it again for normal play.
Stopping the Disc Player
0 Turn the power off or turn the ignition key to off. The
disc stays in the player and will resume playing at the
point where it stopped when the ignition is turned on.
switch to the radio. Press it again to restart the disc at
the point where it stopped.
Press EJCT to eject the disc and switch to the radio.
If the ignition or audio system
is turned off, the
player will pull the disc back in
if you don’t remove
it from the opening within
30 seconds.
0 Press STOP-PLAY to stop playing the disc and
3-17