1996 CHEVROLET CORVETTE Convertible
[x] Cancel search: ConvertiblePage 110 of 386
Downloaded from www.Manualslib.com manuals search engine NOTICE:
To help avoid damaging the hardtop when not in
use:
Store the hardtop in its normal position,
resting on
its mounting brackets.
0 Store hardware and trim panel with
the hardtop.
12. Connect the rear window defogger electrical
connectors.
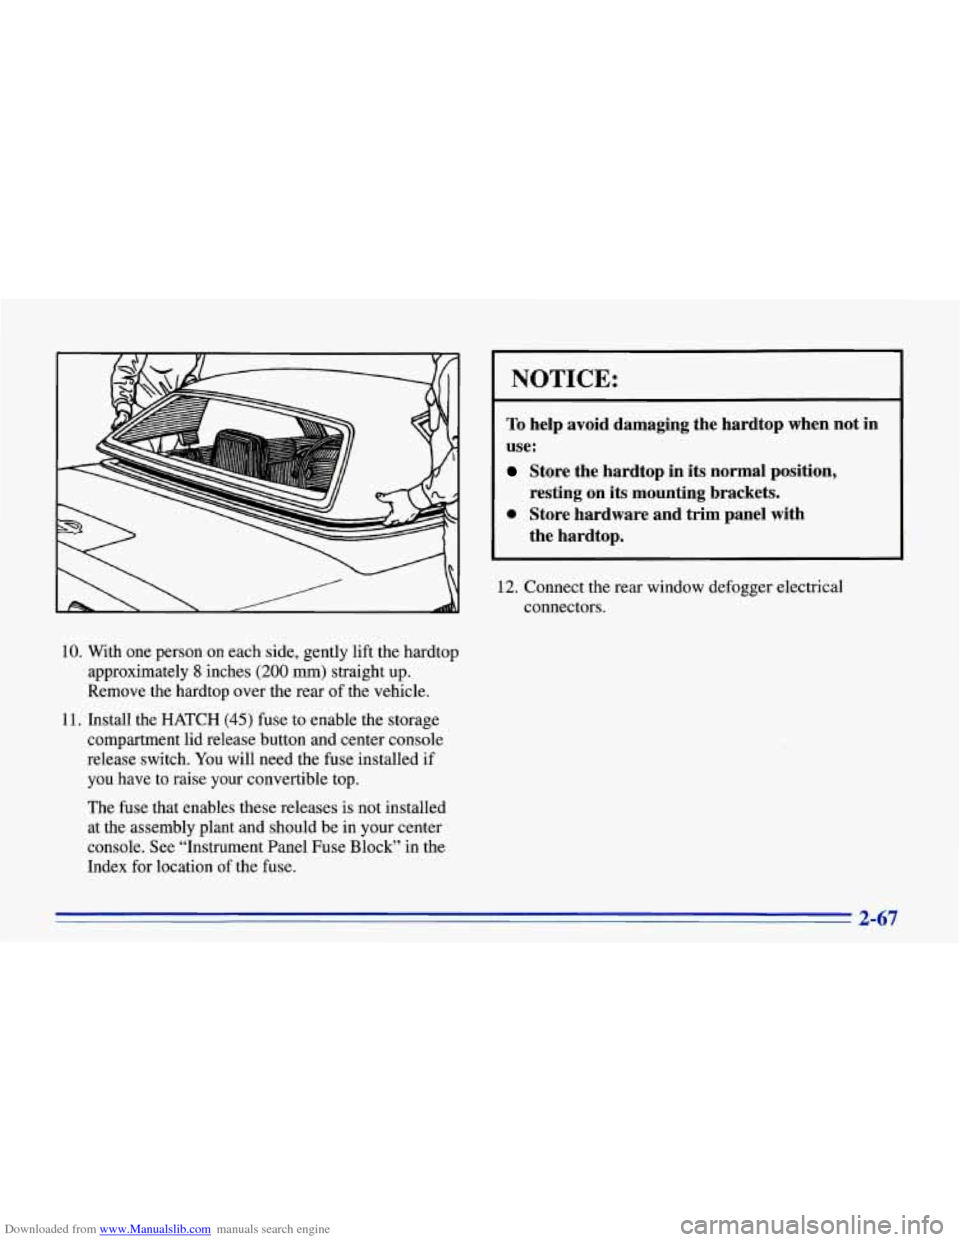
10. With one person on each side, gently lift the hardtop
approximately
8 inches (200 mm) straight up.
Remove the hardtop over the rear of the vehicle.
11. Install the HATCH
(45) fuse to enable the storage
compartment lid release button and center console
release switch. You will need the fuse installed if
you have to raise your convertible top.
The fuse that enables these releases is not installed
at the assembly plant and should be in your center
console. See “Instrument Panel Fuse Block” in the
Index for location of the fuse.
2-67
Page 111 of 386
Downloaded from www.Manualslib.com manuals search engine Installing Your Convertible Hardtop
1. Park on a level surface, set the parking brake firmly
and shift an automatic transmission into
PARK (P).
Shift a manual transmission into REVERSE (R).
Lower both windows and sunshades. Turn off the
radio to lower the power antenna and turn the
ignition key to the
LOCK position.
2. Disconnect both rear window defogger electrical
3. Lower the convertible top. Refer to “Convertible
connectors
behind the lock pillar.
Top” in the Index.
This procedure will require the use of the storage
compartment lid release button behind the driver’s seat
or the center console release switch. The fuse that
enables these releases is not installed at the assembly
plant and should
be in your center console. See
“Instrument Panel Fuse Block” in the Index for
location of the fuse. The fuse is labeled HATCH (45). 4. With
one person on each side, carefully position the
hardtop over the vehicle. Lower the hardtop slowly,
aligning the rear bolt spacers onto the bezels, and
front conical nuts into the tapered receivers. Realign
the hardtop, if necessary.
NOTICE:
To help avoid damage, don’t force the rear
of the hardtop
down. The hardtop may rest
slightly above the storage compartment lid
until the release lever
is pulled. See Step 8 in
this procedure.
5. Move both seatbacks forward. Slide the lock pillar
bracket into the receiver bracket until the scribed line
is even with the lower edge of the receiver bracket.
6. Connect the electrical connectors and make sure they
are inside the vehicle.
Page 112 of 386
Downloaded from www.Manualslib.com manuals search engine 7.
8.
9.
Insert the two upper bolts into both receiver
brackets. You may have to lift the hardtop slightly
to install the lock pillar bracket.
If the hardtop hasn’t lowered into position, pull the
release lever behind the driver’s seat (located under the storage compartment lid).
Secure but don’t tighten the rear corner bracket
bolts using the ratchet.
10. Tighten the front bolts using the wrench.
11. Insert the lower bolt into the bottom flange of the
lock pillar brackets and tighten. Install and tighten
the remaining bolts into the lock pillar brackets.
12. Using the ratchet, tighten the rear corner bracket
bolts.
Do not over-tighten these bolts.
13. Slide the rear trim panel in place.
If the hardtop isn’t secure, it can’t give as much
protection in a crash.
A loose hardtop could fly
off the vehicle in an accident or sudden
maneuver. You or others could be injured. Don’t
drive your vehicle until all the hardtop fasteners
are tight.
14. Remove the HATCH (45) fuse. Store it in the center
console while the convertible hardtop is in use.
(This will prevent accidental unlatching of the
storage compartment lid.)
2-69
Page 156 of 386
Downloaded from www.Manualslib.com manuals search engine Delco-Bose AM-FM Stereo with Cassette
Tape
and Compact Disc Players (Option)
Playing the Radio
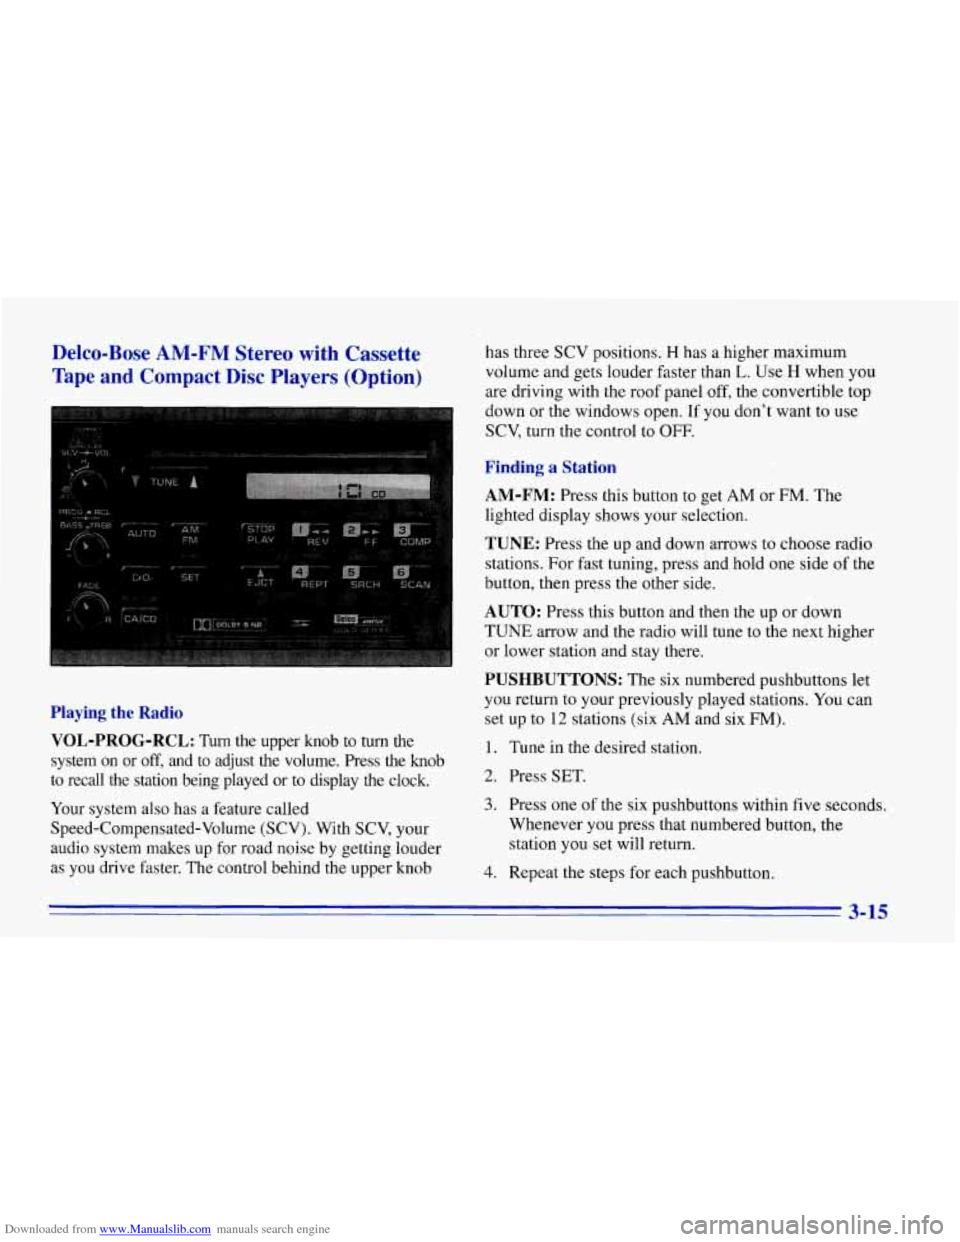
VOL-PROG-RCL:
Turn the upper knob to turn the
system on or
off, and to adjust the volume. Press the knob
to recall the station being played or to display the clock.
Your system also has a feature called
Speed-Compensated-Volume (SCV). With SCV, your
audio system makes up for road noise by getting louder
as you drive faster. The control behind the upper knob has three
SCV positions.
H has a higher maximum
volume and gets louder faster than
L. Use H when you
are driving with the roof panel off, the convertible top
down or the windows open. If you don't want to use
SCV, turn the control to OFF.
Finding a Station
AM-FM:
Press this button to get AM or FM. The
lighted display shows your selection.
TUNE: Press the up and down arrows to choose radio
stations. For fast tuning, press and hold one side of the
button, then press the other side.
AUTO: Press this button and then the up or down
TUNE arrow and the radio will tune to the next higher
or lower station and stay there.
PUSHBUTTONS: The six numbered pushbuttons let
you return to your previously played stations.
You can
set up to
12 stations (six AM and six FM).
1. Tune in the desired station.
2. Press SET.
3. Press one of the six pushbuttons within five seconds.
Whenever
you press that numbered button, the
station you
set will return.
4. Repeat the steps for each pushbutton.
3-15
Page 275 of 386
Downloaded from www.Manualslib.com manuals search engine Rear Cargo Compartment Lamp -- Coupe
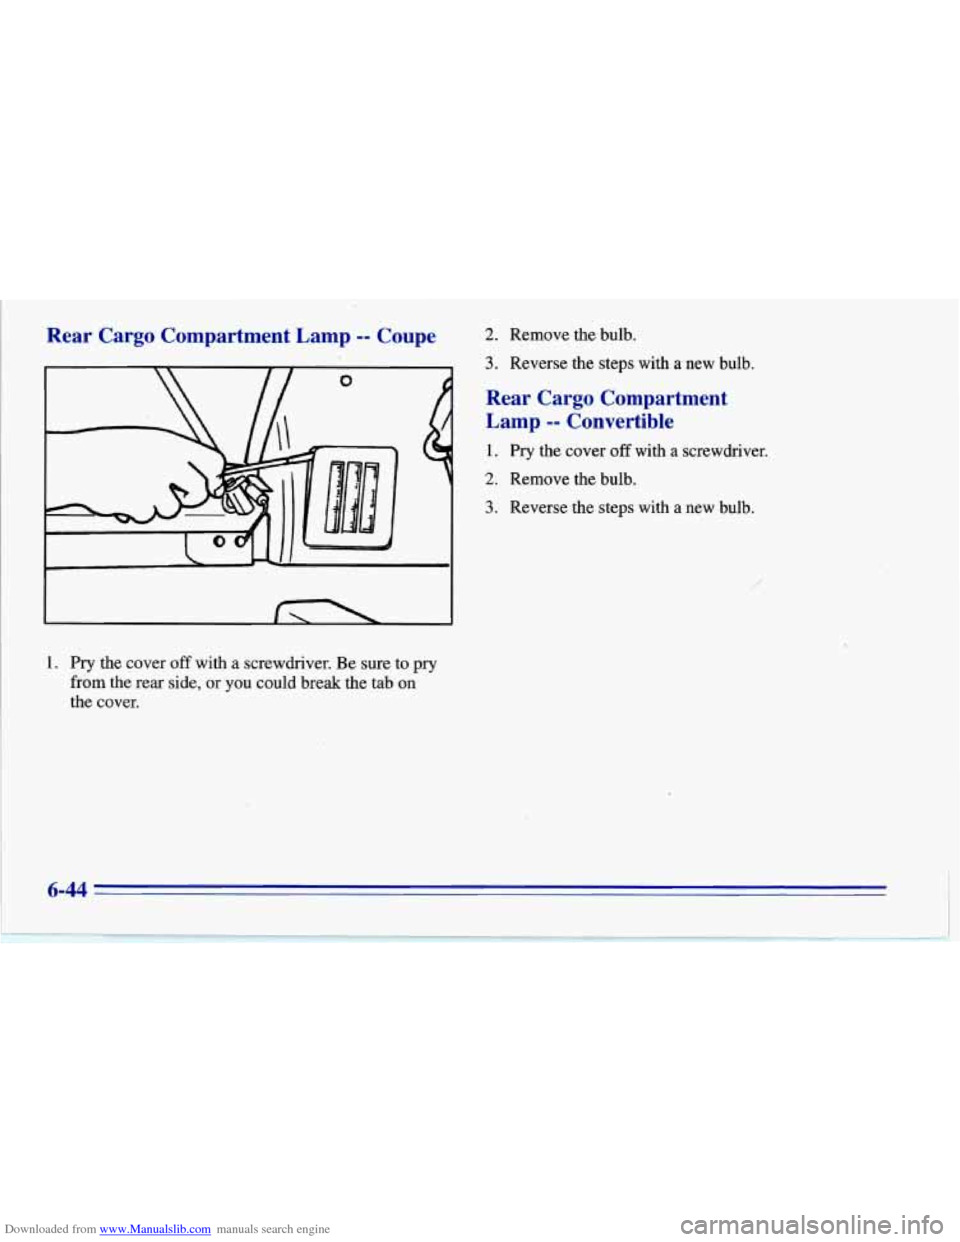
1. Pry the cover off with a screwdriver. Be sure to pry
from the rear side,
or you could break the tab on
the cover.
6-44
2. Remove the bulb.
3. Reverse the steps with a new bulb.
Rear Cargo Compartment
Lamp
-- Convertible
1. Pry the cover off with a screwdriver.
2. Remove the bulb.
3. Reverse the steps with a new bulb.
Page 290 of 386
Downloaded from www.Manualslib.com manuals search engine Your Corvette has a “basecoat/clearcoat” paint finish.
The clearcoat gives more depth and gloss to the colored
basecoat. Always use waxes and polishes that
are
non-abrasive and made for a basecoatklearcoat
paint finish.
I NOTICE:
Machine compounding or aggressive polishing on
a basecoatklearcoat paint finish may dull the
finish
or leave swirl marks.
Foreign materials such as calcium chloride and other
salts, ice melting agents, road oil and tar,
tree sap, bird
droppings, chemicals from industrial chimneys, etc. can
damage your vehicle’s finish if they remain on painted
surfaces. Wash the vehicle as soon as possible.
If
necessary, use non-abrasive cleaners that are marked
safe for painted surfaces to remove foreign matter.
Exterior painted surfaces
are subject to aging, weather
and chemical fallout that can take their toll over a period
of years. You can help to keep the paint finish looking
new by keeping your Corvette garaged or covered
whenever possible.
Cleaning Your Convertible Top
Your convertible top should be cleaned often. If you use
an automatic car wash, use one with water jets and
hanging cloths.
When you hand wash the top, do it in partial shade.
Use a mild soap, lukewarm water and a soft sponge.
A chamois or cloth may leave lint on the top, and
a
brush can chafe the threads in the top fabric. Don’t use
detergents, harsh cleaners, solvents or bleaching agents.
When you clean the top, put one hand under it to
support it. Wet the entire vehicle and wash the top
evenly to avoid spots or rings. Let the soap remain on
the fabric for a few minutes. When the top is really dirty,
use a mild foam-type cleaner. Thoroughly rinse the
entire vehicle, then let the top dry in direct sunlight.
To protect the convertible top:
0
0
0
After you wash the vehicle, make sure the top is
completely dry before
you lower it.
Don’t get any cleaner on the vehicle’s painted finish;
it could leave streaks.
If you decide to go through an automatic car wash,
ask the manager if the equipment could damage
your top.
Page 304 of 386
Downloaded from www.Manualslib.com manuals search engine Replacement Bulbs
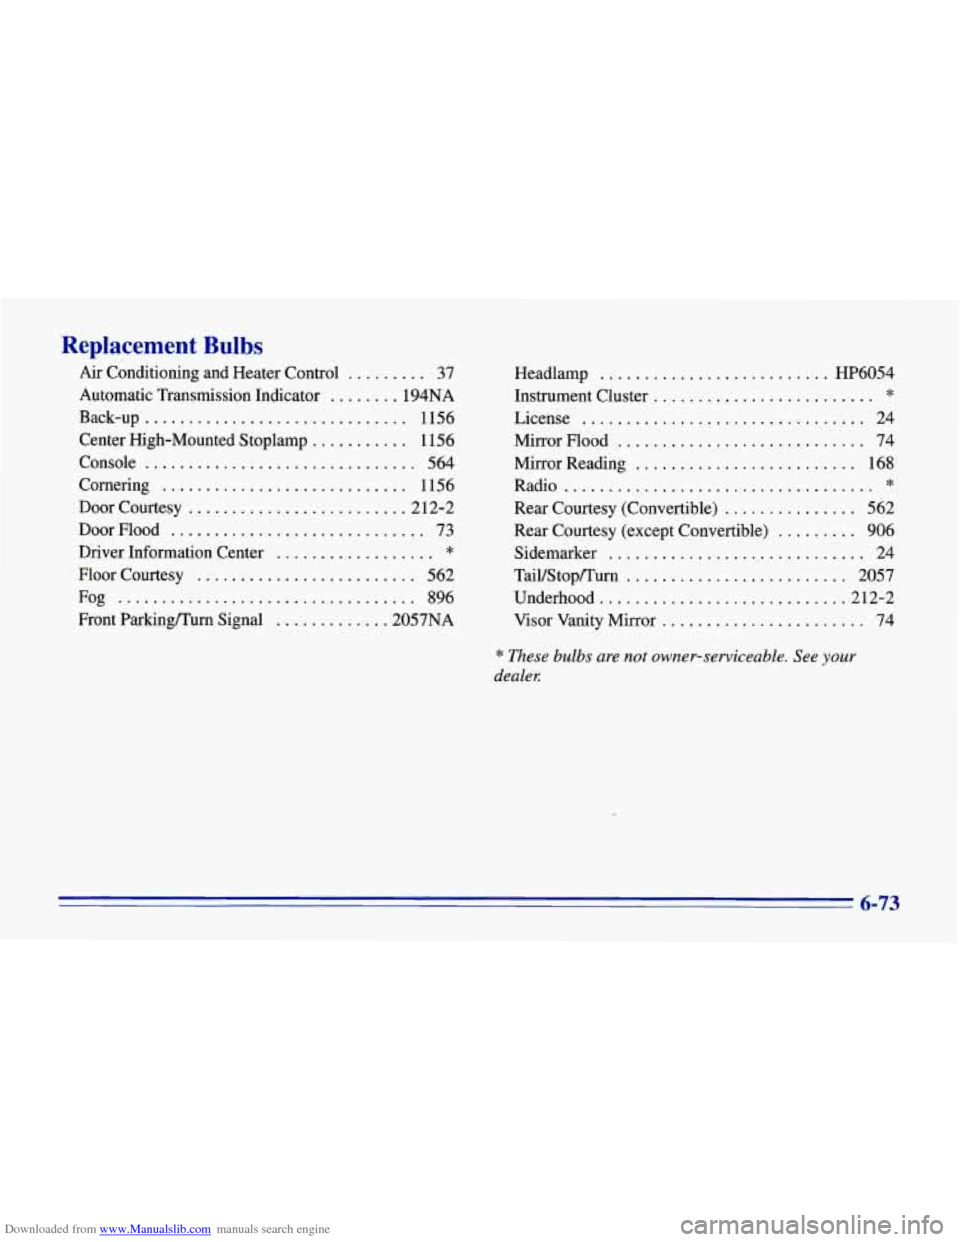
Air Conditioning and Heater Control ......... 37
Automatic Transmission Indicator
........ 194NA
Center High-Mounted Stoplamp
........... 1156
Console
............................... 564
Door Courtesy
......................... 2 12-2
DoorFlood
............................. 73
Driver Information Center
.................. *
Back-up .............................. 1156
Cornering
............................ 1156
Floor Courtesy
......................... 562
Fog .................................. 896
Front ParkingDurn Signal
............. 2057NA Headlamp
.......................... HP6054
Instrument Cluster
License
................................ 24
Mirror Flood
............................ 74
Radio
* .........................
Mirror Reading ......................... 168
Rear Courtesy (Convertible)
............... 562
Rear Courtesy (except Convertible)
......... 906
Sidemarker
............................. 24
Tail/Stop/Turn
......................... 2057
Underhood
............................ 2 12-2
Visor Vanity Mirror
....................... 74
* ...................................
* These bulbs are not owner.serviceab1e . See your
dealel:
6-73
Page 306 of 386
Downloaded from www.Manualslib.com manuals search engine Replacement Parts
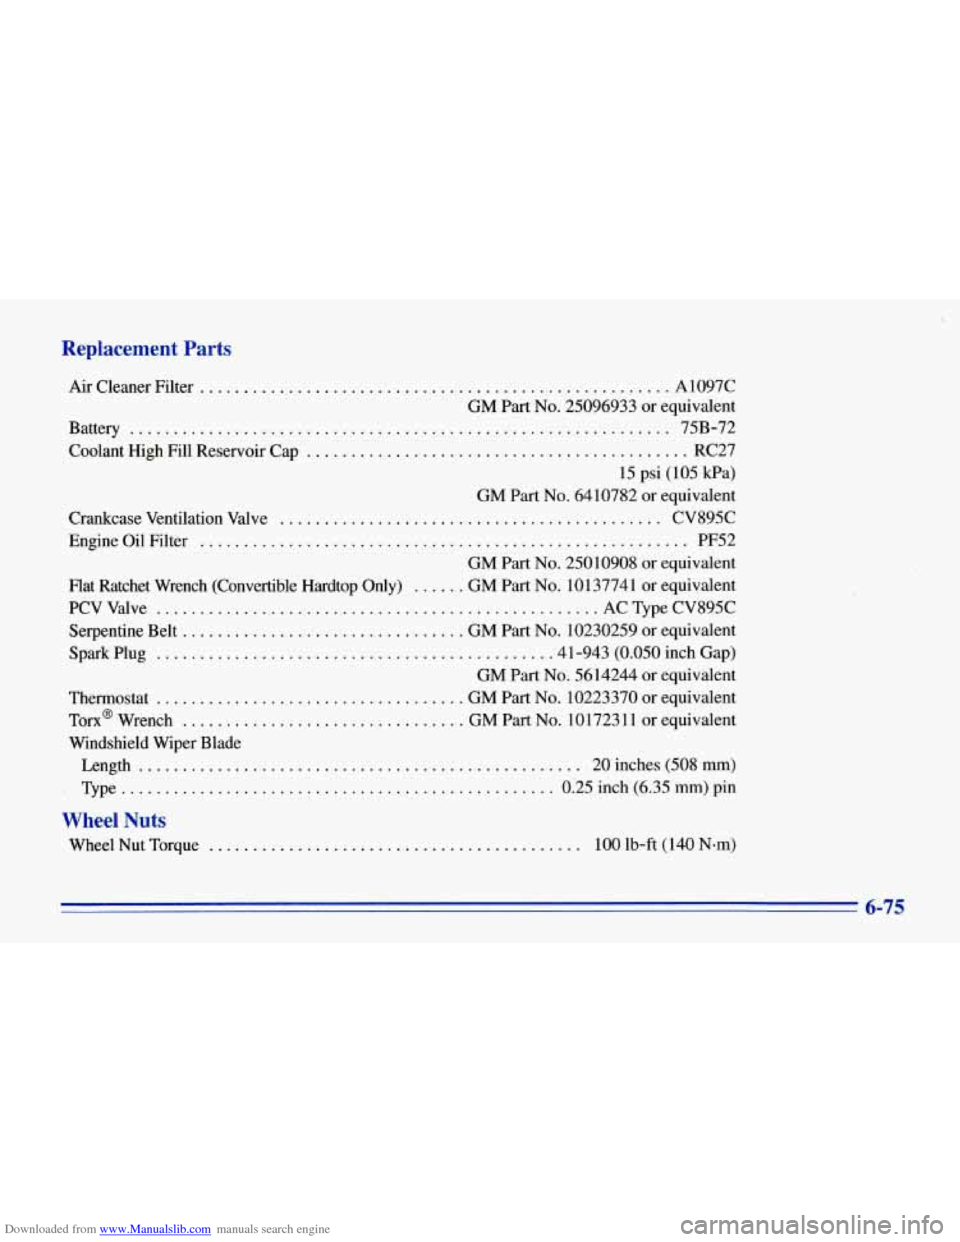
Air Cleaner Filter ..................................................... A 1097C
GM Part
No. 25096933 or equivalent
Battery
.............................................................. 75B-72
Coolant High Fill Reservoir Cap
........................................... RC27
15 psi (105 kPa)
GM Part
No. 6410782 or equivalent
Crankcase Ventilation Valve
........................................... CV895C
Engine Oil Filter
....................................................... PF52
GM Part
No. 25010908 or equivalent
Flat Ratchet Wrench (Convertible Hardtop
Only) ...... GM Part No. 101 37741 or equivalent
PCV Valve
.................................................. AC Type CV895C
Serpentine Belt
................................ GM Part No. 10230259 or equivalent
Spark Plug
............................................ .4 1-943 (0.050 inch Gap)
GM Part
No. 5614244 or equivalent
Thermostat
................................... GM Part No. 10223370 or equivalent
Tom@ Wrench
................................ GM Part No. 1017231 1 or equivalent
Windshield Wiper Blade Length
...................... .......................... 20 inches (508 mm)
Type ................................................. 0.'25 inch (6.35 mm) pin
Wheel Nuts
Wheel Nut Torque .......... ......... ................... 100 lb-ft (140 N-m)
6-75