Page 71 of 372

Hatch
A CAUTION:
It can be dangerous to drive with the rear
swing-out windows, rear hatch or rear doors
open because carbon monoxide (CO) gas can
come into your vehicle. You can’t see or smell
CO. It can cause unconsciousness and even death.
If you must drive with the rear swing-out
windows, rear hatch or rear doors open or
if
electrical wiring or other cable connections must
pass through the seal between the body and the
rear swing-out windows, rear hatch or rear doors:
Make sure all windows are shut.
’hrn the fan on your heating or cooling
system to its highest speed with the setting
on anything but MAX A/C. That will force
outside air into your vehicle. See “Comfort
Controls” in the Index.
instrument panel, open them all the way.
If you have air outlets on or under the
See “Engine Exhaust” in the Index.
Rear Hatch and Dutch Doors Release
(Option)
If you have this option, your vehicle must be in either
PARK (P) or NEUTRAL
(N) to release the hatch and
unlock the Dutch doors. If your battery
is dead, the
hatch and Dutch doors will not open,
even from the
outside with a key.
To release the hatch and
unlock the doors from the
inside of the vehicle, press
the REAR HATCH button
on the instrument panel.
It
is located on the right side of the steering column. The
hatch will release with or without the key
in the ignition.
Then, pull up on
the hatch handle and open the doors.
2-11
Page 72 of 372

To release the hatch using the optional Keyless Entry
hand-held transmitter, see “Keyless Entry System”
in
the Index.
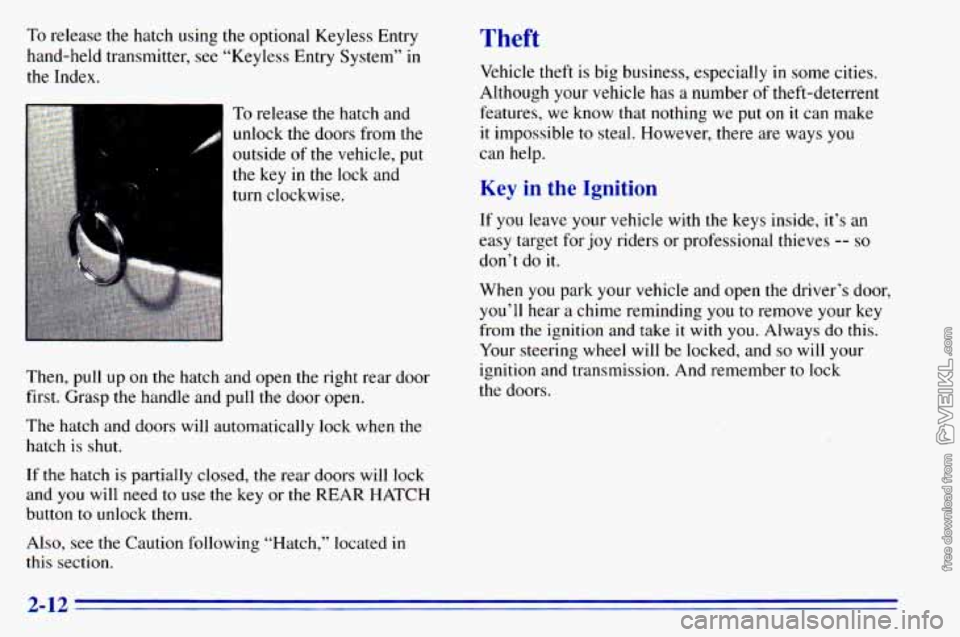
To release the hatch and unlock the doors from the
outside
of the vehicle, put
the key in the lock and
turn clockwise.
Then, pull up
on the hatch and open the right rear door
first. Grasp the handle and pull the door open.
The hatch and doors will automatically lock when the
hatch is shut.
If
the hatch is partially closed, the rear doors will lock
and you will need to use the key or the REAR HATCH
button to unlock them.
Also, see the Caution following “Hatch,” located in
this section.
Theft
Vehicle theft is big business, especially in some cities.
Although your vehicle has a number
of theft-deterrent
features, we know
that nothing we put on it can make
it impossible
to steal. However, there are ways you
can help.
Key in the Ignition
If you leave your vehicle with the keys inside, it’s an
easy target for joy riders or professional thieves
-- so
don’t do it.
When you park your vehicle and open the driver’s door,
you’ll hear a chime reminding
you to remove your key
from the ignition and take
it with you. Always do this.
Your steering wheel will be locked, and
so will your
ignition and transmission. And remember to lock
the doors.
2-12
Page 73 of 372

Parking at Night
Park in a lighted spot, close all windows and lock your
vehicle. Remember to keep your valuables
out of sight.
Put them
in a storage area, or take them with you.
Parking Lots
If you park in a lot where someone will be watching
your vehicle,
it’s best to lock it up and take your keys.
But what if you have to leave your ignition key? What if
you have to leave something valuable in your vehicle?
0 Put your valuables in a storage area, like your
glove box.
0 Remember to lock the storage compartment/glove
0 Lock all the doors except the driver’s.
box and take that key
with you.
New Vehicle “Break-In”
NOTICE:
Your
modern vehicle doesn’t need an elaborate
“break-in.” But it will perform better in the long
run if you follow these guidelines:
0
0
0
0
Keep your speed at 55 mph (88 kmk) or
less for the first
500 miles (804 km).
Don’t drive at
any one speed -- fast or
slow
-- for the first 500 miles (804 km).
Don’t make full-throttle starts.
Avoid making hard stops for the first
200 miles (322 km) or so. During this time
your new brake linings aren’t yet broken
in. Hard stops with new linings can mean
premature wear and earlier replacement.
Follow this breaking-in guideline every
time you get new brake linings.
Don’t tow
a trailer during break-in. See
“Towing
a Trailer’’ in the Index for
more information.
2-13
Page 109 of 372

Sun Visors
To block out glare, you can swing down the visors. You can
also swing them from side
to side. Your visors may have
an extension that can be pulled
out for additional glare
protection and
a strap for holding small items, such as maps.
Visor Vanity Mirror
I-
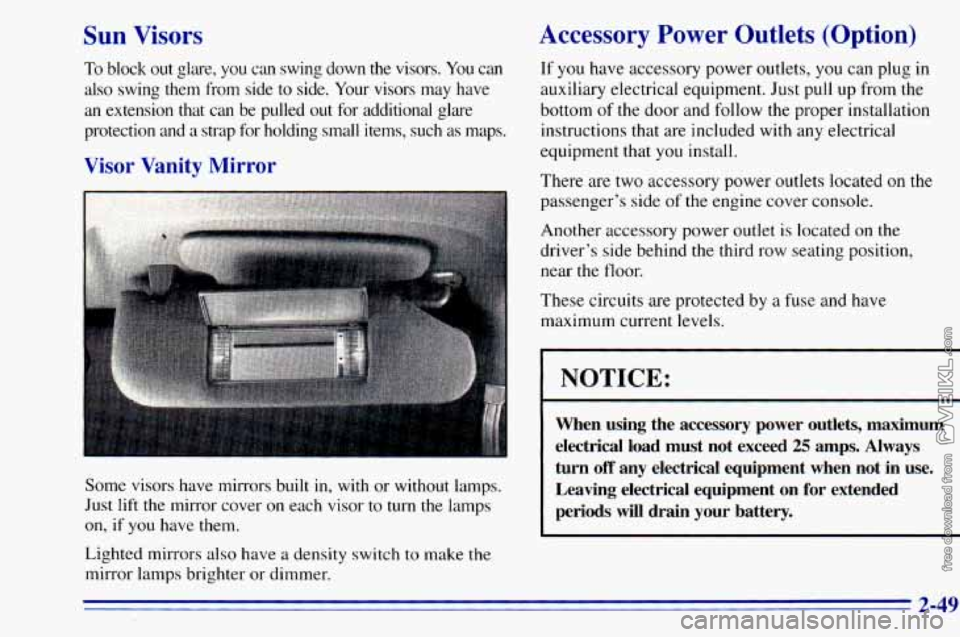
Some visors have mirrors built in, with or without lamps.
Just
lift the mirror cover on each visor to turn the lamps
on, if you have them.
Lighted mirrors also have a density switch to make
the
mirror lamps brighter or dimmer.
Accessory Power Outlets (Option)
If you have accessory power outlets, you can plug in
auxiliary electrical equipment. Just pull up from the
bottom
of the door and follow the proper installation
instructions that are included with any electrical
equipment that
you install.
There are two accessory power outlets located on the
passenger’s side
of the engine cover console.
Another accessory power outlet is located on the
driver’s side behind
the third row seating position,
near the floor.
These circuits are protected by
a fuse and have
maximum current levels.
I NOTICE:
~~
When using the accessory power outlets, maximum
electrical load must not exceed
25 amps. Always
turn
off any electrical equipment when not in use.
Leaving electrical equipment
on for extended
periods will drain your battery.
2-49
Page 216 of 372
- Removing the Spare Tire and Tools
The jacking equipment you’ll need is stored by your
vehicle’s rear doors, along the passenger side wall.
Remove your jack cover by pulling
it away from the
side wall and down to release the tabs securing the top
‘ of the cover. Remove the wheel, blocks by turning the top nut
counterclockwise. Remove the nut and washer, then pull
the wheel blocks off the bolt. Push down on the bolt and
remove the hooked
end from the slot. Slide the jack
toward the front of the vehicle and lift it from the
mounting. Remove the extension and the ratchet from
the pouch.
5-24
Page 218 of 372
Attach the ratchet, with the DOWN side facing you, to
the extension. The extension has a socket end and
a flat
chisel end.
Put the flat end of the extension on an angle through the
hole in the rear door frame, above the bumper. Be sure
the flat end connects into the hoist shaft. Turn
the ratchet counterclockwise to lower the spare tire
to the ground. Keep turning the ratchet until the spare
tire can be pulled out from under the vehicle.
5-26
Page 227 of 372

1.
2.
3.
Put the flat tire on the ground at the rear of the
vehicle, with the valve stem pointed down.
Tilt retaining bar downward and through the wheel
opening. Make sure it is fully seated across the
underside of the wheel. Attach the ratchet, with the
UP side facing you, to the extension.
Put the
flat end of the extension on an angle through
the hole in the rear door frame, above the bumper.
Turn the ratchet clockwise until the tire is against the
underside
of the vehicle.
You will
feel two “clicks” when the tire is up all the
way. Try to move the tire with your hands to make
sure it is securely in place.
The compact spare is for temporary use only. Replace
the compact spare tire with a full-size tire
as soon as
you can. See “Compact Spare Tire” in the Index. See
the storage instructions label to restore your compact
spare properly.
Return the jacking equipment
to its proper location.
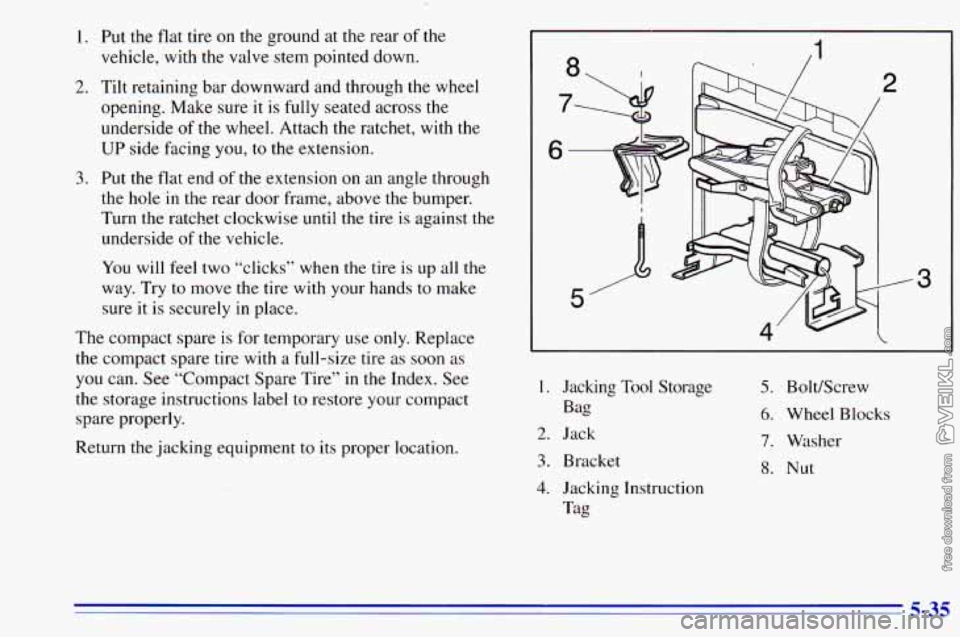
I 4
3
I. Jacking Tool Storage
Bag
2. Jack
3. Bracket
4. Jacking Instruction
Tag
5. BoltKcrew
6. Wheel Blocks
7, Washer
8. Nut
5-35
Page 236 of 372
I A CAUTION:
---
If you get gasoline on yourself and then.
something ignites
it, you could be badly burned.
Gasoline can spray ,out on you
if you open the
fuel filler cap too quickly. This spray can happen
if your tank is nearly full, and is more likely in
hot weather. Open the fuel filler cap slowly and
wait for any “hiss” noise to stop. Then unscrew
the cap all the way.
While refueling, hang the cap inside the fuel door.
To take off the cap, turn it slowly to the left
(counterclockwise). Be
careful not
to spill gasoline. Clean gasoline from
painted surfaces as soon as possible. See “Cleaning the
Outside of Your Vehicle” in the Index.