Page 9 of 390

L
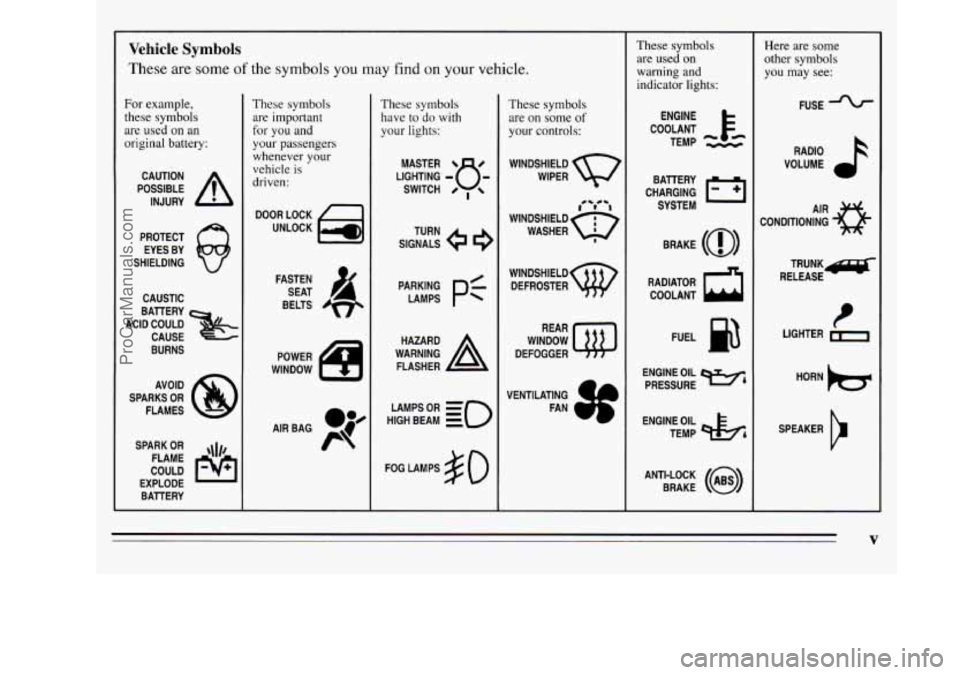
Vehicle Symbols
These are some of the symbols you may find on your vehicle.
For example,
these symbols are used on an
original battery:
POSSIBLE A
CAUTION
INJURY
PROTECT EYES BY
SHIELDING
CAUSTIC
ACID COULD BAlTERY
CAUSE
BURNS
AVOID
SPARKS
OR
FLAMES
SPARK
OR ,111,
COULD FLAME
EXPLODE BAllERY
These symbols are important
for you and
your passengers whenever your
vehicle is
driven:
DOOR LOCK
UNLOCK
FASTEN SEAT
BELTS
POWER
WINDOW
These symbols have to do with
your lights:
SIGNALS e e3
TURN
WARNING
A
HAZARD
FLASHER
HIGH
LAMPSoR BEAM = zo
FOG LAMPS $0
These symbols
are on some
of
your controls:
WINDSHIELD
WIPER
WINDSHIELD DEFROSTER
WINDOW
DEFOGGER
VENTILATING FAN
These symbols are used on
warning and
indicator lights:
COOLANT F-
TEMP --
ENGINE
CHARGING BAllERY
SYSTEM
BRAKE
(a)
RADIATOR COOLANT
a
FUEL
ENGINE OIL
PRESSURE
w4
TEMP OIL pk;
ANTI-LOCK (a)
BRAKE
Here are some
other symbols
you may see:
FUSE
RADIO
VOLUME
CONDITIONING
43
TRUNX~
RELEASE
HORN
)tr
SPEAKER
b
V
ProCarManuals.com
Page 86 of 390

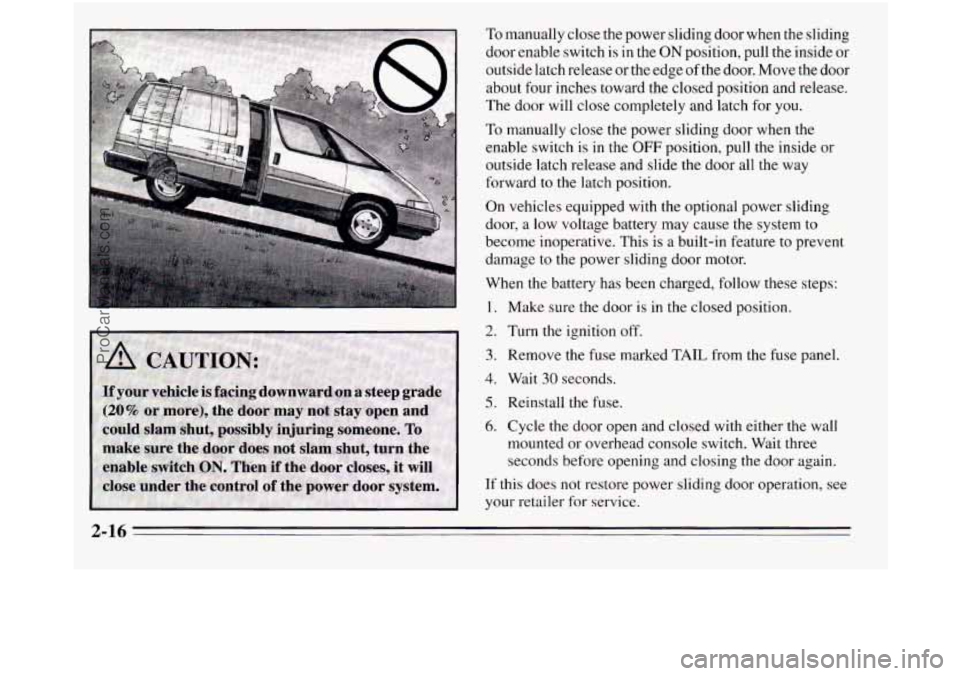
To manually close the power sliding door when the sliding
door enable switch
is in the ON position, pull the inside or
outside latch release or the edge
of the door. Move the door
about four inches toward the closed position and release.
The door will close completely and latch for you.
To manually close the power sliding door when the
enable switch is in the
OFF position, pull the inside or
outside latch release and slide the door all the way
forward
to the latch position.
On vehicles equipped with the optional power sliding
door,
a low voltage battery may cause the system to
become inoperative. This is a built-in feature to prevent
damage to the power sliding door motor.
When the battery has been charged, follow these steps:
1. Make sure the door is in the closed position.
2. Turn the ignition off.
3. Remove the fuse marked TAIL from the fuse panel.
4. Wait 30 seconds.
5. Reinstall the fuse.
6. Cycle the door open and closed with either the wall
mounted
or overhead console switch. Wait three
seconds before opening and closing the door again.
If this does not restore power sliding door operation, see
your retailer for service.
2-16
ProCarManuals.com
Page 91 of 390
Glove Bodstorage Compartment
Your vehicle has a storage compartment on top of the
dash and a glove box below it.
To open the storage compartment, push in the latch
release, then
lift the lid.
r
To open the glove box, pinch the latch release.
The fuse panel
is located inside the glove box door. See
“Fuses and Circuit Breakers” in the Index.
Theft
Vehicle theft is big business, especially in some cities.
Although your Oldsmobile has a number of theft
deterrent features, we know that nothing we put on it
can make
it impossible to steal. However, there are ways
you can help.
2-21
ProCarManuals.com
Page 111 of 390

mrn Signal and Lane Change Indicator
OFF ON RESUME
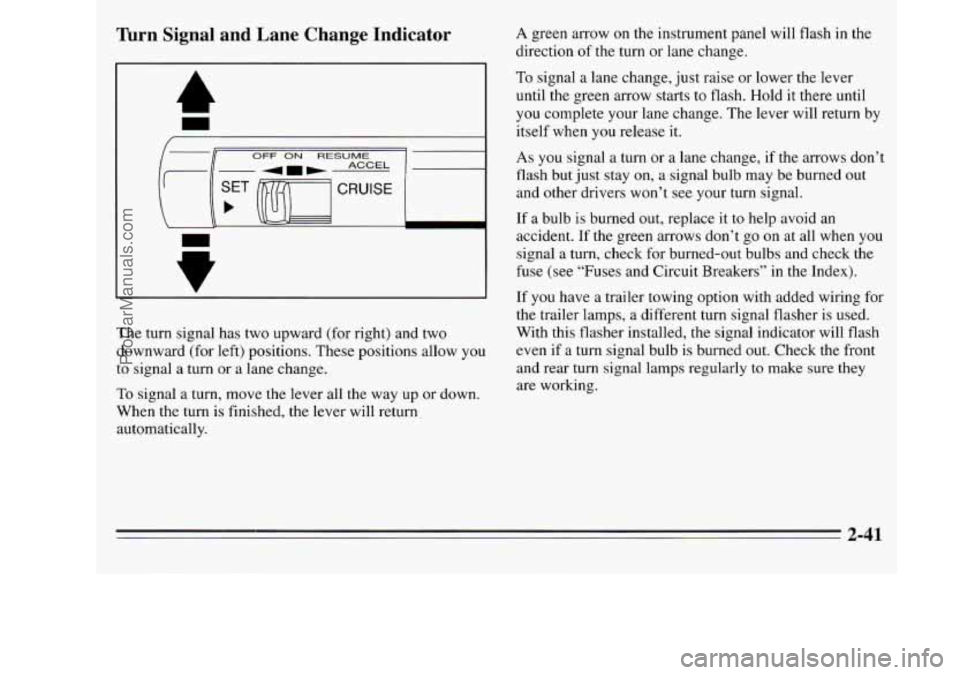
The turn signal has two upward (for right) and two
downward (for left) positions. These positions allow you
to signal a turn or a lane change.
To signal a turn, move the lever all the way up or down.
When the turn is finished, the lever will return,
automatically.
A green arrow on the instrument panel will flash in the
direction
of the turn or lane change.
To signal a lane change, just raise or lower the lever
until the green arrow starts to flash. Hold it there until
you complete your lane change. The lever will return by
itself when you release it.
As you signal a turn or a lane change, if the arrows don’t
flash but just stay on, a signal bulb may be burned out
and other drivers won’t
see your turn signal.
If a bulb
is burned out, replace it to help avoid an
accident. If the green arrows don’t go on at all when
you
signal a turn, check for burned-out bulbs and check the
fuse
(see “Fuses and Circuit Breakers” in the Index).
If you have a trailer towing option with added wiring for
the trailer lamps, a different turn signal flasher is used.
With this flasher installed, the signal indicator will flash
even if
a turn signal bulb is burned out. Check the front
and rear turn signal lamps regularly
to make sure they
are working.
2-41
ProCarManuals.com
Page 134 of 390

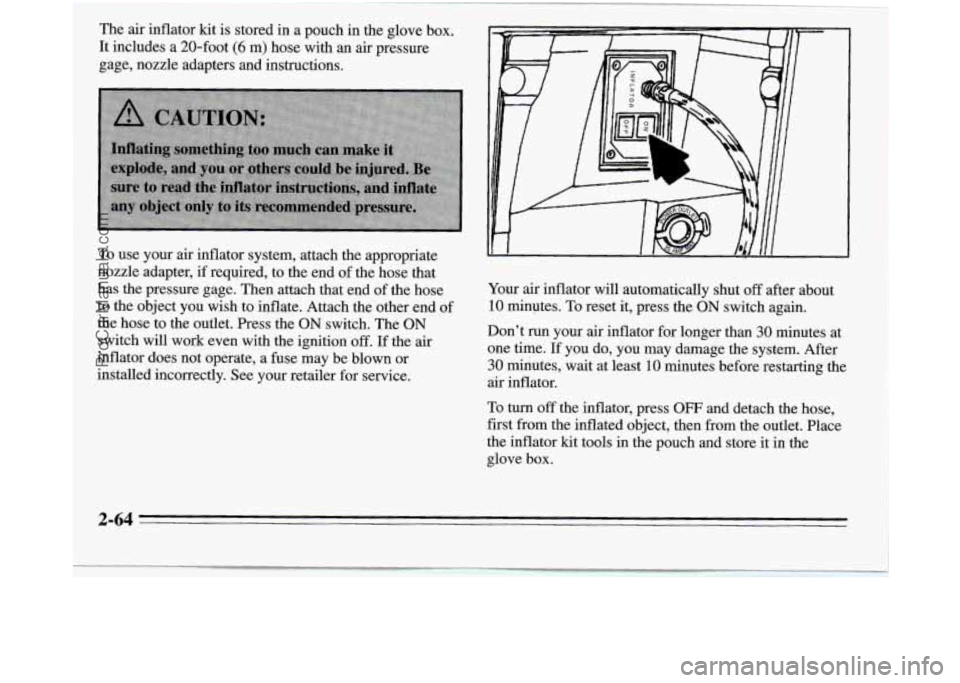
The air inflator kit is stored in a pouch in the glove box.
It includes a 20-foot
(6 m) hose with an air pressure
gage, nozzle adapters and instructions.
To use your air inflator system, attach the appropriate
nozzle adapter, if required, to the end of the hose that
has the pressure gage. Then attach that end of the hose
to the object you wish to inflate. Attach the other end of
the hose to the outlet. Press the
ON switch. The ON
switch will work even with the ignition off. If the air
inflator does not operate, a fuse may be blown or
installed incorrectly. See your retailer for service. Your air
inflator will automatically shut
off after about
10 minutes. To reset it, press the ON switch again.
Don’t run your air inflator for longer than
30 minutes at
one time. If you do, you may damage the system. After
30 minutes, wait at least 10 minutes before restarting the
air inflator.
To turn off the inflator, press OFF and detach the hose,
first from the inflated object, then from the outlet. Place
the inflator kit tools in the pouch and store it in the
glove box.
2-64
ProCarManuals.com
Page 138 of 390
Electronic Level Control (Option)
With this option, the rear of the vehicle automatically
adjusts to changes in load weight. (See “Loading Your
Vehicle” in the Index.)
You may hear the compressor operating when you load
or unload your vehicle, and periodically as the system
self-adjusts. This is normal.
The compressor should operate for brief periods
of time.
If the sound continues for an extended period
of time,
your vehicle needs service.
To keep your battery from
being drained, you may want to pull the
ELC fuse in the
fuse control panel until you can get your vehicle
serviced (see “Fuses and Circuit Breakers’’ in the Index).
To replace the bin, set the hinge pins (one on each side
of the bin, at the bottom) into the hinge guides (one at
each side
of the console opening, at the base), then close
the bin.
If the hinge pins are placed properly in the
guides, the bin will close easily.
2-68
ProCarManuals.com
Page 312 of 390
Fuses and Circuit Breakers
L
The wiring circuits in your vehicle are protected from
short circuits by a combination of fuses and circuit
breakers in the wiring itself. This greatly reduces the
chance of damages caused by electrical problems.
To identify and check fuses, refer to the fuse panel,
which is behind the glove box door, and the fuse usage
chart later in this section.
A fuse puller is clipped inside the fuse panel door. Place
the wide end
of the fuse puller over the plastic end of
the fuse. Squeeze the ends over the fuse and pull it out.
Look at the silver-colored band inside the fuse. If the
band
is broken or melted, replace the fuse. Be sure you
replace a bad fuse with a new one of the correct size.
6-52
ProCarManuals.com
Page 313 of 390

e
E5
c3
€3
ELC
HORN
E3 RDOllAUX
TAIL
El
c3
n
c3
ECM
TURN B/U
GAUGES LPS
ABS
E3 R WIPER
€5 HTRA/C
F WIPER
p-4 R BLW
Fuse Panel (3.1L V6 Engine)
Position Circuitry
CTSY Dome Lamps, Courtesy Lamps, Power Door
Lock Switches, Glove Box Lamp, Power
Mirrors, Power Sliding Delay Lock Module
ELC
HORN
STOP
HAZ Auto
Level Control, Underhood Lamp
Horns, Horn Relay, Safety Belt Buzzer
Front/Rear Turn Lamps, Front Sidemarker
Lamps, Rear Stop Lamps, Instrument Cluster
Turn Indicator Lamps, Cruise Brake Switch
F PUMP Fuel Pump,
Oil Pressure SenderIFuel Pump Switch
Position
RDO 1/
AUX
TAIL
ECM
TURN
B/U
GAUGES
LPS
ABS
RD02
R WIPER
F WIPER
IGN
HTR-A/C
R BLW
Circuitry
Radio, Front Cigar Lighter, Accessory Power
Outlet
Front Park Lamps, Rear Taillamps, Front
Sidemarker Lamps, License Plate Lamp, Radio,
HeatNentlAC Control Head, Power Sliding Door
Throttle Body Fuel Injection, Fuel Pump Relay,
Elec. Vac. Reg. Valve, Elec. Control Module,
Elec. Spark Control Module
Front/Rear Turn Lamps, Front Sidemarker Lamps, Cluster Turn Telltale, Back-up Lamps,
Fog Lamps
Cluster, Anti-Lock Brake System Lamp
Module, Elec. Level Control Sensor
Cluster, Radio, Wiper Switch, Headlamp
Switch, Rear Blower Switch, Heat/Vent/AC
Control Head, Door Switch Illumination,
FrontIRear Ashtray Illumination Bulbs
Anti-Lock Brake System
Radio
Rear Wiperwasher Motors; Overhead Console
Compass
Front Wipermasher Motor
A/C Compressor, A/C Solenoid Box, Compressor
Relay, Temp. Door Motor,
Low Blower Relay;
HeatNentlAC Control Head; Cruise Module; Cooling Fan Relay; Rear Defogger Relay;
Key
Chime; Vehicle Speed Sensor Buffer and Generator
Charge Discrete, Transaxle Converter Clutch Switch
FrondRear Blower Motors, High Blower Relay
Rear Blower, Rear Heat/Vent/AC
6-53
ProCarManuals.com