1995 OLDSMOBILE SILHOUETTE clock
[x] Cancel search: clockPage 75 of 390
position, you won’t be able to set the door locks with the
power door lock switch or the remote transmitter.
This
feature is designed to help keep you from locking your
keys in your vehicle.
If the sliding door is open wheq you press the power
door locks switch, it will lock automatically within five
seconds after you close it.
If you have the optional Remote Lock Control system,
this feature will be replaced by a different lock delay
system. See “Remote Lock Control” later in this section.
With power locks, when the doors
are locked, the inside as
well as the outside door latch release cannot open the
doors.
This safety feature prevents a door from being
accidentally opened from the inside by moving the handle.
To override this safety feature, slide the locking lever to
the unlock position on the door you want
to open.
When the liftgate has been unlocked with the power door
locks, you won’t need the key to open it. Simply turn the
lock clockwise until the latch releases. This is also true if
you use the optional Remote Lock Control transmitter.
See “Remote Lock Control” later in this section.
To lock the liftgate, use either the power door lock switch or
the optional Remote Lock Control transmitter.
You may
also lock it manually by turning the lock counterclockwise.
Automatic Door Locks (Option)
With this feature you can unlock all of the doors from
the outside by holding the key
in the unlock position for
one second.
To unlock only the driver’s or passenger’s
door, turn the key to the unlock position and release.
From the inside, when the ignition is on and the driver’s
door
is closed, all doors will lock each time you move
the shift lever out of PARK (P). If the passenger’s door
or the liftgate are open when you move the shift lever
out of PARK
(P), they will lock when closed.
If the sliding door is open when you move the shift lever
out of PARK (P) or manually lock the doors using the
power door lock switches, a lock delay feature allows
the sliding door
to lock five seconds after it is closed.
All other doors will lock again, too.
With the automatic door locks feature, you can still lock
or unlock the doors at any time, either manually or with
the power
door lock switches.
Overriding Lock Delay
To override the lock delay feature, press the front of the
power door locks switch (the unlock position) while the
shift lever is in PARK
(P).
2-5
ProCarManuals.com
Page 81 of 390
1.
2.
3.
4.
5.
Insert a coin into the slot in the back of the
transmitter, and turn it counterclockwise to open the
cover.
Remove the cover.
Remove and replace the 3-volt battery (CR2032).
Reassemble the transmitter. Check the transmitter operation.
Illuminated Entry System (Option)
This option comes with the optional Remote Lock
Control system.
When you open the driver’s door, by itself or in
combination with any passenger door or the liftgate, the
interior lamps will come on and then gradually dim to
off 10 seconds after the last door is closed. (If the
driver’s door has not been opened, the interior lamps
will immediately dim to
off.)
When you press the unlock symbol on your remote
transmitter, the lamps inside your vehicle will
go on,
then gradually dim to
off after about 40 seconds, unless
a door or the liftgate is opened.
When you turn on the ignition, the interior lamps will
immediately dim
to off.
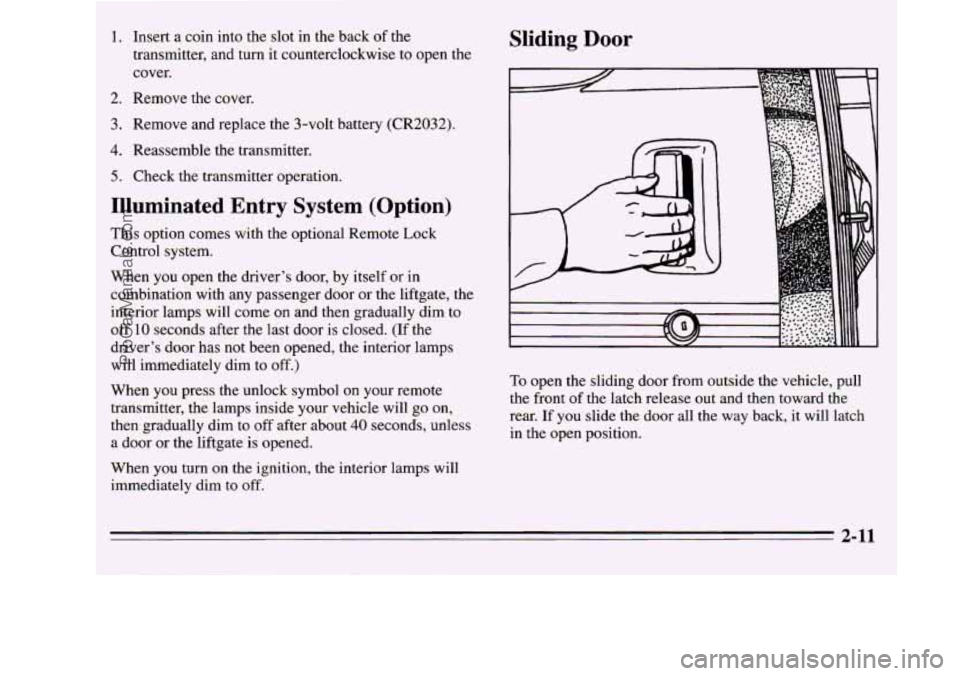
Sliding Door
To open the sliding door from outside the vehicle, pull
the front
of the latch release out and then toward the
rear.
If you slide the door all the way back, it will latch
in the open position.
2-11
ProCarManuals.com
Page 89 of 390
Liftgate Lock Raising the Liftgate
Open the liftgate using the handle above the license
plate. Once slightly opened, the liftgate will rise
by
itself. Lamps in the liftgate will come on, illuminating
the rear cargo area (see “Rear Interior Lamps” in the
Index).
I NOTICE:
Be sure there are no overhead obstructions, such
as a garage door, before you open the liftgate.
You could slam the liftgate into something and
break the glass.
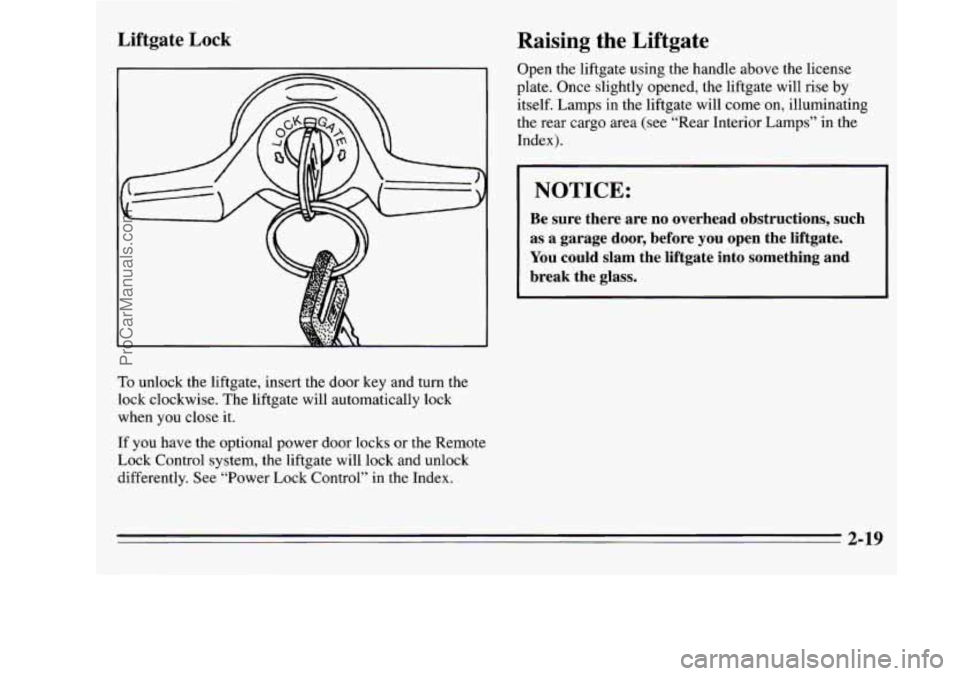
To unlock the liftgate, insert the door key and turn the
lock clockwise. The liftgate will automatically lock
when you close it.
If you have the optional power door locks or the Remote
Lock Control system, the liftgate will lock and unlock
differently. See “Power Lock Control’’ in the Index.
2-19
ProCarManuals.com
Page 132 of 390
NOTICE:
Loading cargo that weighs more than 125 pounds
(56 kg) on the luggage carrier may damage your
vehicle. When you carry cargo
on the luggage
carrier of
a proper size and weight, put it on the
slats,
as far forward as you can. Then slide the
crossrail up against the rear
of the load, to help
keep
it from moving. You can then tie it down.
Don’t exceed the maximum vehicle capacity when
loading your Oldsmobile. For more information on
vehicle capacity and loading, see “Loading Your
Vehicle” in the Index.
To prevent damage or loss of cargo as you’re driving,
check now and then to make sure the luggage carrier and
cargo are still securely fastened.
4 I
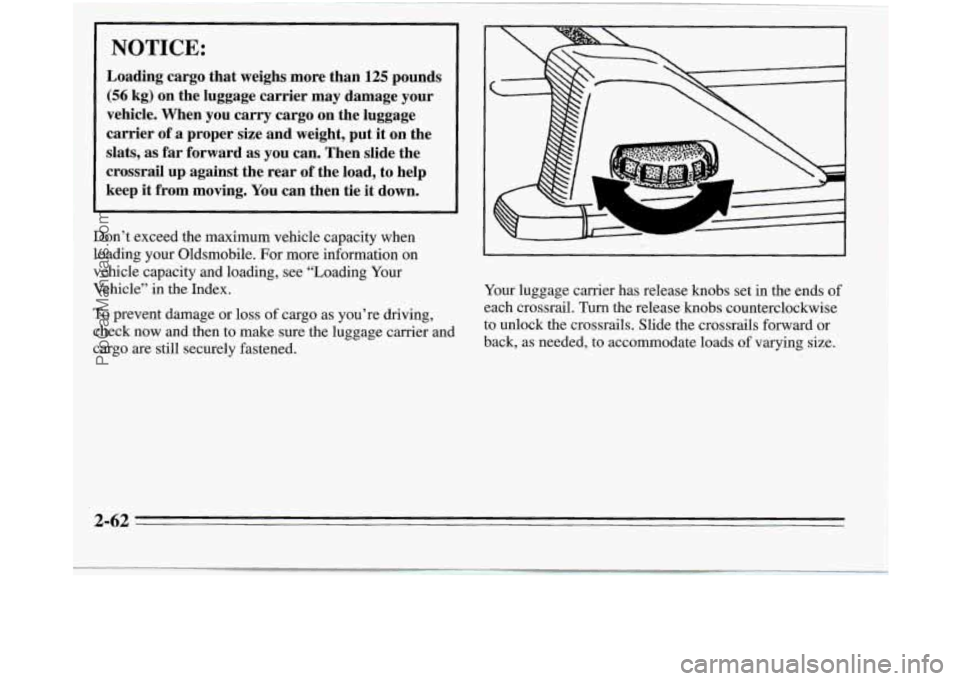
Your luggage carrier has release knobs set in the ends of
each crossrail. Turn the release
knobs counterclockwise
to unlock the crossrails. Slide the crossrails forward or
back, as needed, to accommodate loads
of varying size.
2-62
ProCarManuals.com
Page 133 of 390
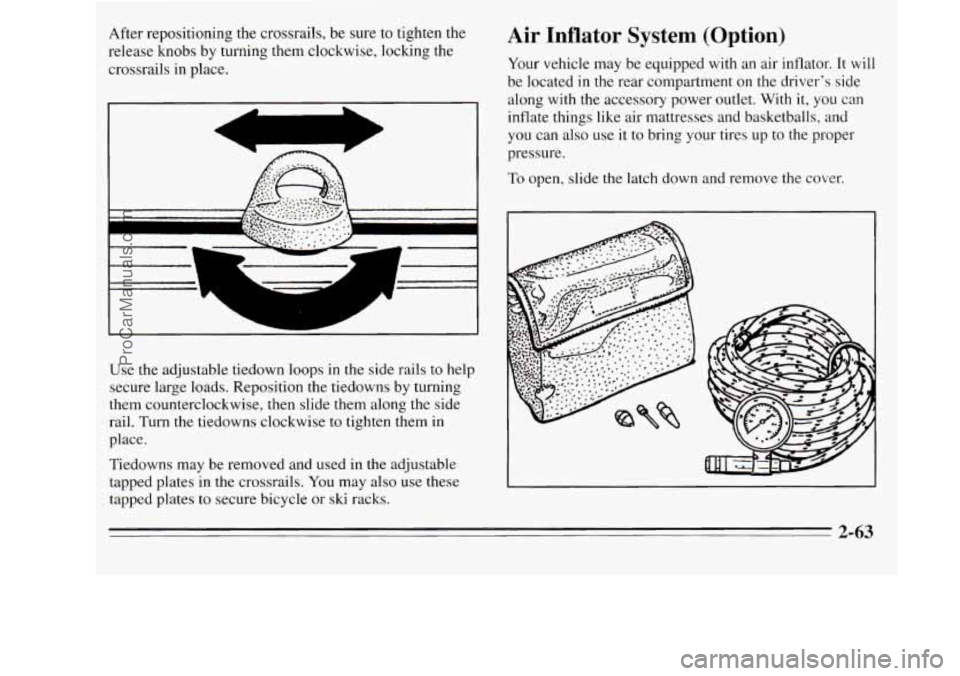
After repositioning the crossrails, be sure to tighten the
release knobs by turning them clockwise, locking the
crossrails in place.
--
L A
Use the adjustable tiedown loops in the side rails to help
secure large loads. Reposition the tiedowns by turning
them counterclockwise, then slide them along the side
rail. Turn the tiedowns clockwise
to tighten them in
place.
Tiedowns may be removed and used in the adjustable
tapped plates
in the crossrails. You may also use these
tapped plates
to secure bicycle or ski racks.
Air Inflator System (Option)
Your vehicle may be equipped with an air inflator. It will
be located in
the rear compartment on the driver's side
along with the accessory power outlet. With
it, you can
inflate things like air mattresses and basketballs, and
you can also use it to bring your tires up to the proper
pressure.
To open, slide the latch down and remove the cover.
2-63
ProCarManuals.com
Page 166 of 390
Audio Systems
The following pages describe the audio systems
available for your Oldsmobile, and how
to get the best
performance from them. Please read about the
system in
your vehicle.
Setting the Clock
For radios with SEEK A
1. With the radio on or off, press SET. The SET
indicator will appear on the digital display for
five
seconds. You must begin to set the clock to the
correct hour and minute during those
five seconds.
2. Press and hold the down SEEK arrow until the
correct hour appears on the display.
3. Press and hold the up SEEK arrow until the correct
minute appears
on the display. For radios
with SEEK and
SCAN buttons:
1. With the radio on or off, press SET. The SET
indicator will appear on the digital display for five
seconds.
You must begin to set the clock to the
correct hour and minute during those five seconds.
2. Press and hold SEEK until the correct hour appears
on the display.
3. Press and hold SCAN until the correct minute
appears on the display.
For radios
with 4 SEEK and SCAN:
1. With the radio on or off, press SET. The SET
indicator will appear on the digital display for five
seconds. You must begin to set the clock to
the
correct hour and minute during those five seconds.
2. Press and hold SCAN until the correct hour appears
on the display.
3. Press and hold the left or right SEEK arrow until the
correct minute appears on
the display.
3-8
ProCarManuals.com
Page 167 of 390
AM%FM Stereo Radio
I
XJ f AMFM Q
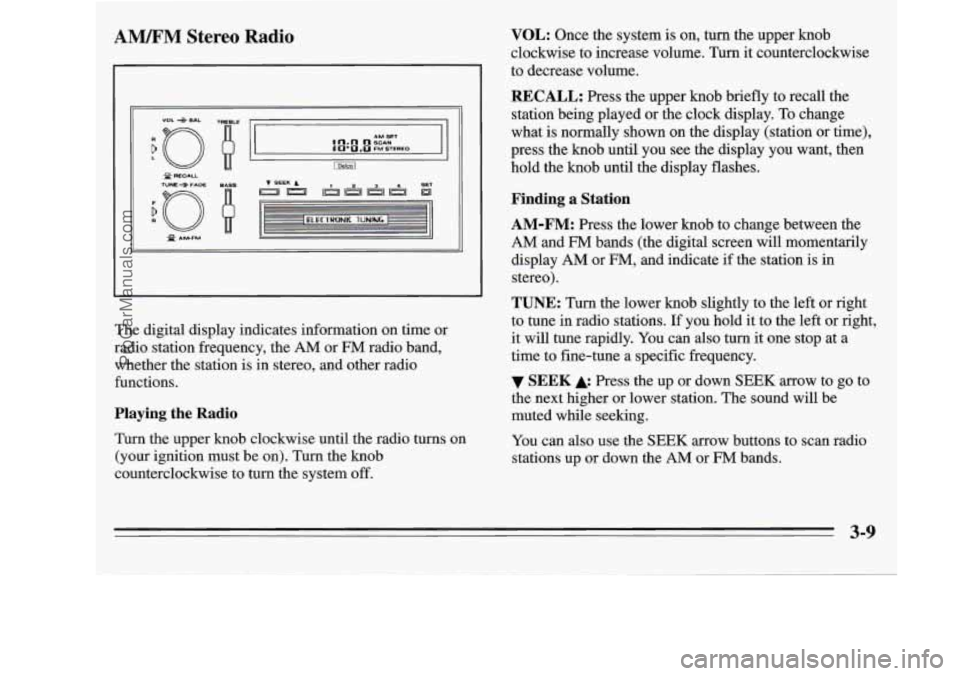
The digital display indicates information on time or
radio station frequency, the
AM or FM radio band,
whether the station is in stereo, and other radio
functions.
Playing the Radio
Turn the upper knob clockwise until the radio turns on
(your ignition must be
on). Turn the knob
counterclockwise to turn the system off.
VOL: Once the system is on, turn the upper knob
clockwise to increase volume. Turn it counterclockwise
to decrease volume.
RECALL: Press the upper knob briefly to recall the
station being played or the clock display. To change
what
is normally shown on the display (station or time),
press the knob until you see the display you want, then
hold the knob until the display flashes.
Finding a Station
AM-FM:
Press the lower knob to change between the
AM and FM bands (the digital screen will momentarily
display
AM or FM, and indicate if the station is in
stereo).
TUNE: Turn the lower knob slightly to the left or right
to tune in radio stations. If you hold it to the left or right,
it will tune rapidly. You can also turn it one stop at a
time to fine-tune a specific frequency.
the next higher or lower station. The sound will be
muted while seeking.
You can also use the
SEEK arrow buttons to scan radio
stations up or down the
AM or FM bands.
SEEK Press the up or down SEEK arrow to go to
3-9
ProCarManuals.com
Page 170 of 390
![OLDSMOBILE SILHOUETTE 1995 Owners Manual AMEM Stereo with Cassette Player with
Dolby@ (Option)
9
n AM 1 u - FM TUNE
r 1
(IJ (2) [T) [TI [y) [L] [=]
PROG Cr02 REV FWD PREV NEXT
L /
Playing the Radio
Push the PWR button to turn OLDSMOBILE SILHOUETTE 1995 Owners Manual AMEM Stereo with Cassette Player with
Dolby@ (Option)
9
n AM 1 u - FM TUNE
r 1
(IJ (2) [T) [TI [y) [L] [=]
PROG Cr02 REV FWD PREV NEXT
L /
Playing the Radio
Push the PWR button to turn](/manual-img/31/58210/w960_58210-169.png)
AMEM Stereo with Cassette Player with
Dolby@ (Option)
9
n AM 1 u - FM TUNE
r 1
(IJ (2) [T) [TI [y) [L] [=]
PROG Cr02 REV FWD PREV NEXT
L /
Playing the Radio
Push the PWR button to turn the system on or off.
VOL: Turn the upper knob clockwise to increase
volume. Turn it counterclockwise to decrease volume.
MUTE: Press the upper knob to mute the radio or tape
player. Press it again to listen.
RCL: When the ignition is off, press this button to
display the clock. When the radio is on, press it to
change between the clock and radio station frequency
shown on the digital display.
Finding a Station
AM-FM:
Press the lower knob to change between the
AM and
FM bands. The band you select will appear
momentarily on the digital display.
TUNE: Turn the lower knob slightly to the left or right
to tune in radio stations. If you hold it to the left or right,
it will tune rapidly. You can also turn it one stop at a
time to fine-tune a specific frequency.
4 SEEK b: Press to seek and stop on the next station
higher or lower on the radio band.
SCAN: When you press SCAN, the radio will go to the
next station and pause there for a few seconds. SCAN
will be shown on the digital display. Press SCAN again
to stop on a station.
3-12
5
ProCarManuals.com