1995 HONDA ODYSSEY tire pressure
[x] Cancel search: tire pressurePage 36 of 240
Indicator Lights
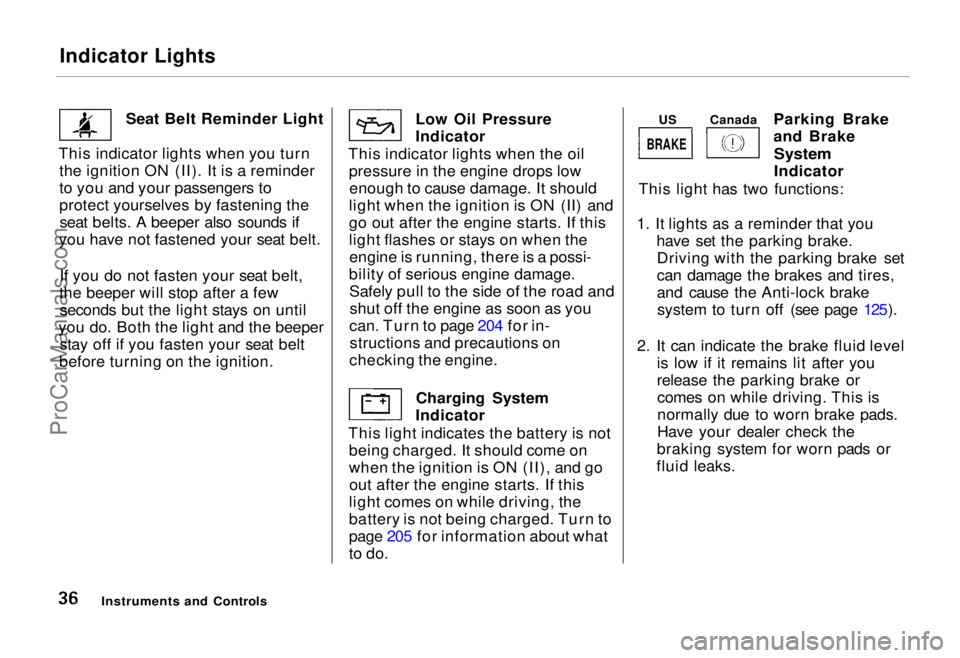
Seat Belt Reminder Light
This indicator lights when you turn the ignition ON (II). It is a reminder
to you and your passengers to
protect yourselves by fastening theseat belts. A beeper also sounds if
you have not fastened your seat belt.
If you do not fasten your seat belt,
the beeper will stop after a few seconds but the light stays on until
you do. Both the light and the beeper stay off if you fasten your seat belt
before turning on the ignition. Low Oil Pressure
Indicator
This indicator lights when the oil pressure in the engine drops lowenough to cause damage. It should
light when the ignition is ON (II) and
go out after the engine starts. If this
light flashes or stays on when the engine is running, there is a possi-
bility of serious engine damage. Safely pull to the side of the road andshut off the engine as soon as you
can. Turn to page 204 for in- structions and precautions on
checking the engine.
Charging System
Indicator
This light indicates the battery is not being charged. It should come on
when the ignition is ON (II), and goout after the engine starts. If this
light comes on while driving, the
battery is not being charged. Turn to
page 205 for information about what
to do. Parking Brake
and Brake
System
Indicator
This light has two functions:
1. It lights as a reminder that you have set the parking brake.Driving with the parking brake set
can damage the brakes and tires,
and cause the Anti-lock brakesystem to turn off (see page 125).
2. It can indicate the brake fluid level is low if it remains lit after you
release the parking brake orcomes on while driving. This is
normally due to worn brake pads.
Have your dealer check the
braking system for worn pads or
fluid leaks.
Instruments and Controls
BRAKE
US
CanadaProCarManuals.comMain Menu Table of Contents s t
Page 114 of 240
Fuel Economy
The condition of your car and your driving habits are the two most
important things that affect the fuel
mileage you get.
Vehicle Condition Always maintain your car according to the maintenance schedule. This
will keep it in top operating condition.
An important part of that mainte- nance is the Periodic Checks (see
page 144). For example an under-inflated tire causes more "rolling
resistance," which uses fuel. It also
wears out faster, so check the tire
pressure at least monthly. In winter,
the build-up of snow on your car's
underside adds weight and rolling
resistance. Frequent cleaning helps
your fuel mileage and reduces the chance of corrosion. Driving Habits
You can improve fuel economy by driving moderately. Rapid acceler-
ation, abrupt cornering, and hard
braking use more fuel.
Always drive in the highest gear that allows the engine to run and acceler-
ate smoothly.
Depending on traffic conditions, try
to maintain a constant speed. Every
time you slow down and speed up,
your car uses extra fuel. Use the cruise control, when appropriate, to
increase fuel economy. A cold engine uses more fuel than a
warm engine. It is not necessary to "warm-up" a cold engine by letting it
idle for a long time. You can drive away in about a minute, no matter
how cold it is outside. The engine
will warm up faster, and you get better fuel economy. To cut down on
the number of "cold starts," try tocombine several short trips into one.
The air conditioning puts an extra load on the engine which makes ituse more fuel. Turn off the A/C to
cut down on air conditioning use.Use the flow-through ventilation
when the outside air temperature is moderate.
Before DrivingProCarManuals.comMain Menu Table of Contents s t
Page 118 of 240
Preparing to Drive
You should do the following checks and adjustments every day before
you drive your car.
1. Make sure all windows, mirrors, and outside lights are clean and
unobstructed. Remove frost, snow,
or ice.
2. Check that the hood and tailgate are fully closed.
3. Visually check the tires. If a tire looks low, use a gauge to check its
pressure.
4. Check that any items you may be carrying with you inside are stored
properly or fastened down
securely. 5. Check the adjustment of the seat
(see page 56).
6. Check the adjustment of the inside and outside mirrors (see
page 66).
7. Check the adjustment of the steering wheel (see page 46).
8. Make sure the doors are securely closed and locked.
9. Fasten your seat belt. Check that your passengers have fastened
their seat belts (see page 7). 10. Turn the ignition ON (II). Check
the indicator lights in the instru-
ment panel.
11. Start the engine (see page 119).
12. Check the gauges and indicator lights in the instrument panel (see
page 35).
DrivingProCarManuals.comMain Menu Table of Contents s t
Page 127 of 240
Driving in Bad Weather
Visibility — Being able to see clearly in all directions and being
visible to other drivers are important in all weather conditions. This is
more difficult in bad weather. To be
seen more clearly during daylight
hours, turn on your headlights.
Inspect your windshield wipers and
washers frequently. Keep the wind- shield washer reservoir full of the
proper fluid. Have the windshield
wiper blades replaced if they start to streak the windshield or leave parts
unwiped. Use the defrosters and air conditioning to keep the windows
from fogging up on the inside (see page 82). Traction — Check your tires
frequently for wear and properpressure. Both are important in
preventing "hydroplaning" (loss of
traction on a wet surface). In the
winter, mount snow tires on all four
wheels for the best handling.
Watch road conditions carefully, they can change from moment to
moment. Wet leaves can be as slip-
pery as ice. "Clear" roads can have
patches of ice. Driving conditions
can be very hazardous when theoutside temperature is near freezing.
The road surface can become covered with areas of water puddles
mixed with areas of ice, so your
traction can change without warning.
Be careful when downshifting. If
traction is low, you can lock up the drive wheels for a moment and cause
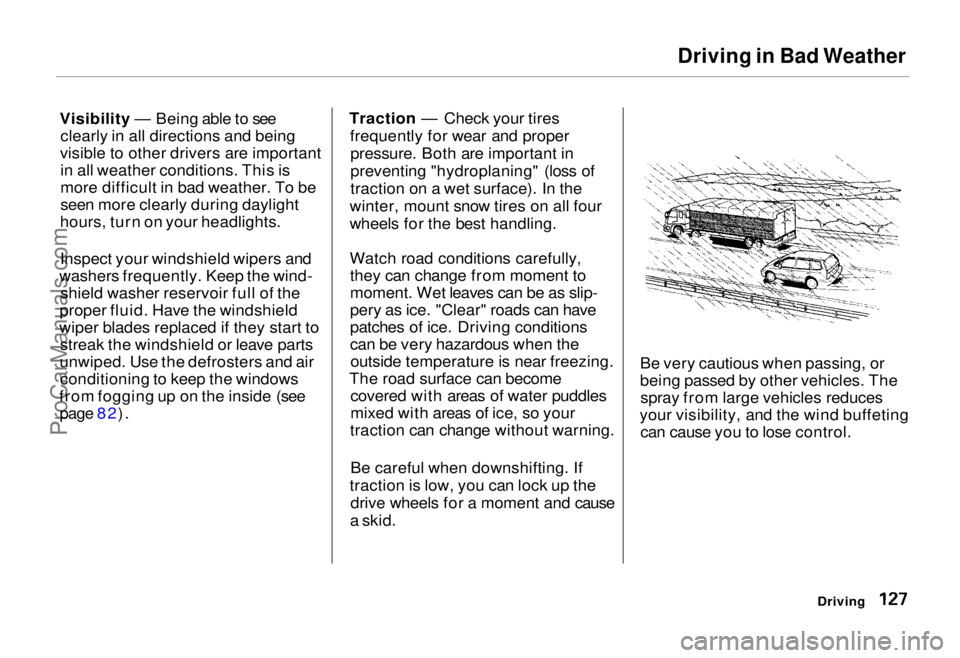
a skid. Be very cautious when passing, or
being passed by other vehicles. The
spray from large vehicles reduces
your visibility, and the wind buffeting can cause you to lose control.
DrivingProCarManuals.comMain Menu Table of Contents s t
Page 131 of 240
Towing a Trailer
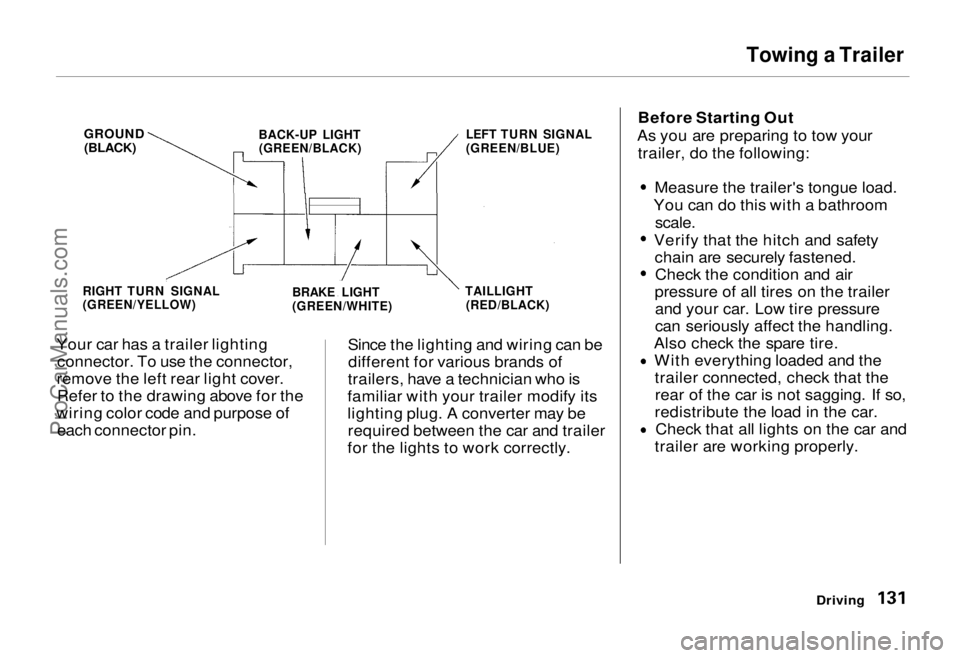
Your car has a trailer lighting connector. To use the connector,
remove the left rear light cover. Refer to the drawing above for the
wiring color code and purpose of each connector pin. Since the lighting and wiring can be
different for various brands of
trailers, have a technician who is
familiar with your trailer modify its
lighting plug. A converter may be required between the car and trailer
for the lights to work correctly. Before Starting Out
As you are preparing to tow your trailer, do the following:
Measure the trailer's tongue load.
You can do this with a bathroom
scale.
Verify that the hitch and safety chain are securely fastened.Check the condition and air
pressure of all tires on the trailer and your car. Low tire pressure
can seriously affect the handling.
Also check the spare tire. With everything loaded and thetrailer connected, check that therear of the car is not sagging. If so,
redistribute the load in the car. Check that all lights on the car and
trailer are working properly.
Driving
RIGHT TURN SIGNAL
(GREEN/YELLOW)
BRAKE LIGHT
(GREEN/WHITE)TAILLIGHT
(RED/BLACK) LEFT TURN SIGNAL
(GREEN/BLUE)
BACK-UP LIGHT
(GREEN/BLACK)
GROUND
(BLACK)ProCarManuals.comMain Menu Table of Contents s t
Page 143 of 240
Periodic Checks
You should check the following items at the specified intervals. If
you are unsure of how to perform any check, turn to the page given. Engine oil level — Check every
time you fill the fuel tank. See
page 112.
Engine coolant level — Check the
radiator reserve tank every time
you fill the fuel tank. See page 113.
Windshield washer fluid — Check the level in the reservoir monthly.If weather conditions cause you to
use the washers frequently, check
the reservoir each time you stop
for fuel. See page 154. Automatic transmission — Check
the fluid level monthly. See page
155.
Brakes and power steering —
Check the fluid level monthly. See
page 156.
Tires — Check the tire pressure
monthly. Examine the tread for
wear and foreign objects. See page
169.
Battery — Check its condition and
the terminals for corrosion monthly. See page 162. Air conditioning — Check its
operation weekly. See page 168. Lights — Check the operation of
the headlights, parking lights,
taillights, high-mount brake light,
turn signals, brake lights, and
license plate lights monthly. See
page 175.
Maintenance
ProCarManuals.comMain Menu Table of Contents s t
Page 168 of 240
Drive Belts, Tires
Drive Belts POWER STEERING BELT
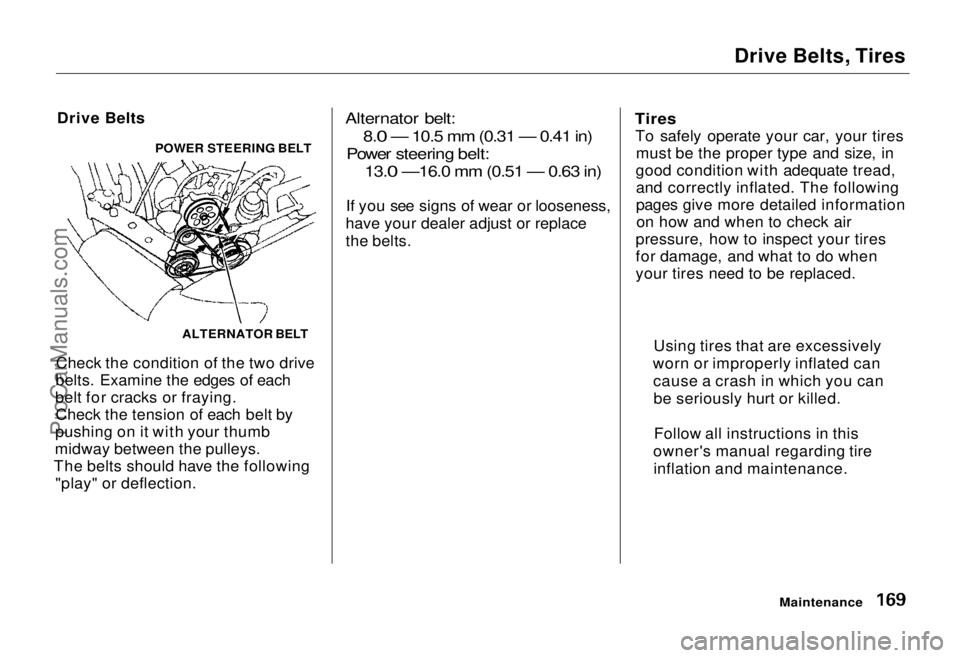
Check the condition of the two drive
belts. Examine the edges of each
belt for cracks or fraying. Check the tension of each belt by
pushing on it with your thumb
midway between the pulleys.
The belts should have the following "play" or deflection.
Alternator belt:
8.0 — 10.5 mm (0.31 — 0.41 in)
Power steering belt:
13.0 —16.0 mm (0.51 — 0.63 in)
If you see signs of wear or looseness,
have your dealer adjust or replace
the belts.
Tires
To safely operate your car, your tires must be the proper type and size, in
good condition with adequate tread, and correctly inflated. The following
pages give more detailed informationon how and when to check air
pressure, how to inspect your tires
for damage, and what to do when
your tires need to be replaced.
Maintenance
ALTERNATOR BELT
Using tires that are excessively
worn or improperly inflated can cause a crash in which you canbe seriously hurt or killed.
Follow all instructions in this
owner's manual regarding tire inflation and maintenance.
ProCarManuals.comMain Menu Table of Contents s t
Page 169 of 240
Tires
Inflation
Keeping the tires properly inflated
provides the best combination of
handling, tread life and riding comfort. Underinflated tires wear
unevenly, adversely affect handling
and fuel economy, and are more
likely to fail from being overheated. Overinflated tires can make your car
ride more harshly, are more prone to damage from road hazards, and wear
unevenly.
We recommend that you visually check your tires every clay and use a
gauge to measure the air pressure at
least once a month. If you think a tire
might be low, check it immediately.Remember to check the spare tire at
the same time you check all the
other tires.
Check the pressure in the tires when
they are cold. This means the car
has been parked for at least three
hours. If you have to drive the car
before checking the tire pressure,
the tires can still be considered
"cold" if you drive less than 1.6 km
(1 mile).
If you check the pressure when the
tires are hot (the car has been driven several miles), you will see readings
28 to 41 kPa (0.3 to 0.4 kg/cm2, 4 to
6 psi) higher than the cold reading.
This is normal. Do not let air out to match the specified cold pressure.
The tire will be underinflated.
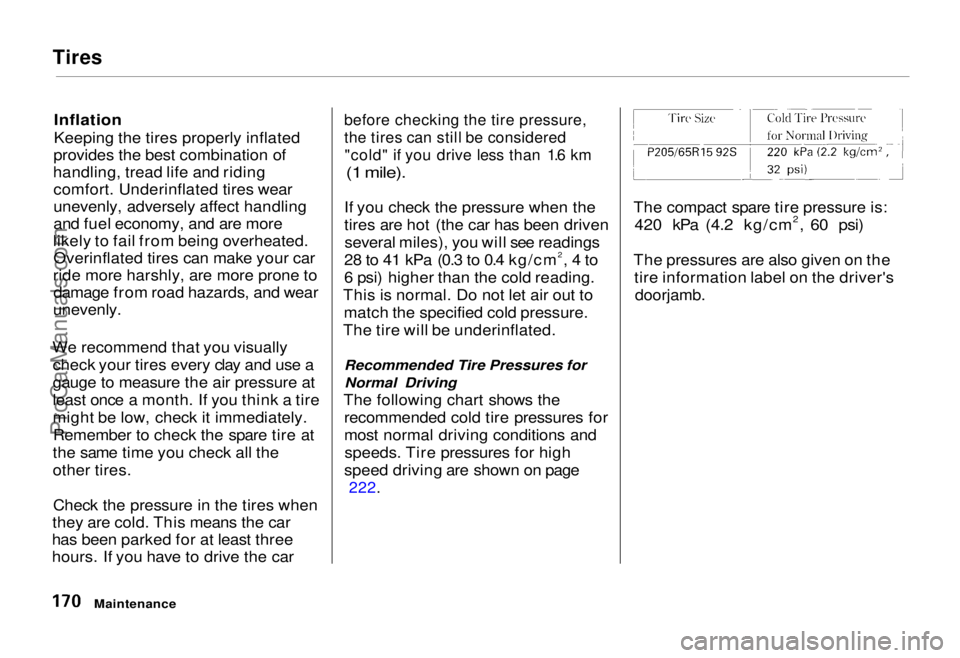
Recommended Tire Pressures forNormal Driving
The following chart shows the recommended cold tire pressures for
most normal driving conditions andspeeds. Tire pressures for high
speed driving are shown on page
222.
The compact spare tire pressure is:
420 kPa (4.2 kg/cm2, 60 psi)
The pressure
s
are also given on the
tire information label on the driver's
doorjamb.
MaintenanceProCarManuals.comMain Menu Table of Contents s t