1995 HONDA ODYSSEY check engine light
[x] Cancel search: check engine lightPage 17 of 240
Supplemental Restraint System
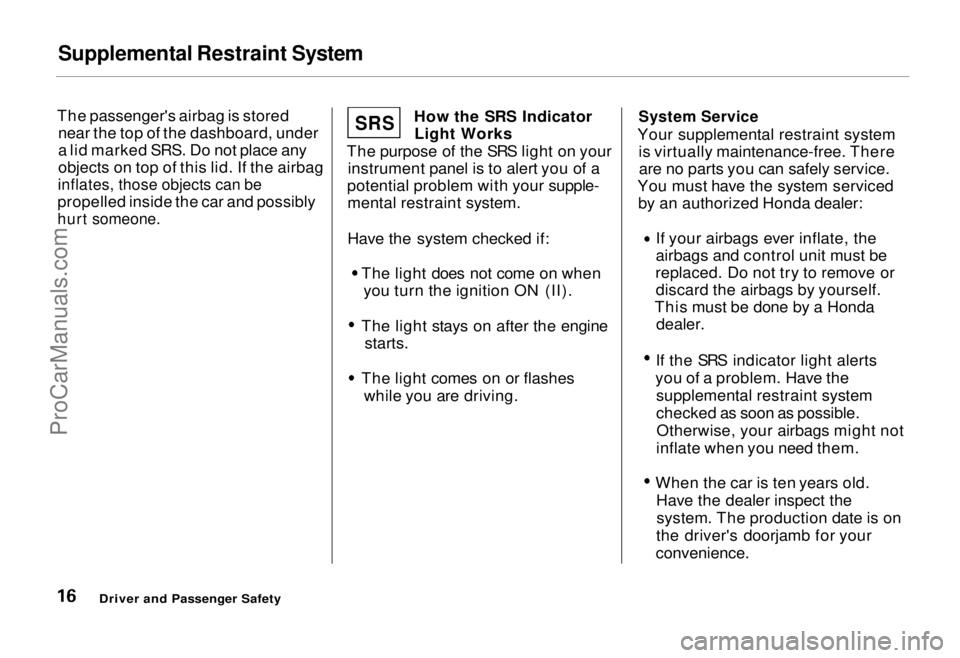
The passenger's airbag is stored near the top of the dashboard, under
a lid marked SRS. Do not place any
objects on top of this lid. If the airbag
inflates, those objects can be
propelled inside the car and possibly
hurt someone.
How the SRS Indicator
Light Works
The purpose of the SRS light on your instrument panel is to alert you of a
potential problem with your supple- mental restraint system.
Have the system checked if: The light does not come on when
you turn the ignition ON (II).
The light stays on after the engine
starts.
The light comes on or flashes while you are driving.
System Service
Your supplemental restraint system is virtually maintenance-free. Thereare no parts you can safely service.
You must have the system serviced by an authorized Honda dealer:
If your airbags ever inflate, the
airbags and control unit must be
replaced. Do not try to remove or discard the airbags by yourself.
This must be done by a Honda
dealer.
If the SRS indicator light alerts
you of a problem. Have the supplemental restraint system
checked as soon as possible.Otherwise, your airbags might not
inflate when you need them.
When the car is ten years old. Have the dealer inspect thesystem. The production date is on
the driver's doorjamb for your
convenience.
Driver and Passenger Safety
SRS
ProCarManuals.comMain Menu Table of Contents s t
Page 35 of 240
Indicator Lights
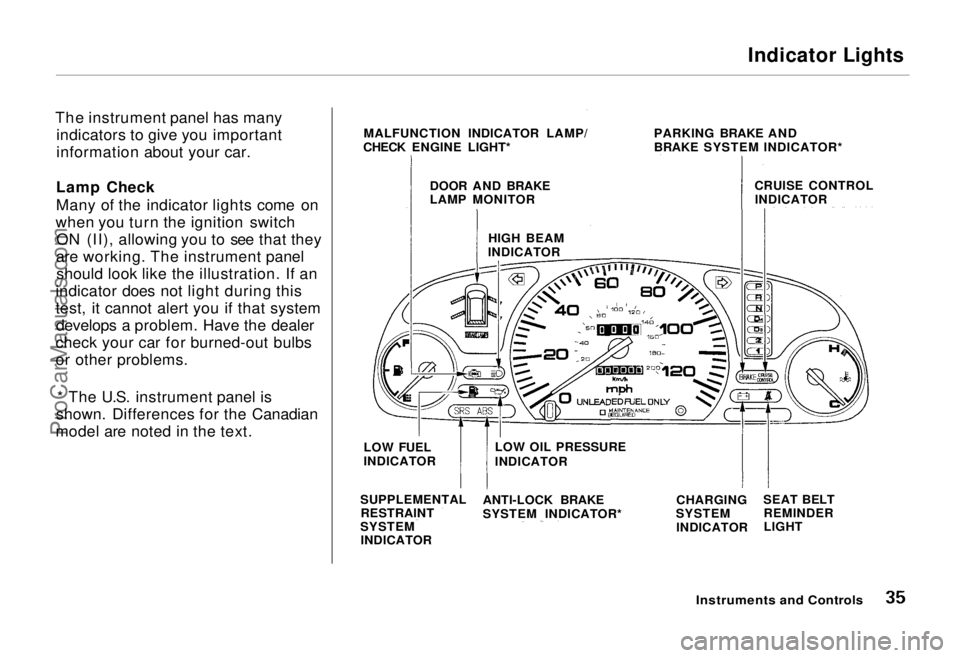
The instrument panel has many indicators to give you important
information about your car.
Lamp Check
Many of the indicator lights come on
when you turn the ignition switch ON (II), allowing you to see that they
are working. The instrument panel should look like the illustration. If an
indicator does not light during this
test, it cannot alert you if that system develops a problem. Have the dealer
check your car for burned-out bulbs
or other problems.
* The U.S. instrument panel is
shown. Differences for the Canadian
model are noted in the text.
Instruments and Controls
MALFUNCTION INDICATOR LAMP/
CHECK ENGINE LIGHT* PARKING BRAKE AND
BRAKE SYSTEM INDICATOR*
CRUISE CONTROLINDICATOR
DOOR AND BRAKE
LAMP MONITOR
HIGH BEAM
INDICATOR
LOW FUEL
INDICATOR
SUPPLEMENTAL RESTRAINT
SYSTEM INDICATOR LOW OIL PRESSURE
INDICATOR
ANTI-LOCK BRAKE
SYSTEM INDICATOR* CHARGING
SYSTEM
INDICATOR SEAT BELT
REMINDER
LIGHTProCarManuals.comMain Menu Table of Contents s t
Page 36 of 240
Indicator Lights
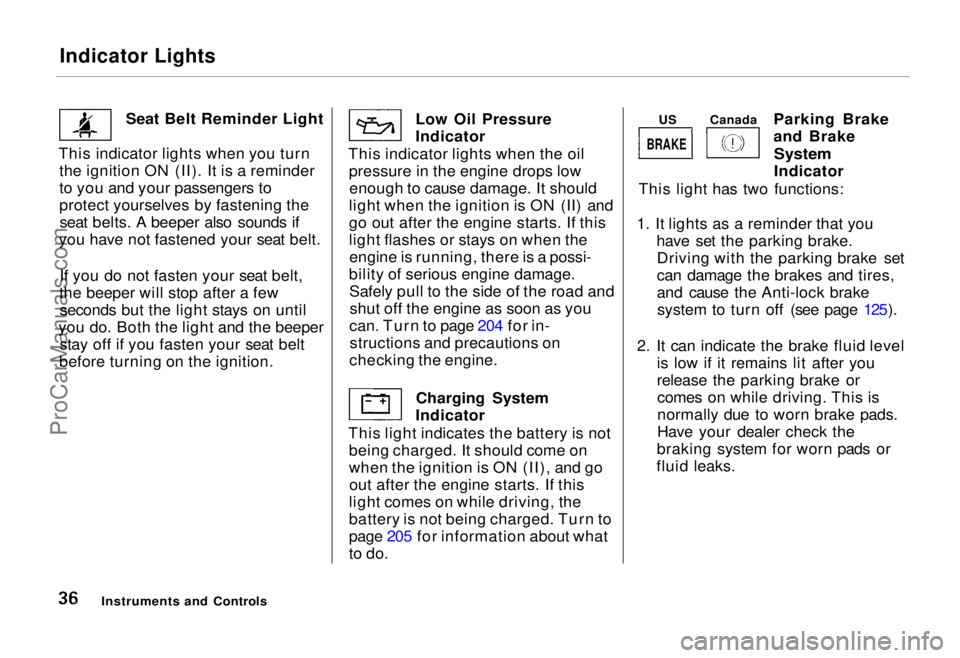
Seat Belt Reminder Light
This indicator lights when you turn the ignition ON (II). It is a reminder
to you and your passengers to
protect yourselves by fastening theseat belts. A beeper also sounds if
you have not fastened your seat belt.
If you do not fasten your seat belt,
the beeper will stop after a few seconds but the light stays on until
you do. Both the light and the beeper stay off if you fasten your seat belt
before turning on the ignition. Low Oil Pressure
Indicator
This indicator lights when the oil pressure in the engine drops lowenough to cause damage. It should
light when the ignition is ON (II) and
go out after the engine starts. If this
light flashes or stays on when the engine is running, there is a possi-
bility of serious engine damage. Safely pull to the side of the road andshut off the engine as soon as you
can. Turn to page 204 for in- structions and precautions on
checking the engine.
Charging System
Indicator
This light indicates the battery is not being charged. It should come on
when the ignition is ON (II), and goout after the engine starts. If this
light comes on while driving, the
battery is not being charged. Turn to
page 205 for information about what
to do. Parking Brake
and Brake
System
Indicator
This light has two functions:
1. It lights as a reminder that you have set the parking brake.Driving with the parking brake set
can damage the brakes and tires,
and cause the Anti-lock brakesystem to turn off (see page 125).
2. It can indicate the brake fluid level is low if it remains lit after you
release the parking brake orcomes on while driving. This is
normally due to worn brake pads.
Have your dealer check the
braking system for worn pads or
fluid leaks.
Instruments and Controls
BRAKE
US
CanadaProCarManuals.comMain Menu Table of Contents s t
Page 37 of 240
Indicator Lights
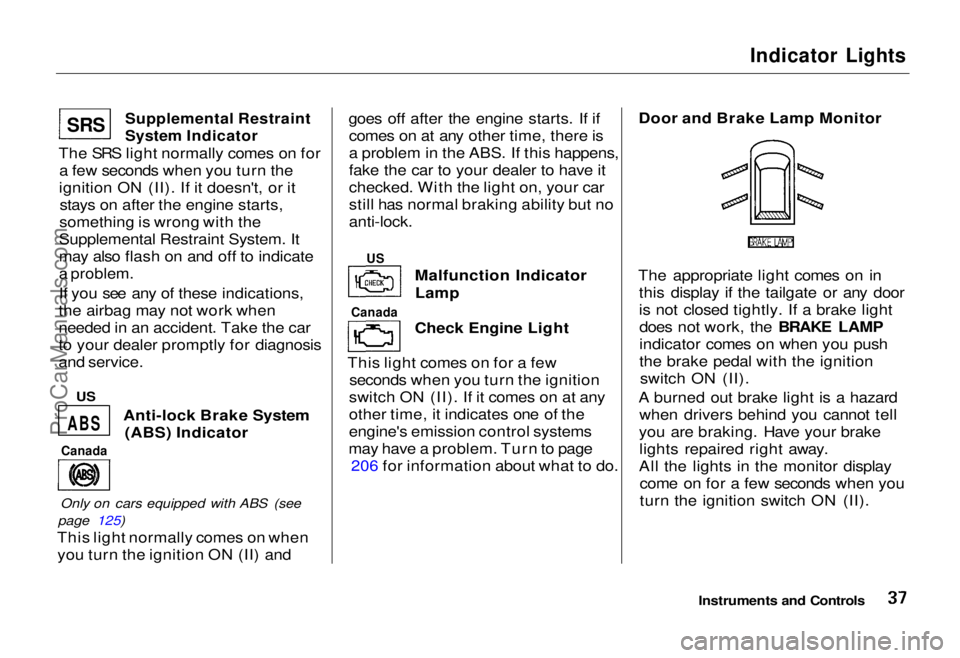
Supplemental Restraint
System Indicator
The SRS light normally comes on for a few seconds when you turn the
ignition ON (II). If it doesn't, or it stays on after the engine starts,
something is wrong with the
Supplemental Restraint System. It
may also flash on and off to indicate
a problem.
If you see any of these indications,
the airbag may not work when
needed in an accident. Take the car
to your dealer promptly for diagnosis
and service.
Anti-lock Brake System(ABS) Indicator
Only on cars equipped with ABS (see
page 125)
This light normally comes on when you turn the ignition ON (II) and goes off after the engine starts. If if
comes on at any other time, there is
a problem in the ABS. If this happens,
fake the car to your dealer to have it
checked. With the light on, your car
still has normal braking ability but no
anti-lock.
Malfunction IndicatorLamp
Check Engine Light
This light comes on for a few seconds when you turn the ignition
switch ON (II). If it comes on at any
other time, it indicates one of the
engine's emission control systems
may have a problem. Turn to page 206 for information about what to do. Door and Brake Lamp Monitor
The appropriate light comes on in this display if the tailgate or any door
is not closed tightly. If a brake lightdoes not work, the BRAKE LAMP
indicator comes on when you push
the brake pedal with the ignition switch ON (II).
A burned out brake light is a hazard when drivers behind you cannot tell
you are braking. Have your brake lights repaired right away.
All the lights in the monitor display come on for a few seconds when you
turn the ignition switch ON (II).
Instruments and Controls
Canada
ABS
Canada
US
SR
S
US
ProCarManuals.comMain Menu Table of Contents s t
Page 40 of 240
Gauges
Temperature Gauge This shows the temperature of the engine's coolant. During normal
operation, the pointer should rise
from the bottom white mark to about
the middle of the gauge. In severe driving conditions, such as very hot
weather or a long period of uphill driving, the pointer may rise to the
upper white mark. If it reaches the
red "H" (Hot) mark, pull safely to
the side of the road. Turn to page
202 for instructions and precautions on checking the engine's cooling
system.
Fuel Gauge
This shows how much fuel you have. It is most accurate when the car is on
level ground. It may show slightly more or less than the actual amount
when you are driving on curvy or hilly roads.
The gauge stays at the same fuel level reading after you turn off the
ignition. When you add fuel, the
gauge slowly changes to the new
reading after you turn the ignition
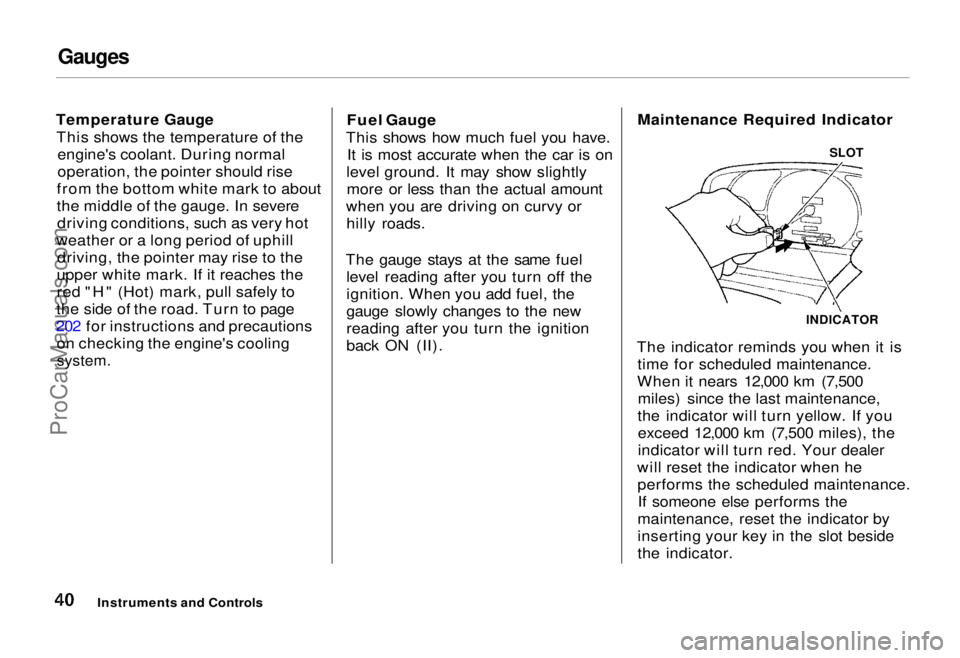
back ON (II). Maintenance Required Indicator
The indicator reminds you when it is time for scheduled maintenance.
When it nears 12,000 km (7,500 miles) since the last maintenance,
the indicator will turn yellow. If you exceed 12,000 km (7,500 miles), the
indicator will turn red. Your dealer
will reset the indicator when he performs the scheduled maintenance.If someone else performs the
maintenance, reset the indicator by
inserting your key in the slot beside
the indicator.
Instruments and Controls
INDICATOR
SLOTProCarManuals.comMain Menu Table of Contents s t
Page 118 of 240
Preparing to Drive
You should do the following checks and adjustments every day before
you drive your car.
1. Make sure all windows, mirrors, and outside lights are clean and
unobstructed. Remove frost, snow,
or ice.
2. Check that the hood and tailgate are fully closed.
3. Visually check the tires. If a tire looks low, use a gauge to check its
pressure.
4. Check that any items you may be carrying with you inside are stored
properly or fastened down
securely. 5. Check the adjustment of the seat
(see page 56).
6. Check the adjustment of the inside and outside mirrors (see
page 66).
7. Check the adjustment of the steering wheel (see page 46).
8. Make sure the doors are securely closed and locked.
9. Fasten your seat belt. Check that your passengers have fastened
their seat belts (see page 7). 10. Turn the ignition ON (II). Check
the indicator lights in the instru-
ment panel.
11. Start the engine (see page 119).
12. Check the gauges and indicator lights in the instrument panel (see
page 35).
DrivingProCarManuals.comMain Menu Table of Contents s t
Page 124 of 240
The Braking System
Your Honda is equipped with disc brakes at all four wheels. The
braking system is power-assisted to reduce the effort needed on the
brake pedal.
Put your foot on the brake pedal only
when you intend to brake. Resting
your foot on the pedal keeps the brakes applied lightly, causing them
to build up heat. Heat build-up canreduce how well your brakes work. It
also keeps your brake lights on all
the time, confusing drivers behind
you.
Constant application of the brakes
when going down a long hill builds up heat and reduces their effective-
ness. Use the engine to assist the
brakes by downshifting to a lower
gear and taking your foot off the accelerator pedal. Check your brakes after driving
through deep water. Apply the
brakes moderately to see if they feel normal. If not, apply them gently and
frequently until they do. Since a
longer distance is needed to stop
with wet brakes, be extra cautious and alert in your driving.
Brake Wear Indicators
All four brakes have audible brake wear indicators.
When the brake pads need replacing, you will hear a distinctive metallic "screeching" sound when you apply
the brakes. If you do not have the
brake pads replaced, they will begin screeching all the time.
Your brakes may sometimes squeal or squeak when you apply them
lightly. Do not confuse this with the
brake wear indicators. They make a
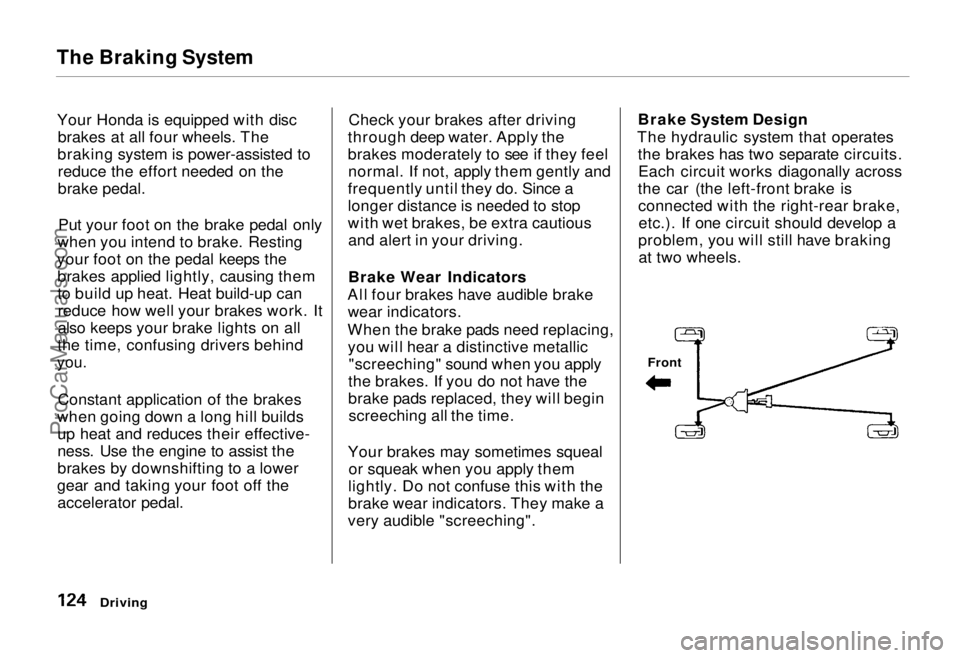
very audible "screeching". Brake System Design
The hydraulic system that operates the brakes has two separate circuits.Each circuit works diagonally across
the car (the left-front brake is connected with the right-rear brake,etc.). If one circuit should develop a
problem, you will still have braking at two wheels.
Driving
FrontProCarManuals.comMain Menu Table of Contents s t
Page 125 of 240
The Braking System
If this happens, you will immediately
notice that the brake pedal goes down much farther and you need to
press on it much harder. A much
longer distance will be needed to stop the car.
Slow the car by downshifting to a
lower gear and removing your foot
from the accelerator pedal. Pull to the side of the road as soon as it issafe. Because of the longer stopping
distance needed, brake system
failure is very hazardous. It is best to
have your car towed, but if you must drive the car in this condition, be
extremely cautious. Have your car
repaired as soon as possible.
Anti-lock Brakes
All U.S. models and the Canadian six-passenger model have an Anti-lockBrake System (ABS) as standard
equipment. It is optional on the
Canadian seven-passenger model.
ABS helps you maintain steering control. It does this by helping you to
prevent the wheels from locking up and skidding.
The ABS is always "On". It requires no special effort or driving technique.
You will feel a pulsation in the brake pedal when the ABS activates.
Activation varies with the amount of traction your tires have. On dry
pavement, you will need to press on
the brake pedal very hard before you
feel the pedal pulsation that means
the ABS has activated. However, youmay feel the ABS activate immedi-
ately if you are trying to stop on
snow or ice. Under all conditions, the
ABS is helping to prevent the wheels from locking so you can retainsteering control. You should con-
tinue to press on the brake pedal
with the same force.
You may feel a slight movement of the brake pedal just after you start
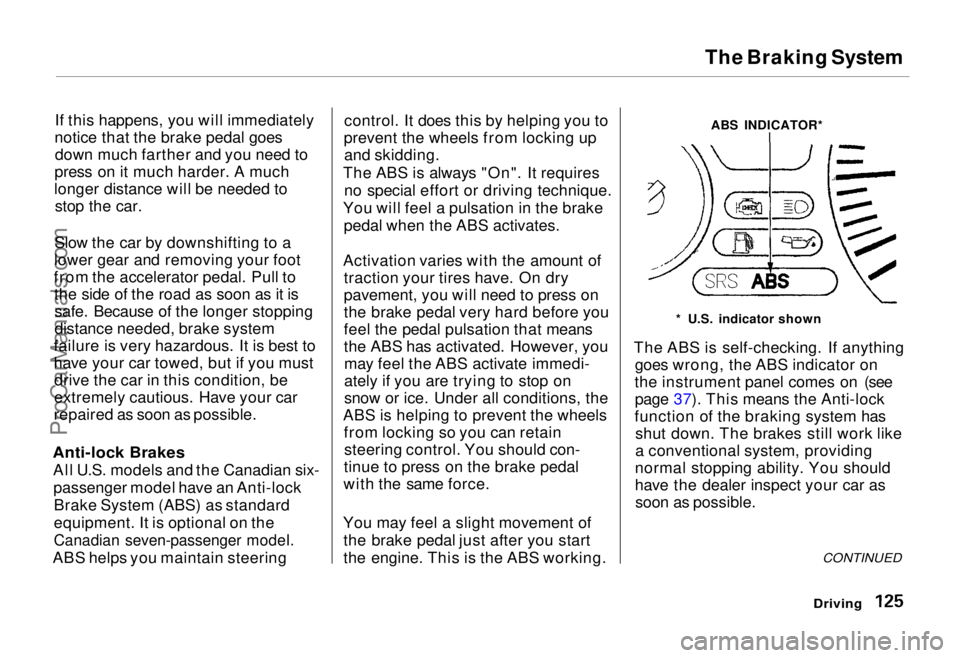
the engine. This is the ABS working. ABS INDICATOR*
* U.S. indicator shown
The ABS is self-checking. If anything goes wrong, the ABS indicator on
the instrument panel comes on (see page 37). This means the Anti-lock
function of the braking system has shut down. The brakes still work like
a conventional system, providing
normal stopping ability. You should
have the dealer inspect your car as soon as possible.
CONTINUED
DrivingProCarManuals.comMain Menu Table of Contents s t