Page 79 of 486

Downloaded from www.Manualslib.com manuals search engine Ignition Switch
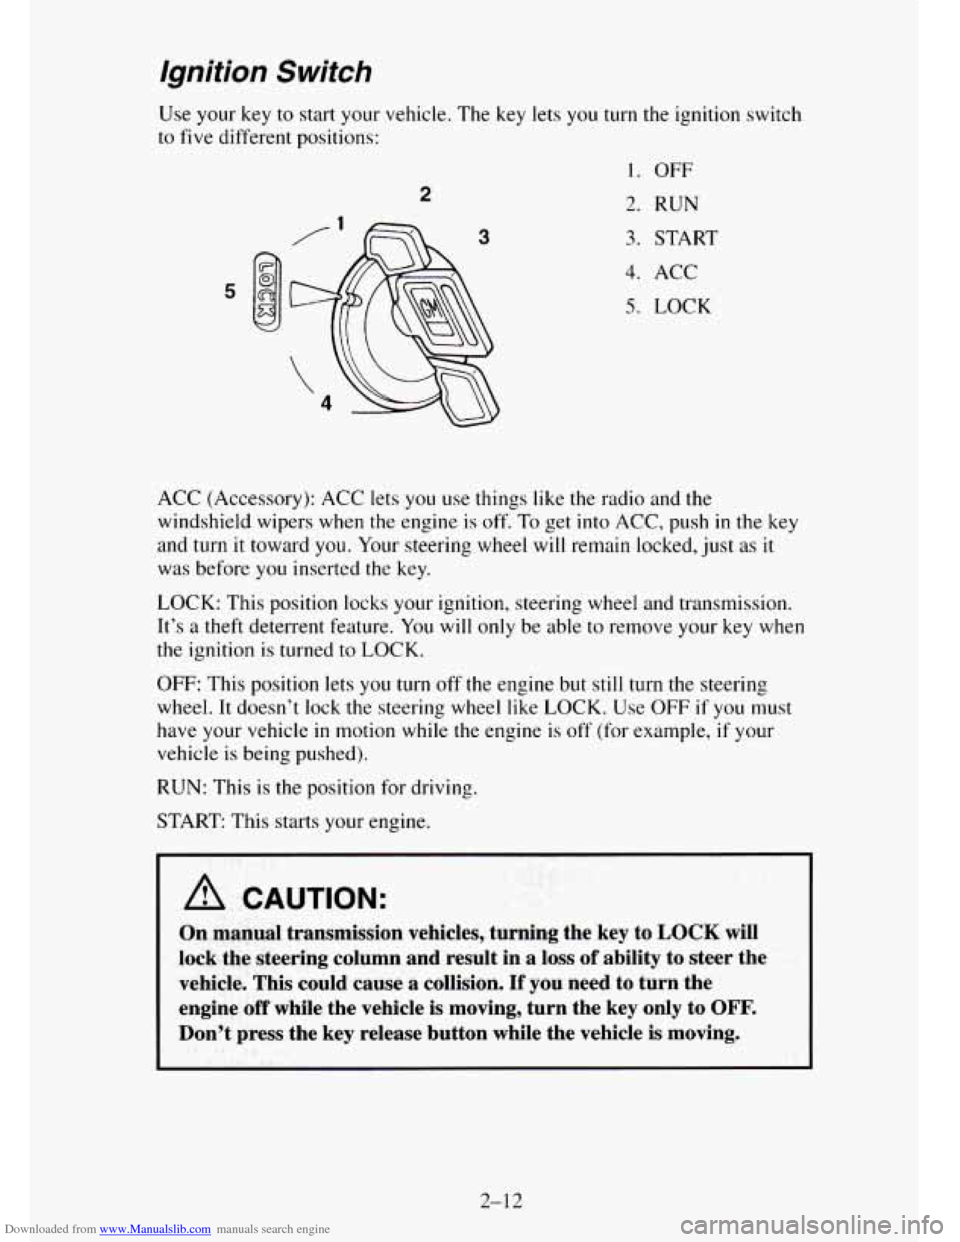
Use your key to start your vehicle. The key lets you turn the ignition switch
to
five different positions:
2
3
1. OFF
2. RUN
3. START
4. ACC
5. LOCK
ACC (Accessory): ACC lets you use things like the radio and the
windshield wipers when the engine is off. To get into ACC, push in the key
and turn it toward you. Your steering wheel will remain locked, just
as it
was before
you inserted the key.
LOCK: This position locks your ignition, steering wheel and transmission.
It’s a theft deterrent feature. You will only be able to remove your key when
the ignition is turned to LOCK.
OFF: This position lets you turn off the engine but still turn the steering
wheel.
It doesn’t lock the steering wheel like LOCK. Use OFF if you must
have your vehicle
in motion while the engine is off’ (for example, if your
vehicle is being pushed).
RUN: This is the position for driving.
START: This starts your engine.
I I
A CAUTION:
On manual transmission vehicles, turning the key to LOCK will
lock the steering column and result in
a loss of ability to steer the
vehicle. This could cause
a collision. If you need to turn the
engine
off while the vehicle is moving, turn the key only to OFF.
Don’t press the key release button while the vehicle is moving.
2-12
Page 106 of 486
Downloaded from www.Manualslib.com manuals search engine Tilt Wheel (Option)
A tilt steering wheel
allows you to adjust
the steering wheel
BEFORE you drive.
You can also raise it to the highest level
to give your legs more room when
you enter and exit the vehicle.
To tilt the wheel, hold the steering wheel and pull the lever. Move the
steering wheel to a comfortable level, then release the lever to lock the
wheel in place.
Multifunction Lever
The lever on the left side of the steering column includes your:
Turn Signal and Lane Change Indicator
Headlamp High-Low Beam & Passing Signal
Windshield Wipers
Windshield Washer
Cruise Control (Option)
2-39
I
Page 108 of 486
Downloaded from www.Manualslib.com manuals search engine Headlamp High-Low Beam
... ..
Windshield Wipers
To change the
headlamps from low
beam to high or high
to
low, pull the turn
signal lever all the
way toward
you. Then
release it.
When the high beams
are
on, this blue light
on the instrument
panel also will be on.
You control the
windshield wipers by
turning
the band with
the wiper symbol on it.
2-41
Page 109 of 486

Downloaded from www.Manualslib.com manuals search engine For a single wiping cycle, turn the band to MIST. Hold it there until the
wipers start, then let go. The wipers will stop after one cycle. If you want
more cycles, hold the band
on MIST longer.
You can set the wiper speed for a long or short delay between wipes. This
can be very useful in light rain or snow. Turn the band to choose the delay
time. The closer
to LOW, the shorter the delay.
For steady wiping at low speed,
turn the band to the LOW position. For high
speed wiping, turn the band further, to
HIGH. To stop the wipers, move the
band to the off symbol.
Remember that damaged wiper blades may prevent
you from seeing well
enough to drive safely.
To avoid damage, be sure to clear ice and snow from
the wiper blades before using them.
If they are frozen to the windshield,
carefully loosen or thaw them.
If your blades do become damaged, get new
blades
or blade inserts.
Heavy snow or ice can overload your wipers. The windshield wiper motor is
protected from overload by a circuit breaker and
a fuse. If the motor
overheats due to heavy snow, etc.,
the wiper will stop until the motor cools.
Although the circuit is protected from electrical overload, overload due
to
heavy snow, etc. may cause wiper linkage damage. Always clear ice and
heavy snow from the windshield before using your windshield wipers.
Windshield Washer
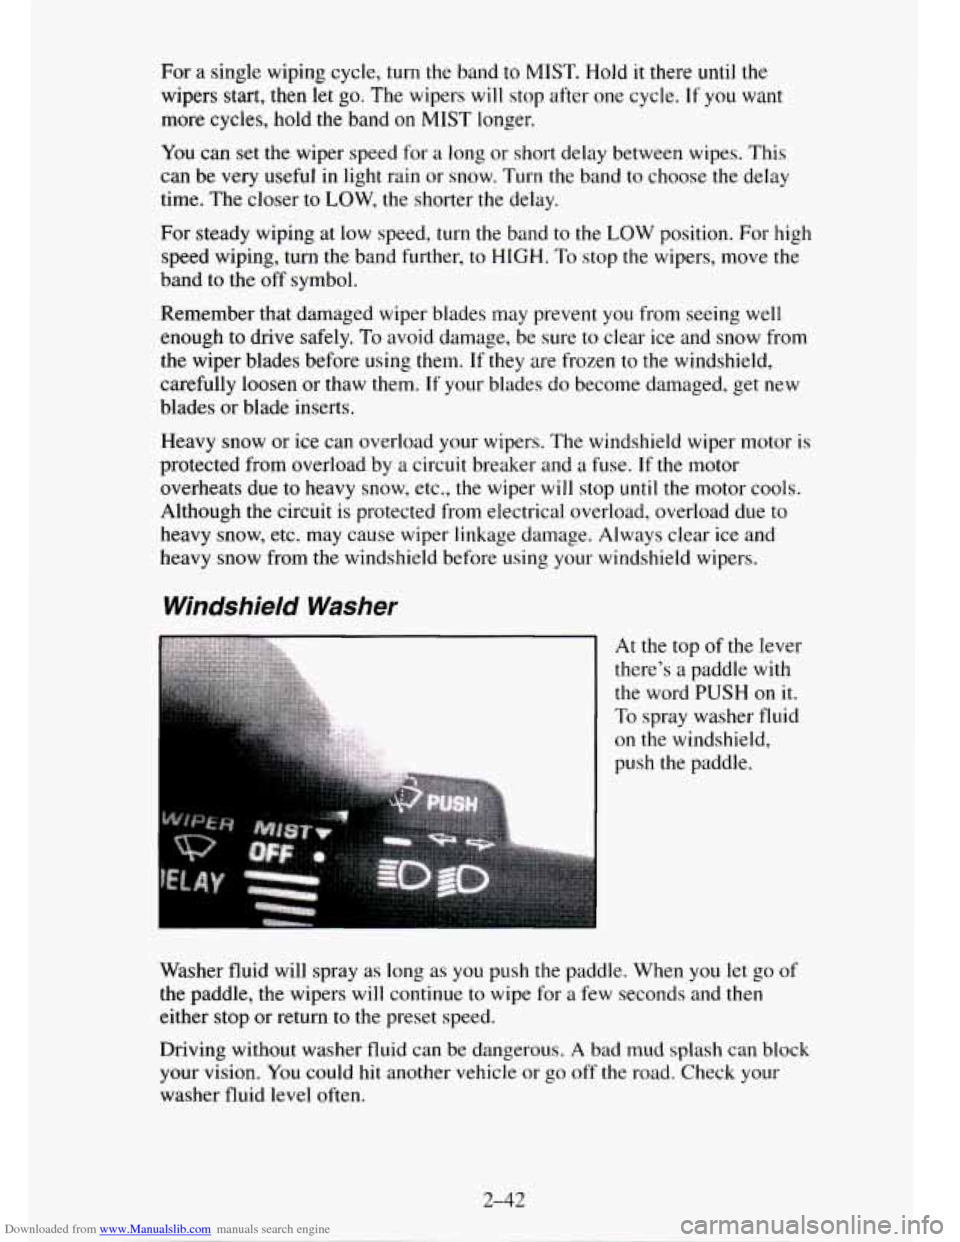
At the top of the lever
there’s a paddle with
the word PUSH on it.
To spray washer fluid
on the windshield,
push the paddle.
Washer fluid will spray as long as
you push the paddle. When you let go of
the paddle, the wipers will continue to wipe for a few seconds and then
either stop or return to the preset speed.
Driving without washer fluid can be dangerous.
A bad mud splash can block
your vision. You
could hit another vehicle or go off the road. Check your
washer fluid level often.
2-42
Page 352 of 486

Downloaded from www.Manualslib.com manuals search engine Fuses and Circuit Breakers
The wiring circuits in your vehicle are protected from short circuits by a
combination of fuses, circuit breakers, and fusible thermal links
in the
wiring itself. This greatly reduces the chance
of fires caused by electrical
problems. See “Fuses and Circuit Breakers”
in the Index for more
information.
Headlamps
The headlamp wiring is protected by a circuit breaker in the lamp switch.
An electrical overload will cause
the lamps to flicker on and off, or in some
cases to remain off. If this happens, have your headlamp wiring checked
right away.
Windshield Wipers
The windshield wiper motor is protected by a circuit breaker and a fuse. If
the motor overheats due
to heavy snow, etc., the wiper will stop until the
motor cools. Although the circuit is protected from electrical overload,
overload due
to heavy snow, etc., may cause wiper linkage damage. Always
clear ice and heavy snow from the the windshield before using the
windshield wipers. If the overload
is caused by some electrical problem and
not snow, etc., be sure to get it fixed.
Power Windows and Other Power Options
Circuit breakers in the fuse panel protect the power windows and other
power accessories. When the current load is
too heavy, the circuit breaker
opens and closes. This protects the circuit
until the current load returns to
normal
or the problem is fixed.
Trailer Wiring Harness
The seven-wire trailer wiring harness is protected by an in-line fuse in the
battery feed wire. This fuse is near the junction block. See “Trailer Wiring
Harness”
in the Index for more information.
6-75
Page 484 of 486
Downloaded from www.Manualslib.com manuals search engine Hub Caps and Wheel Nut Caps ..................................
NutTighteningSequence .......................................
NutTorque ..................................................
Replacement .................................................
Used Replacement ............................................
Windows ......................................................
5-32
5-37
6-77
6-60
6-61
2-35
Defogger. Rear
............................................ 3-7
Rear Window Wiper and Washer ................................. 2-56
Washer ...................................................... 2-42
WasherFluid
................................................. 6-40
Wiper Blade Chatter ........................................... 6-67
Wiper Blade Cleaning (See “Cleaning”)
Wiper Blade Replacement
...................................... 6-44
Wipers ...................................................... 2-41
Windshield
11