1995 CHEVROLET TAHOE jacking
[x] Cancel search: jackingPage 257 of 486
Downloaded from www.Manualslib.com manuals search engine h
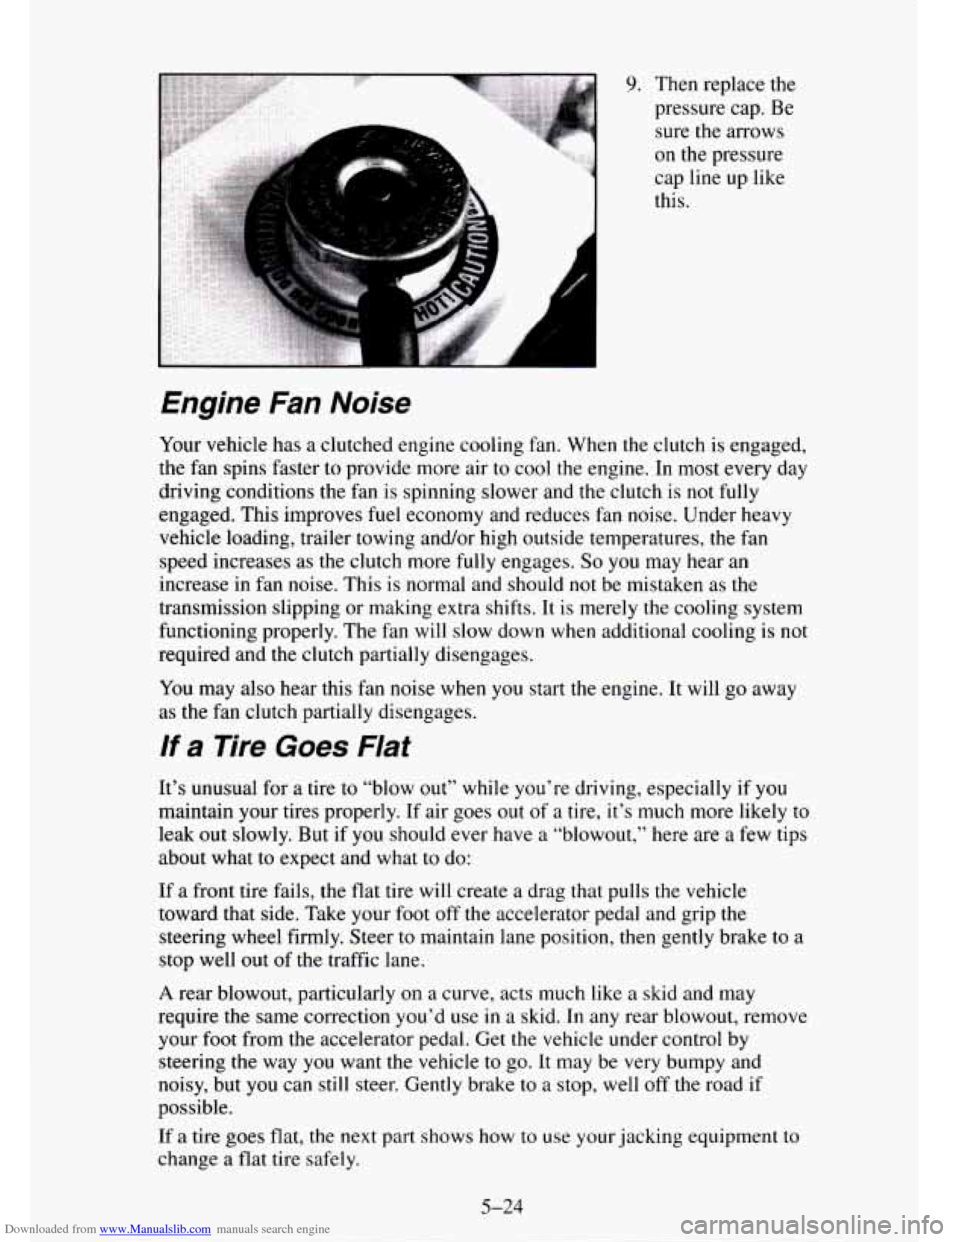
9. Then replace the
pressure cap. Be
sure the arrows
on the pressure
cap line up like
this.
Engine Fan Noise
Your vehicle has a clutched engine cooling fan. When the clutch is engaged,
the fan spins faster to provide more air to cool the engine. In most every day
driving conditions the fan
is spinning slower and the clutch is not fully
engaged. This improves fuel economy and reduces fan noise. Under heavy
vehicle loading, trailer towing and/or high outside temperatures,
the fan
speed increases as the clutch more
fully engages. So you may hear an
increase in fan noise. This is normal and should not be mistaken as the
transmission slipping
or making extra shifts. It is merely the cooling system
functioning properly. The fan will slow down when additional cooling is not
required and the clutch partially disengages.
You may also hear this fan noise when you start the engine. It will go away
as the fan clutch partially disengages.
If a Tire Goes Flat
It’s unusual for a tire to “blow out” while you’re driving, especially if you
maintain your tires properly. If air goes out of a tire, it’s much more likely to
leak out slowly. But if you should ever have a “blowout,” here are a few tips
about what
to expect and what to do:
If a front tire fails, the flat tire will create a drag that pulls the vehicle
toward that side. Take your foot off the accelerator pedal and grip the
steering wheel firmly. Steer
to maintain lane position, then gently brake to a
stop well out of the traffic lane.
A rear blowout, particularly on a curve, acts much like a skid and may
require the same correction you’d
use in a skid. In any rear blowout, remove
your foot from
the accelerator pedal. Get the vehicle under control by
steering the way
you want the vehicle to go. It may be very bumpy and
noisy, but you can still steer. Gently brake to a stop, well
off the road if
possible.
If a tire goes flat, the next part shows how to use your jacking equipment to
change a flat tire safely.
5-24
Page 259 of 486
Downloaded from www.Manualslib.com manuals search engine Spare Tire - ZDoor Utility Model and Suburban
I
c
I
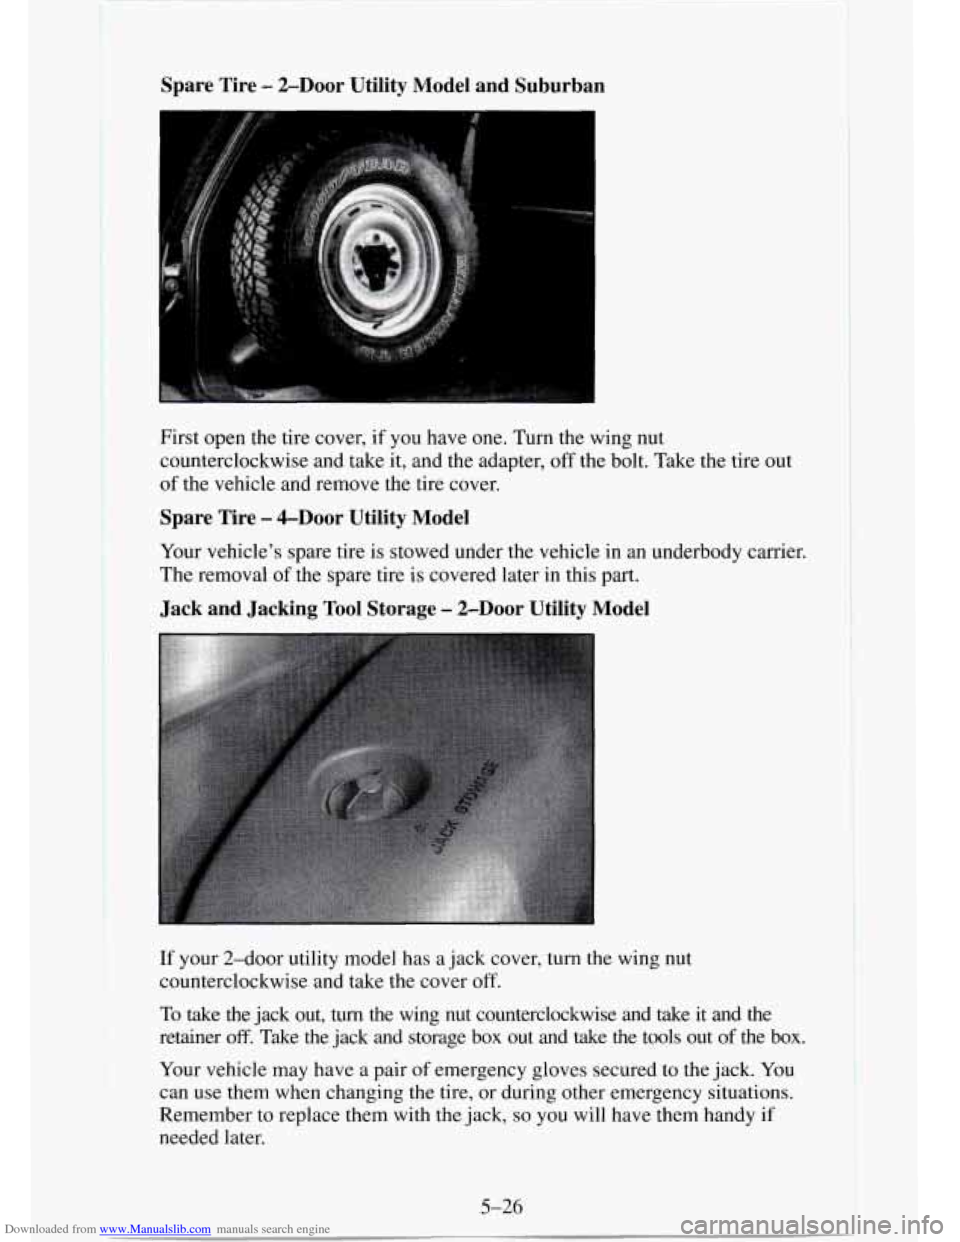
First open the tire cover, if you have one. Turn the wing nut
counterclockwise and take it, and the adapter,
off the bolt. Take the tire out
of the vehicle and remove the tire cover.
Spare Tire - &Door Utility Model
Your vehicle’s spare tire is stowed under the vehicle in an underbody carrier.
The removal
of the spare tire is covered later in this part.
Jack and Jacking Tool Storage - 2-Door Utility Model
If your 2-door utility model has a jack cover, turn the wing nut
counterclockwise and take the cover off.
To take the jack out, turn the wing nut counterclockwise and take it and the
retainer
off. Take the jack and storage box out and take the tools out of the box.
Your vehicle may have a pair
of emergency gloves secured to the jack. You
can use them when changing the tire,
or during other emergency situations.
Remember
to replace them with the jack, so you will have them handy if
needed later.
5-26
Page 260 of 486
Downloaded from www.Manualslib.com manuals search engine Jack and Jacking Tool Storage - &Door Utility Model
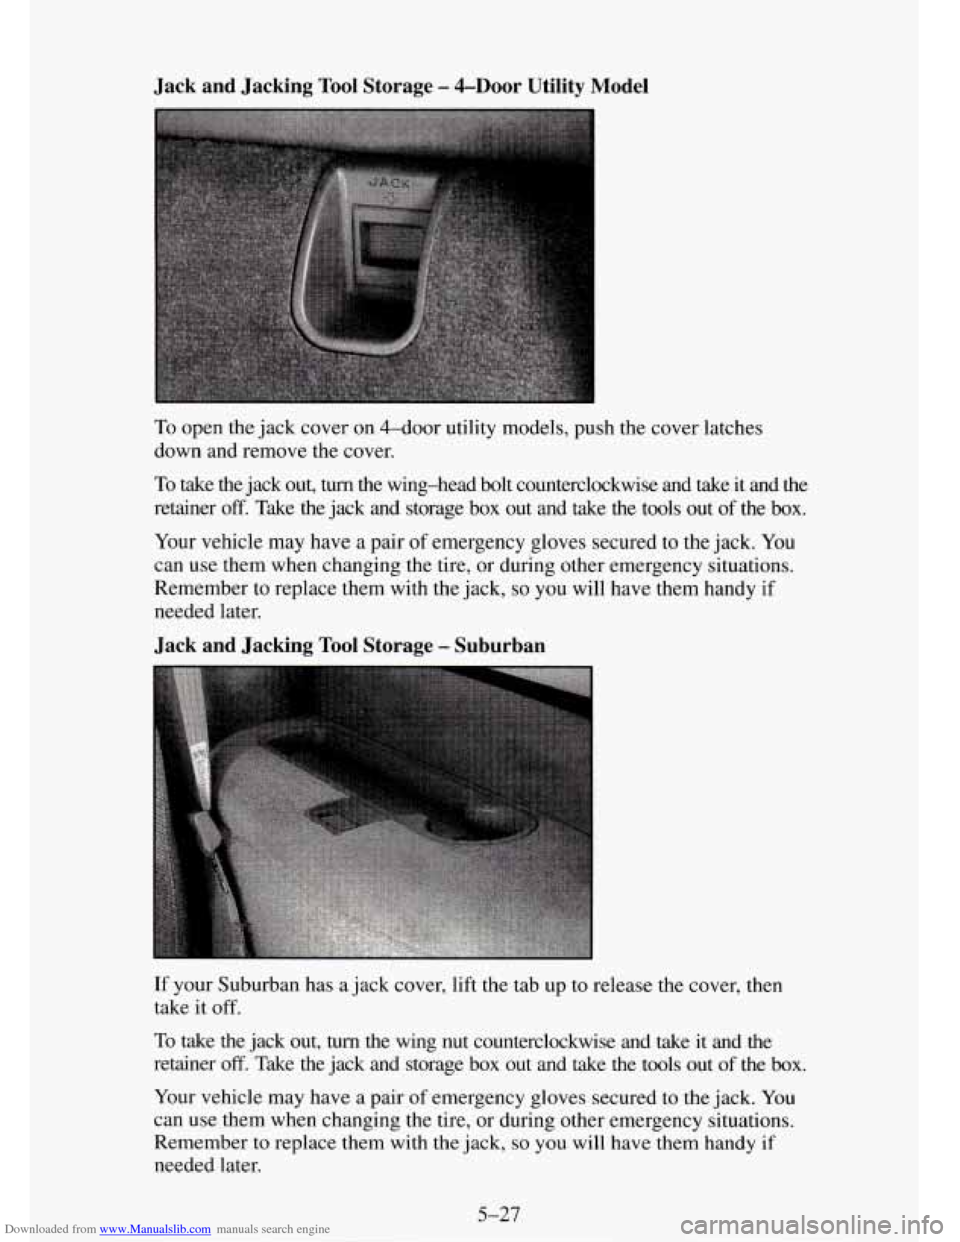
To open the jack cover on 4-dOOr utility models, push the cover latches
down and remove the cover.
To take the jack out, turn the wing-head bolt counterclockwise and take it and the
retainer
off. Take the jack and storage box out and take the tools out of the box.
Your vehicle may have a pair of emergency gloves secured to the jack. You
can use them when changing the tire, or during other emergency situations.
Remember
to replace them with the jack, so you will have them handy if
needed later.
Jack and Jacking Tool Storage - Suburban
If your Suburban has a jack cover, lift the tab up to release the cover, then
take it
off.
To
take the jack out, turn the wing nut counterclockwise and take it and the
retainer
off. Take the jack and storage box out and take the tools out of the box.
Your vehicle may have a pair
of emergency gloves secured to the jack. You
can use them when changing the tire, or during other emergency situations.
Remember to replace them with the jack,
so you will have them handy if
needed later.
5-27
Page 261 of 486
Downloaded from www.Manualslib.com manuals search engine Jacking Tool Storage - All Models
-2
5
U
'4
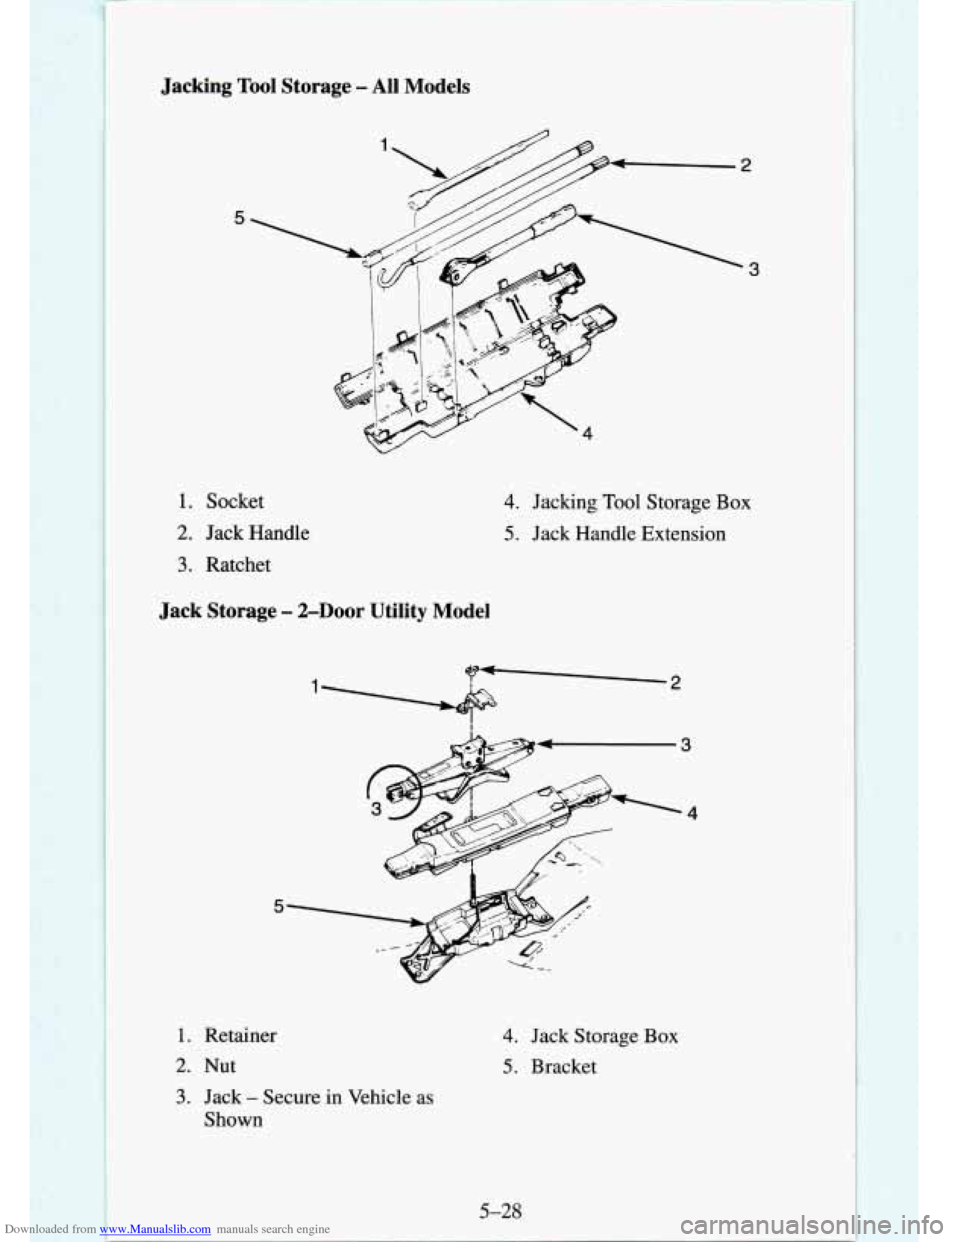
1. Socket
2. Jack Handle
3. Ratchet
Jack Storage - 2-Door Utility Model
4. Jacking Tool Storage Box
5. Jack Handle Extension
1. Retainer
2. Nut
3. Jack - Secure in Vehicle as
Shown
4. Jack Storage Box
5. Bracket
5-28
Page 272 of 486
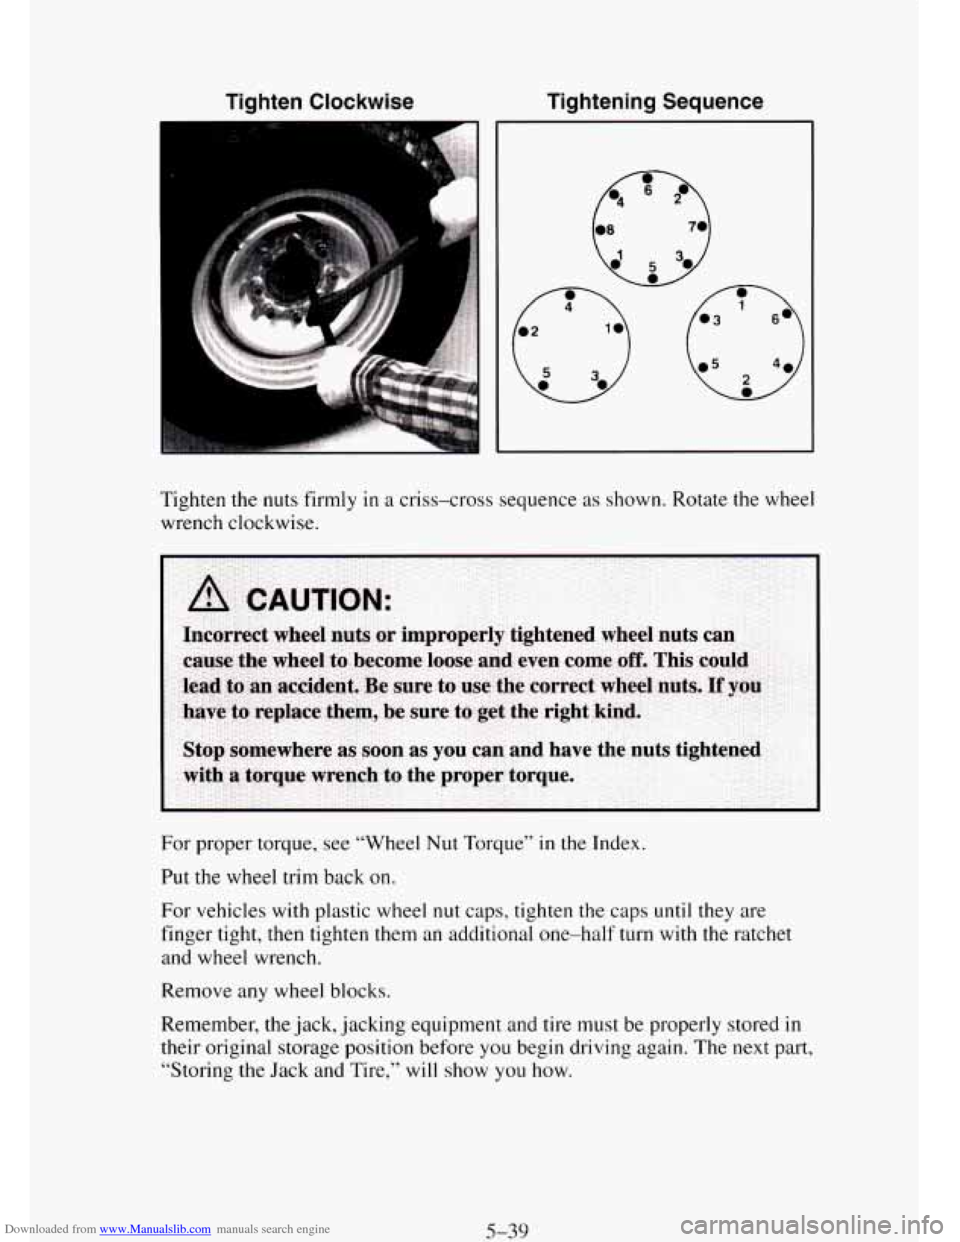
Downloaded from www.Manualslib.com manuals search engine Tighten Clockwise Tightening Sequence
Tighten
the nuts firmly in a criss-cross sequence as shown. Rotate the wheel
wrench clockwise.
For proper torque, see “Wheel Nut Torque”
in the Index.
Put
the wheel trim back on.
For vehicles with plastic wheel
nut caps, tighten the caps until they are
finger tight, then tighten them an additional one-half turn with the ratchet
and wheel wrench.
Remove any wheel blocks.
Remember, the jack, jacking equipment and
tire must be properly stored in
their original storage position before you begin driving again. The next part,
“Storing the Jack and Tire,” will show you how.
5-39
Page 273 of 486
Downloaded from www.Manualslib.com manuals search engine Stowing the Tire - &Door Utility Model
For a under-body spare tire carrier, stow the flat tire under the rear of the
vehicle in
the spare tire carrier. To stow the flat tire:
1. Put the tire
on the ground at the rear of the vehicle with the valve stem
2. Pull the wheel retainer through the wheel opening.
pointed
down.
3. Attach the ratchet to the wheel wrench with the UP marking facing you.
4. Put the other end of the wheel wrench through the rear bumper access
hole, located at the passenger side edge of the license plate. Be sure the
wheel wrench connects into the hoist shaft.
5. Turn the ratchet clockwise to raise the tire. Keep turning the ratchet
until the tire
is all the way up. You will hear two “clicks” when the tire
is secure. Pull on the tire to make sure
it is tightly secured.
Stowing the Jack and Jacking Tools
Put the tools into the storage box and close it tightly. Fit the storage box on the
bracket with the bolt through the
box. Put the jack onto the box. Be sure the jack
points in
the right direction as shown in the illustrations earlier in this part. Secure the
emergency gloves, if your vehicle has them, to the jack using the provided strap.
Slide the retainer over the bolt onto the jack and put the wing
nut on. Turn
the nut clockwise until it is tight against the retainer.
Replace the jack storage cover, if your vehicle has one, by simply reversing
the removal procedure described earlier.
Stowing the Tire - 2-Door Utility Model and Suburban
Stow the flat tire in the cargo area of the vehicle secured in the tire carrier.
To stow the flat tire:
1. Put the cover back on the tire
if your vehicle has one.
2. Put the flat tire in the cargo area of the vehicle, over the retainer bolt.
3. Slide the adapter onto the bolt in the proper location for your model
4. Turn the wing nut clockwise until the adapter is tight and secure against
and
put
the wing nut on.
the wheel.
5. Close the tire cover, if you have one.
5-40
Page 478 of 486
Downloaded from www.Manualslib.com manuals search engine G
Gages Engine Coolant Temperature Gage
................................
FuelGage ...................................................
Oil Pressure Gage .............................................
Speedometer .................................................
Tachometer ..................................................
Tamper Resistant Odometer .....................................
Trip Odometer ................................................
Voltmeter ....................................................
2-79
2-78
2-80
2-68
2-69
2-68
2-68
2-81
Halogen Bulbs (See “Bulb Replacement”)
Hazard Warning Flashers
........................................... 5-1
Head Restraints (See “Seats”)
Headlamps and Vehicle Lighting
.................................... 2-48
Replacement (See “Bulb Replacement”)
High Beam Indicator Light (See “Lights”)
High-LowBeamChanger
...................................... 2-38
Reminder .................................................... 2-46
Heatercontrols .................................................. 3-1
RearHeater ................................................... 3-5
Heater/Air Conditioning Controls .................................... 3-2
Rear Air Conditioning ........................................... 3-4
Refrigerant Capacity ........................................... 6-79
Highway Hypnosis (See “Driving-Highway Hypnosis”)
Hitches (See “Towing-Hitches”)
Hood Checking Under, Hood Release
.................................. 6-13
Horn .......................................................... 2-38
Hydraulicclutch ................................................ 6-30
Howtocheck ................................................ 6-31
When to Check and What to Use ................................. 6-31
Hydroplaning (See “Driving in the Rain”)
If You’re Stuck in Sand. Mud. Ice. or Snow ........................... 5-41
Ignitionswitch .................................................. 2-12
Inflation-Tire Pressure (See “Tires”)
Instrument Cluster
............................................... 2-67
Instrumentpanel ................................................ 2-67
Jacking Equipment Storage ................................... 5.26. 5-40
Jump Starting .................................................... 5-2
.