1995 CHEVROLET SUBURBAN air condition
[x] Cancel search: air conditionPage 6 of 486
Table of Contents
Introduction - How to Use this Manual
This section tells you how to use your manual and includes safety
and vehicle damage warnings and symbols.
Section 1 - Seats and Restraint Systems
This section tells you how to use your seats and safety belts
properly. It also explains the air bag system.
Section 2 - Features & Controls
This section explains how to start and operate your vehicle.
Section 3 - Comfort Controls & Audio Systems
This section tells you how to adjust the ventilation and comfort
controls and how to operate your audio system.
Section 4 - Your Driving and the Road
Here you’ll find helpful information and tips about the road and
how to drive under different conditions.
Section 5 - Problems on the Road
This section tells you what to do if you have a problem while
driving, such as a flat tire or engine overheating, etc.
Section 6 - Service & Appearance Care
Here the manual tells you how to keep your vehicle running
properly and looking good.
Section 7 - Maintenance Schedule
This section tells you when to perform vehicle maintenance and
what fluids and lubricants to use.
Section 8 - Customer Assistance Information
This section tells you how to contact GM for assistance and how to
get service publications. It also gives you information on
“Reporting Safety Defects” on page
8-4.
Index
Here’s an alphabetical listing of almost every subject in this
manual. You can use it to quickly find something you want to read.
i
ProCarManuals.com
Page 46 of 486
When should an air bag inflate?
The air bag is designed to inflate in moderate to severe frontal or near-frontal
crashes. The air bag
will inflate only if the impact speed is above the system’s
designed “threshold level.” If your vehicle goes straight into a wall that doesn’t
move or deform, the threshold level is about 12 to 16 mph (19 to 26
km/h).
The threshold level can vary, however, with specific vehicle design, so that it
can be somewhat above or below
this range. If your vehicle strikes something
that will move or deform, such as a parked car, the threshold level will be
higher. The air bag is not designed to inflate
in rollovers, side impacts, or rear
impacts, because inflation would not help the occupant.
In any particular crash, no one can say whether an air bag should have
inflated simply because of the damage to a vehicle or because of what the
repair costs were. Inflation is determined
by the angle of the impact and the
vehicle’s deceleration. Vehicle damage is only one indication of this.
The air bag system is designed to work properly under a wide range
of
conditions, including off-road usage. Observe safe driving speeds,
especially on rough terrain.
As always, wear your safety belt. See
“Off-Road Driving”
in the Index for more tips on off-road driving.
What makes an air bag inflate?
In a frontal or near-frontal impact of sufficient severity, the air bag sensing
system detects that the vehicle is suddenly stopping as a result
of a crash.
The sensing system triggers a chemical reaction of the sodium azide sealed
in the inflator. The reaction produces nitrogen gas, which inflates the air
bag. The inflator, air bag, and related hardware are all part of the air bag
module packed inside the steering wheel.
How does an air bag restrain?
In moderate to severe frontal or near-frontal collisions, even belted
occupants can contact the steering wheel. The air bag supplements the
protection provided by safety belts. Air bags distribute the force of the
impact more evenly over the occupant’s upper body, stopping the occupant
more gradually. But air bags would not help you in many types
of collisions,
including rollovers and rear and side impacts, primarily because an
occupant’s motion is not toward the air bag. Air bags should never be
regarded as anything more than a supplement to safety belts, and then only
in moderate to severe frontal or near-frontal collisions.
What will you see after an air bag inflates?
After the air bag inflates, it quickly deflates. This occurs so quickly that some
people may not even realize
the air bag inflated. Some components of the air
bag module in the steering wheel hub will be hot for a short time, but the part
of the bag that comes into contact with you will not be hot
to the touch. There
will be some smoke and dust coming from vents in the deflated air bag. Air
bag inflation
will not prevent the driver from seeing or from being able to
steer the vehicle, nor
will it stop people from leaving the vehicle.
1-31
ProCarManuals.com
Page 48 of 486
Adding Equipment to Your Air Bag-Equipped Vehicle
Q: IfI add a push bumper or a bicycle rack to the front of my vehicle,
A: As long as the push bumper or bicycle rack is attached to your vehicle
will it keep the air bag from working properly?
so that the vehicle’s basic structure isn’t changed, it’s not likely to keep
the air bags from working properly
in a crash.
Q: What if I add a snow plow? Will it keep the air bag from working
properly?
A: We’ve designed our air bag systems to work properly under a wide
range
of conditions, including snow plowing with vehicles equipped
with the optional Snow Plow Prep Package (RPO VYU). But don’t
change or defeat the snow plow’s “tripping mechanism.”
If you do, it
can damage your snow plow and your vehicle, and it may cause an air
bag inflation.
Q: Is there anything I might add to the front of the vehicle that could
A: Yes. If you add things that change your vehicle’s frame, bumper
keep the air bag from working properly?
system, front end sheet metal or height, they may keep the air bag
system from working properly. Also, the air bag system may
not work
properly
if you relocate any of the air bag sensors. If you have any
question about this,
you should contact Customer Assistance before
you modify your vehicle. (The phone numbers and addresses for
Customer Assistance are in Step Two
of the Customer Satisfaction
Procedure in this manual. See “Customer Satisfaction Procedure”
in
the Index.)
1-33
ProCarManuals.com
Page 82 of 486
NOTICE:
Your engine is designed to work with the electronics in your
vehicle.
If you add electrical parts or accessories, you could
change the way the fuel injection system operates. Before addin\
g electrical equipment, check with your dealer.
If you don’t, your
engine might not perform properly.
If you ever have to have your vehicle towed, see the part of this
manual that tells how to do it without damaging your vehicle.
See “Towing Your Vehicle” in the Index.
Driving Through Deep Standing Water
NOTICE:
If you drive too quickly through deep puddles or standing water,
water can come in through your engine’s air intake and badl\
y
damage your engine. Never drive through water that is slightly \
lower than the underbody of your vehicle. If you can’t avoid
deep puddles
or standing water, drive through them very slowly.
Driving In Snow (Diesel Engines)
When driving in a heavy snowstorm or in swirling snow with a diesel
engine, snow can get into the air intake system.
If you keep driving in these
conditions the air cleaner may get plugged, causing black smoke and loss
of
power. In an emergency, if the air cleaner gets plugged with snow, you can
remove the air cleaner. Then, drive to
a place of safety as soon as possible
and put
the air cleaner back on.
Starting Your Diesel Engine
Your diesel engine starts differently than a gasoline engine.
1. Move your shift lever to PARK (P) or NEUTRAL (N). Your engine
won’t start
in any other position - that’s a safety feature. To restart
when you’re already moving, use NEUTRAL
(N) only.
2-1 5
ProCarManuals.com
Page 142 of 486
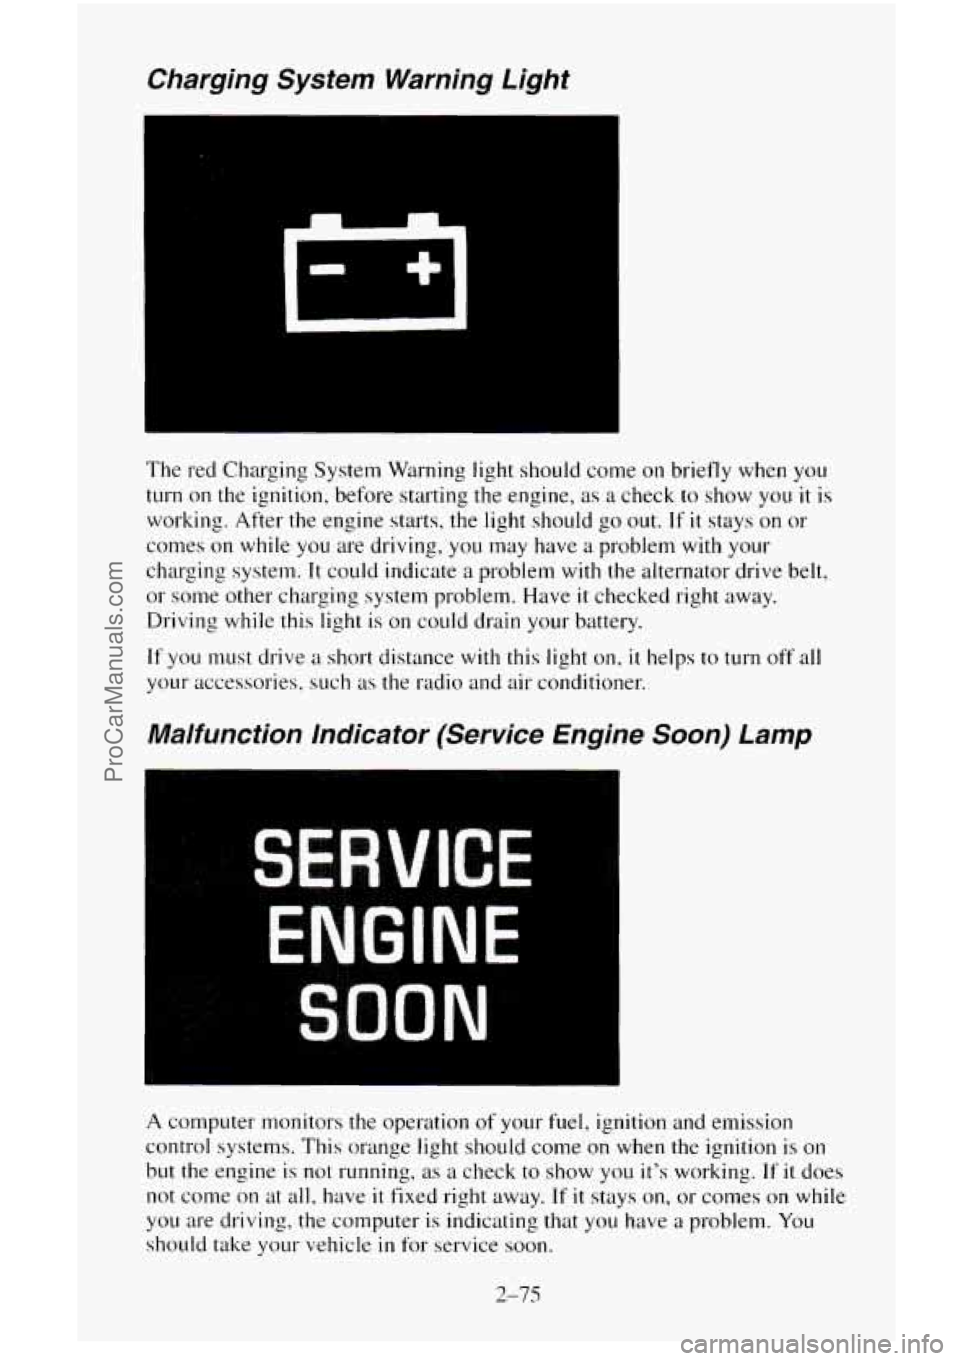
Charging System Warning Light
The red Charging System Warning light should come on briefly when you
turn on the ignition, before starting the engine, as a check to show you it is
working. After the engine starts, the light should go out. If it stays on or
conles on while you are driving, you may have a problem with your
charging system.
It could indicate a problem with the alternator drive belt,
or some other charging system problem. Have
it checked right away.
Driving while this light is on could drain your battery.
If you must drive a short distance with this light on, it helps to turn off all
your accessories, such
as the radio and air conditioner.
Malfunction indicator (Service Engine Soon) Lamp
A computer monitors the operation of your fuel, ignition and emission
control systems.
This orange light should come on when the ignition is on
but the engine is
not running, as a check to show you it’s working. If it does
not come on at all, have
it fixed right away. If it stays on, or comes on while
you are driving, the computer is indicating that you have a problem. You
should take your vehicle in for service soon.
2-75
ProCarManuals.com
Page 156 of 486
Comfort Controls and Audio Systems
Section
In this section you’ll find out how to operate the comfort control systems
and audio systems offered with your vehicle.
Be sure to read about the
particular system supplied with your vehicle.
Comfort Controls
Heater Controls
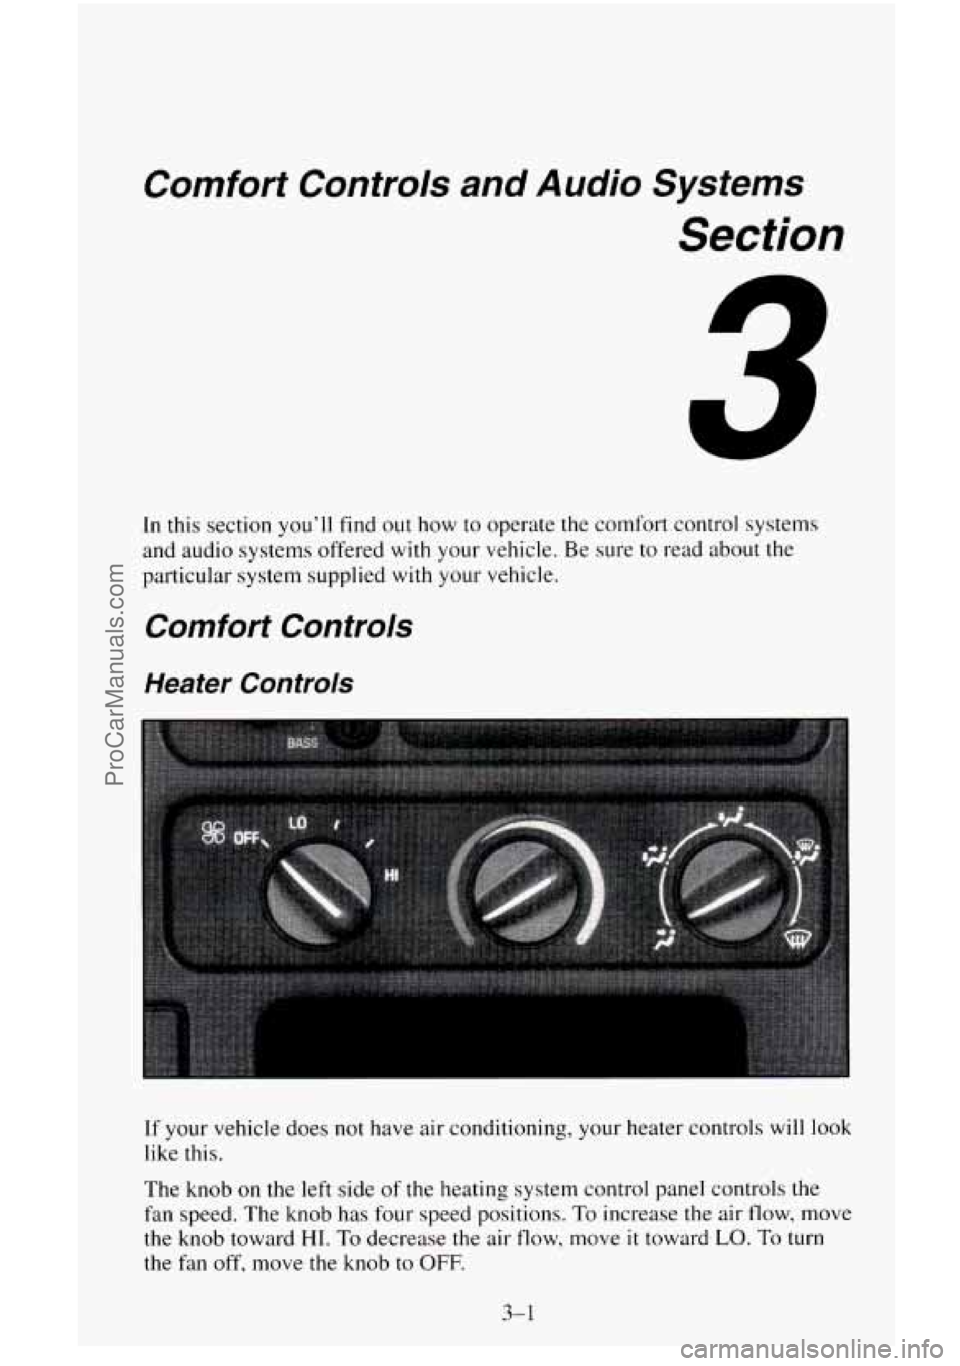
If your vehicle does not have air conditioning, your heater controls will look
like this.
The knob
on the left side of the heating system control panel controls the
fan speed. The knob has four speed positions. To increase the air flow, move
the knob toward
HI. To decrease the air flow, move it toward LO. To turn
the fan off, move the knob
to OFF,
3-1
ProCarManuals.com
Page 157 of 486
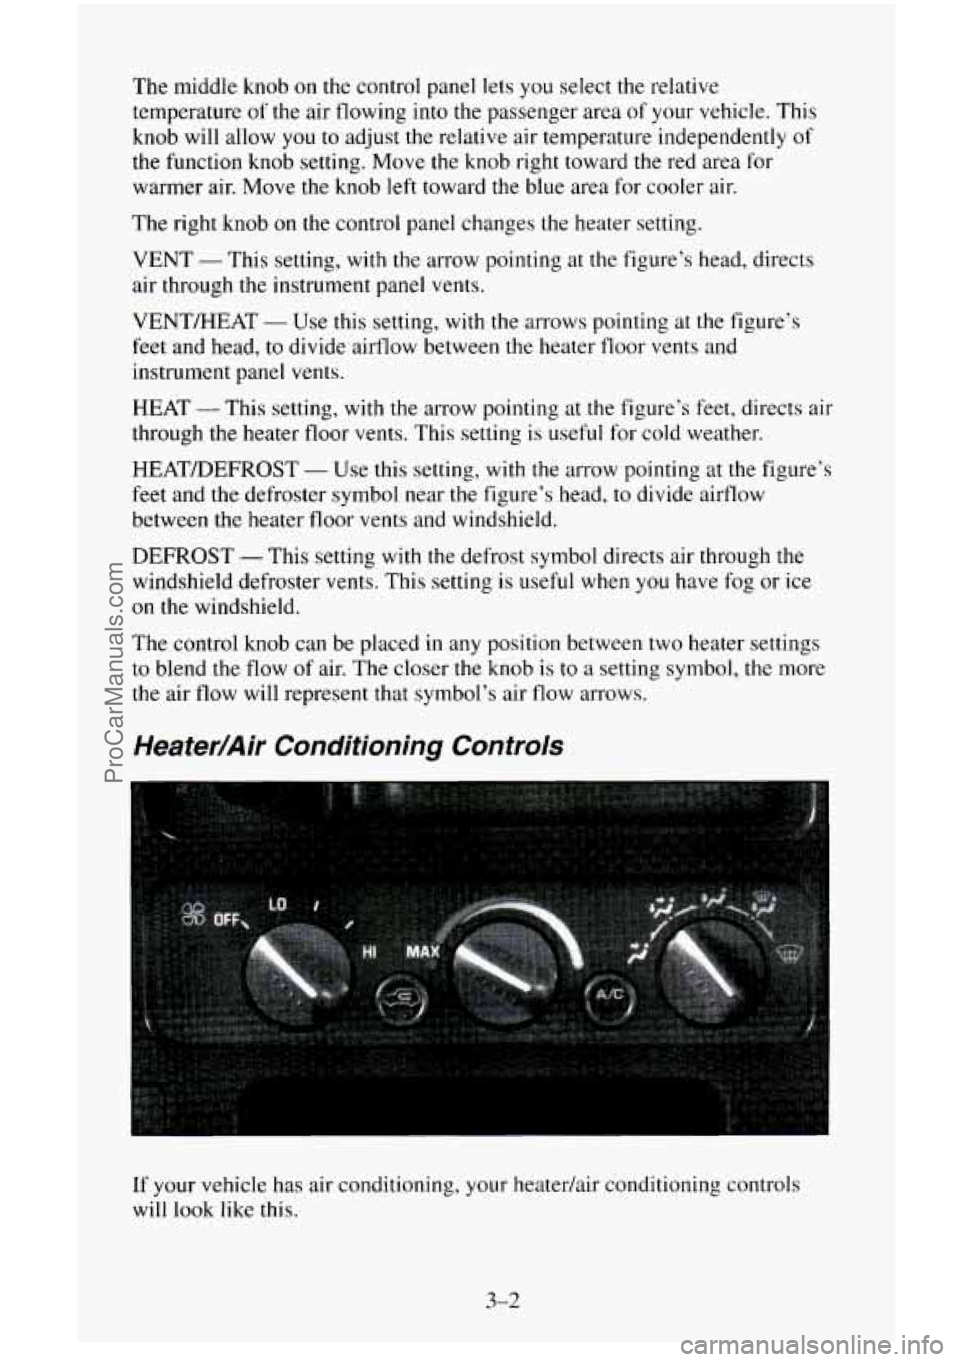
The middle knob on the control panel lets you select the relative
temperature
of the air flowing into the passenger area of your vehicle. This
knob will allow
you to adjust the relative air temperature independently of
the function knob setting. Move the knob right toward the red area for
warmer air. Move the knob left toward the blue area for cooler air.
The right
knob on the control panel changes the heater setting.
VENT
- This setting, with the arrow pointing at the figure’s head, directs
air through the instrument panel vents.
VENT/HEAT
- Use this setting, with the arrows pointing at the figure’s
feet and head, to divide airflow between the heater
floor vents and
instrument panel vents.
HEAT -This setting, with the arrow pointing at the figure’s
feet, directs air
through
the heater floor vents. This setting is useful for cold weather.
HEAT/DEFROST
- Use this setting, with the arrow pointing at the figure’s
feet
and the defroster symbol near the figure’s head, to divide airflow
between the heater floor vents and windshield.
DEFROST -This setting with the defrost symbol directs air through the
windshield defroster vents.
This setting is useful when you have fog or ice
on the windshield.
The control knob
can be placed in any position between two heater settings
to blend the flow of air. The closer the knob is to a setting symbol, the more
the air flow will represent
that symbol’s air flow arrows.
Heater/Air Conditioning Controls
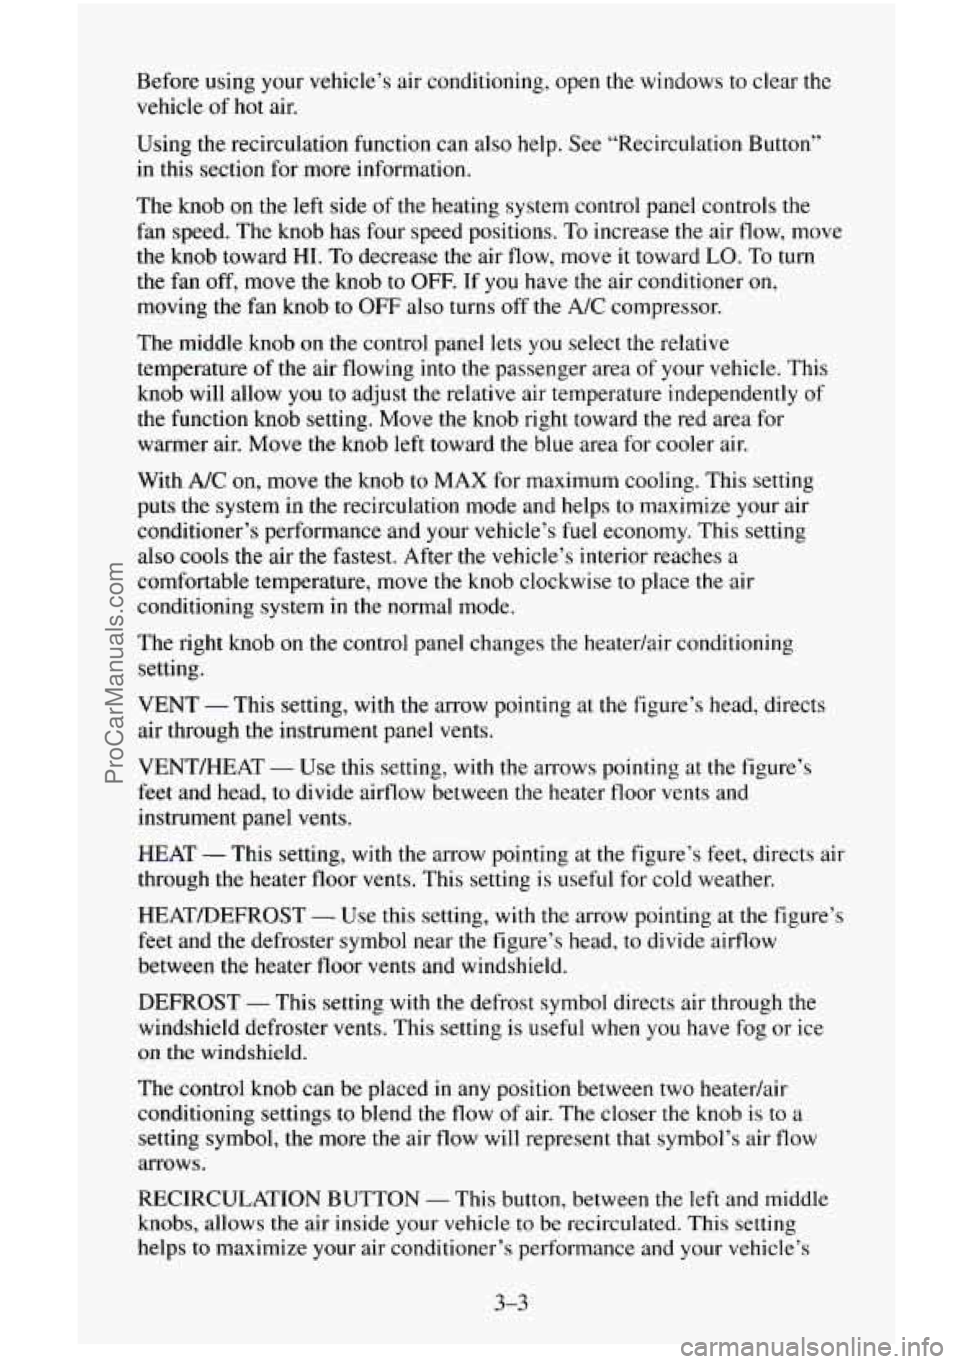
If your vehicle has air conditioning, your heatedair conditioning controls
will look like this.
3-2
ProCarManuals.com
Page 158 of 486
Before using your vehicle’s air conditioning, open the windows to clear the
vehicle of
hot air.
Using the recirculation function can also help. See “Recirculation Button”
in this section for more information.
The knob on the left side of the heating system control panel controls the
fan speed. The knob has four speed positions. To increase the air flow, move
the knob toward HI.
To decrease the air flow, move it toward LO. To turn
the fan off, move the knob to
OFF. If you have the air conditioner on,
moving the fan knob to OFF also turns off the A/C compressor.
The middle knob
on the control panel lets you select the relative
temperature
of the air flowing into the passenger area of your vehicle. This
knob will allow
you to adjust the relative air temperature independently of
the function knob setting. Move the knob right toward the red area for
warmer air. Move the knob left toward the blue area for cooler air.
With
A/C on, move the knob to MAX for maximum cooling. This setting
puts the system in the recirculation mode and helps to maximize your air
conditioner’s performance and your vehicle’s fuel economy. This setting
also cools the air
the fastest. After the vehicle’s interior reaches a
comfortable temperature, move
the knob clockwise to place the air
conditioning system
in the normal mode.
The right knob on the control panel changes the heatedair conditioning
setting.
VENT
- This setting, with the arrow pointing at the figure’s head, directs
air through the instrument panel vents.
VENT/HEAT
- Use this setting, with the arrows pointing at the figure’s
feet and head, to divide airflow between the heater floor vents and
instrument panel vents.
HEAT
- This setting, with the arrow pointing at the figure’s feet, directs air
through the heater floor vents. This setting
is useful for cold weather.
HEAT/DEFROST
- Use this setting, with the arrow pointing at the figure’s
feet and the defroster symbol near
the figure’s head, to divide airflow
between the heater floor
vents and windshield.
DEFROST
- This setting with the defrost symbol directs air through the
windshield defroster vents. This setting is useful when
you have fog or ice
on the windshield.
The control knob can be placed in any position between two heatedair
conditioning settings to blend the flow of air. The closer the knob
is to a
setting symbol, the more
the air flow will represent that symbol’s air flow
arrows.
RECIRCULATION BUTTON
- This button, between the left and middle
knobs, allows the air inside your vehicle to be recirculated. This setting
helps to maximize your air conditioner’s performance and your vehicle’s
3-3
ProCarManuals.com