1995 CHEVROLET CAVALIER air conditioning
[x] Cancel search: air conditioningPage 10 of 340
Downloaded from www.Manualslib.com manuals search engine Vehicle Symbols
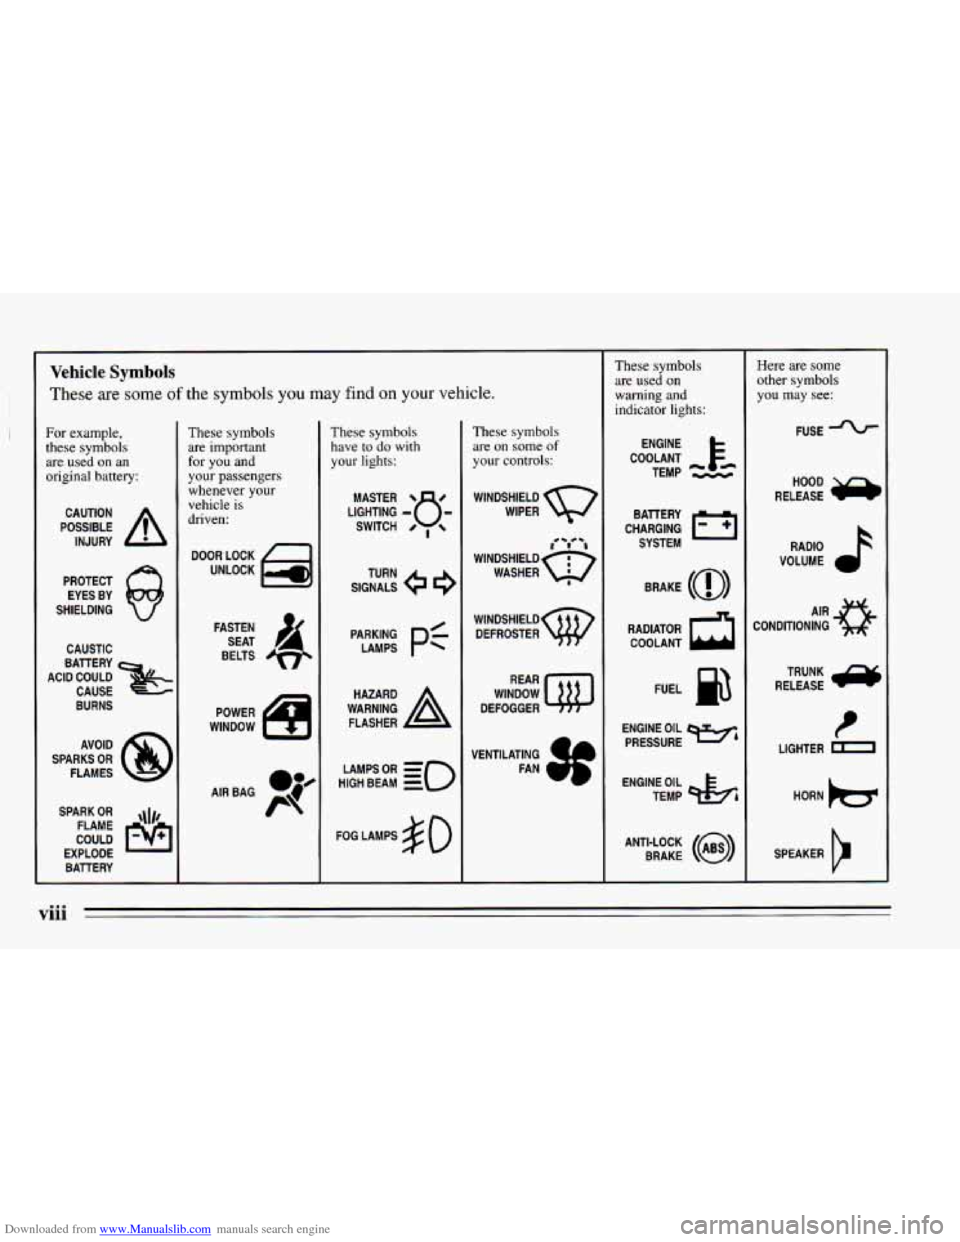
These are some of the symbols you may find on your vehicle.
For example,
these symbols are used on an
original battery:
POSSIBLE A
CAUTION
INJURY
PROTECT EYES BY
SHIELDING
Q
CAUSTIC
ACID COULD BATTERY
CAUSE
BURNS
AVOID
SPARKS
OR
FLAMES
SPARK
OR ,\I/,
COULD FLAME
EXPLODE BATTERY
These symbols
are important
for you and
your passengers
whenever your
vehicle is
driven:
DOOR LOCK
UNLOCK
FASTEN SEAT
4
BELTS
POWER
WINDOW
These symbols have to
do with
your lights:
SIGNALS 6
TURN
HIGH
LAMPSoR BEAM = =o
FOG LAMPS $0
These symbols
are on
some of
your controls:
WINDSHIELD
WIPER
i i
WINDSHIELD
WASHER I
WINDSHIELD DEFROSTER
WINDOW
DEFOGGER
VENTILATING FAN
These symbols are used on
warning and
indicator lights:
COOLANT F-
ENGINE
TEMP
--
CHARGING I-1
BATTERY SYSTEM
BRAKE
(0)
RADIATOR COOLANT
a
FUEL
ENGINE OIL
PRESSURE
Wb
TEMP OIL &
ANTI-LOCK (@)
BRAKE
Here are some
other symbols
you may
see:
FUSE
RELEASE
a
RADIO
VOLUME
CONDITIONING
AIR 43
LIGHTER HORN
)b.
SPEAKER
b
viii
Page 127 of 340
Downloaded from www.Manualslib.com manuals search engine 0 Section 3 Comfort Controls and Audio Svstems J
In this section you’ll find out how to operate the comfort
control systems and audio systems offered with your
Chevrolet. Be sure
to read about the particular system
supplied with your vehicle.
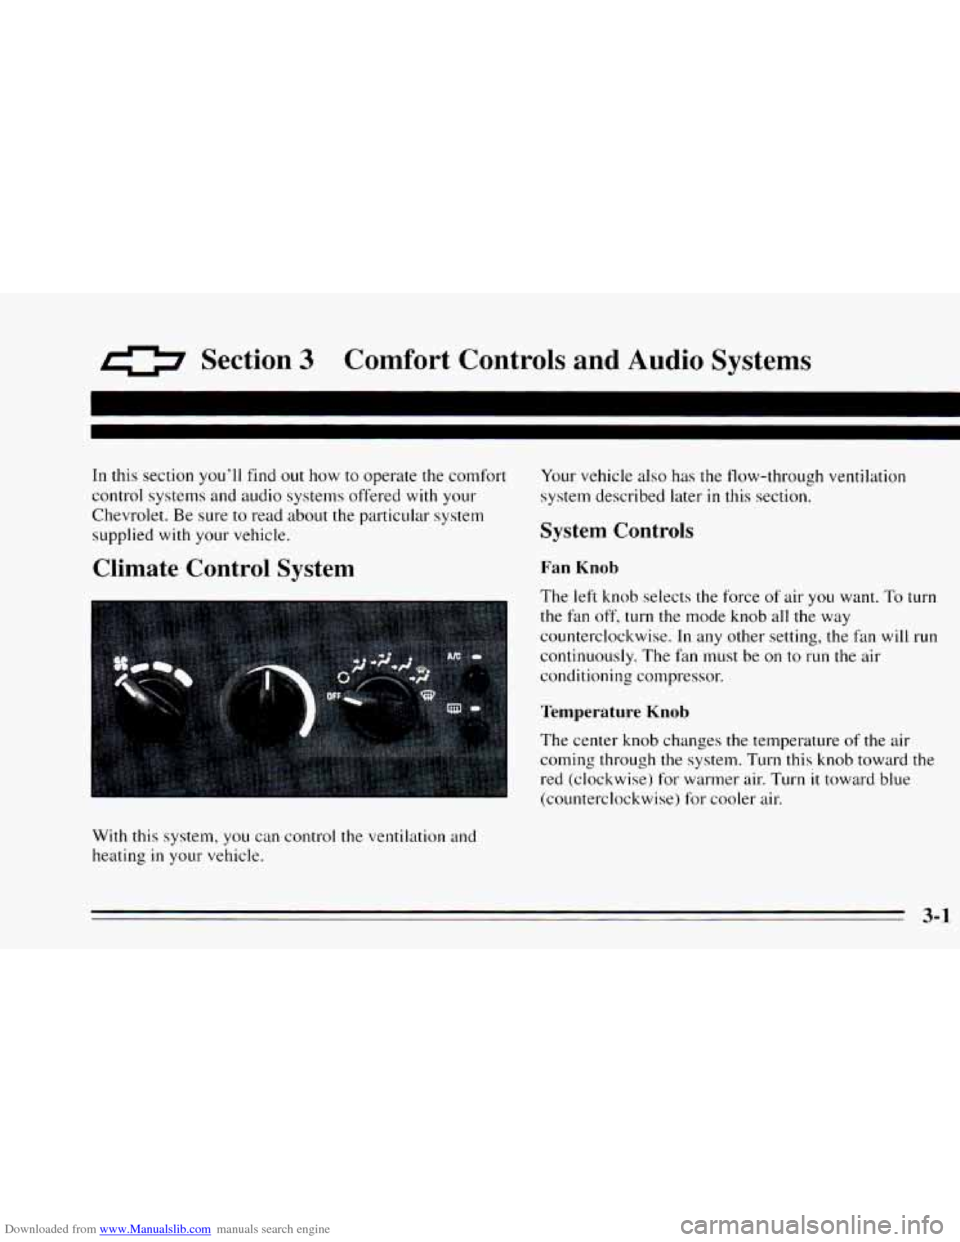
Climate Control System
With this system, you can control the ventilation and
heating
in your vehicle. Your
vehicle also has the flow-through ventilation
system described later
in this section.
System Controls
Fan Knob
The left knob selects the force of air you want. To turn
the fan off, turn the mode knob all the way
counterclockwise.
In any other setting, the fan will run
continuously. The fan must
be on to run the air
conditioning compressor.
Temperature Knob
The center knob changes the temperature of the air
coming through
the system. Turn this knob toward the
red (clockwise) for warmer air. Turn it toward blue
(counterclockwise) for cooler air.
3-1
Page 128 of 340
Downloaded from www.Manualslib.com manuals search engine Mode Knob
The right knob has several settings to control the
direction
of air flow. For each setting, set the
temperature to a comfortable setting.
0 MAX (Option): This setting recirculates much of
the air inside your vehicle and sends it through the
instrument panel outlets. The air conditioning
compressor will run automatically
in this setting when it
is needed to help dry the air in the vehicle.
2 VENT: This setting brings in outside air and
directs it through the instrument panel.
BI-LEVEL: This setting brings in outside air and
directs
it two ways. Some air is directed through the
instrument panel outlets. Most of the air is directed
through the floor ducts and a little
to the defrost and side
window vents.
1j FLOOR: This setting sends most of the air through
the ducts near the floor. The rest comes
out of the
defroster and side window vents.
9 DEFOG: This setting allows half of the air to go to
the floor ducts and half to the defrost and side window
vents.
9 DEFROST: This setting directs most of the air
through the defroster and side window vents. Some
of
the air goes to the floor ducts. If your vehicle is
equipped with an
air conditioner, the air conditioning
compressor will
run automatically in this setting when it
is needed to help dry
the air in the vehicle.
Air Conditioning Compressor Button
Press the A/C button to operate the air conditioner
compressor. The indicator light above the button will
glow when the button
is pressed. You don’t have to
press
the button to run the compressor in MAX or
DEFROST.
Air Conditioning (Option)
On very hot days, open the windows long enough to let
hot, inside air escape. This reduces the time it takes for
your vehicle to cool down, which should help fuel
economy.
For quick cool-down on very hot days, use
MAX with
the temperature
knob all the way in the blue area. If this
3-2
Page 130 of 340
Downloaded from www.Manualslib.com manuals search engine Rear Window Defogger
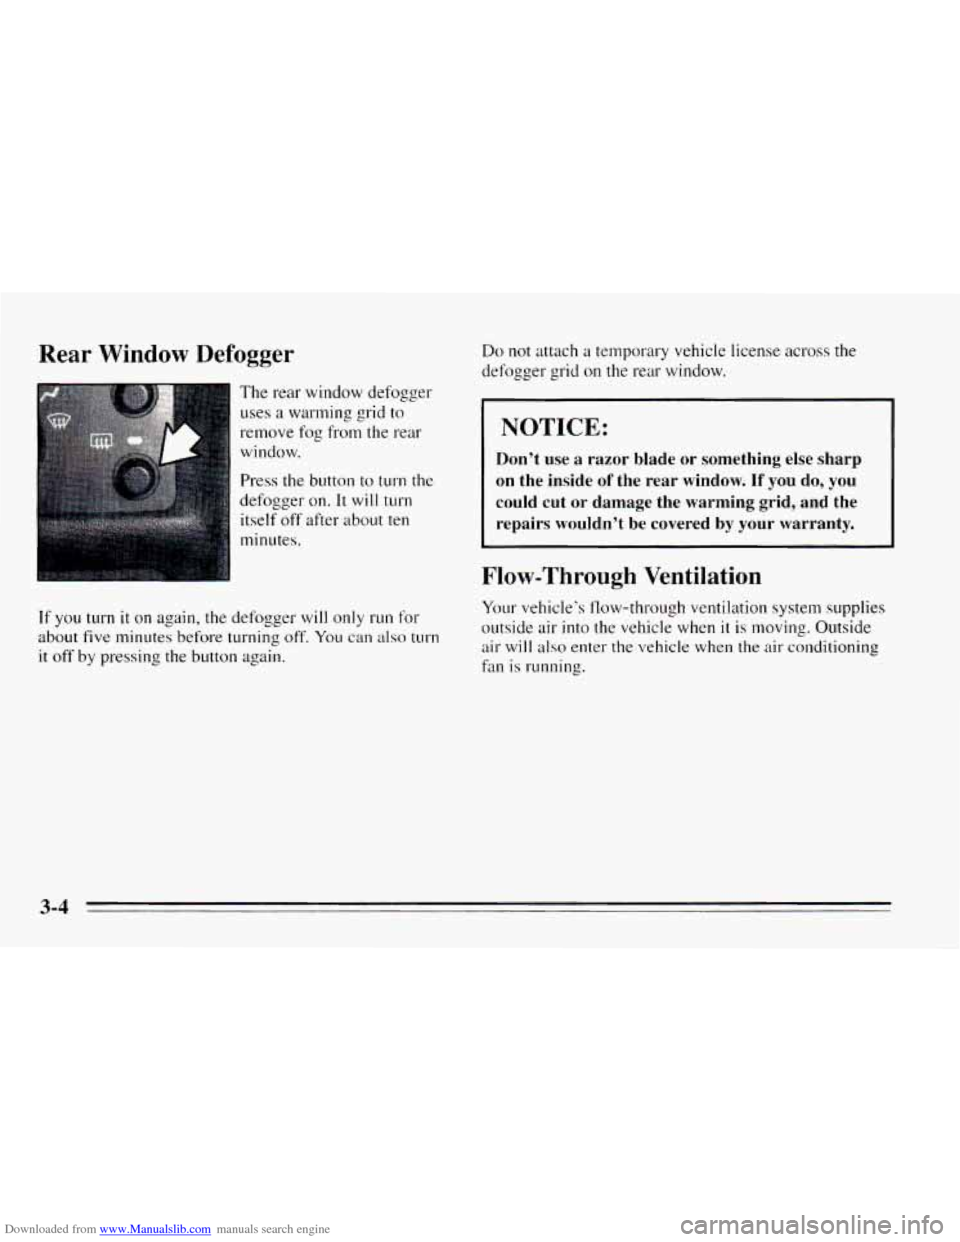
The rear window defogger
uses a warming grid to
remove fog from the rear
window.
Press
the button to t11rn the
defogger on.
It will turn
itself
off after about ten
minutes.
If you turn it on again, the defogger will only run for
about five minutes before turning off. You can also turn
it off by pressing the button again.
Do not attach a temporary vehicle license across the
defogger grid on
the rear window.
I NOTICE:
Don’t use a razor blade or something else sharp
on the inside
of the rear window. If you do, you
could cut or damage the warming grid, and the
repairs wouldn’t be covered by your warranty.
Flow-Through Ventilation
Your vehicle’s flow-through ventilation system supplies
outside air into the vehicle when
it is moving. Outside
air will
also enter the vehicle when the air conditioning
fan is running.
3-4
Page 259 of 340
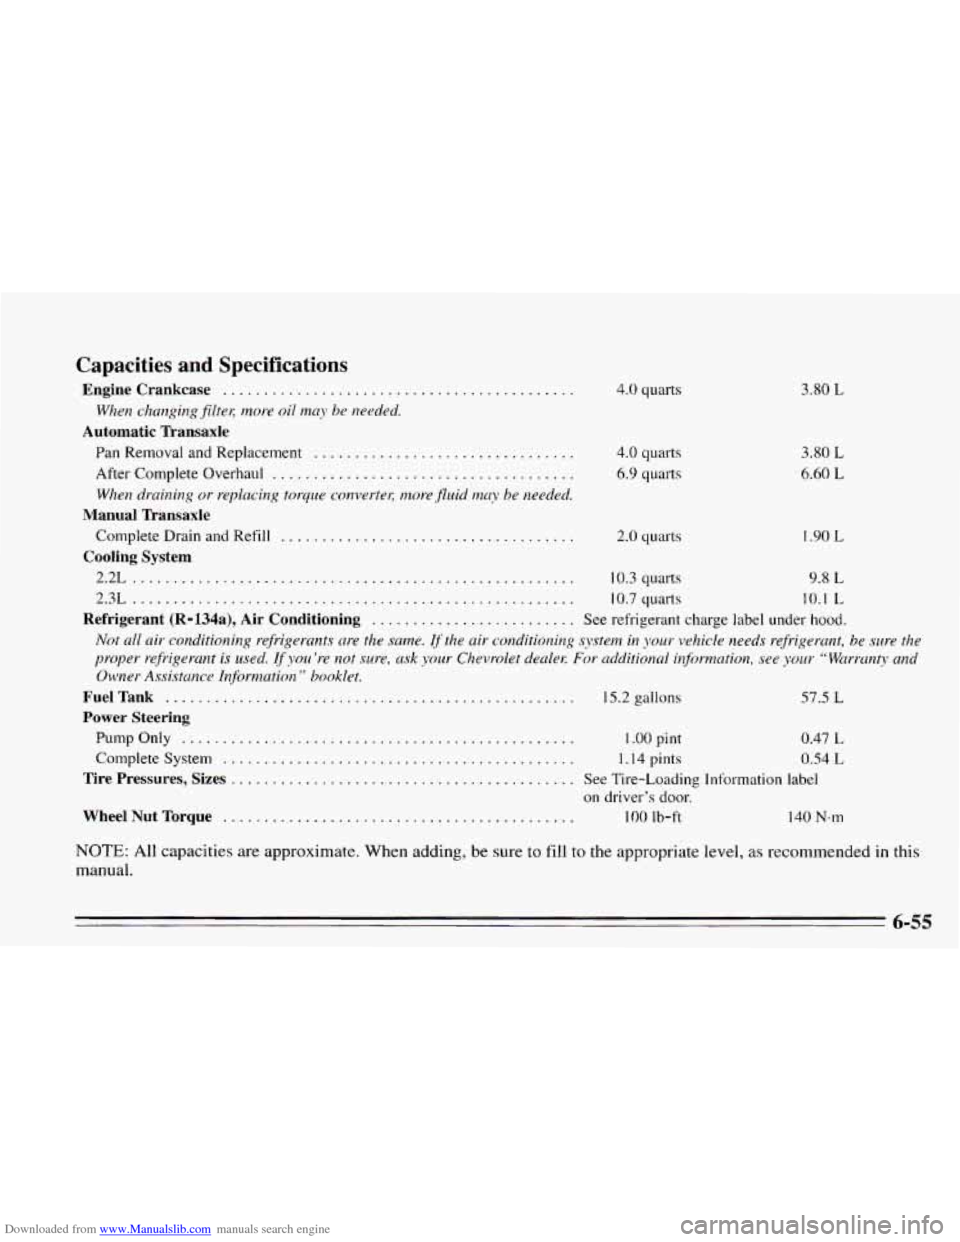
Downloaded from www.Manualslib.com manuals search engine 4.0 quarts 3.80 L
Capacities and Specifications
Enginecrankcase ...........................................
Automatic Transaxle
When chcwging$lte& more oil! rnuy be needed.
Pan Removal and Replacement ................................
When draining or replacing torque convertec 1nore.fluid may be needed.
Complete Drain and Refill ....................................
After Complete Overhaul .....................................
Manual Transaxle
Cooling System
2.2L ...................................................... 10.3 quarts 9.8 L
2.3L
...................................................... 10.7 quarts 10.1 L
Refrigerant (R-l34a), Air Conditioning ......................... See refrigerant charge label under hood.
Not all air conditioning refrigerants are the same. If the air conditioning system in your vehicle needs refrigerant, he sure the
proper refrigerant is used. IJ’you ’re not sure, ask your Chevrolet dealer:
For additionul information, see your “Warrunty and
Owner Assistunce Infixmution, ” booklet.
FuelTank ...............................................
Power Steering
PumpOnly ................................................ 1 .OO pint 0.47 L
Complete System ........................................... 1.14 pints 0.54 L
Tire Pressures, Sizes
.......................................... See Tire-Loading Information label
on driver’s door.
WheelNutTorque ........................................... 100 Ib-ft
4.0 quarts
6.9 quarts
2.0 quarts
15.2 gallons
3.80 L
6.60 L
I .90 L
57.5 L
140 N.m
NOTE: All capacities are approximate. When adding, be sure to fill to the appropriate level, as reconmended in this
manual.
6-55
Page 327 of 340
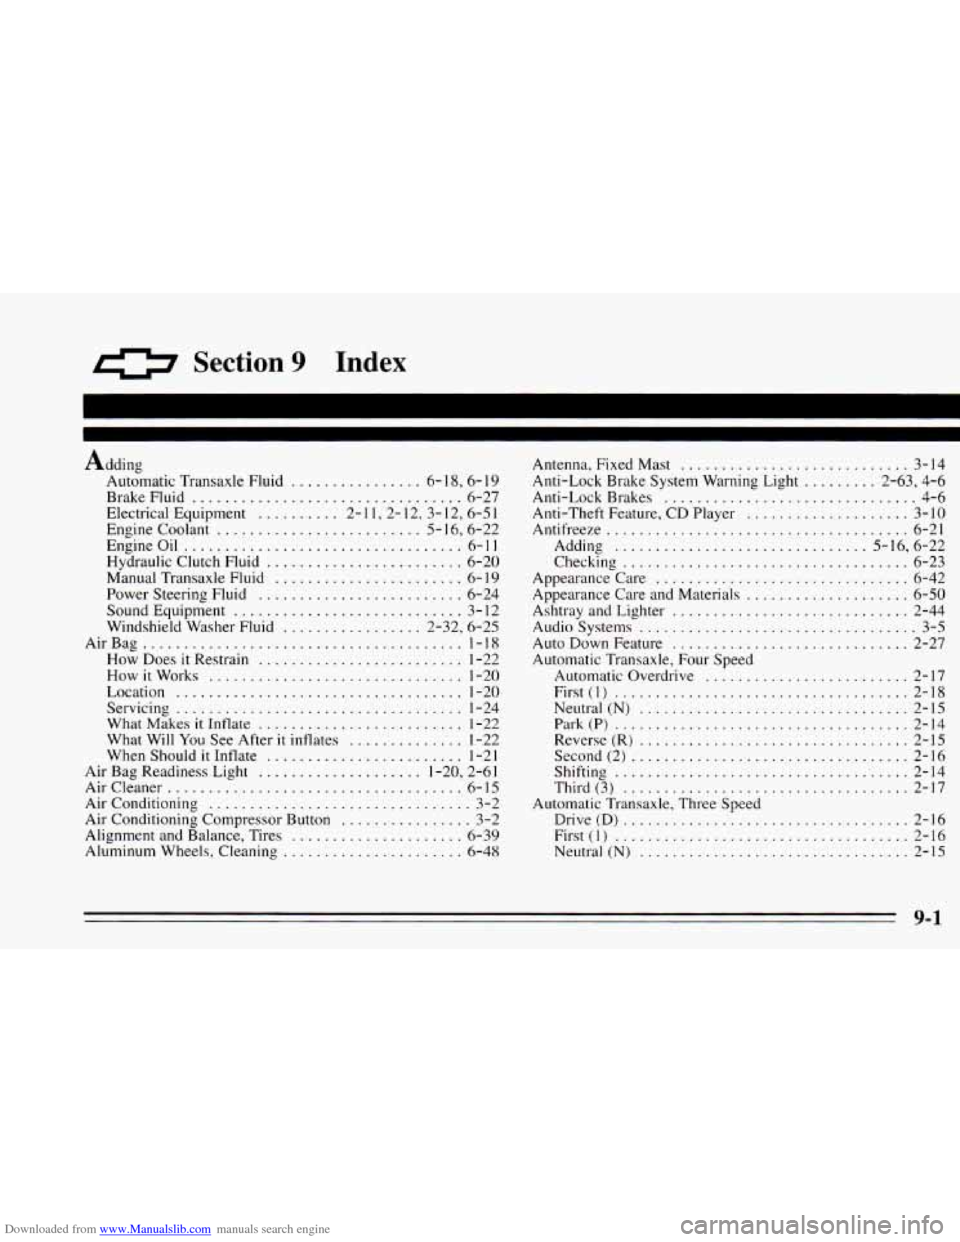
Downloaded from www.Manualslib.com manuals search engine 0 Section 9 Index
Adding Automatic Transaxle Fluid
................ 6- 18. 6- 19
BrakeFluid ................................. 6-27
Electrical Equipment
.......... 2-1 1 , 2- 12, 3- 12, 6-5 1
Engine Coolant ......................... 5- 16, 6-22
Engineoil
.................................. 6-11
Hydraulic Clutch Fluid ........................ 6-20
Manual Transaxle Fluid
....................... 6- 19
Power Steering Fluid ......................... 6-24
SoundEquipment
............................ 3-12
Windshield Washer Fluid
................. 2-32, 6-25
AirBag
....................................... 1-18
How Does
it Restrain ......................... 1-22
Howitworks
............................... 1-20
Location
................................... 1-20
Servicing
................................... 1-24
What Makes
it Inflate ......................... 1-22
What Will You See After it inflates .............. 1-22
When Should
it Inflate ........................ 1-2 1
Air Bag Readiness Light .................... 1-20, 2-61
Aircleaner
.................................... 6-15
Air Conditioning ................................ 3-2
Air Conditioning Compressor Button
................ 3-2
Alignment and Balance, Tires
..................... 6-39
Aluminum Wheels, Cleaning ...................... 6-48
Antenna. Fixed Mast ............................ 3-14
Anti-Lock Brake System Warning Light
......... 2.63. 4.6
Anti-Lock Brakes
............................... 4-6
Anti-Theft Feature.
CD Player .................... 3-10
Antifreeze ..................................... 6-21
Adding
............................... 5.16. 6.22
Checking
................................... 6-23
Appearance Care
............................... 6-42
Appearance Care and Materials
.................... 6-50
Ashtray and Lighter ............................. 2-44
Audiosystems
.................................. 3-5
Auto Down Feature
............................. 2-27
Automatic Transaxle.
Four Speed
Automatic Overdrive
......................... 2-17
First(1)
.................................... 2-18
Neutral
(N) ................................. 2-15
Park(P) .................................... 2-14
Reverse(R)
................................. 2-15
Second(2)
.................................. 2-16
Shifting
.................................... 2-14
Third (3)
................................... 2-17
Drive(D)
................................... 2-16
First(1)
.................................... 2-16
Neutral (N)
................................. 2-15
Automatic Transaxle. Three Speed
9-1