Page 184 of 388

Downloaded from www.Manualslib.com manuals search engine cloth to your vehicle to alert police that you’ve been
stopped by the snow. Put
on extra clothing or wrap a
blanket around you. If you have no blankets or extra
clothing,
make body insulators from newspapers, burlap
bags, rags, floor mats
-- anything you can wrap around
yourself
or tuck under your clothing to keep warm.
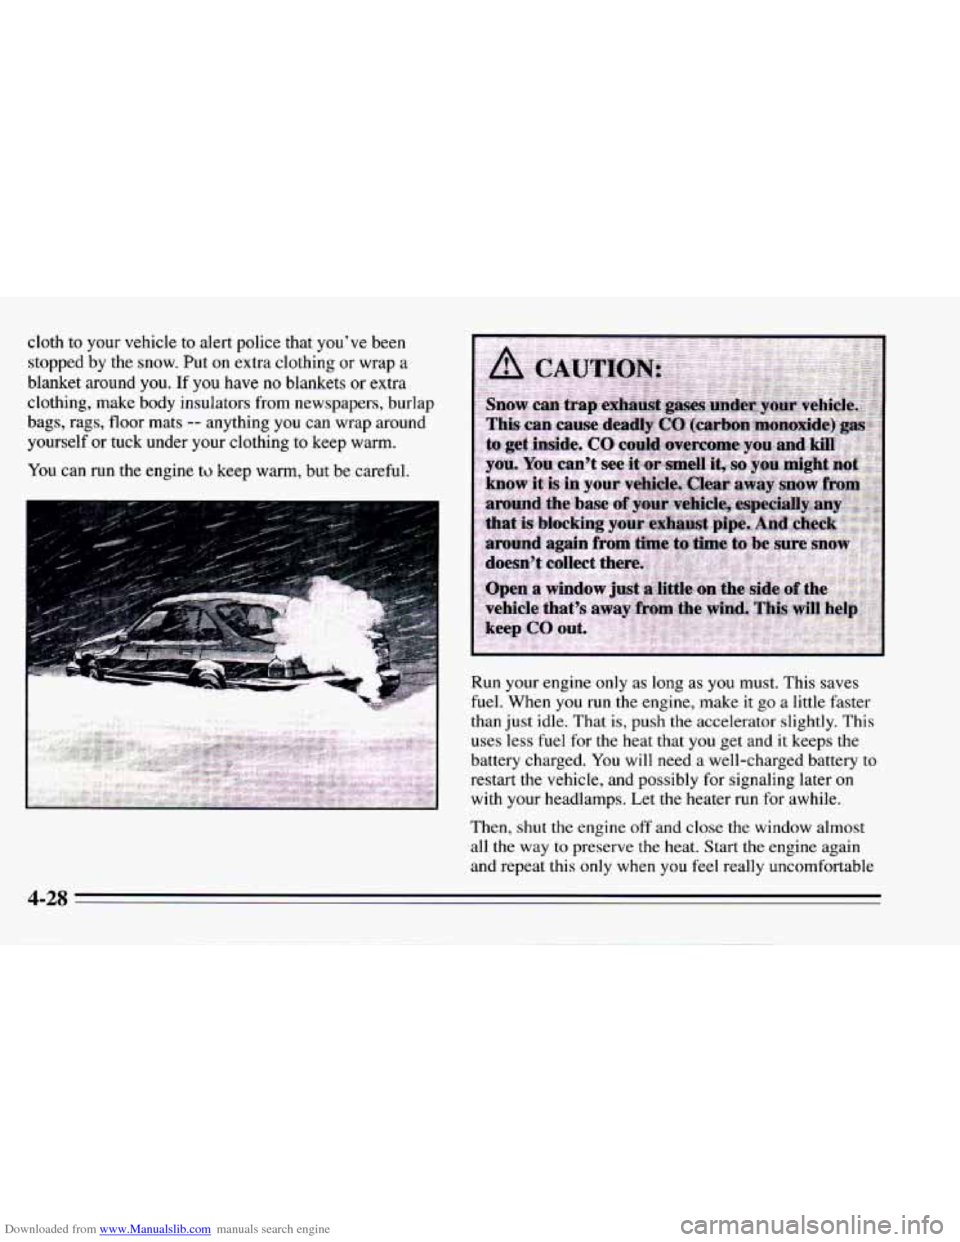
You can
run the engine to keep warm, but be careful.
Run your engine only as long as you must. This saves
fuel. When you run the engine, make it
go a little faster
than just idle. That
is, push the accelerator slightly. This
uses less fuel for the heat that you get and it keeps the
battery charged. You
will need a well-charged battery to
restart the vehicle, and possibly for signaling later
on
with your headlamps. Let the heater run for awhile.
Then,
shut the engine off and close the window almost
all the way to preserve the heat. Start the engine again
and repeat this only when you feel really uncomfortable
4-28
. ..
Page 270 of 388

Downloaded from www.Manualslib.com manuals search engine Battery
Every new Chevrolet has a Delco Freedom@ battery.
You never have to add water to one of these. When it’s
time for a new battery, we recommend a Delco
Freedom’ battery. Get one that has the replacement
number shown on the original battery’s label.
Bulb Replacement
For the proper type of replacement bulb, see
“Replacement Bulbs”
in the Index.
Halogen Bulbs
Vehicle Storage
If you’re not going to drive your vehicle for 25 days or
more, take off the black, negative
(-) cable from the
battery. This will help keep your battery from running
down.
Headlamp Aiming
Your vehicle has the 55 x 135 mini-quad headlamp
system. These headlamps have horizontal and vertical
aim indicators. The aim has been pre-set at the factory
and should need no further adjustment.
Contact your dealer to learn how
to prepare your vehicle
for longer storage periods. If
your vehicle is damaged in an accident and the
headlamp aim seems to be affected, see your Chevrolet
dealer. Headlamps on damaged vehicles may require
recalibration of the horizontal aim by your Chevrolet
dealer.
6-38
Page 271 of 388

Downloaded from www.Manualslib.com manuals search engine To check the aim, the vehicle should be properly
prepared as follows:
The vehicle must have all four tires on a perfectly
level surface.
0 The vehicle should not have any snow, ice, or mud
There should not be any cargo or loading of vehicle,
except it should have a full tank of gas and one
person or
160 pounds (75 kg) on the driver’s seat.
attached to
it.
0 Tires
should be properly inflated.
0 The horizontal indicator should read “0.”
I NOTICE:
To make sure your headlamps are aimed
properly, read all the instructions before
beginning. Failure to
follow these instructions
could cause damage to headlamp parts.
State inspection stations will allow a vertical reading of
plus
0.76 degrees or minus 0.76 degrees for the center of
the bubble. It
is recommended that the upper limit not exceed plus
0.4 degrees for the center of the bubble. Other drivers
may flash their bright lights at you if your adjustment is
much above plus
0.4 degrees.
If you find that the headlamp aiming needs adjustment,
follow these steps:
To adjust the aim of your headlamps:
1. Move your vehicle to a level surface. Use a spirit
level to be sure. Be sure to remove any items that are
not part of your original equipment from the trunk
and passenger areas.
No one should be seated in the
vehicle and your fuel tank should be about half full.
Check to be sure your tires are at the correct
pressure.
6-39
Page 272 of 388
Downloaded from www.Manualslib.com manuals search engine There are four headlamps. Each one has its own
vertical and horizontal aim position indicator. Each
indicator has its own aiming screw.
A. Vertical Indicator
E!. Horizontal Indicator
C. Vertical Aiming Screw
D. Horizontal Aiming Screw
2. Start with the horizontal (left and right) headlamp
aim. Don’t try to adjust the vertical (up and down)
aim first.
3. Check the horizontal aim for each headlamp and
4. Turn the horizontal aiming screw until the pointer is
adjust
it
as necessary.
lined up with the
0 (zero).
6-40
Page 273 of 388
Downloaded from www.Manualslib.com manuals search engine 5. Now adjust the vertical aim. Check the vertical aim
for each headlamp and adjust it as necessary.
6. Turn the vertical aiming screw until the bubble in the
7. If the gage readings are not centered, repeat steps 2
Try not to touch threaded parts other than the vertical
and horizontal aiming screws.
level
is centered at 0 (zero).
and
3.
To Replace a Headlamp
Before replacing a headlamp that does not light, check
to make sure that the wiring connector is securely
fastened to it.
See “Replacement Bulbs”
in the Index to check the size
and type of headlamp you need to
use before you begin
to replace the headlamp.
You must replace a headlamp
with one that
is exactly the same.
Be careful
not to move the aiming screws when you
replace the headlamp. If the headlamp being replaced
was properly aimed, the
new one will be also if it is
properly installed.
6-41
Page 275 of 388
Downloaded from www.Manualslib.com manuals search engine 3. Pull the headlamp out of the assembly. Remove the
wiring connector from the headlamp socket by lifting
the plastic locking tabs
on the connector and pulling
it
from the socket.
4. Check the new headlamp again. The number on the
lamp must match the number of the headlamp being
replaced. The letter
U or L must also match.
5. Plug the wiring connector into the headlamp socket.
Snap the locking tabs onto the socket.
6. Place the new headlamp in the headlamp assembly.
The socket must be pointing in the same direction
the socket on the burned out bulb was.
7. Insert the tabs on the aiming ring into the tabs in the
headlamp assembly.
8. Hold the aiming ring closed, insert the screws at the
end
of the ring. Tighten the screws until the aiming
ring touches the plastic nuts
on both the top and
bottom.
Do not overtighten. Do not damage the
vertical aiming bubble.
6-43
Page 276 of 388
Downloaded from www.Manualslib.com manuals search engine 9. Check the headlamp aim indicators. The horizontal
indicator (A) should be on
0 (zero). If the vehicle
is level, the vertical indicator
(B) should also be on
0 (zero). If the vehicle isn’t level, check the vertical
aim
on a level surface as soon as you can. If either
indicator doesn’t read
0 (zero), adjust the headlamp
aim.
See “Adjusting Headlamp Aim” in the Index.
If your vehicle is damaged in an accident and the headlamp
aim seems
to be fleeted, see your Chevrolet dealer.
Headlamps
on damaged vehicles may require recalibration
of the horizontal aim by your Chevrolet dealer.
Center High-Mounted Stoplamp
To replace the bulb:
1. Remove the two screws in the stoplamp lens.
2. Gently pull assembly out and remove bulb from the
back
of the assembly.
3. Reverse the steps with a new bulb.
6-44
Page 288 of 388

Downloaded from www.Manualslib.com manuals search engine Wheel Replacement
Replace any wheel that is bent, cracked, or badly rusted
or corroded. If wheel nuts keep coming loose, the wheel,
wheel bolts, and wheel nuts should be replaced. If the
wheel leaks air, replace it (except some aluminum
wheels, which can sometimes be repaired). See your
Chevrolet dealer if any
of these conditions exist.
Your dealer will know the kind
of wheel you need.
Each new wheel should have the same load carrying
capacity, diameter, width, offset, and be mounted the
same way as the one it replaces.
If you need
to replace any of your wheels, wheel bolts,
or wheel
nuts, replace them only with new GM original
equipment parts. This way,
you will be sure to have the
right wheel, wheel bolts, and wheel nuts
for your
Chevrolet model. I NOTICE:
The wrong wheel can also cause problems with
bearing life, brake cooling,
speedometerlodometer calibration, headlamp
aim, bumper height, vehicle ground clearance,
I and tire or tire chain clearance to the body and
chassis.
6-56