1995 CHEVROLET CAMARO ECU
[x] Cancel search: ECUPage 106 of 388
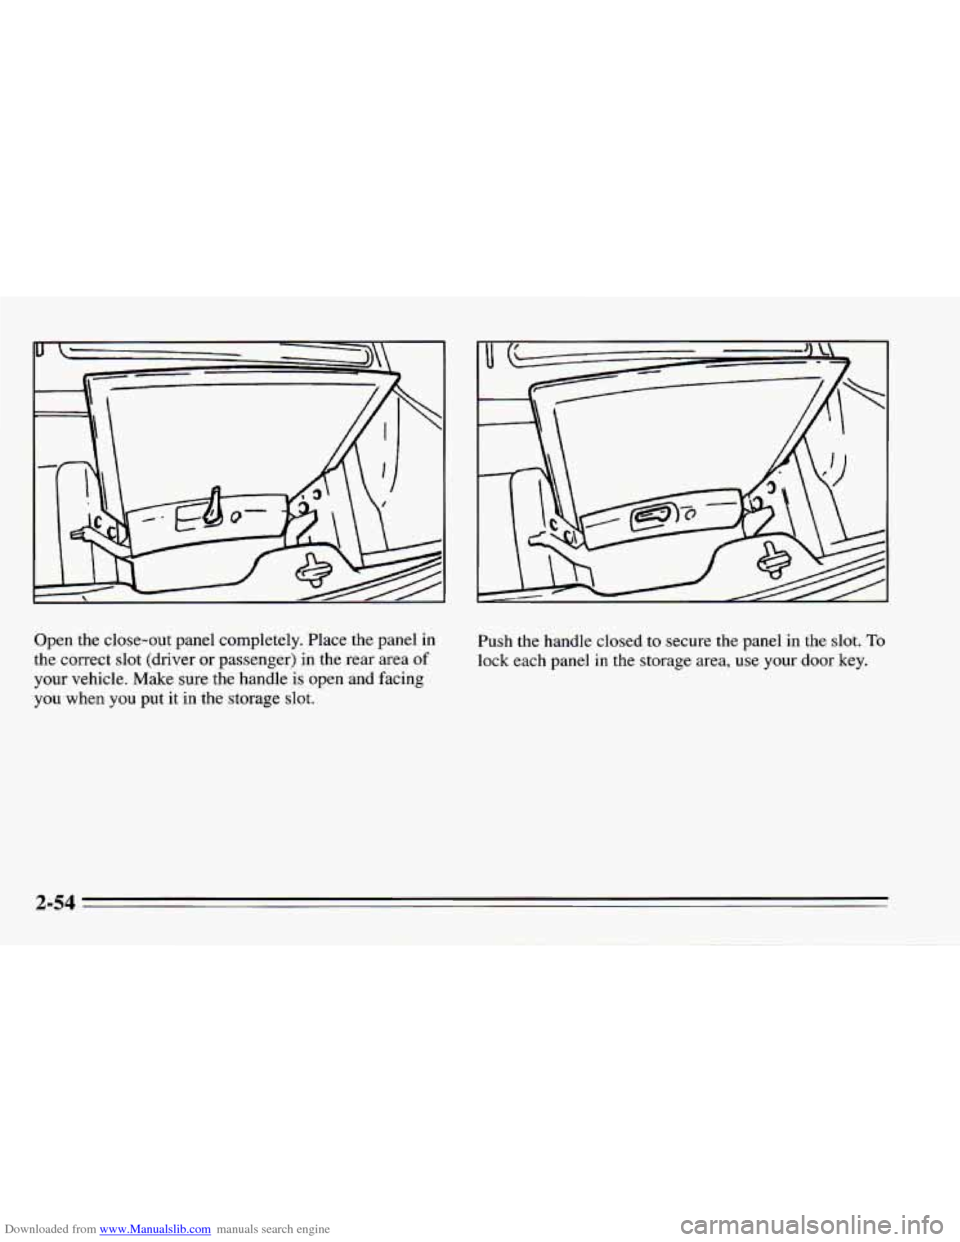
Downloaded from www.Manualslib.com manuals search engine Open the close-out panel completely. Place the panel in
the correct slot (driver or passenger) in the rear area of
your vehicle. Make sure the handle is open and facing
you when you put it in the storage slot. Push the handle closed
to secure the
panel in the slot. To
lock each panel in the storage area, use your door key.
Page 151 of 388
Downloaded from www.Manualslib.com manuals search engine To Replay the Current Selection
Press PREV to hear a track again.
If you press and hold this button, or press it more than
once, the disc will return to previous tracks.
REV (Reverse): Press and hold REV to rapidly return
to a favorite passage. Release it to play the passage.
FWD (Fast Forward): Press and hold FWD to quickly
advance within
a track. Release it to resume playing.
SCAN Press SCAN to listen to each track for about
10 seconds. Press RDM or SCAN to stop the scanning
COMP (Compression): Press COMP to make loud and
soft passages more nearly equal
in volume.
RDM (Random): Press RDM to hear a random
selection of tracks.
To Stop the Disc Player
Turn the power off or turn the ignition key off. The
disc stays in the player and will resume playing at
the point where it stopped.
Press ST-PL to stop playing the disc and switch to
radio. Press ST-PL to restart the disc at the point
where it stopped.
0 Press EJCT to eject the disc and the radio will play.
The disc will start playing at track
1 when you
reinsert it.
Theft-Deterrent Feature
Delco-Loc I1 is a security feature for the compact disc
player. It can be used or ignored. If ignored, the system
functions normally.
If it is used, your system won’t be
usable
if it’s ever stolen.
3-13
Page 152 of 388
Downloaded from www.Manualslib.com manuals search engine Setting Your Security Code
The instructions below tell you how to enter a security
code into the system. If your vehicle loses battery power
for any reason, you must enter the security code again
before the system will turn on.
1.
2.
3.
4.
5.
6.
7.
Write down any six-digit number and keep it in a
safe place.
Turn the ignition switch to the ACC or RUN
position.
Turn the audio system
off.
Press and hold pushbuttons 1 and 4 together until
You are now ready
to enter your security code. Don’t
wait more than
15 seconds between steps.
Press
SET and “000” will appear on the display.
Press
SCAN and hold it until the first digit of the
code appears.
Press SEEK
4 or SEEK b and hold until the second
and third digits
of your code appears. Release the
button.
‘&---” shows on the display.
8. Press the lower knob and “OOO” will appear. Now you
are ready to enter
the last three digits of your code.
9. Press SCAN and hold until the fourth digit of your
10. Press SEEK 4 or b and hold until the fifth and sixth
code appears.
Release the button.
digits of your code appears. Release the button.
seconds, and then
“000” will appear.
11.
Press
the lower knob. rEP will appear for five
12. For verification, repeat steps 6 through 11. If “SEC”
appears, your audio system is secured. If
“---” shows
on the display, your system is not secured. You must
restart
the entire procedure again from step 4.
Shutting Off the Theft-Deterrent Feature
If your audio system is secured (SEC shows on display)
and you wish to disable
it, enter your security code as
follows, pausing
no more than 15 seconds between steps:
1. Turn the ignition on. Make sure the audio system is
2. Press pushbuttons 1 and 4 together until SEC shows
off. The time
will show
on the display.
on the display.
3-14
Page 153 of 388
Downloaded from www.Manualslib.com manuals search engine 3.
4.
5.
6.
7.
8.
9.
Press SET. “000” will appear on the display.
Press SCAN and hold until the first digit of your
code appears. Release the button.
Press SEEK
4 or b and hold until the second and
third digits of your code appears. Release
the button.
Press the lower knob.
“000” will appear on the
display.
Press SCAN and hold
until the fourth digit of your
code appears. Release the button.
Press SEEK
4 or and hold until the fifth and sixth
digits of your security code appears. Release the
button.
Press the lower knob. If
“---” shows, you have shut
off the theft-deterrent feature. If SEC shows, your
audio system is still secured.
NOTE: If you lose or forget your security code, see
your dealer for assistance.
Unlocking the Audio System after a Power Failure
If power is disrupted to the audio system while in the
SEC mode, the unit will
not work and LOC will show
on the display whenever the ignition is on.
To unlock the
unit:
1.
2.
3.
4.
5.
6.
7.
8.
Turn the ignition switch to the ACC or RUN
position.
Press SET.
“000” will appear on the display.
Press SCAN and hold
until the first digit of your
code appears, then release the button.
Press SEEK
4 or b and hold until the second and
third digits of your code appears. Release the button.
Press the lower knob.
“000’ will appear on the
display.
Press SCAN and hold
until the fourth digit of your
code appears. Release the button.
Press SEEK
4 or and hold until the fifth and sixth
digits of your security code appears. Release the
button.
Press the lower knob. “SEC”
will appear and the unit
will work. If “LOC” shows, the numbers did not
match and the
unit is still locked.
3-15
Page 154 of 388
Downloaded from www.Manualslib.com manuals search engine How to Change Your Security Code
You can change your security code by following these
steps:
1. Using your old code, follow the directions given
under “Shutting Off the Theft-Deterrent Feature.’’
2. Repeat directions of “Setting Your Security Code”
with your new security code.
Understanding Radio Reception
FM Stereo
FM stereo will give you the besr sound. But FM signals
will reach only about
10 to 40 miles (16 to 65 km). And,
tall buildings or hills can interfere with FM signals,
causing the
sound to come and go.
AM
The range for most AM stations is greater than for FM,
especially at night. The longer range, however, can
cause stations to interfere with each other.
AM can pick
up noise from things like storms and power lines. Try
reducing the treble
to reduce this noise if you ever get it.
AM Stereo
This means the Delco@ system can receive C-QUAM@
stereo broadcasts. Many
AM stations around the country
use C-QUAM@ to produce stereo, though some do not.
(C-QUAM@
is a registered trademark of Motorola, Inc.)
If your Delco@ system can get
C-QUAM@, your
STEREO light
will come on when you’re receiving it.
Tips about Your Audio System
Hearing damage from loud noise is almost undetectable
until it is too late. Your hearing can adapt to higher
volumes of sound. Sound that seems normal can be loud
and harmful to your hearing. Take precautions by
adjusting the volume control on your radio to
a safe
sound level before your hearing adapts to it.
To help avoid hearing
loss or damage:
Adjust the volume control to the lowest setting.
0 Increase volume slowly until you hear comfortably
and clearly.
Page 181 of 388
Downloaded from www.Manualslib.com manuals search engine Winter Driving
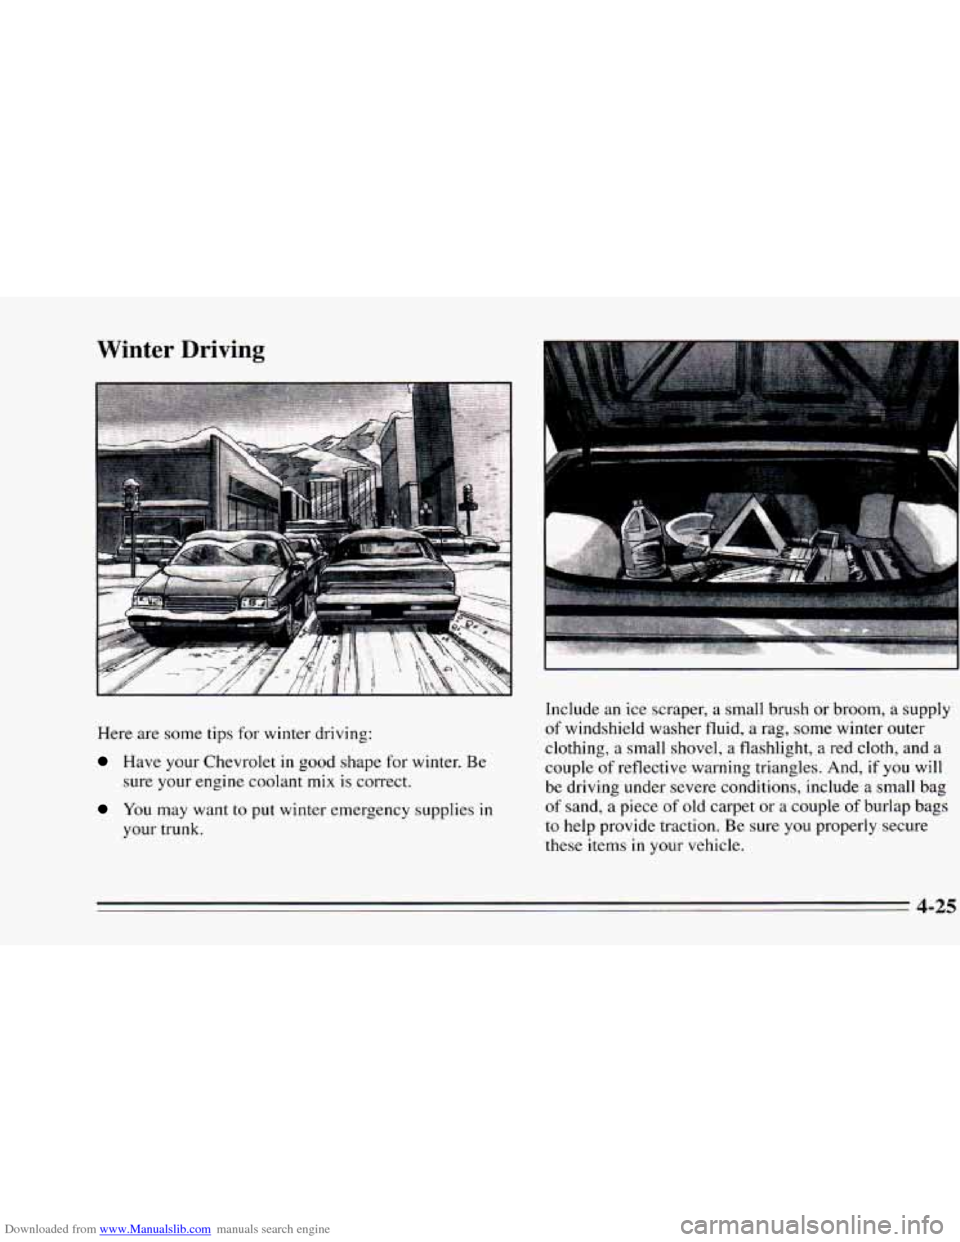
Here are some tips for winter driving:
Have your Chevrolet in good shape for winter. Be
sure your engine coolant mix is correct.
You may want to put winter emergency supplies in
your trunk. Include an
ice scraper, a small brush
or broom, a supply
of windshield washer fluid,
a rag, some winter outer
clothing, a small shovel, a flashlight, a red cloth, and a
couple of reflective warning triangles. And, if you will
be driving under severe conditions, include a small bag
of sand, a piece
of old carpet or a couple of burlap bags
to help provide traction. Be sure you properly secure
these items
in your vehicle.
4-25
Page 191 of 388
Downloaded from www.Manualslib.com manuals search engine Driving with a Trailer
Towing a trailer requires a certain amount of experience.
Before setting out for the open road, you’ll want to get
to know your rig. Acquaint yourself with the feel
of
handling and braking with the added weight of the
trailer. And always keep in mind that the vehicle you are
driving is now a good deal longer and
not nearly as
responsive
as your vehicle is by itself.
Before
you start, check the trailer hitch and platform
(and attachments), safety chains, electrical connector,
lamps, tires and mirror adjustment. If the trailer has
electric brakes, start your vehicle and trailer moving and
then apply the trailer brake controller by hand
to be sure
the brakes are working. This lets
you check your
electrical connection at the same time.
During your trip, check occasionally
to be sure that the
load is secure, and that the lamps and any trailer brakes
are still working.
Following Distance
Stay at least twice as far behind the vehicle ahead as you
would when driving your vehicle without
a trailer. This
can help
you avoid situations that require heavy braking
and sudden turns.
Passing
You’ll need more passing distance up ahead when
you’re towing
a trailer. And, because you’re a good deal
longer, you’ll need to go much fxther beyond
the
passed vehicle before you can return to your lane.
Backing Up
Hold the bottom of the steering wheel with one hand.
Then,
to move the trailer to the left, just move that hand
to the left.
To move the trailer to the right, move your
hand
to the right. Always back up slowly and, if
possible, have someone guide you.
Page 273 of 388
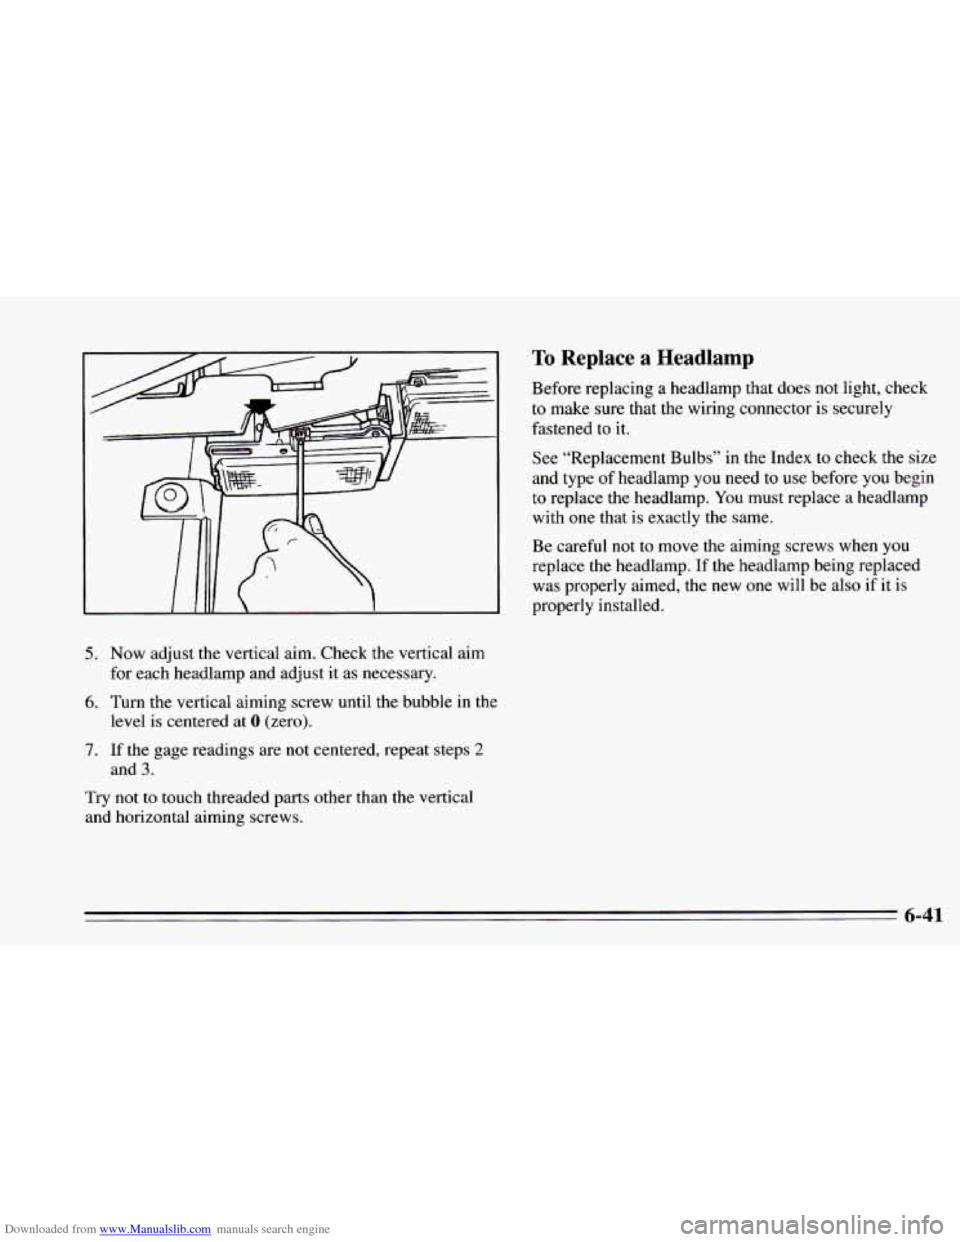
Downloaded from www.Manualslib.com manuals search engine 5. Now adjust the vertical aim. Check the vertical aim
for each headlamp and adjust it as necessary.
6. Turn the vertical aiming screw until the bubble in the
7. If the gage readings are not centered, repeat steps 2
Try not to touch threaded parts other than the vertical
and horizontal aiming screws.
level
is centered at 0 (zero).
and
3.
To Replace a Headlamp
Before replacing a headlamp that does not light, check
to make sure that the wiring connector is securely
fastened to it.
See “Replacement Bulbs”
in the Index to check the size
and type of headlamp you need to
use before you begin
to replace the headlamp.
You must replace a headlamp
with one that
is exactly the same.
Be careful
not to move the aiming screws when you
replace the headlamp. If the headlamp being replaced
was properly aimed, the
new one will be also if it is
properly installed.
6-41