Page 193 of 306
Downloaded from www.Manualslib.com manuals search engine A CAUTION:
A vehicle can fall from a car carrier if it isn’t
adequately secured. This can cause a collision,
serious personal injury and vehicle damage. The
vehicle should be tightly secured with chains
or
steel cables before it is transported.
Don’t use substitutes (ropes, leather straps,
canvas webbing, etc.) that can be cut
by sharp
edges underneath the towed vehicle. Always use
T-hooks inserted in the T-hook slots. Never use
J-hooks. They will damage drivetrain and
suspension components.
When your vehicle is being towed, have the ignition key
OFF. The steering wheel should be clamped in a
straight-ahead position, with a clamping device
designed
for towing service. Do not use the vehicle’s
steering column
lock for,this. The transmission should
be in
NEUTRAL (N) and the parking brake released.
Page 205 of 306
Downloaded from www.Manualslib.com manuals search engine If a Tire Goes Flat
It’s unusual for a tire to “blow out” while you’re driving,
especially if you maintain your tires properly. If air goes
out of a
tire, it’s much more likely to leak out slowly.
But if you should ever have a “blowout,” here are
a few
tips about what to expect and what to do:
If a front tire fails, the flat tire will create a drag that
pulls the vehicle toward that side. Take your foot
off the
accelerator pedal and grip the steering wheel firmly.
Steer to maintain lane position, and then gently brake to
a stop well out of the traffic lane.
A rear blowout, particularly on a curve, acts much like a
skid and may require the same correction you’d use in a
skid.
In any rear blowout, remove your foot from the
accelerator pedal. Get the vehicle under control by
steering the way you want the vehicle
to go. It may be
very bumpy and noisy, but you can still steer. Gently
brake to a stop
-- well off the road if possible.
If a tire goes flat, the next part shows how to use your
jacking equipment to change a flat tire safely.
Changing a Flat Tire
If a tire goes flat, avoid further tire and wheel damage
by driving slowly to
a level place. Turn on your hazard
warning flashers.
I
Changing a tire can cause an injury. The vehicle
can slip off the jack and roll over you or other
people. You and they could be badly injured.
Find a level place to change your tire. To help
prevent the vehicle from moving:
1. Put the shift lever in PARK (P).
2. Set the parking brake firmly.
3. Turn off the engine.
To be even more certain the vehicle won’t move,
you can put blocks at the front and rear of the
tire farthest away from the one being changed.
That would be the tire on the other side
of the
vehicle,
at the opposite end.
5-20
Page 212 of 306
Downloaded from www.Manualslib.com manuals search engine 3. Lower the vehicle by rotating the wheel wrench
counterclockwise. Lower the vehicle completely.
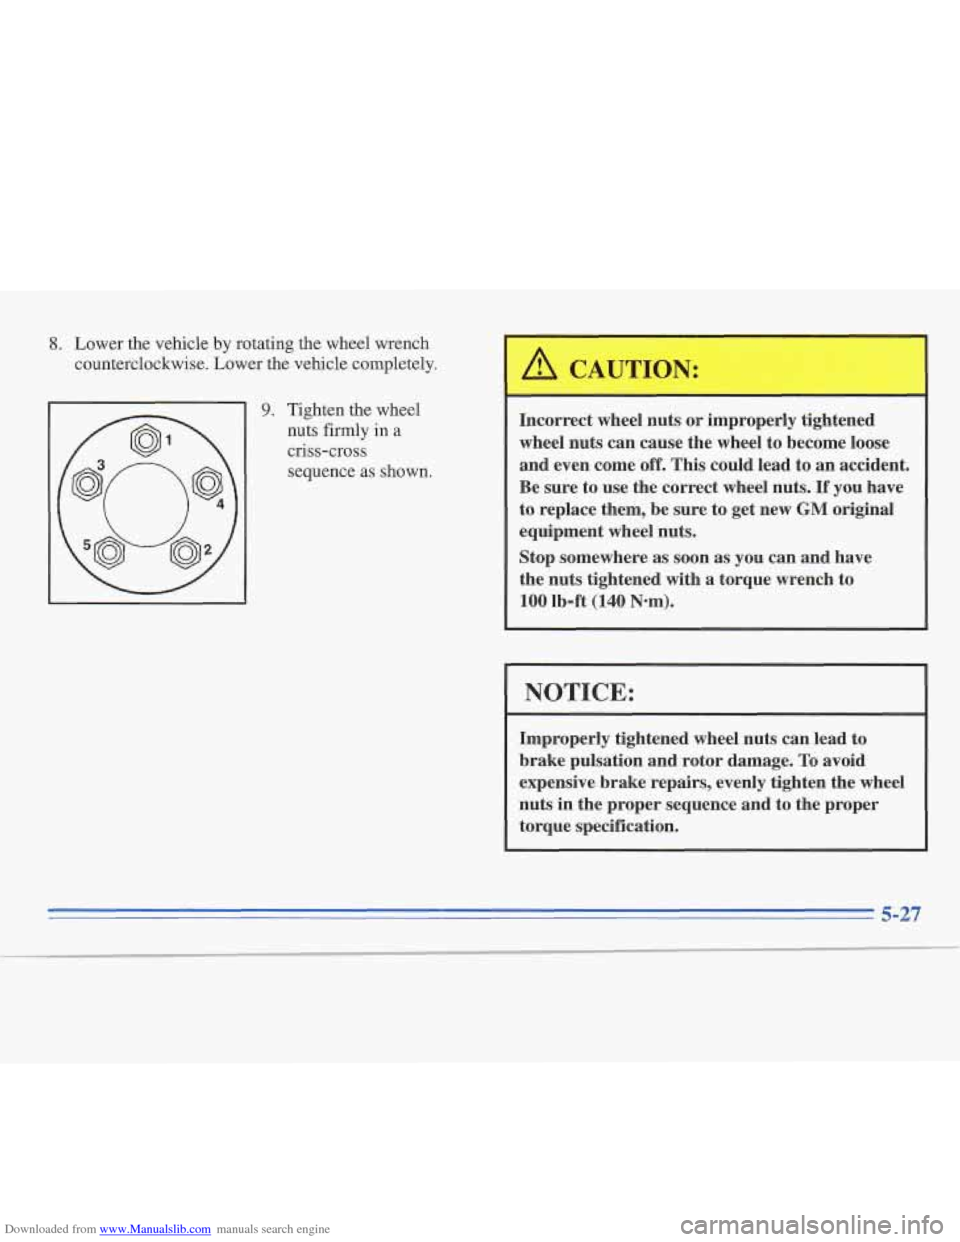
9. Tighten the wheel
nuts firmly
in a
criss-cross
sequence as shown.
A CAUTION:
Incorrect wheel nuts or improperly tightened
wheel nuts can cause the wheel
to become loose
and even come
off. This could lead to an accident.
Be sure to use the correct wheel nuts.
If you have
to replace them, be sure to get new
GM original
equipment wheel nuts.
Stop somewhere as soon as you can and have
the nuts tightened with a torque wrench to
100 lb-ft (140 Nom).
1 NOTICE:
Improperly tightened wheel nuts can lead to
brake pulsation and rotor damage.
To avoid
expensive brake repairs, evenly tighten the wheel
nuts in the proper sequence and to the proper
torque specification.
Page 215 of 306
Downloaded from www.Manualslib.com manuals search engine 1 Compact Spare Tire (If So Equipped)
Although the compact spare tire was fully inflated when
your vehcle was new, it can lose air after a time. Check
the inflation pressure regularly. It should be
60 psi
(420 Wa).
After installing the compact spare on your vehicle, you
should stop as soon as possible and make sure your
spare tire is correctly inflated. The compact spare is
made to perform well at posted speed limits for
distances up to
3,000 miles (5 000 km), so you can
finish your trip and have your full-size tire repaired
or
replaced where you want. Of course, it’s best to replace
your spare with a full-size tire as soon as you can. Your
spare will last longer and be in good shape in case you
Your anti-lock brake system warning light may come
on
“Anti-Lock Brake System Warning Light” in the Index.
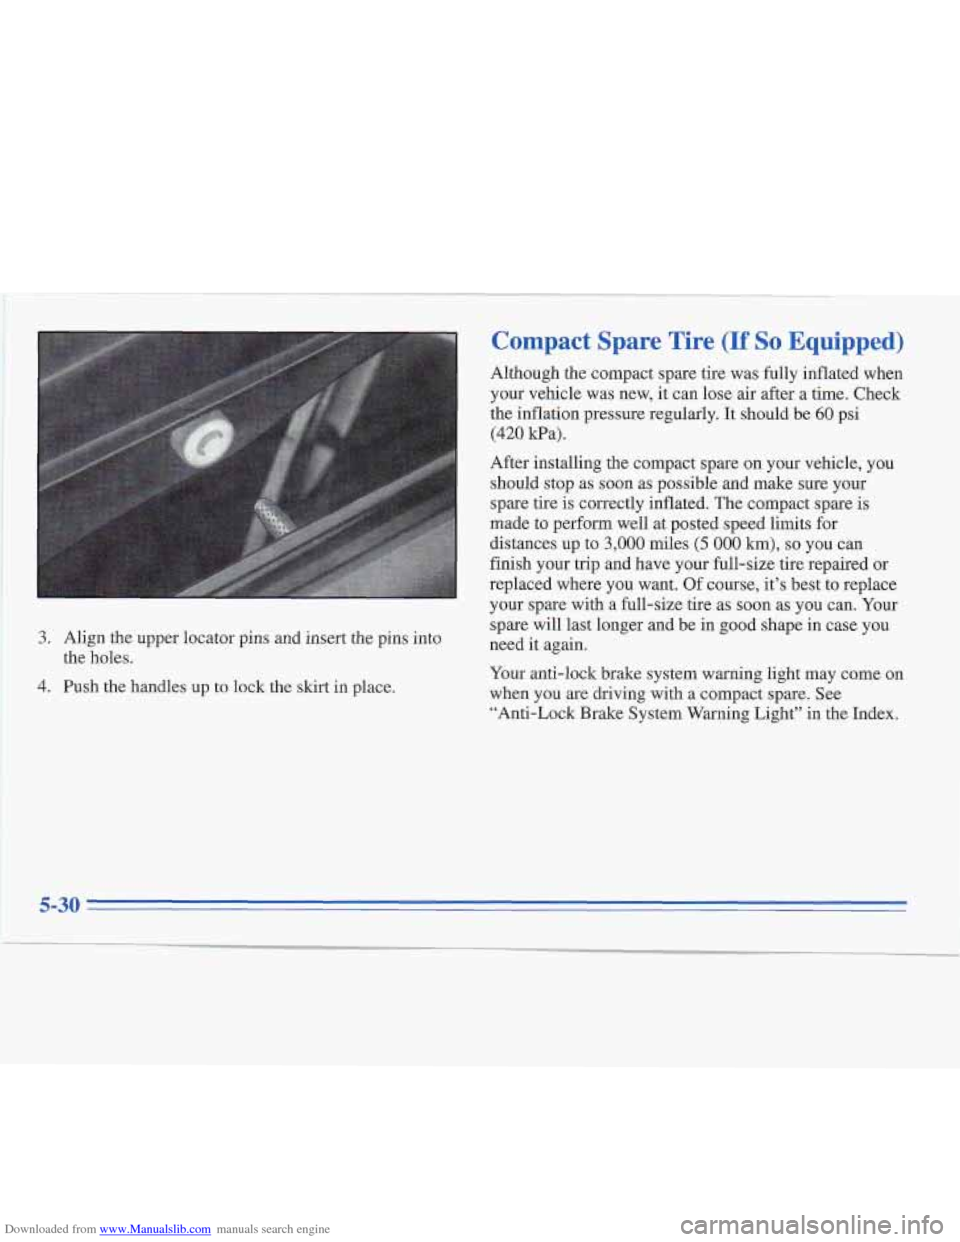
3. Align the upper locator pins and insert the pins into
need it again.
4. Push the handles up to lock the skirt in place.
when you are driving with a compact spare. See
the holes.
5-30
Page 223 of 306
Downloaded from www.Manualslib.com manuals search engine When you put the cap back on, turn it to the right until
you hear at least three clicks. Make sure you fully install
the cap.
The diagnostic system can determine if the fuel
cap has been left off or improperly installed. This would
allow fuel to evaporate into the atmosphere. See
“Malfunction Indicator Lamp” in the Index.
NOTICE:
If you need a new cap, be sure to get the right
type. Your dealer can get one for you.
If you get
the wrong type,
it may not fit or have proper
venting, and your fuel tank and emissions system
might be damaged.
Checking Things Under the Hood
A CkmON’:
An electric fan under the hood can start up and
injure you even when the engine
is not running.
Keep hands, clothing and tools away from any
underhood electric fan.
Things that burn can get on hot engine parts and
start a fire. These include liquids like gasoline,
oil, coolant, brake fluid, windshield washer and
other fluids, and plastic or rubber. You or others
could be burned. Be careful not to drop or spill
things that will burn onto a hot engine.
6-6
Page 225 of 306
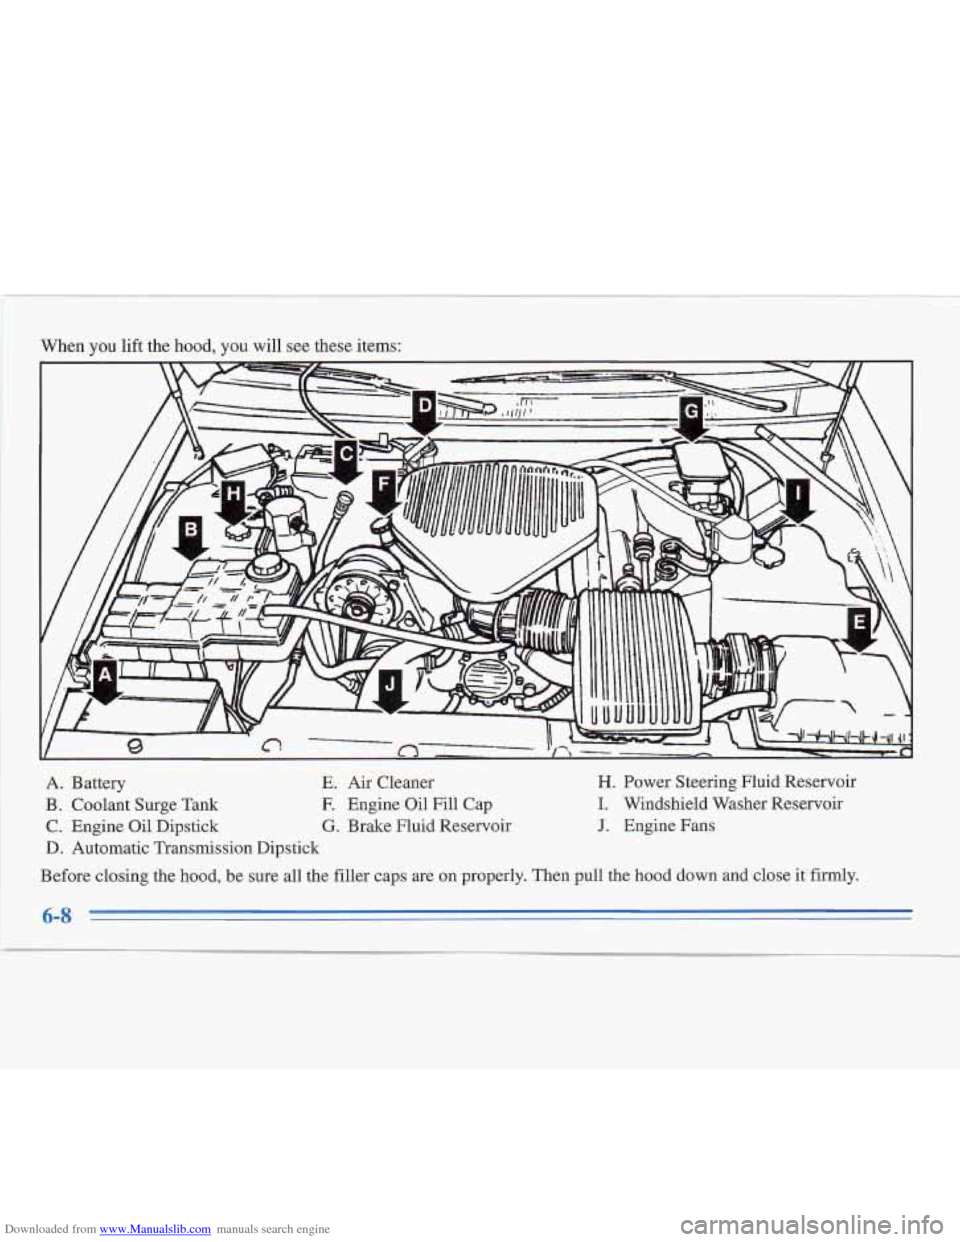
Downloaded from www.Manualslib.com manuals search engine When you lift the hood, you will see these items:
A. Battery E. Air Cleaner
B. Coolant Surge Tank E Engine Oil Fill Cap
C. Engine Oil Dipstick G. Brake Fluid Reservoir
D. Automatic Transmission Dipstick
H. Power Steering Fluid Reservoir
I. Windshield Washer Reservoir
J. Engine Fans
Before closing the hood, be sure all the filler caps are
on properly. Then pull the hood down and close it firmly.
Page 243 of 306
Downloaded from www.Manualslib.com manuals search engine Brakes
Brake Fluid
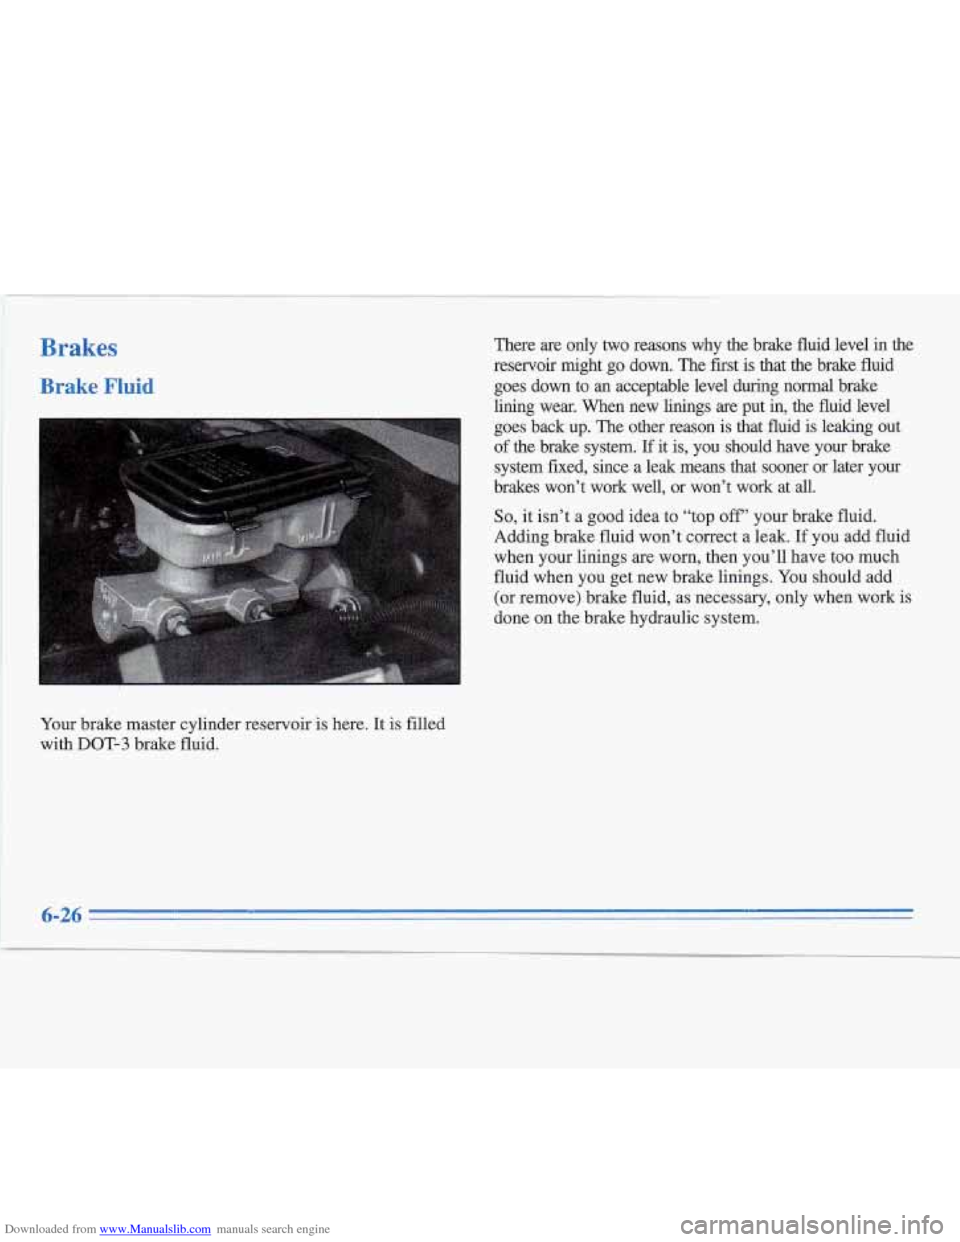
Your brake master cylinder reservoir is here. It is filled
with
DOT-3 brake fluid. There
are only two reasons why
the brake fluid level in the
reservoir might go down. The first is that
the brake fluid
goes down to
an acceptable level during normal brake
lining wear. When new linings
are put in, the fluid level
goes back up. The other reason is that fluid
is leaking out
of the brake system. If it is, you should have your brake
system fixed, since a leak means that sooner or later your
brakes won’t work well, or won’t work at
all.
So, it isn’t a good idea to “top off” your brake fluid.
Adding brake fluid won’t correct a leak.
If you add fluid
when your linings
are worn, then you’ll have too much
fluid when you get new brake linings. You should add
(or remove) brake fluid, as necessary, only when work
is
done on the brake hydraulic system.
6-26
Page 244 of 306
Downloaded from www.Manualslib.com manuals search engine I A CAUTION:
If you have too much brake fluid, it can spill on the
engine. The fluid
wiIl burn if the engine is hot
enough. You or others could be burned, and your
vehicle could be damaged. Add brake fluid only when work is done on the brake hydraulic system. Checking Brake Fluid
I
Refer to
the Maintenance Schedule to determine when to
check your brake fluid. See “Periodic Maintenance
Inspections” in the Index.
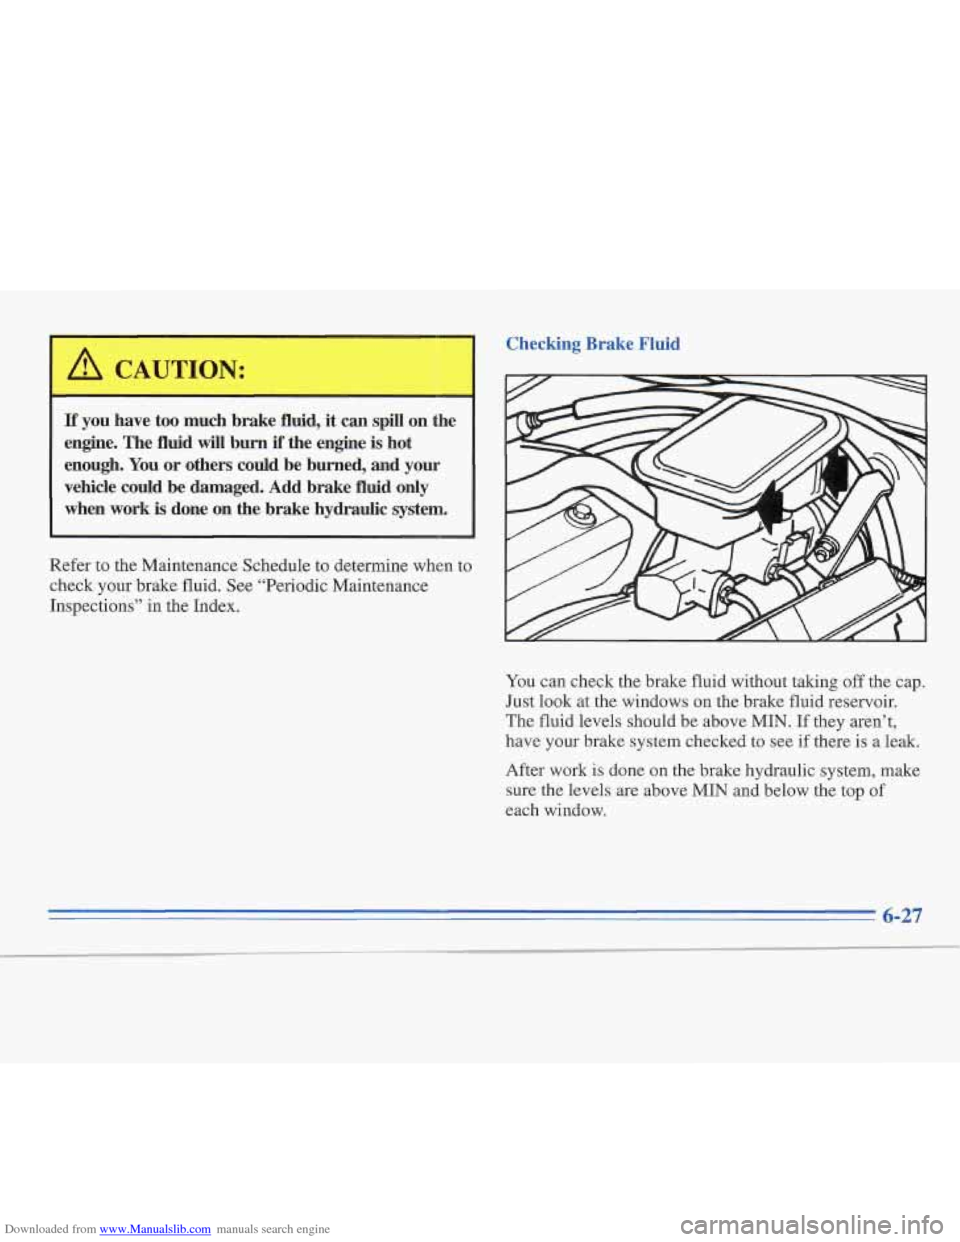
You can check the brake fluid without taking off the cap.
Just look at the windows on the brake fluid reservoir.
The fluid levels should be above
MIN. If they aren’t,
have your brake system checked
to see if there is a leak.
After work is done
on the brake hydraulic system, make
sure the levels are above MIN and below the top of
each window..
6-27