Page 1 of 74
17-1
Lubrication system
components, removing and
installing
Notes:
If large quantities of metal particles or other
deposits (caused, for example, by partial
seizure of the crankshaft or connecting rod
bearings) are found in the engine oil when
performing repairs, clean the oil passages
thoroughly and replace the oil cooler in order to
prevent further damage from occurring later.
Always replace O-rings, gaskets and oil seals
when performing repairs.
The oil level must not be above the max. mark -
otherwise this can cause damage to the
catalytic converter. Markings Page 17
-67
Viscosity grades and oil specifications
Repair Manual, Maintenance
Oil capacities
Repair Manual, Maintenance
Checking oil pressure Page 17
-65
Pa
ge 1 of 74 Lubrication s
ystem com
ponents, removin
g and installin
g
11/21/2002 htt
p://127.0.0.1:8080/audi/servlet/Dis
play?action=Goto&t
yp
e=re
pair&id=AUDI.B5.GE05.17.1
Page 7 of 74
17-7
Notes: Fig. 1 Securing tensioner in position before removing
- Using a hex key, turn toothed belt tensioning roller -1- clockwise 8 mm
in direction of arrow until tensioning lever -2- compresses tensioner -3-
far enough to enable a 2 mm dia. spring pin to be inserted in drilling
and in plunger.
The toothed belt tensioner is oil-damped and can only be compressed
slowly by applying gradual pressure. Use spring pin from 2024 A.
- Insert spring pin and release toothed belt tensioning roller.
Pa
ge 7 of 74 Lubrication s
ystem com
ponents, removin
g and installin
g
11/21/2002 htt
p://127.0.0.1:8080/audi/servlet/Dis
play?action=Goto&t
yp
e=re
pair&id=AUDI.B5.GE05.17.1
Page 22 of 74

17-22
Notes:
Mark the direction of rotation of the toothed belt
with chalk or felt pen before removing. A used
belt can break if it rotates in the wrong direction
when reinstalled.
The toothed belt tensioning element is oil-
damped and can therefore only be compressed
slowly by applying constant pressure.
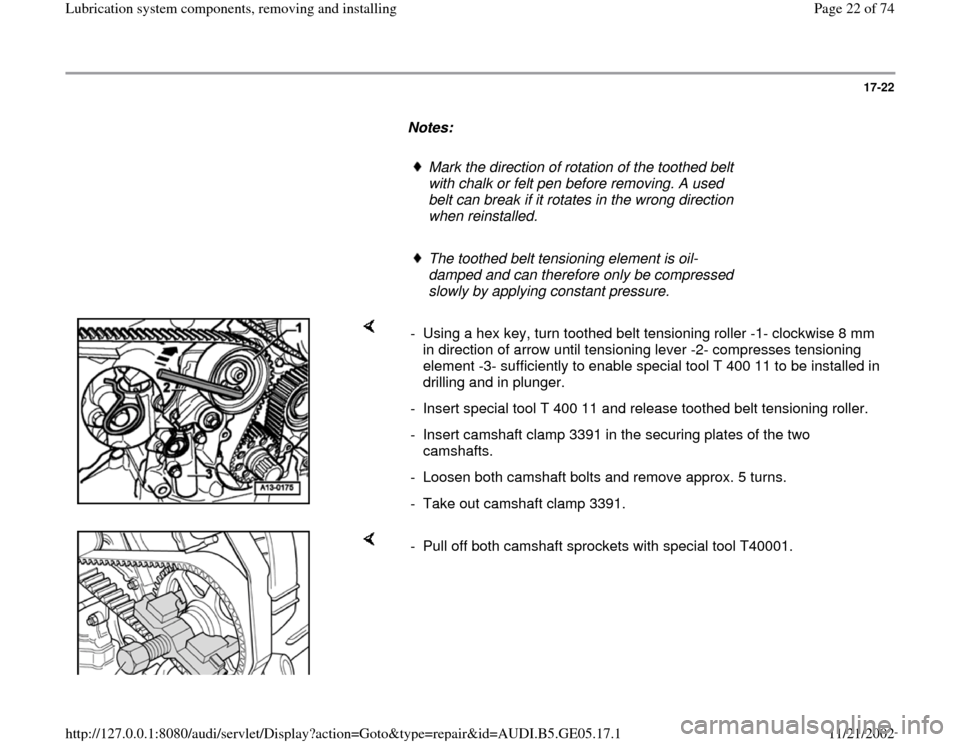
- Using a hex key, turn toothed belt tensioning roller -1- clockwise 8 mm
in direction of arrow until tensioning lever -2- compresses tensioning
element -3- sufficiently to enable special tool T 400 11 to be installed in
drilling and in plunger.
- Insert special tool T 400 11 and release toothed belt tensioning roller.
- Insert camshaft clamp 3391 in the securing plates of the two
camshafts.
- Loosen both camshaft bolts and remove approx. 5 turns.
- Take out camshaft clamp 3391.
- Pull off both camshaft sprockets with special tool T40001.
Pa
ge 22 of 74 Lubrication s
ystem com
ponents, removin
g and installin
g
11/21/2002 htt
p://127.0.0.1:8080/audi/servlet/Dis
play?action=Goto&t
yp
e=re
pair&id=AUDI.B5.GE05.17.1
Page 37 of 74
17-35
- Cut open cable ties -arrows-, open retainer for starter cable and take
out cable.
- Unbolt torque reaction support at front of oil pan.
- Unbolt coolant line from oil pan.
- Disconnect connector from oil pressure switch on left of oil pan.
- Remove torque reaction support -1-.
- Release hose clamps -arrows-.
- Remove water line -2-.
Pa
ge 37 of 74 Lubrication s
ystem com
ponents, removin
g and installin
g
11/21/2002 htt
p://127.0.0.1:8080/audi/servlet/Dis
play?action=Goto&t
yp
e=re
pair&id=AUDI.B5.GE05.17.1
Page 70 of 74
17-64
- Remove crankshaft toothed belt sprocket.
- Remove inner part of oil seal extractor 3203 two
turns (approx. 3 mm) out of outer part and lock
with knurled screw.
Installing - Lubricate threaded head of oil seal extractor, place it in position and,
exerting firm pressure, screw it in as far as possible into oil seal.
- Loosen knurled screw and turn inner part against crankshaft until oil
seal is pulled out.
- Place guide sleeve 3202/1 onto crankshaft journal.
- Slide dry seal over guide sleeve.
Then proceed as for removing, performing steps in reverse order. - Press oil seal in flush with installing sleeve 3265.
Pa
ge 70 of 74 Lubrication s
ystem com
ponents, removin
g and installin
g
11/21/2002 htt
p://127.0.0.1:8080/audi/servlet/Dis
play?action=Goto&t
yp
e=re
pair&id=AUDI.B5.GE05.17.1
Page 71 of 74
17-65
Oil pressure and oil pressure switch,
checking
Note:
Servicing and checking function of oil pressure
warning lamp and buzzer:
Electrical Wiring Diagrams, Troubleshooting &
Component Locations
Test procedure
- Remove oil pressure switch (F1) and screw oil pressure switch into
tester.
- Screw tester into oil pan in place of oil pressure switch.
- Connect brown wire of tester to ground (GND) (-).
- Using test leads from VAG 1594, connect diode test lamp VAG 1527
between positive battery terminal (+) and oil pressure switch.
- Start engine and gradually increase engine speed.
LED should light up at 1.2...1.6 bar, otherwise replace oil pressure
switch.
- Increase engine speed further.
At 2000 RPM and an oil temperature of 80 C oil pressure should be at
least 2.0 bar.
Pa
ge 71 of 74 Lubrication s
ystem com
ponents, removin
g and installin
g
11/21/2002 htt
p://127.0.0.1:8080/audi/servlet/Dis
play?action=Goto&t
yp
e=re
pair&id=AUDI.B5.GE05.17.1