1994 PONTIAC GRAND-AM radiator cap
[x] Cancel search: radiator capPage 95 of 274

Features & Controls
Fuel Gage (CONT.)
0 It takes a little more or less fuel to fill
up than the gage indicated. For
example, the gage may have indicated
the tank was half full, but it actually
took a little more or less than half the
tank’s capacity to fill the tank.
0 The gage moves a little when you turn
a corner or speed up.
0 The gage doesn’t go back to “E” when
you turn off the ignition.
For your fuel tank capacity, see “Service
Station Information”
on the last page of
this manual.
Engine Coolant Temperature Warning
Light
This light tells you that your engine
coolant has overheated or your radiator
cooling fan is not working.
If you have been operating your vehicle
under normal driving conditions, you should pull
off the road, stop your vehicle
and
turn the engine off as soon as possible
HOT COOLANT CAN BURN YOU
BADLY!
In “Problems on the Road”, this manual
shows what to do. See “Engine
Overheating” in the Index.
Engine Coolant
Temperature Gage
This gage shows the engine coolant
temperature. If the gage pointer moves
into the red area, your engine is too hot!
That reading means the same thing as the
warning light. It means that your engine
coolant has overheated.
If you have been operating your vehicle
under normal driving conditions, you
should pull
off the road, stop your vehicle
and
turn off the engine as soon as possible.
HOT COOLANT CAN BURN YOU
BADLY!
In “Problems on the Road”, this manual shows what to do. See “Engine
Overheating” in the Index.
ProCarManuals.com
Page 160 of 274
How to Add Coolant to the
Coolant Surge Tank
If you haven’t found a problem yet, but
the coolant level isn’t at or above
FULL
COLD,-add a 50/50 mixture of clean
water (preferably distilled) and a proper
antifreeze
at the coolant surge tank, but be
sure the cooling system, including the
coolant surge tank pressure cap, is cool
before
you do it. (See “Engine Coolant”
in the Index for more information about
the proper coolant
mix.)
NOTICE:
In cold weather, water can freeze
and crack the engine, radiator,
heater core and other
parts. So use
the recommended coolant.
L
159...
ProCarManuals.com
Page 161 of 274
Problems on the Road
..
How to Add Coolant to the
Coolant Surge Tank
(CONK)
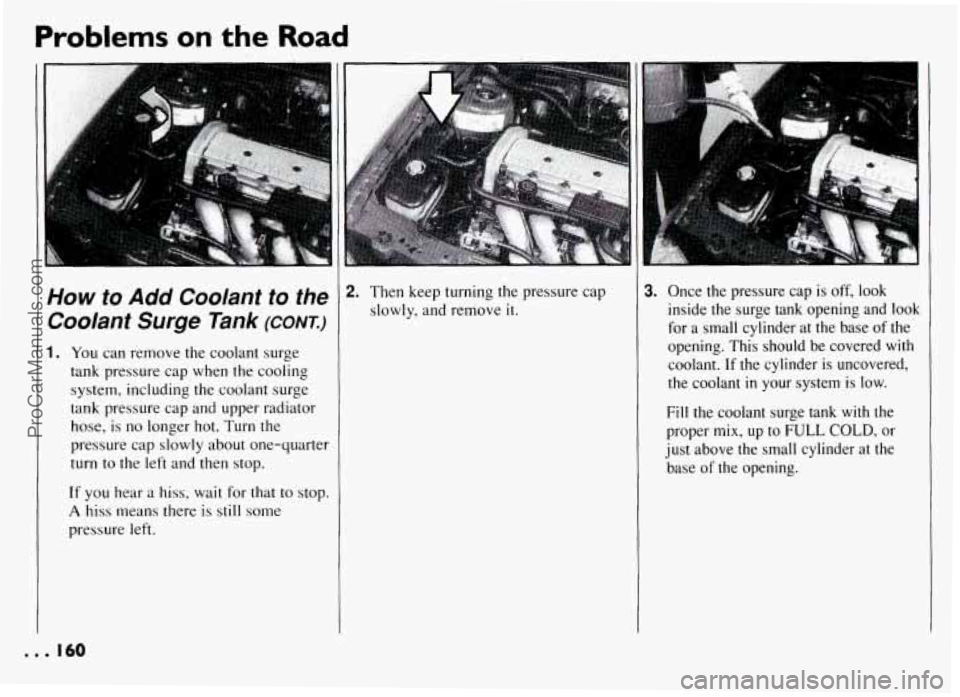
1. You can remove the coolant surge
tank pressure cap when the cooling
system, including the coolant surge
tank pressure cap and upper radiator
hose, is no longer hot. Turn the
pressure cap slowly about one-quarter
turn to the left and then stop.
If you hear a hiss, wait for that to stop.
A hiss means there is still some
pressure left.
2. Then keep turning the pressure cap
slowly, and remove it.
. Once the pressure cap is off, look
inside the surge tank opening and look
for a small cylinder at the base
of the
opening. This should be covered with
coolant. If the cylinder
is uncovered,
the coolant
in your system is low.
Fill the coolant surge tank with the
proper mix, up to FULL COLD, or
just above the small cylinder at the
base
of the opening.
... 160
ProCarManuals.com
Page 162 of 274
7
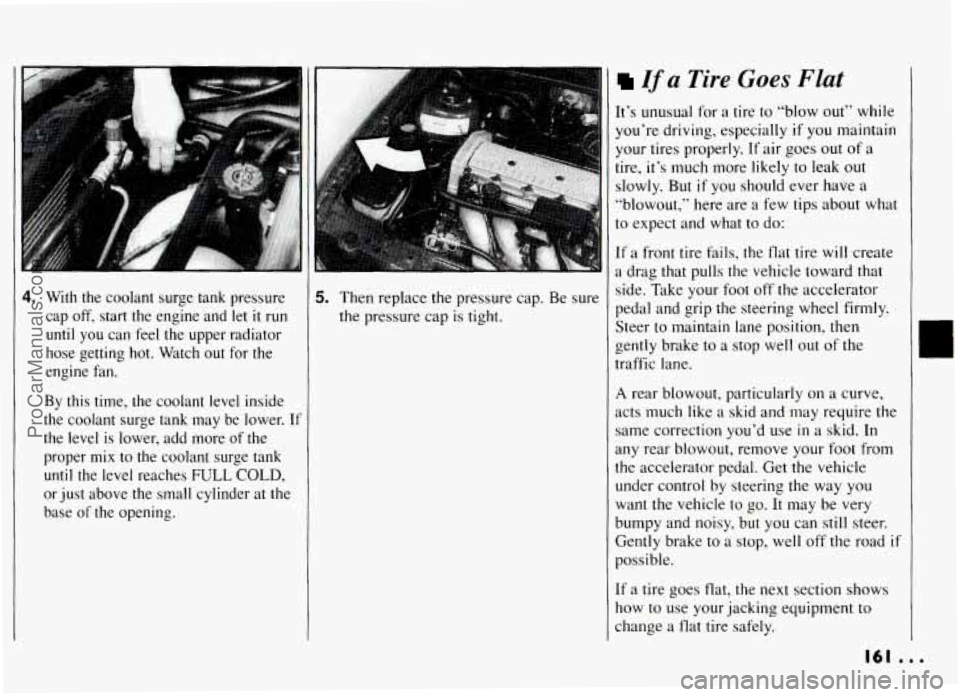
4. With the coolant surge tank pressure
cap off, start the engine and let
it run
until you can feel the upper radiator
hose getting hot. Watch out for the
engine fan.
By this time, the coolant level inside
the coolant surge tank may be lower. If
the level is lower, add more
of the
proper
mix to the coolant surge tank
until the level reaches FULL COLD,
or just above the small cylinder at the
base
of the opening.
I
5. Then replace the pressure cap. Be sure
the pressure cap is tight.
If a Tire Goes Flat
It’s unusual for a tire to “blow out” while
you’re driving, especially
if you maintain
your tires properly. If air goes out
of a
tire, it’s much more likely to leak out
slowly. But if you should ever have a
“blowout,” here are
a few tips about what
to expect and what to do:
If a front tire fails, the flat tire will create
a drag that pulls the vehicle toward that
side. Take your foot off the accelerator
pedal and grip
the steering wheel firmly.
Steer to maintain lane position, then
gently brake to
a stop well out of the
traffic lane.
A rear blowout, particularly on a curve,
acts much like a skid and may require
the
same correction you’d use in a skid. In
my rear blowout, remove your foot from
the accelerator pedal. Get the vehicle
under control by steering the way you
want the vehicle to go. It may be very
wmpy and noisy, but you can still steer.
Sently brake to a stop, well off the road if
Jossible.
[fa tire goes flat, the next section shows
low to use your jacking equipment to
:hange a
flat tire safely.
161 ...
ProCarManuals.com
Page 189 of 274

Service & Appearance Care
How to Check:
The proper fluid should be added if the
level is at or below the STEP mark on the
reservoir cap. See the instructions on the
reservoir cap.
Engine Coolant
The following explains your cooling
system and how to add coolant when
it is
low.
If you have a problem with engine
overheating, see “Engine Overheating”
in
the Index,
The proper coolant for your Pontiac will:
Give freezing protection down to
-34°F (-37°C).
Give boiling protection up to 262°F
( 128 “C).
Protect against rust and corrosion.
Help keep the proper engine
temperature.
Let the warning lights work as they
should.
What to Use
Use a mixture of one-half clean water
(preferably distilled) and one-half
antifreeze that meets “GM Specification
1825-M,” which won’t damage aluminum
parts.
You can also use a recycled coolant
conforming to GM Specification 1825-M
with a complete coolant flush and refill. If
you use this mixture, you don’t need to
add anything else. NOTICE:
If you use an improper coolant mix,
your engine could overheat and be
badly damaged. The repair cost
wouldn’t be covered by your
warranty. Too much water
in the
mix can freeze and crack the engine,
radiator, heater core and other parts.
... 188
ProCarManuals.com
Page 191 of 274
Service & Appearance Care
V
P
I
E
b
S’
C
C.
P
A
I Surge Tank Pressure
Cap
NOTICE:
Your pressure cap is an 18 psi
( 124 kPa) pressure-type cap and
must be tightly installed to prevent
coolant
loss and possible engine
damage from overheating.
irhen you replace your surge tank
ressure cap, a GM cap is recommended.
I Thermostat
lngine coolant temperature is controlled
y a thermostat in the engine coolant
ystem. The thermostat stops the flow
of
oolant through the radiator until the
oolant reaches a preset temperature.
Jhen you replace your thermostat, an
.C@ thermostat is recommended.
Power Steering Fluid
How To Check Power
Steering Fluid
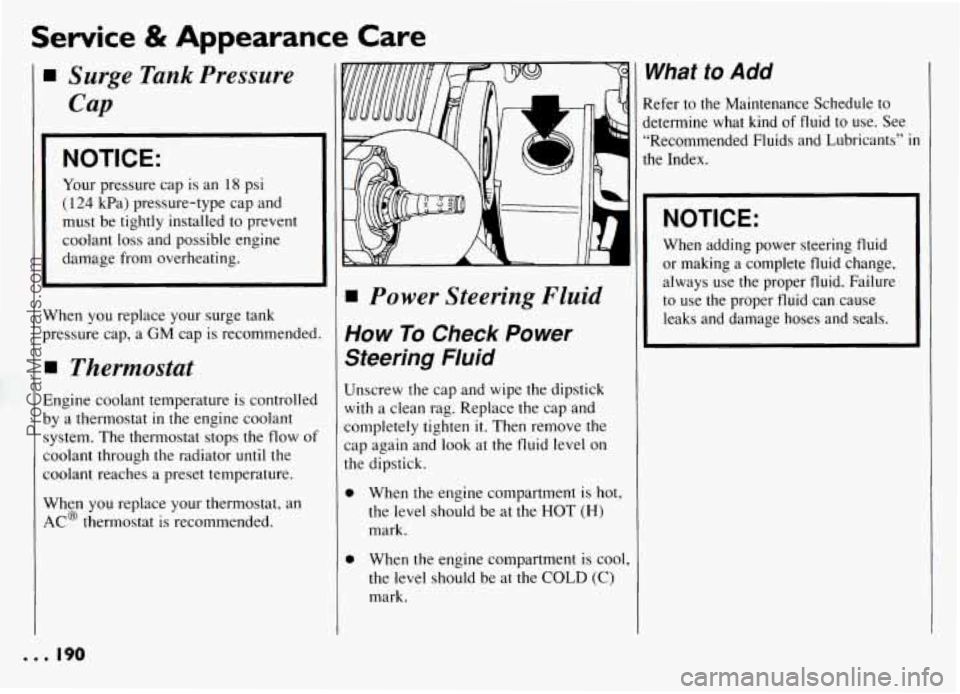
Unscrew the cap and wipe the dipstick
with a clean rag. Replace the cap and
completely tighten
it. Then remove the
cap again and
look at the fluid level on
the dipstick.
0
0
When the engine compartment is hot,
the level should be at the HOT
(H)
mark.
When the engine compartment is cool,
the level should be at the
COLD (C)
mark.
1
I
1
What to Add
Refer to the Maintenance Schedule to
jetermine what kind
of fluid to use. See
“Recommended Fluids and Lubricants”
in
the Index.
NOTICE:
When adding power steering fluid
or making a complete fluid change,
always use the proper fluid. Failure
to use the proper fluid can cause
leaks and damage hoses and seals.
... 190
ProCarManuals.com
Page 192 of 274
NOTICE:
1 Windshield Washer
Fluid
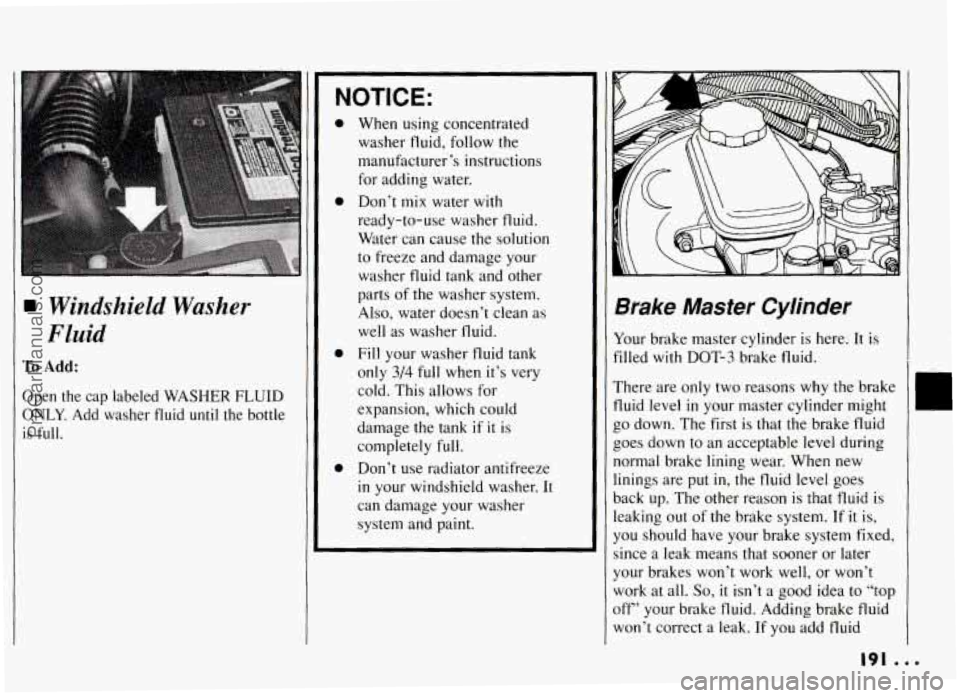
To Add:
Open the cap labeled WASHER FLUID
ONLY. Add washer fluid until the bottle
is full.
a
e
a
a
When using concentrated
washer fluid, follow the
manufacturer’s instructions
for adding water.
Don’t
mix water with
ready-to-use washer fluid.
Water can cause the solution
to freeze and damage your
washer fluid tank and other
parts of the washer system.
Also, water doesn’t clean as
well as washer fluid.
Fill your washer
fluid tank
only
3/4 full when it’s very
cold. This allows for
expansion, which could
damage the tank if
it is
completely
full.
Don’t use radiator antifreeze
in your windshield washer. It
can damage your washer
system and paint.
Brake Master Cylinder
Your brake master cylinder is here; It is
filled
with DOT-3 brake fluid.
There are only two reasons why the brake
fluid level
in your master cylinder might
go down. The first is that the brake fluid
goes down to an acceptable level during
normal brake lining wear. When new
linings are put
in, the fluid level goes
back up. The other reason
is that fluid is
leaking out of the brake system.
If it is,
you should have your brake system fixed,
since a leak means that sooner or later
your brakes won’t work well, or won’t
work at all.
So, it isn’t a good idea to “top
off’ your brake fluid. Adding brake fluid
won’t correct
a leak. If you add fluid
191 ...
ProCarManuals.com
Page 231 of 274
Maintenance Schedule
Explanation of Scheduled Maintenance
Services
Following are explanations of the services listed in Schedule I
and Schedule 11.
The proper fluids and lubricants to use are listed in Section D.
Make sure whoever services your vehicle uses these. All parts
should be replaced and all necessary repairs done before you or
anyone else drives the vehicle.
NOTE: To determine your engine’s displacement and code, see
“Engine Identification”
in the Index.
1.
2.
Engine Oil and Filter Change* -- Always use SH or SG
Energy Conserving I1 oils of proper viscosity. The “SH” or
“SG” designation may be shown alone or in combination
with others, such as “SH/CD,” “SH, SG, CD,” “SG/CD,”
etc. To determine the preferred viscosity for your vehicle’s
engine (e.g., SAE 5W-30 or SAE 10W-30), see “Engine
Oil”
in the Index.
Chassis Lubrication -- Lubricate suspension and steering
linkage. Lubricate the transaxle shift linkage, underbody
contact points and linkage.
3.
4.
5.
Tire and Wheel Rotation and Inspection -- For proper
wear and maximum tire life, rotate your tires following the
instructions
in this manual. See “Tires, Inspection &
Rotation” in the Index. Check the tires for uneven wear or
damage. If you see irregular or premature wear, check the
wheel alignment, Check for damaged wheels also.
Engine Accessory Drive Belt(s) Inspection -- Inspect the
belt(s) for cracks, fraying, wear and proper tension. Replace
as needed. (Belts can have many small cracks
in individual
ribs without affecting performance.)
Cooling System Service* -- Drain, flush and refill the
system with new or approved recycled coolant conforming
to
GM Specification 1825M. Keep coolant at the proper
mixture as specified. See “Coolant”
in the Index. This
provides proper freeze and boil protection, corrosion
inhibitor level and maintains proper engine operating
temperature.
Inspect hoses and replace if they are cracked, swollen or
deteriorated. Tighten screw-type hose clamps. Clean the
outside of the radiator and air conditioning condenser. Wash
the pressure cap and neck.
To help ensure proper operation, we recommend a pressure
test of both the cooling system and the pressure cap.
. . 230
ProCarManuals.com