1994 PONTIAC GRAND-AM ABS
[x] Cancel search: ABSPage 4 of 274

How to Use This Manual
It
Using Your 1994 Pontiac
Owner’s Manual
I‘
Many people read their owner’s manual
from beginning
to end when they first
receive their new vehicle. This will help
you learn about the features and controls
for your vehicle. In this manual, you’ll
find that pictures and words work
together to explain things quickly.
There are nine parts with black-tabbed
pages
in this manual. Each part begins
with a brief list of contents, so you can
usually tell at a glance
if that part
contains the information you want.
You can bend the manual slightly to reveal
the black tabs that help you find a part.
I
Part 1: Seats & Restraint Systems
This part tells you how to use your seats
and safety belts properly. It also explains
the
“SRS” (Air Bag) System.
Part 2: Features & Controls
This part,explains how to start and
operate your Pontiac.
Part 3: Comfort Controls & Audio
Systems
This part tells you how to adjust the
ventilation and comfort controls and how
to operate your sound system.
Part 4: Your Driving and the Road
Here you’ll find helpful information and
tips about
the road and how to drive
under different conditions.
Part 5: Problems on the Road
This part tells you what to do if you have
a problem while driving, such as a flat tire
or engine overheating, etc.
Part 6: Service & Appearance Care
Here the manual tells you how to keep
your Pontiac running properly and
looking good.
Part 7: Maintenance Schedule
This part tells you when to perform
vehicle maintenance and what fluids and
lubricants to use.
Part 8: Customer Assistance
Information
This part tells you how to contact Pontiac
for assistance and how to get service
publications. It
also gives you information
on “Reporting Safety Defects’’ on
page 247.
Part 9: Index
Here’s an alphabetical listing of almost
?very subject
in this manual. You can use it
to quickly find something you want to read.
Service Station Information
This is a quick reference of service
information.
You can find it on the last
page of this manual.
3.. .
ProCarManuals.com
Page 125 of 274

Your Driving and the Road
anti-Lock Brakes (ABS)
‘CONT.)
’his light on the instrument panel will go
In when you start your vehicle.
Nhen you start your vehicle, or when yo^
begin to drive away, you may hear a
nomentary motor or clicking noise. And
‘ou may even notice that your brake
edal moves a little while this
is going on
rhis is the ABS system testing itself.
If
here’s a problem with the anti-lock brakc
ystem, the anti-lock brake system
Yarning light will stay on or flash.
iee “Anti-lock Brake System Warning
ight” in the Index.
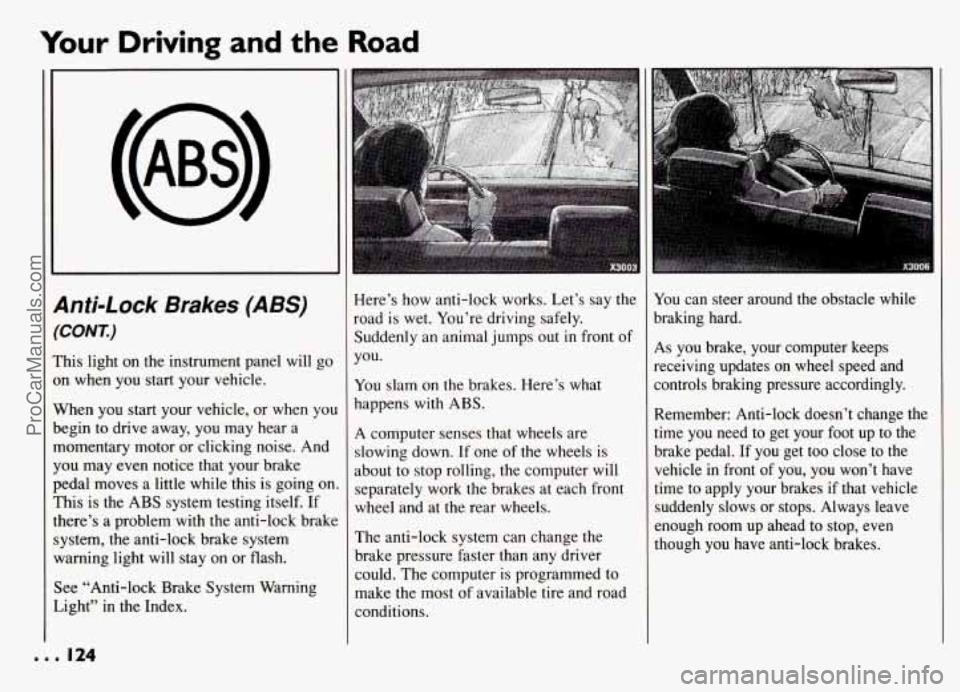
Here’s how anti-lock works. Let’s say the
road is wet. You’re driving safely.
Suddenly an animal jumps out in front of
you.
You slam on the brakes. Here’s what
happens with ABS.
A computer senses that wheels are
slowing down. If one of the wheels is
about to stop rolling, the computer will
separately work the brakes at each front
wheel and at the rear wheels.
The anti-lock system can change the
brake pressure faster than any driver
could. The computer is programmed to
make the most of available tire and road
conditions.
You can steer around the obstacle while
braking hard.
As you brake, your computer keeps
receiving updates
on wheel speed and
controls braking pressure accordingly.
Remember: Anti-lock doesn’t change the
time you need to get your foot up to the
brake pedal.
If you get too close to the
vehicle in front of you, you won’t have
time to apply your brakes
if that vehicle
suddenly slows
or stops. Always leave
enough room
up ahead to stop, even
though you have anti-lock brakes.
... 124
ProCarManuals.com
Page 130 of 274

Of course, traction is reduced when water, I
snow, ice, gravel, or other material is on
the road. For safety, you’ll want to slow
down and adjust your driving to these conditions. It is important to slow down
on slippery surfaces because stopping
distance will be longer and vehicle
control more limited.
While driving on a surface with reduced traction, try your best to avoid sudden
steering, acceleration, or braking
(including engine braking by shifting to a
lower gear). Any sudden changes could cause the tires to slide.
You may not?
realize the surface is slippery until your
vehicle is skidding. Learn to recognize
warning clues
-- such as enough water;
ice or packed snow on the road to make a
“mirrored surface”
-- and slow down
when you have any doubt.
Remember: Any anti-lock braking system (ABS) helps avoid only the braking skid.
I
Driving at Night
Night driving is more dangerous than day
driving. One reason is that some drivers
are likely to be impaired
-- by alcohol or
drugs, with night vision problems, or by
fatigue.
Here are some tips on night driving.
Drive defensively.
0 Don’t drink and drive.
Adjust your inside rearview mirror to
reduce the glare from headlights
behind you.
0 Since you can’t see as well, you may
need to slow down and keep more
space between you and other vehicles.
0 Slow down, especially on higher
speed roads. Your headlights can light
up only
so much road ahead.
In remote areas, watch for animals.
If you’re tired, pull off the mad in a
safe place and rest.
Night Wsion
No one can see as well at night as in the
daytime. But as we get older these
differences increase. A 50-year-old driver
may require at least twice as much. light to
see the same thing at night as a
20-year-old.
What you do in the daytime can also
affect your night vision. For example, if
you spend the day
in bright sunshine you
are wise to wear sunglasses. Your eyes
will have less trouble adjusting to night.
But
if you’re driving, don’t wear
sunglasses at night. They may cut down
on glare from headlights, but they also
make a lot of things invisible.
129...
ProCarManuals.com
Page 146 of 274

1 Driving On Grades
Reduce speed and shift to a lower gear
before you start down a long or steep
downgrade. If you don’t shift down,
you
might have to use your brakes so much
that they would get hot and no longer
work well.
On a long uphill grade, use the highest
gear possible. If you cannot maintain
posted speeds, driving at a lower speed
may help avoid overheating your engine
and transaxle.
If you have a manual transaxle with fifth
gear, it’s better not to use fifth gear. Just
drive
in fourth gear (or, as you need to, a
lower gear).
Parking on Hills
You really should not park your vehicle,
with a trailer attached, on
a hill. If
something goes wrong, your rig could
start to move. People can be injured, and
both your vehicle and the trailer can be
damaged.
But if you ever have to park your rig on a
hill, here’s how to do it:
1. Apply your regular‘brakes, but don’t
shift into PARK (P) yet, or into gear
for a manual transaxle.
2. Have someone place chocks under the
trailer wheels.
3. When the wheel chocks are in place,
release the regular brakes
until the
chocks absorb the load.
4. Reapply the regular brakes. Then
apply your parking brake, and then
shift to PARK
(P), or REVERSE (R)
for a manual transaxle.
5. Release the regular brakes.
When You Are Ready to Leave After
Parking
on a Hill
1. Apply your regular brakes and hold
the pedal down while you:
Start your engine;
Shift into a gear; and
Release the parking brake.
2. Let up on the brake pedal.
3. Drive slowly until the trailer is clear
of the chocks.
4. Stop and have someone pick up and
store the chocks.
145...
ProCarManuals.com
Page 264 of 274

Index
Adding
Brake Fluid ................. 192
Electrical Equipment
..... 107. 2 11
Engine Coolant
.......... 159. 189
Engine Oil
.................. 18 1
Hydraulic Clutch Fluid ........ 187
Power Steering Fluid
..... 190. 216
Transaxle Fluid
Automatic ........... 185. 215
Manual
.............. 187. 215
Windshield Washer Fluid
...... 191
Air Bag Readiness Light .......... 22
Air Bag (Supplemental Restraint
System - SRS) ................. 21
Air Cleaner .................... 183
Air Conditioner
................ 103
Alcohol. Driving Under the
Influence of .................. 120
Alcohol
in Gasoline ......... 17 1. 172
Aluminum Wheels. Cleaning ...... 208
Antenna. Fixed
Mast ............ 118
Antifreeze
..................... 188
Anti-Lock Brake System (ABS)
... 123
Anti-Lock Brake System
Warning Light ................. 99
Appearance Care and Materials
.... 204
Ashtray and Lighter
.............. 86
Audio Systems
................. 106
AM/FM Stereo Radio ......... 108
AM/FM Stereo Radio
with
Cassette Player ............. 109
AM/FM Stereo Radio with
Cassette Player and Graphic
Equalizer
.................. 11 1
AM/FM Stereo Radio with
Compact Disc Player ........ 11 3
Care of Audio Systems
........ 11 7
Delco LOC II@
.............. 115
Radio Reception. For the Best
. . 117
Setting the Clock
............. 107
Automatic Door Locks ............ 48
Automatic Lap-Shoulder Belt
(see “Safety Belts”)
Automatic Transaxle
Adding Fluid ............ 185. 215
Checking Fluid
.............. 184
Shifting
..................... 59
Starting Your Engine
........... 56
Battery .................. 148. 194
Jump Starting
........... 148. 194
Rundown Protection
........... 80
Voltmeter
.................... 97
BBB Auto Line
................ 245
Blizzard. If You’re Caught In a
.... 137
Block Heater. Engine
......... 58. 182
Blowout. Tire
.................. 16 1
Brakes
....................... 123
Adjustment ................. 193
Anti-Lock Brake System (ABS)
. 123
Brake Pedal Travel
........... 193
Fluid
...................... 191
Master Cylinder ............. 191
Parking
..................... 66
Rear Drums
................. 192
Replacement
................ 193
Warning Light
................ 98
Wear Indicators
.............. 192
Brakes. Anti-Lock .............. 123
Brake System Warning Light
....... 98
Anti-Lock Brake System
....... 99
Standard Brakes
.............. 99
Brakenramaxle Shift Interlock
..... 69
Warning Light
................ 99
Braking
....................... 123
Braking in Emergencies
.......... 125
,‘Break-in", New Vehicle
Braking Technique .............. 123
Normal Driving ............... 54
When Towing a Trailer ........ 141
Buckling Up (see “Safety Belts”)
Bulb Replacement
Fog Lights .............. 196. 217
Headlight
............... 195. 217
Taillight
................ 196. 217
Capacities & Specifications ...... 215
Carbon Monoxide
in Exhaust . . 70. 138
Cassette Tape Player (see “Audio
Center Passenger Position ......... 27
Chains. Safety
................. 143
Chains. Tire
................... 203
Systems”) C
263 ...
ProCarManuals.com
Page 271 of 274

warning Flashers. Hazard ....... 148
Warning Lights
.................. 93
ABS
........................ 99
Air Bag Readiness
............ 22
Battery
...................... 97
Brake
....................... 98
Charging System
.............. 97
Check Gauges
............... 100
Coolant Temperature
.......... 94
Fasten Belts
.................. 16
Low Coolant ................. 95
Oil
......................... 95
Safety Belt
.................. 16
Service Engine Soon
.......... 100
Upshift Indicator
............ 65. 99
Washer. Windshield .............. 82
Weight
Gross Axle Rating (GAWR) .... 197
Gross Vehicle Rating (GVWR)
. . 197
Wheel Alignment
& Tire Balance . . 202
Wheel Covers.
How to Remove .... 163
Wheel Nuts
.................... 163
Wheel Nut Torque
.............. 166
Wheel Replacement
............. 202
Defogging .............. 102. 104
Power
...................... 72
Standard
.................... 72
Windshield Washer .............. 82
Windows
Windshield Washer Fluid ......... 191
Windshield Wiper Blade
Replacement ................. 196
Windshield Wipers
............... 81
Cleaning
................... 207
Controlled Cycle
.............. 81
Winter Driving
................. 136
Driving on Snow or Ice
........ 136
If Your Car is Stuck in Deep
Snow ..................... 138
If You’re Caught in a Blizzard
. . 137
Wrecker Towing
................ 152
... 270
ProCarManuals.com