1994 MAZDA MX-5 clock
[x] Cancel search: clockPage 42 of 1708

ENGINE TUNE-UP ENGINE TUNE-UP PREPARATION SST I 49 9200 020 Tension gauge, V-ribbed belt For inspection of ignition timing and idle speed For inspection of drive belt tension ENGINE OIL 49 801 9 9AO System selector Warning Continuous exposure with USED engine oil has caused skin cancer in laboratory mice. Protect your skin by washing with soap and water im- mediately after this work. Inspection 1. Be sure the vehicle is on level ground. 2. Warm up the engine to normal operating temperature and stop it. 3. Wait for five minutes. 4. Remove the dipstick and check the oil level and condi- tion. 5. Add or replace oil if necessary. Note The distance between the L and F marks on the dip- stick represents 0.8 L (0.85 US qt, 0.70 Imp qt}. ENGINE COOLANT Inspection Coolant level (engine cold) Warning Removing the radiator cap or the coolant filler cap while the engine is running, or when the engine and radiator are hot is dangerous. Scalding cool- ant and steam can shoot out and cause serious in- jury. It can also damage the engine and cooling system. Turn off the engine and wait until it is cool. Even then, be very careful when removing the cap. Wrap a thick cloth around it and slowly turn it counterclockwise to the first stop. Step back while the pressure escapes. When you're sure all the pressure is gone, press down on the cap-still using a cloth - turn it, and remove it. 1. Verify that the coolant level is near the radiator filler neck. 2. Verify that the coolant level in the coolant reservoir is be- tween the FULL and LOW marks. 3. Add coolant if necessary. Gartner Banana
Page 51 of 1708

ON-VEHICLE MAINTENANCE Installation Note Tensioner and tensioner spring 1. Install the tensioner and the tensioner spring. 2. Protect the tensioner with a rag. Pry the tensioner out- -,, ward with a bar. 3. Temporarily tighten the tensioner lock bolt with the ten- sioner spring fully extended. Timing belt 1. Verify that the timing belt pulley mark is aligned with the timing mark. 2. Verify that the camshaft pulley marks are aligned with the seal plate marks. E for intake side, and I for exhaust side. 3. Install the timing belt so that there is no looseness at the idler side or between the camshaft pulleys. 4. Install the pulley boss and pulley lock bolt. 5. Turn the crankshaft two turns clockwise and face the pin on the pulley boss upright. Do not turn the crankshaft counterclockwise. 6. Verify that the camshaft pulley marks are again aligned with the seal plate marks. If not aligned, remove the timing belt and repeat from tensioner installation. 7. Turn the crankshaft 1 and 516 turns clockwise and align the timing belt pulley mark with the tension set mark for proper timing belt tension adjustment. 8. Using the SST, loosen the pulley lock bolt and remove the bolt and pulley boss. Do not turn the crankshaft. 9. Verify that the timing belt pulley mark is aligned with the tension set mark. Gartner Banana
Page 52 of 1708

ON-VEHICLE MAINTENANCE B Stem After Installation 10. Loosen the tensioner lock bolt to apply spring tension to the timing belt. 11. Tighten the tensioner lock bolt. Tightening torque: 38-51 N-m (3.8-5.3 kgf.m, 28--38 ftlbf) 12. Install the pulley boss and pulley lock bolt. 13. Turn the crankshaft 2 and 116 turns clockwise and verify that the timing marks are correctly aligned. 14. Measure the timing belt deflection by applying moderate pressure 98 N (10 kgf, 22 Ibf) midway between the cam- shaft pulleys. If the deflection is not correct, repeat from Step 10 above. Deflection: 9.0-11.5mm (0.36-4.45 in) at 98 N (10 kgf, 22 Ibf) Pulley lock bolt Hold the crankshaft with the SST and tighten the pulley lock bolt. Tightening torque: 157-166 N.m (16-17 kgf.m, 116-122 ftlbf) 1. till the radiator with specified amount and type of engine coolant. (Refer to section E.) 2. Connect the negative battery cable. 3. Start the engine and check, and if necessary, adjust the ignition timing. Gartner Banana
Page 111 of 1708

B ASSEMBLY TIMING MARK Timing Belt Pulley 1. lnstall the timing belt pulley. 2. lnstall the pulley woodruff key with the tapered side to- ward the oil pump body. d Idler lnstall the idler. Tightening torque: 38-51 N.m (3.8-5.3 kgf.m, 28-38 ftlbf) Tensioner and Tensioner Spring 1. lnstall the tensioner and the tensioner spring. 2. Temporarily secure the tensioner with the spring fully ex- tended. Timing Belt 1, Turn the crankshaft and align the timing belt pulley mark with the timing mark. Do not turn the crankshaft counter- clockwise. 2. Verify that the camshaft pulley marks are aligned with the seal plate marks. E for intake side and I for exhaust side. Do not turn the crankshaft counterclockwise. 3. lnstall the timing belt so that there is no looseness at the idler side or between the two camshaft pulleys. 4. lnstall the pulley boss and pulley lock bolt. 5. Turn the crankshaft two turns clockwise, and align the timing belt pulley mark with the timing mark. Do not turn the crankshaft counterclockwise. 6. Verify that the camshaft pulley marks are aligned with the seal plate marks. J If not aligned, remove the timing belt and repeat from tensioner installation. Gartner Banana
Page 112 of 1708

ASSEMBLY B r/ DEFLECTION %HECKING POINT , 7. Reverse the direction of the SST on the flywheel (MT) or drive plate (AT). 8. Tighten the pulley lock bolt. Tightening torque: 157-166 N-m (16-17 kgf.m, 116-122 ft-lbf) 9. Turn the crankshaft 1 and 516 turns clockwise, and align the timing belt pulley mark with the tension set mark. 10. Loosen the tensioner lock bolt to apply tension to the tim- ing belt. 11. Tighten the tensioner lock bolt. Tightening torque: 38-51 N-m (3.8-5.3 kgf-m, 28-38 ft4bf) 12. Turn the crankshaft 2 and 116 turns clockwise and verify that the timing marks are correctly aligned. 13. Measure the timing belt deflection by applying moderate pressure 98 N (10 kgf, 22 Ibf) midway between the two camshaft pulleys. If the deflection is not correct, repeat from step 7 above. Deflection: 9.0-11.5mm (0.36-0.45 in) at 98 N (1 0 kgf, 22 Ibf) Timing Belt Cover Install the lower, middle, and upper covers. Tightening torque: 7.9-10.7 N.m (80-110 kgf.cm, 70-95.4 in4bf) Gartner Banana
Page 140 of 1708

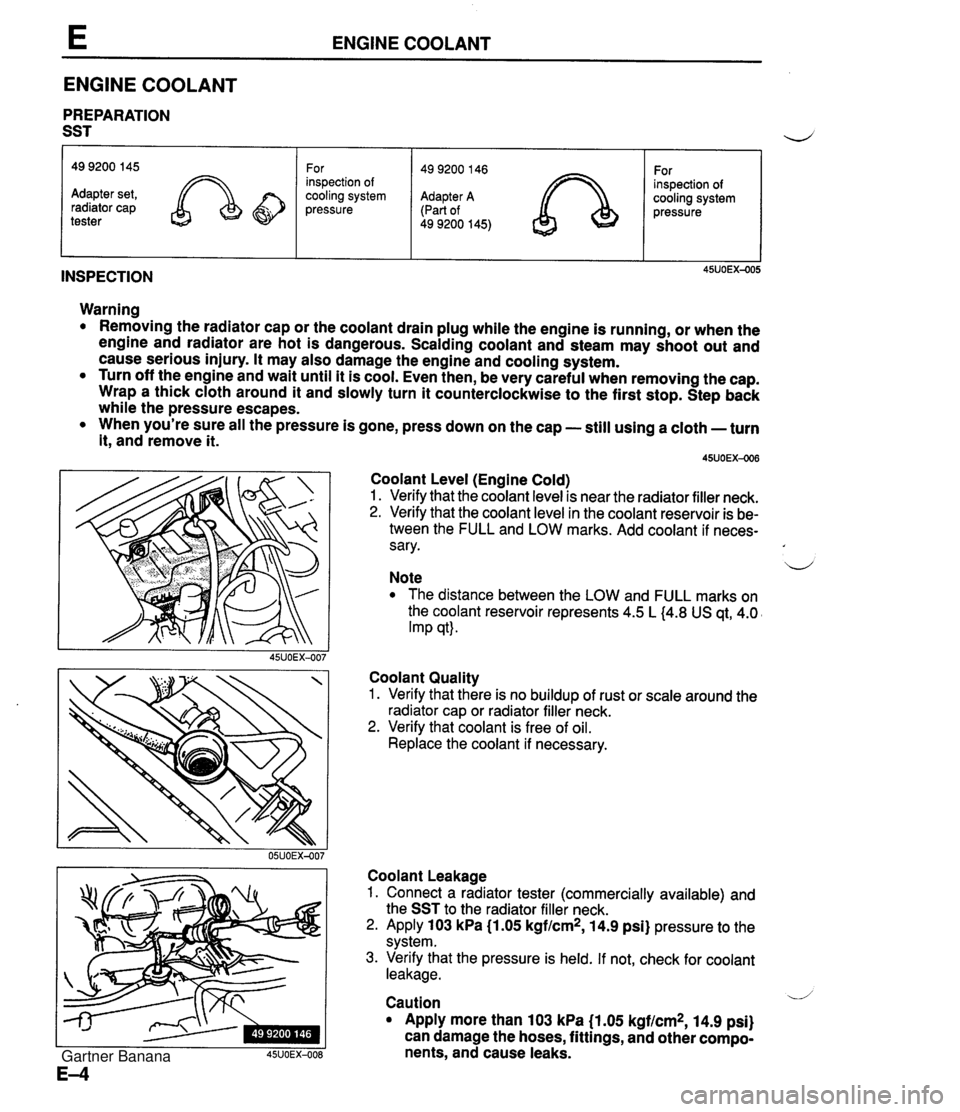
ENGINE COOLANT ENGINE COOLANT PREPARATION SST INSPECTION 49 9200 145 Adapter set, radiator cap tester Warning Removing the radiator cap or the coolant drain plug while the engine is running, or when the engine and radiator are hot is dangerous. Scalding coolant and steam may shoot out and cause serious injury. It may also damage the engine and cooling system. Turn off the engine and wait until it is cool. Even then, be very careful when removing the cap. Wrap a thick cloth around it and slowly turn it counterclockwise to the first stop. Step back while the pressure escapes. When you're sure all the pressure is gone, press down on the cap - still using a cloth -turn it, andremove it. For inspection of cooling system pressure Coolant Level (Engine Cold) 1. Verify that the coolant level is near the radiator filler neck. 2. Verify that the coolant level in the coolant reservoir is be- tween the FULL and LOW marks. Add coolant if neces- sary. u Note The distance between the LOW and FULL marks on the coolant reservoir represents 4.5 L (4.8 US qt, 4.0 Imp qt). Coolant Quality 1. Verify that there is no buildup of rust or scale around the radiator cap or radiator filler neck. 2. Verify that coolant is free of oil. Replace the coolant if necessary. 49 9200 146 Adapter A (Part of 49 9200 145) Coolant Leakage 1. Connect a radiator tester (commercially available) and the SST to the radiator filler neck. 2. Apply 103 kPa (1.05 kgf/cm2, 14.9 psi} pressure to the system. 3. Verify that the pressure is held. If not, check for coolant leakage. For inspection of cooling system pressure / V Caution Apply more than 103 kPa (1.05 kgf/cm2, 14.9 psi) can damage the hoses, fittings, and other compo- nents, and cause leaks. Gartner Banana
Page 141 of 1708

ENGINE COOLANT COOLANT PROTECTION SPECIFIC GRAVITY COOLANT TEMPERATURE "C (OF) 45UOEX-00 Coolant Protection Caution The engine has aluminum parts that can be dam- aged by alcohol or methanol antifreeze. Do not use alcohol or methanol in the cooling system. Use only ethylene-glycol-based coolant. Use only soft (demineralized) water in the coolant mixture. Water that contains minerals will cut down on the coolant's effectiveness. 1. Measure the coolant temperature and specific gravity with a thermometer and a hydrometer. 2. Determine the coolant protection by referring to the graph shown. If the coolant protection is not proper, add water or cool- ant. Antifreeze solution mixture percentage I Coolant protection I I Above -1 6°C (3°F) 1 65 1 35 1 1.054 1 REPLACEMENT Draining Above -26°C {-15°F) Above -40°C I-40°F} Warning Removing the radiator cap or the coolant drain plug while the engine is running, or when the en- gine and radiator are hot is dangerous. Scalding coolant and steam may shoot out and cause seri- ous injury. If may also damage the engine and cooling system. Turn off the engine and wait until it is cool. Even then, be very careful when removing the cap. Wrap a thick cloth around it and slowly turn it counterclockwise to the first stop. Step back while the pressure escapes. When you're sure all the pressure is gone, press down on the cap-still using a cloth - turn it, and remove it. 1. Remove the radiator cap and loosen the drain plug. 2. Drain the coolant into a container. 3. Flush the cooling system with water until all traces of col- or are gone, then let the system drain completely. 4. Install the drain plug. 55 45 45 55 1.066 1.078 Gartner Banana
Page 142 of 1708

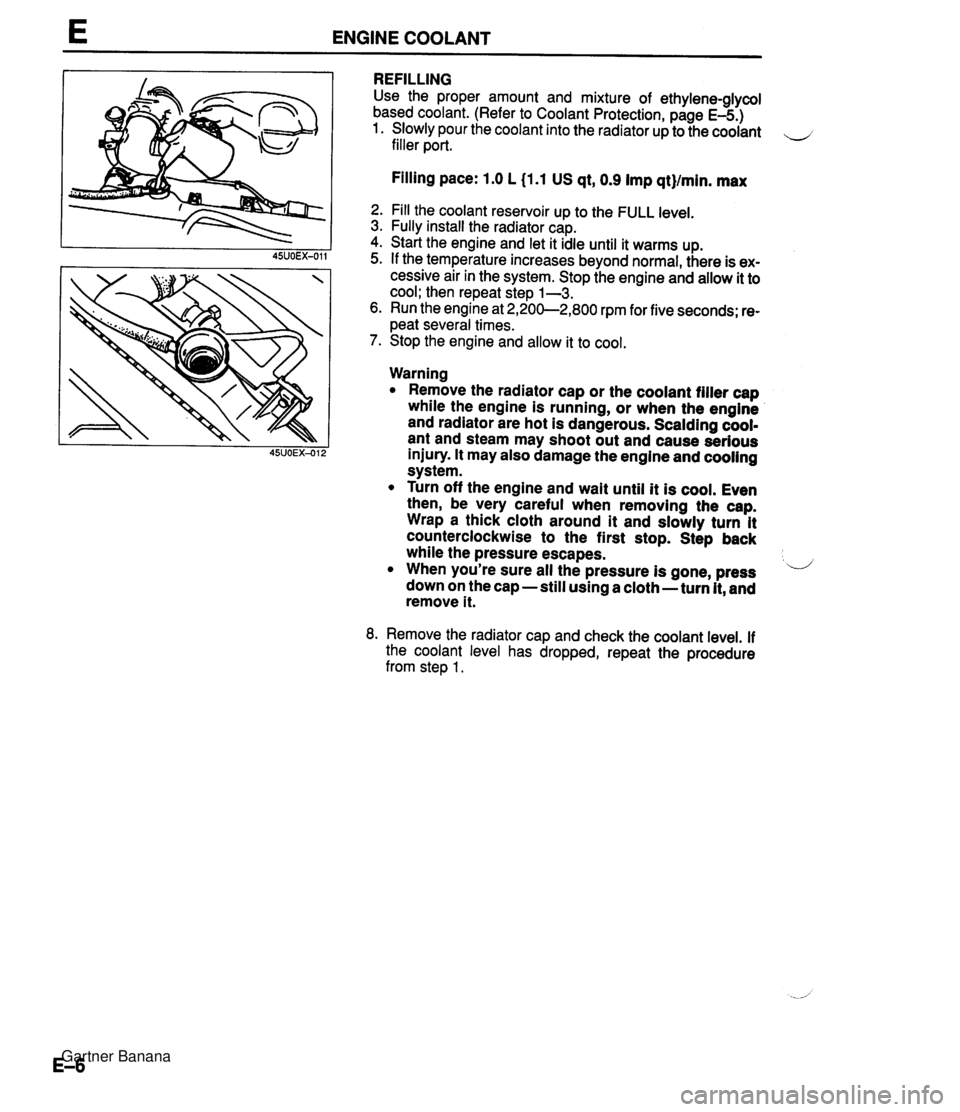
E ENGINE COOLANT REFILLING Use the proper amount and mixture of ethylene-glycol based coolant. (Refer to Coolant Protection, page E-5.) 1. Slowly pour the coolant into the radiator up to the coolant filler port. Filling pace: 1.0 L (1.1 US qt, 0.9 Imp qt}/min. max 2. Fill the coolant reservoir up to the FULL level. 3. Fully install the radiator cap. 4. Start the engine and let it idle until it warms up. 5. If the temperature increases beyond normal, there is ex- cessive air in the system. Stop the engine and allow it to cool; then repeat step 1-3. 6. Run the engine at 2,200-2,800 rpm for five seconds; re- peat several times. 7. Stop the engine and allow it to cool. Warning Remove the radiator cap or the coolant filler cap while the engine is running, or when the engine and radiator are hot is dangerous. Scalding cool- ant and steam may shoot out and cause serious injury. It may also damage the engine and cooling system. Turn off the engine and wait until it is cool. Even then, be very careful when removing the cap. Wrap a thick cloth around it and slowly turn it counterclockwise to the first stop. Step back while the pressure escapes. When you're sure all the pressure is gone, press ii down on the cap -still using a cloth - turn it, and remove it. 8. Remove the radiator cap and check the coolant level. If the coolant level has dropped, repeat the procedure from step 1. Gartner Banana