Page 123 of 1708

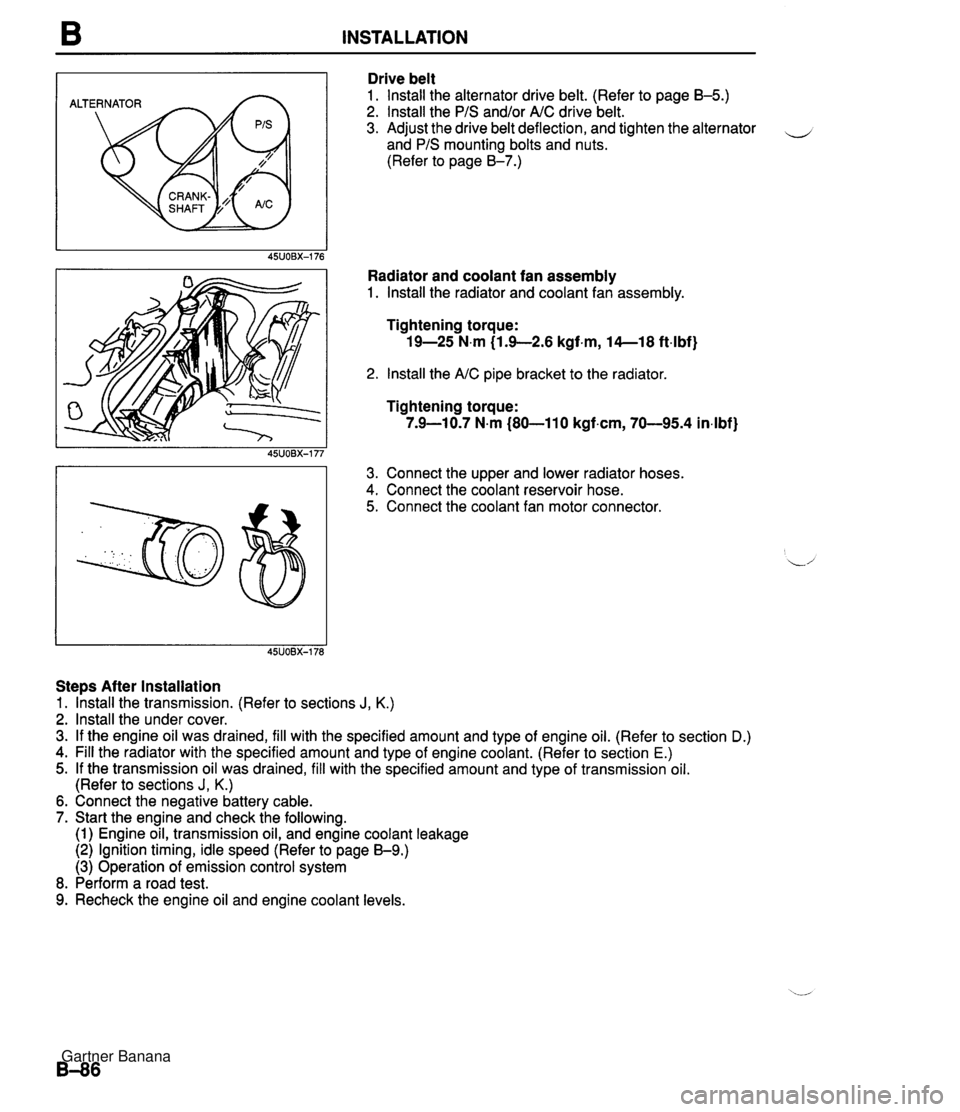
B INSTALLATION ALTERNATOR Drive belt 1. lnstall the alternator drive belt. (Refer to page B-5.) 2. lnstall the PIS and/or AIC drive belt. 3. Adjust the drive belt deflection, and tighten the alternator - and PIS mounting bolts and nuts. (Refer to page 8-7.) Radiator and coolant fan assembly 1. lnstall the radiator and coolant fan assembly. Tightening torque: 19-25 N.m (1.9-2.6 kgf.m, 14--18 ft4bf) 2. lnstall the AIC pipe bracket to the radiator Tightening torque: 7.9-10.7 N.m (80-110 kgf.cm, 70-95.4 in4bf) 3. Connect the upper and lower radiator hoses. 4. Connect the coolant reservoir hose. 5. Connect the coolant fan motor connector. Steps After Installation 1. lhstall the transmission. (Refer to sections J, K.) 2. lnstall the under cover. 3. If the engine oil was drained, fill with the specified amount and type of engine oil. (Refer to section D.) 4. Fill the radiator with the specified amount and type of engine coolant. (Refer to section E.) 5. If the transmission oil was drained, fill with the specified amount and type of transmission oil. (Refer to sections J, K.) 6. Connect the negative battery cable. 7. Start the engine and check the following. (1) Engine oil, transmission oil, and engine coolant leakage (2) Ignition timing, idle speed (Refer to page 59.) (3) Operation of emission control system 8. Perform a road test. 9. Recheck the engine oil and engine coolant levels. Gartner Banana
Page 128 of 1708

ENGINE OIL D ENGINE OIL INSPECTION 1. Be sure the vehicle is on level ground. 2. Warm up the engine to normal operating temperature and stop it. 3. Wait for five minutes. 4. Remove the dipstick and check the oil level and condi- tion. 5. Add or replace oil as necessary. Note The distance between the L and F marks on the dip- stick represents 0.8 L (0.85 US qt, 0.70 Imp qt}. REPLACEMENT Warning When the engine and the oil are hot, they can badly burn. Don't burn yourself with either. 1. Warm up the engine to normal operating temperature and stop it. 2. Remove the oil filler cap and the oil drain plug. 3. Drain the oil into a container. 4. Install a new gasket and the drain plug. Tightening torque: 3041 N-m 13.0-4.2 kgf.m, 22-30 ft-lbf) 5. Refill the engine with the specified type and amount of engine oil. Oil replacement: 3.6 L 13.8 US qt, 3.2 Imp qt) 6. Refit the oil filler cap. 7. Run the engine and check for leaks. 8. Check the oil level and add oil if necessary. Gartner Banana
Page 130 of 1708
OIL COOLER D OIL COOLER REMOVAL I INSTALLATION 1. Disconnect the negative battery cable. 2. Drain the engine oil and engine coolant. (Refer to page D-5, Section E.) 3. Remove in the order shown in the figure. 4. Install in the reverse order of removal. INSTALL OIL COOLER WITH IDENTIFICATION MARK (BLACK) FACING UP A OIL FILTER^ RUBBER I 3049 (3.0--4.0,22-28) REPLACE Nm {kgtm, ft4bf) 1. Oil filter 3. Oil cooler Replacement . . . . . . . . . . . . . . . Page D-6 4. O-ring 2. Water hose Steps After Installation 1. Connect the negative battery cable. 2. Fill with the specified amount and type of engine oil and engine coolant. (Refer to page D-5, Section E.) 3. Start the engine and check for leaks. 4. Check the oil level and add oil if necessary. 5. Recheck the engine coolant levels. Gartner Banana
Page 133 of 1708
OIL PAN NOTCH NOTCH I 05UODX-209 Steps After Installation 1. Install the undercover. Oil pan 1. Remove all foreign material from the contact surfaces. 2. Apply silicone sealant to the shaded areas shown in the figure. 3. Install new gaskets onto the oil pump body and the rear cover with the projections in the notches shown in the fig- ure. 4. Apply a continuous bead of silicone sealant to the oil pan along the inside of the bolt holes and overlap the ends. 5. Install the oil pan with five minutes. Tightening torque 0: 7.9-10.7 N.m (80-110 kgf-cm, 70-95 in4bf) @: 64-49 N.m (6.5-9.1 kgf-m, 48-45 ft-lbf) 2. Connect the negative battery cable. 3. Fill with the specified amount and type of engine oil. (Refer to page D-5.) 4. Start the engine and check for leaks. 5. Check the oil level and add oil if necessary. Gartner Banana
Page 140 of 1708

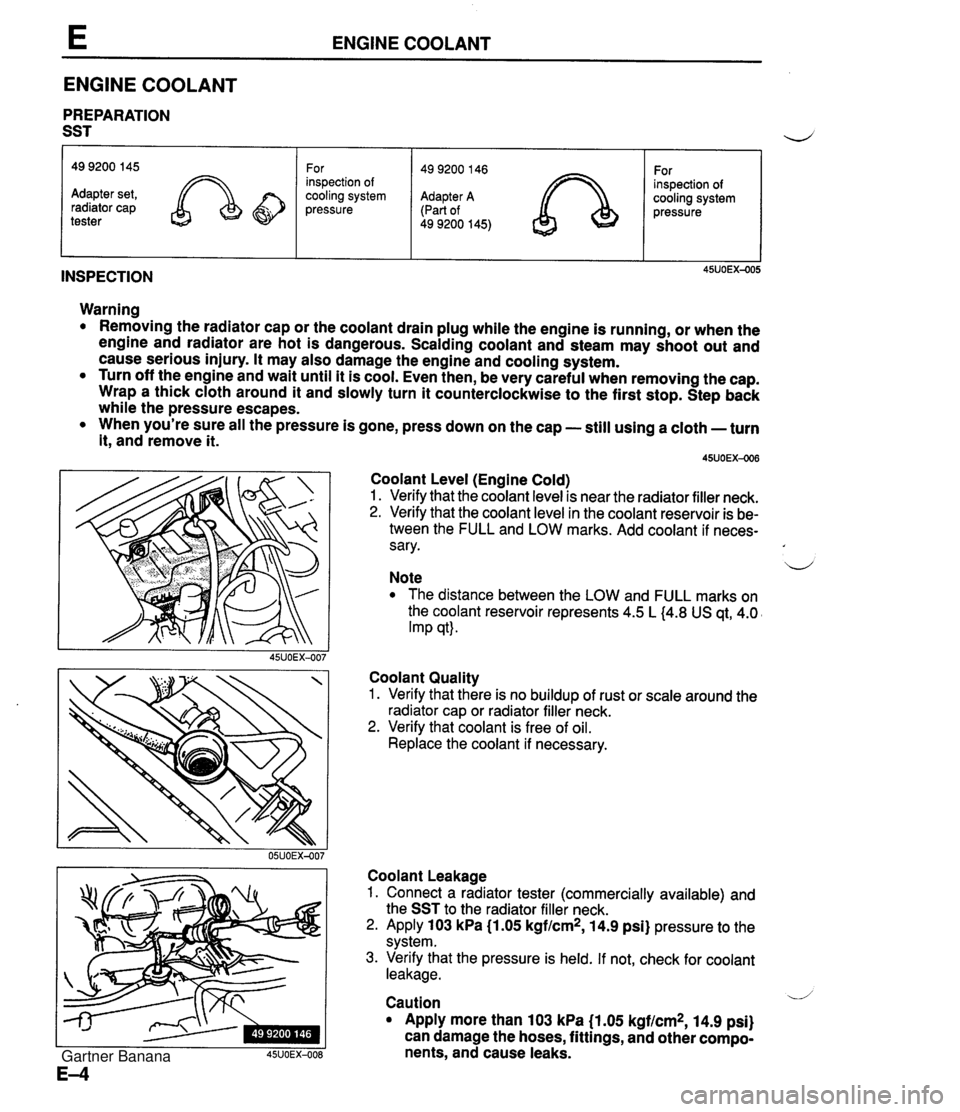
ENGINE COOLANT ENGINE COOLANT PREPARATION SST INSPECTION 49 9200 145 Adapter set, radiator cap tester Warning Removing the radiator cap or the coolant drain plug while the engine is running, or when the engine and radiator are hot is dangerous. Scalding coolant and steam may shoot out and cause serious injury. It may also damage the engine and cooling system. Turn off the engine and wait until it is cool. Even then, be very careful when removing the cap. Wrap a thick cloth around it and slowly turn it counterclockwise to the first stop. Step back while the pressure escapes. When you're sure all the pressure is gone, press down on the cap - still using a cloth -turn it, andremove it. For inspection of cooling system pressure Coolant Level (Engine Cold) 1. Verify that the coolant level is near the radiator filler neck. 2. Verify that the coolant level in the coolant reservoir is be- tween the FULL and LOW marks. Add coolant if neces- sary. u Note The distance between the LOW and FULL marks on the coolant reservoir represents 4.5 L (4.8 US qt, 4.0 Imp qt). Coolant Quality 1. Verify that there is no buildup of rust or scale around the radiator cap or radiator filler neck. 2. Verify that coolant is free of oil. Replace the coolant if necessary. 49 9200 146 Adapter A (Part of 49 9200 145) Coolant Leakage 1. Connect a radiator tester (commercially available) and the SST to the radiator filler neck. 2. Apply 103 kPa (1.05 kgf/cm2, 14.9 psi} pressure to the system. 3. Verify that the pressure is held. If not, check for coolant leakage. For inspection of cooling system pressure / V Caution Apply more than 103 kPa (1.05 kgf/cm2, 14.9 psi) can damage the hoses, fittings, and other compo- nents, and cause leaks. Gartner Banana
Page 224 of 1708

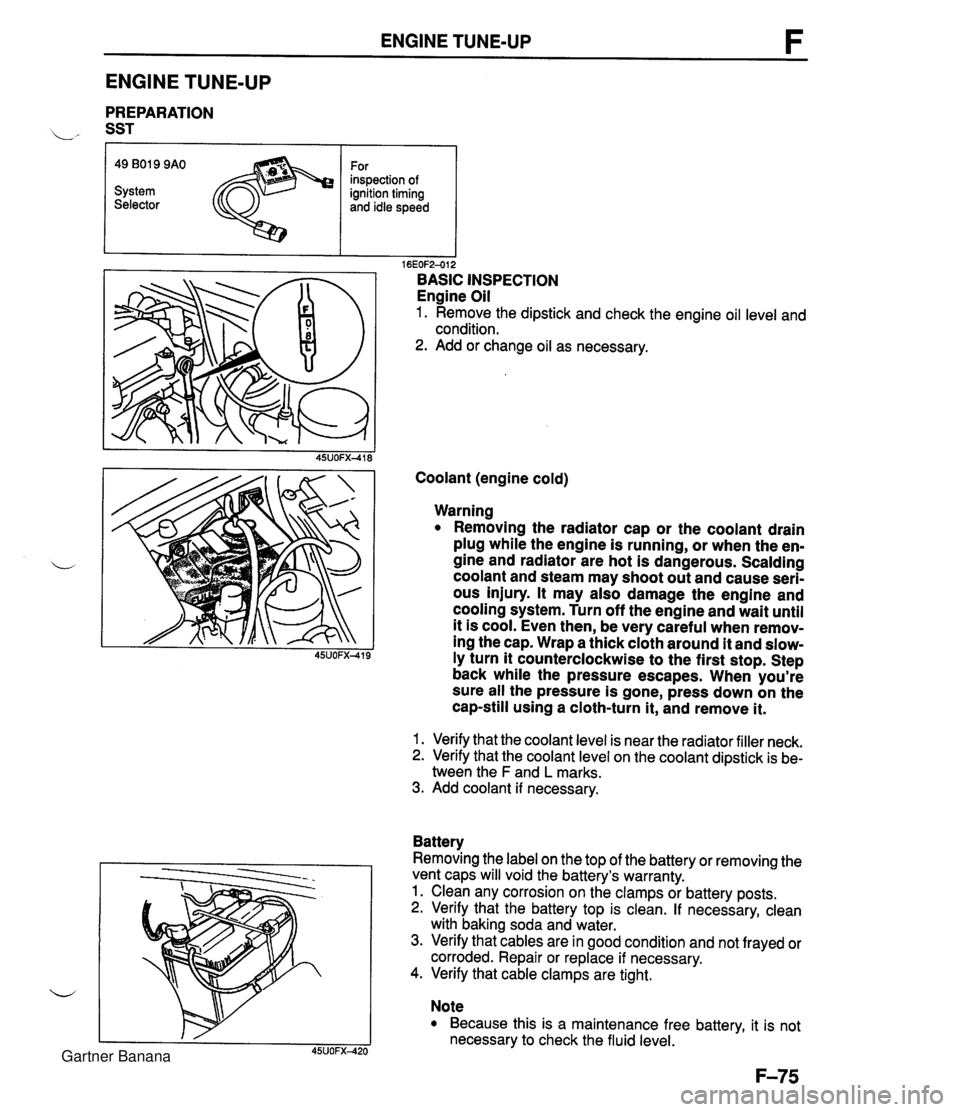
ENGINE TUNE-UP ENGINE TUNE-UP PREPARATION L" SST r I I 16EOF2-012 BASIC INSPECTION Engine Oil 1. Remove the dipstick and check the engine oil level and condition. 2. Add or change oil as necessary. 49 B019 9AO System Selector Coolant (engine cold) For inspection of ignition timing and idle speed Warning Removing the radiator cap or the coolant drain plug while the engine is running, or when the en- gine and radiator are hot is dangerous. Scalding coolant and steam may shoot out and cause seri- ous injury. It may also damage the engine and cooling system. Turn off the engine and wait until it is cool. Even then, be very careful when remov- ing the cap. Wrap a thick cloth around it and slow- ly turn it counterclockwise to the first stop. Step back while the pressure escapes. When you're sure all the pressure is gone, press down on the cap-still using a cloth-turn it, and remove it. 1. Verify that the coolant level is near the radiator filler neck. 2. Verify that the coolant level on the coolant dipstick is be- tween the F and L marks. 3. Add coolant if necessary. Battery Removing the label on the top of the battery or removing the vent caps will void the battery's warranty. 1. Clean any corrosion on the clamps or battery posts. 2. Verify that the battery top is clean. If necessary, clean with baking soda and water. 3. Verify that cables are in good condition and not frayed or corroded. Repair or replace if necessary. 4. Verify that cable clamps are tight. Note Because this is a maintenance free battery, it is not necessary to check the fluid level. Gartner Banana
Page 362 of 1708
J TRANSMISSION OIL TRANSMISSION OIL INSPECTION 1. Remove check plug 0. u 2. Verify that the oil is at the bottom of the check plug hole. If it is low, add the specified oil from check plug @. 3. Wipe the plug clean and apply sealant to the plug threads before installing. Tightening torque @: 25--39 N.m (2.5--4.0 kgf.m, 19-28 ft4bf) REPLACEMENT 1. Remove plugs @I (with washer) and @. 2. Drain the oil into a suitable container. 3. Wipe all plugs clean. 4. Install drain plug @I (with new washer). Tightening torque @: 40-58 N.m (4.0-4.0 kgf.m, 2943 ftlbf) 5. Add the specified oil from check plug 0 port until the level reaches the bottom of check plug hole. Specified oil: API service GL-4 or GL-5 All-season: SAE 75W-90 Above 10°C (50°F): SAE 80W-90 Capacity: 2.0 L (2.1 US qt, 1.8 Imp qt) 6. Apply sealant to threads of plug 0. 7. lnstall plug @. Tightening torque @: 25--39 N.m (2.54.0 kgf.m, 19-28 ft-lbf) Gartner Banana
Page 364 of 1708
J TRANSMISSION REMOVAL 1. Obtain the code number and deactivate the audio antitheft system before disconnecting the battery. (Refer to section T.) 2. is connect the negative battery cable. 3. On level grand, jack up the vehicle and support it evenly on safety stands. 4. Drain the transmission oil into a suitable container. 5. Remove in the order shown in the figure, referring to Removal Note. I. Shift lever knob ?. Rear console 9. Clutch release cylinder 10. Starter I 1 3. Shift lever 11. speedometer cable 4. Undercover 12. Power plant frame (PPF) 5. Performance rod Removal Note ............... page J-1 1 6. Differential mounting pipe 13. Transmission 7. Exhaust pipe J Removal Note ............... page J-12 8. Propeller shaft Service ...................... section L Gartner Banana