Page 206 of 385
Other Warning Devices
If you carry reflective triangles, you can use them to warn others. Set one up
at the side of the road about 300 feet (100 m) behind your vehicle.
Jump Starting
If your battery (or batteries) has run down, you may want to use another
vehicle and some jumper cables to start your vehicle.
But please follow the
steps below to do it safely.
NOTICE:
Ignoring these steps could result in costly damage to your
vehicle that wouldn’t be covered by your vehicle warranty.
Trying
to start your vehicle by pushing or pulling it could
damage your vehicle, even if you have
a manual transmission.
And if you have an automatic transmission, it won’t start that
way.
5-3
ProCarManuals.com
Page 207 of 385
Tu Jump Start Your Vehicle;
1. Check the other vehicle. It must have a 12-volt battery with a negative
ground system.
I NOTICE:
I
If the other system isn’t a 12-volt system with a negative
ground, both vehicles can be damaged.
If you have a diesel engine vehicle with two batteries (or more), you
should know before you begin that, especially in cold weather, you may
not be able to get enough power from a single battery in another
vehicle to start your diesel engine.
If your vehicle has more than one battery, use the battery that’s on the
passenger side
of the vehicle - this will reduce electrical resistance.
2. Get the vehicles close enough so the jumper cables can reach, but be
sure the vehicle’s aren’t touching each other.
If they are, it could cause
a ground connection
you don’t want. You wouldn’t be able to start your
vehicle, and the bad grounding could damage the electrical systems.
You could be injured if
the vehicles roll. Set the parking brake firmly
on each vehicle. Put an automatic transmission in “P’ (Park) or a
manual transmission in “N’ (Neutral). If you have a four-wheel-drive
vehicle, be sure the transfer case is not in “N” (Neutral).
3. Turn off the ignition on both vehicles. Turn off all lights that aren’t
needed, and radios. This will avoid sparks and help save both batteries.
And it could save your radio!
NOTICE:
If you leave your radio on, it could be badly damaged. The
repairs wouldn’t
be covered by your warranty.
4. Open the hoods and locate the batteries. Find the positive (+) and
negative
(-) terminals on each battery.
5-4
ProCarManuals.com
Page 208 of 385
5. Check that the jumper cables don’t have loose or missing insulation. If
they do, you could get a shock. The vehicles could be damaged, too.
Before you connect the cables, here are some basic things you should
know. Positive
(+) will go to positive (+) and negative (-) will go to
negative (-) or a metal engine part. Don’t connect (+) to (-) or you’ll
get a short that would damage the battery and maybe other parts, too.
5-5
ProCarManuals.com
Page 209 of 385
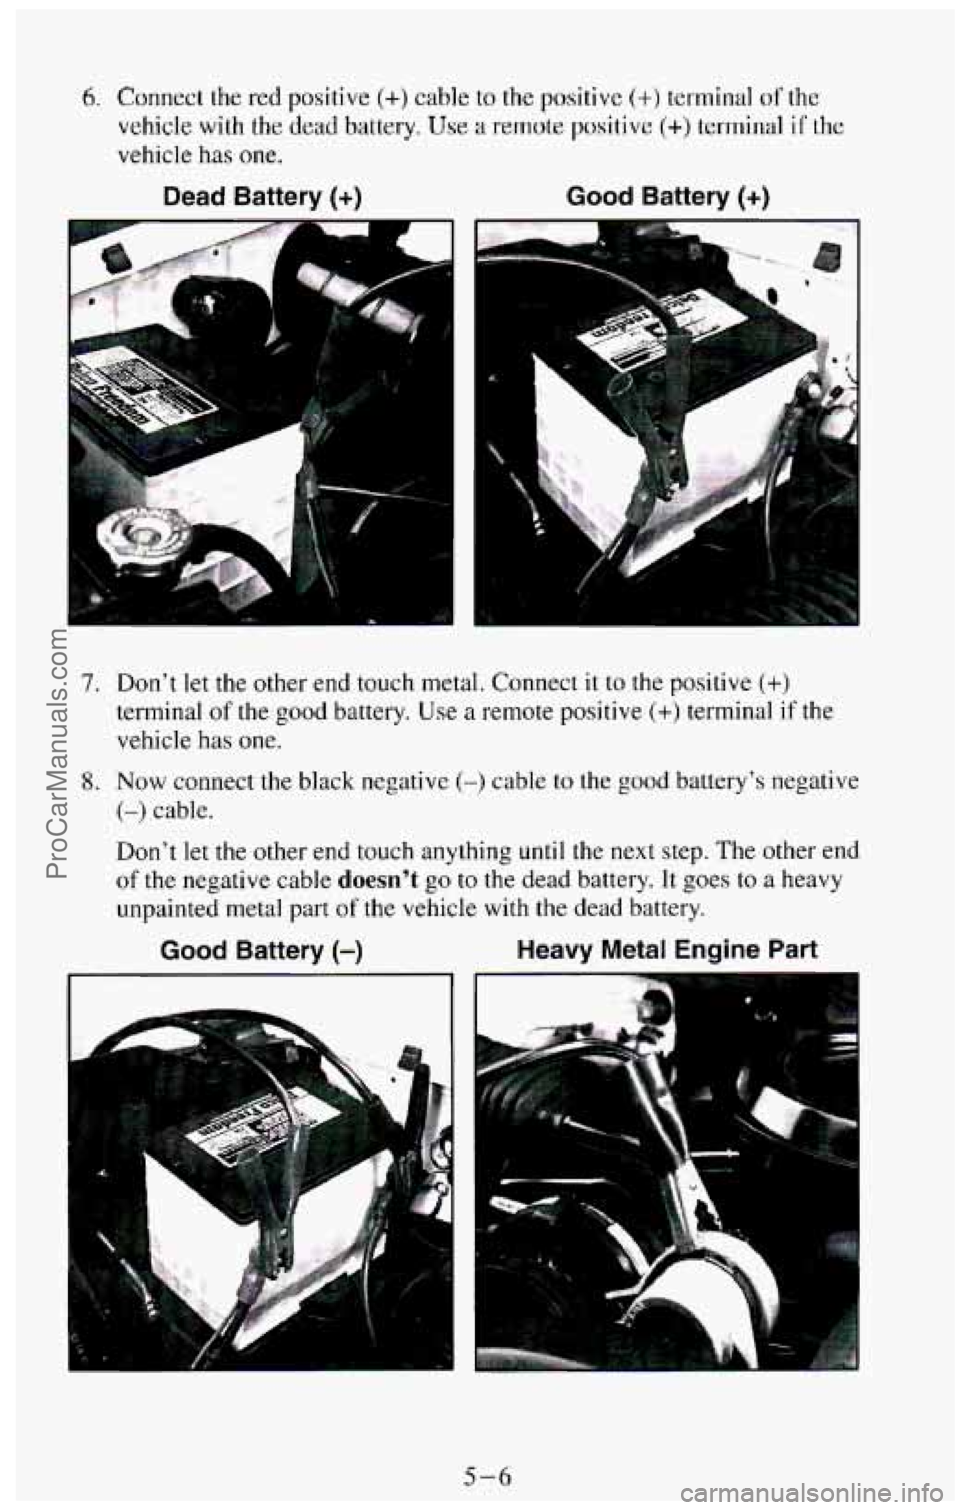
6. Connect the red positive (+) cable to the positive (+) terminal of the
vehicle with the dead battery. Use a remote positive (+> terminal if the
vehicle
has one.
Dead Battery (+) Good Battery (+)
b
7. Don't let the other end touch metal. Connect it to the positive (+)
terminal of the good battery. Use a remote positive (+) terminal if the
vehicle has one.
8. Now connect the black negative (-) cable to the good battery's negative
(-) cable.
Don't let
the other end touch anything until the next step. The other end
of the negative cable doesn't go to the dead battery. It goes to a heavy
unpainted metal
part of the vehicle with the dead battery.
Good Battery (-) Heavy Metal Engine Part
.: . .
I
5-6
ProCarManuals.com
Page 210 of 385
9. Attach the cable at least 18 inches (45 cm) away from the dead battery,
but not near engine parts that move. The electrical connection
is just as
good there, but the chance of sparks getting back to the battery is much
less.
10. Now start the vehicle with the good battery and run the engine for
awhile.
1 1. Try to start the vehicle with the dead battery.
If it won't start after a few tries, it probably needs service.
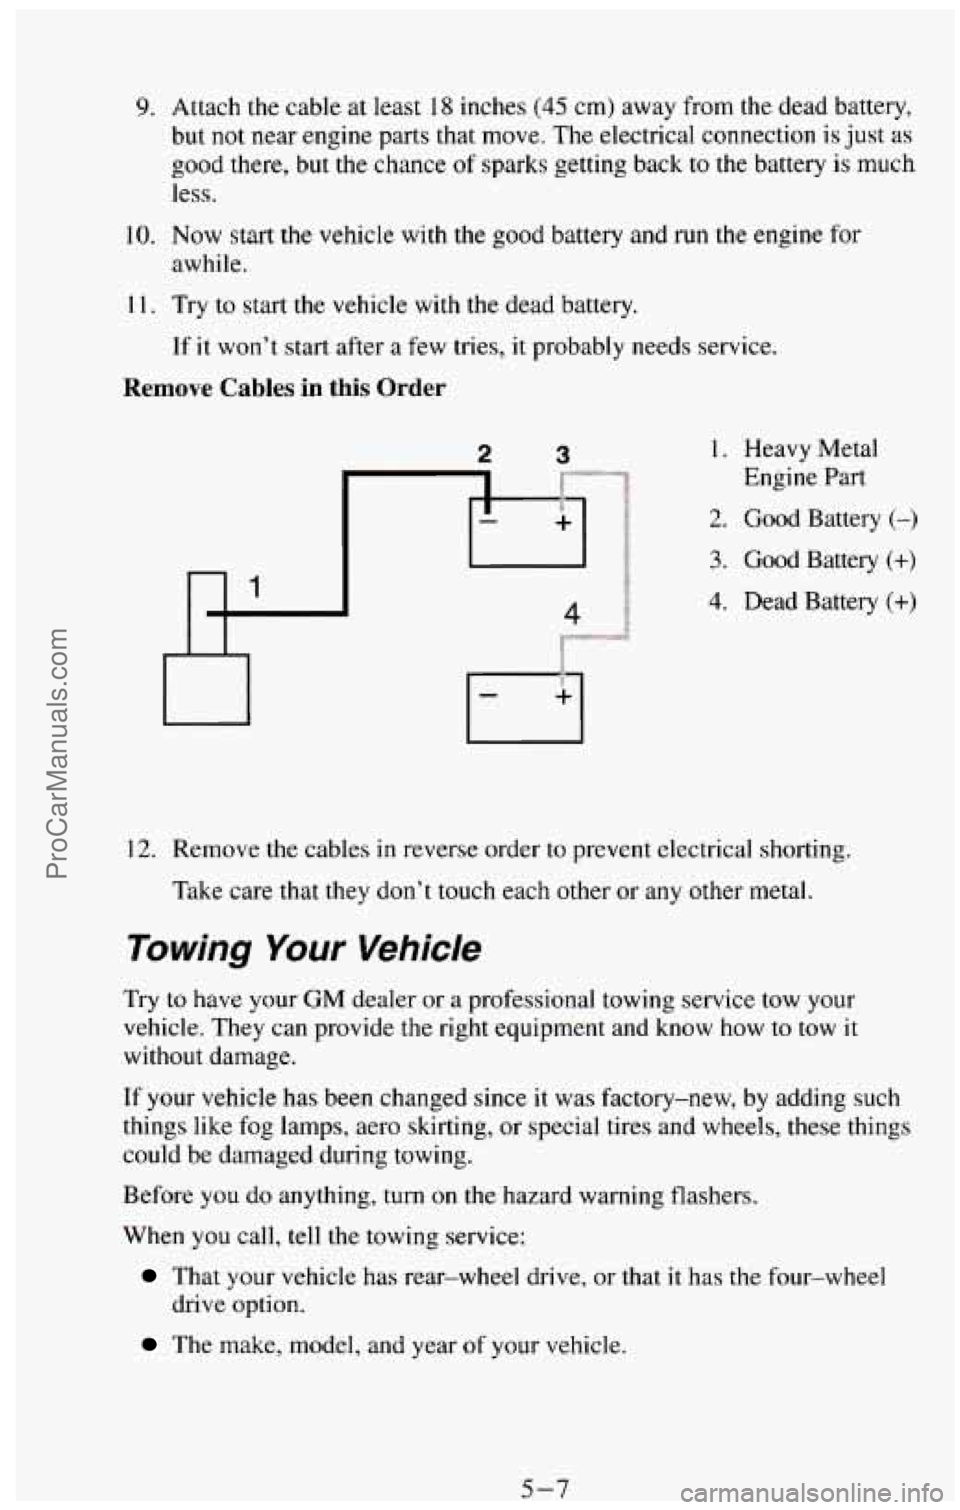
Remove Cables in this Order
1. Heavy Metal
Engine Part
2. Good Battery (-)
3. Good Battery (+)
4. Dead Battery (+)
12. Remove the cables in reverse order to prevent electrical shorting.
Take care that they don't touch each other
or any other metal.
Towing Your Vehicle
Try to have your GM dealer or a professional towing service tow your
vehicle. They can provide the right equipment and know how
to tow it
without damage.
If your vehicle has been changed since
it was factory-new, by adding such
things like fog lamps, aero skirting, or special tires and wheels, these things
could
be damaged during towing.
Before
you do anything, turn on the hazard warning flashers.
When you call,
tell the towing service:
That your vehicle has rear-wheel drive, or that it has the four-wheel
drive option.
The make, model, and year of your vehicle.
5-7 ProCarManuals.com
Page 247 of 385
......................
................
Brake Master Cylinder ................................... 6-43
Replacing Brake System Parts .............................. 6-46
Other Maintenance Items .................................... 646
Lubrication ............. ..... 648
Battery ................ ....... 6-49
Bulb Replacement ......................................... 6-50
Fuses and Circuit Breakers ................................ 6-56
Exhaust System ....................................... 6-58
Loading Your Vehicle ...................................... 6-59
Tires .................................................... 6-62
Inflation-Tire Pressure .................................. 6-62
Tire Inspection and Rotation ............................... 6-64
When It’s Time for New Tires ......................... 6-65
Buying New Tires ..................................... 6-66
Uniform Tire Quality Grading ............................. 6-66
Wheel Alignment and Tire Balance ......................... 6-67
Wheel Replacement ..................................... 6-68
Tire Chains ............................................ 6-69
Appearancecare .......................................... 6-69
Cleaning the Inside of Your Vehicle ......................... 6-70
Cleaning the Outside of Your Vehicle ..................... 6-74
Appearance Care Materials .................................. 6-77
Vehicle Identification Number .............................. 6-78
Service Parts Identification Label ............................. 6-80
Specification Charts ...................................... 6-81
6-2
ProCarManuals.com
Page 294 of 385
Your maintenance schedule will tell you how often to lubricate these items.
See “Recommended Fluids and Lubricants” in the Index for the proper
lubricant to use.
Lock Cylinders
To be sure your locks operate properly, they must be lubricated. Your
vehicle’s maintenance schedule will tell you how often to lubricate them.
See “Recommended Fluids and Lubricants” in the Index for the proper
lubricant to use.
You should not use penetrating oils because they could wash out the factory
installed lubricant and cause the lock to bind. De-icers which contain
alcohol could
also wash away the lubricant, so be sure to lubricate the lock
after using a de-icer of this type.
Tailgate Handle
The tailgate handle pivot points on your vehicle should be lubricated to keep
it working smoothly.
Your maintenance schedule will tell you how often to lubricate the handle.
See “Recommended Fluids and Lubricants” in the Index for the proper
lubricant to use.
Battery
Every new GM vehicle has a Delco Freedom@ battery. You never have to
add water to one of these. When it’s time for a new battery, we recommend
a Delco Freedom@ battery. Get one that has the catalog number shown on
the original battery’s label.
Vehicle Storage
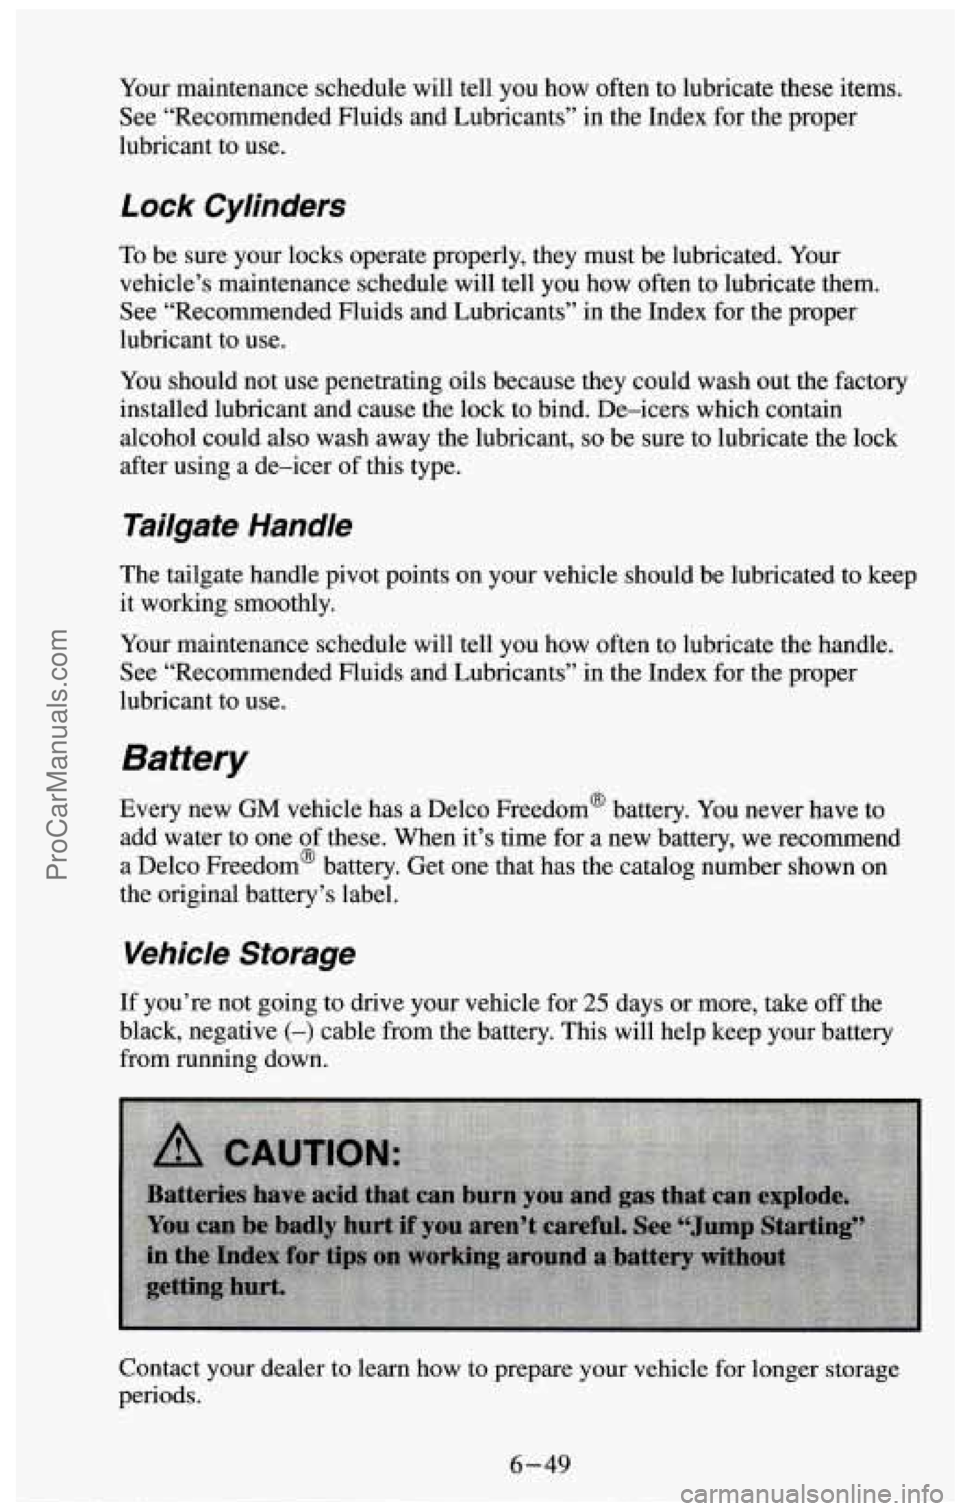
If you’re not going to drive your vehicle for 25 days or more, take off the
black, negative
(-) cable from the battery. This will help keep your battery
from running down.
Contact your dealer to learn how to prepare your vehicle for longer storage
periods.
ProCarManuals.com
Page 302 of 385
Power Windows and Other Power Options
Circuit breakers in the fuse panel protect the power windows and other
power accessories. When the current load is too heavy, the circuit breaker
opens and closes. This protects the circuit until the current load returns to
normal or the problem is fixed
.
Trailer Wiring Harness
The optional seven-wire trailer wiring harness is protected by an in-line
fuse in the battery feed wire. This fuse is near the junction block. See
“Trailer Wiring Harness” in the Index for more information.
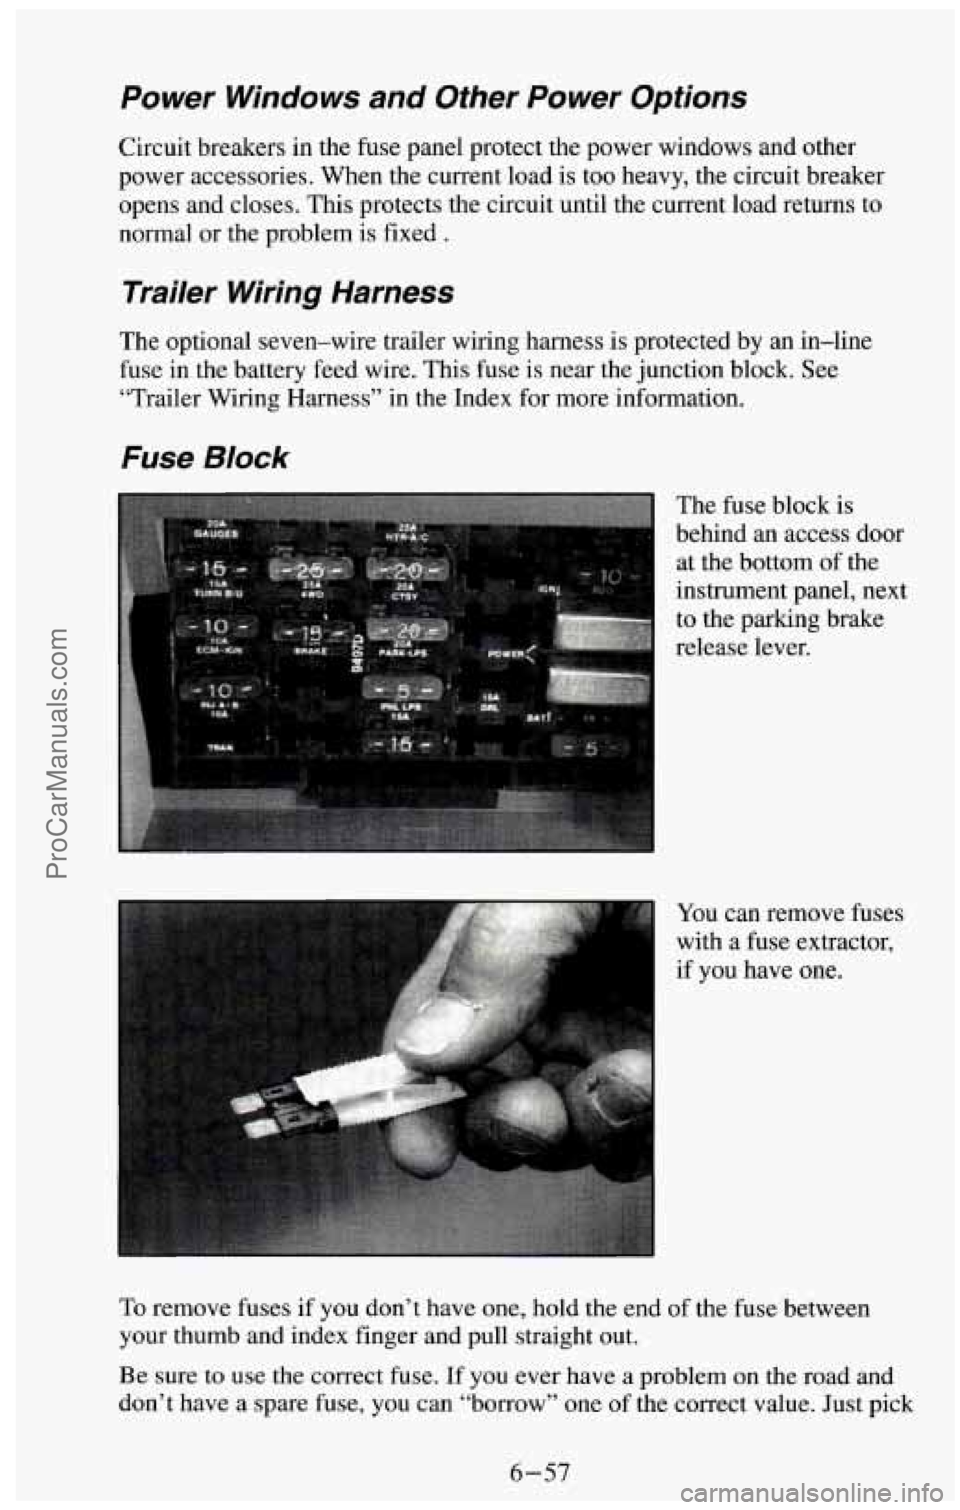
Fuse Block
The fuse block is
behind an access door
at the bottom
of the
instrument panel, next
to the parking brake
release lever.
You can remove fuses
with a fuse extractor,
if you have one.
To remove fuses if you don’t have one, hold the end of the fuse between
your thumb and index finger and pull straight out.
Be sure to use the correct fuse. If
you ever have a problem on the road and
don’t have a spare fuse, you can “borrow” one of the correct value. Just pick
6-57
ProCarManuals.com