Page 214 of 340
Downloaded from www.Manualslib.com manuals search engine L
Put the nuts on by
hand. Make sure the
cone-shaped end
is
toward the wheel.
Tighten each nut by hand until the wheel
is held against the hub. If a nut
can’t be turned by hand, use the wheel wrench and see your dealer \
as soon
as possible.
Lower the vehicle by
rotating the
jackhandle to the left.
Lower the jack
completely. ..
5-32
k.
Page 215 of 340
Downloaded from www.Manualslib.com manuals search engine Tightening Wheel Nut Tightening Sequence
Use the wrench to tighten the wheel nuts firmly in a criss-cross sequence as
shown. Remove the wheel blocks.
Storing 'The Tire in The Underbody Carrier
Put the tire on the ground at the rear of the vehicle, with the valve stem
pointed down and to the rear.
Pull the retaining bar through the wheel.
NOTE: With ZR2 option, spring and retainer must be separated to insert
through wheel opening.
Put the chisel end
of the wheel wrench, on an angle, through the hole in the
rear bumper and into the hoist shaft. Turn the wheel wrench right until the
tire is raised against the underside
of the vehicle.
You will hear two"clicks" when the tire is secure, but pull on th\
e tire to
make sure.
5-33
Page 216 of 340
Downloaded from www.Manualslib.com manuals search engine Storing The Jacking Equipment
Return the jack, wheel wrench and wheel blocks to the proper location
behind the seat. Secure the items
and replace the jack cover.
NOTICE:
Don’t use the existing hoist to store a tire with an aluminum
wheel or it could damage the wheel. Secure the tire in the pickup
bed.
If You’re Stuck: In Sand, Mud, Ice or Snow
What you don’t want to do when your vehicle is stuck is to spin your
wheels. The method
known as “rocking” can help you get out when you’re
stuck, but
you must use caution.
NOTICE:
Spinning your wheels can destroy parts of your vehicle as well as
the tires.
If you spin the wheels too fast while shifting your
transmission back and forth, you can destroy your transmission.
5-34
Page 217 of 340

Downloaded from www.Manualslib.com manuals search engine Rocking your vehicle to get it out:
First, turn your steering wheel left and right. That will clear the area around
your front wheels. Then shift back and forth between
“R’ (Reverse) and a
forward gear (or with a manual transmission, between First or \
Second gear and Reverse), spinning the wheels as little as possible. Release the
accelerator pedal while you shift, and press lightly on the accelerator pedal
when the transmission is
in gear. If that doesn’t get you out after a few .tries,
you may need to be towed out. Or, you can use your recovery hooks, if your
vehicle has them.
If you do need to be towed out, see “Towing Your
Vehicle” in the Index.
Using the Recovery Hooks
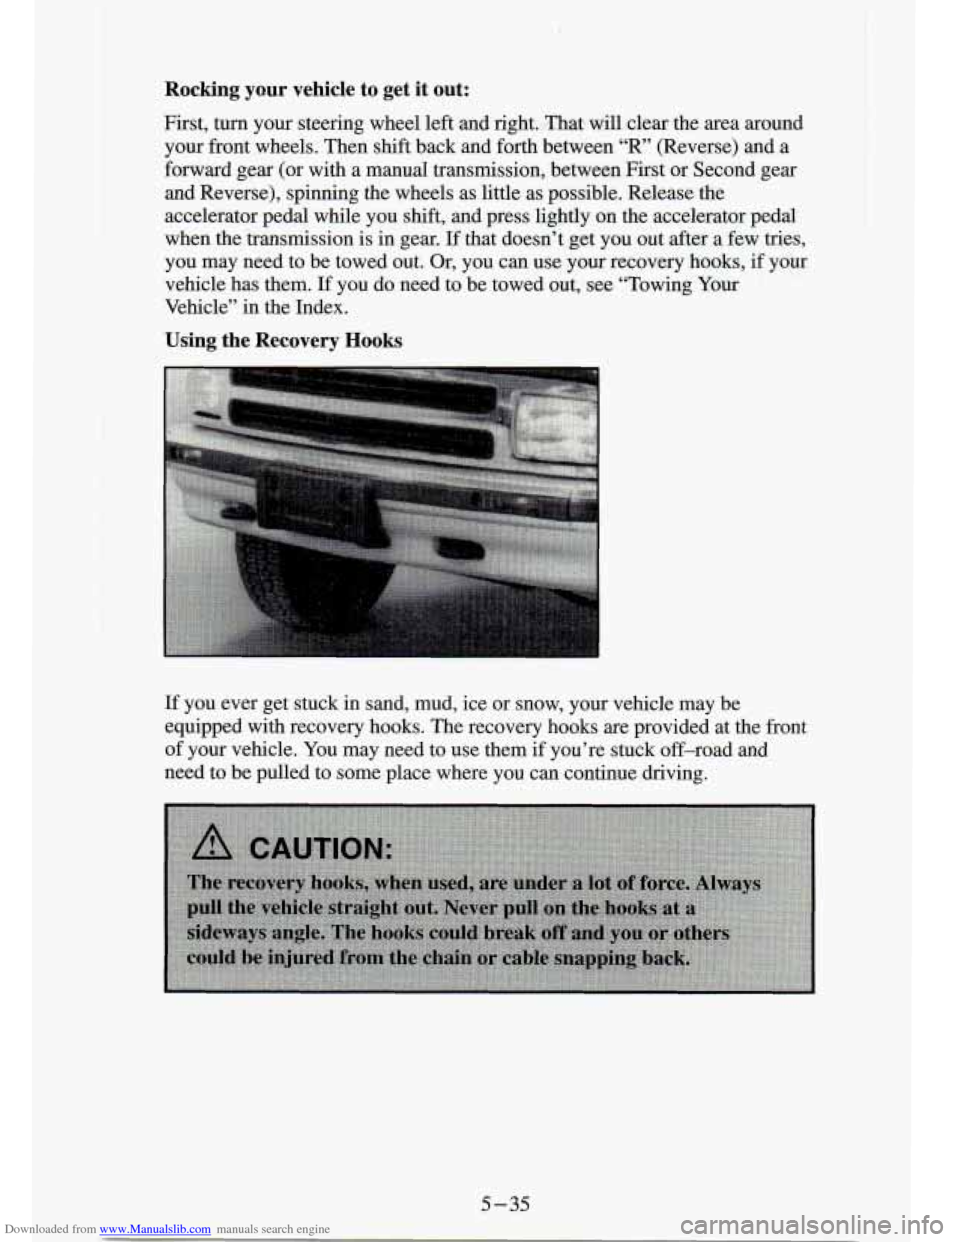
If you ever get stuck in sand, mud, ice or snow, your vehicle may be
equipped with recovery hooks. The recovery hooks are provided at the front
of your vehicle. You may need to use them if you’re stuck off-road and
need to be pulled to some place where you can continue driving.
5-35
Page 231 of 340

Downloaded from www.Manualslib.com manuals search engine Engine Oil Additives
Don’t add anything to your oil. Your GM dealer is ready to advise if you
think something should be added.
When to Change Engine Oil
See if any one of these is true for you:
Most trips are less than 4 miles (6 km).
0 It’s below freezing outside and most trips are less than 10 miles (16
km).
The engine is at low speed most of the time (as in door-to-door
delivery, or in stop-and-go traffic).
You tow a trailer often.
Most trips are through dusty places.
0 The vehicle is frequently operated off-road.
If any one of these is true for your vehicle, then you need to change your oil
andfilter every 3,000 miles (5 000 km) or 3 months - whichever comes
first.
If none of them is true, change the oil every
7,500 miles (12 500 km) or 12
months - whichever comes first. Change the filter at the first oil change
and at every other oil change after that.
Four-wheel Drive Remote Oil Filter
If your vehicle has four-wheel drive, you will have a remote oil filter
located under the radiator support. There is a special access \
door in the
vehicle body skirt shield.
Engine Coolant Heater (Engine Block Heater)
An engine coolant heater can be a big help if you have to park outside in
very cold weather,
0 “F (-1 8 O C) or colder. If your vehicle has this option,
see “Engine Coolant Heater
” in the Index.
What to Do with Used Oil
Did you know that used engine oil contains certain elements that may be
unhealthy for your skin and could even cause cancer? Don’t let used oil stay
on your skin for very long. Clean your skin and nails with soap and water,
or a good hand cleaner. Wash or properly throw away clothing or rags
containing wed engine oil. (See the manufacturer’s warnings about the use
and disposal of oil products.)
6-13
Page 239 of 340
Downloaded from www.Manualslib.com manuals search engine How to Check Lubricant
If the level is below
the bottom of the filler
plug hole, you’ll need to add some lubricant.
Add enough lubricant
to raise the level to the
bottom of the filler
plug hole.
What to Use
Refer to the Maintenance Schedule to determine what kind of lubricant to
use. See “Recommended Fluids and Lubricants” in the Index.
Four- Wheel Drive
Most lubricant checks in this section also apply to four-wheel-drive
vehicles. However, they have two additional systems that need l\
ubrication.
Transfer Case
When to Check Lubricant
Refer to the Maintenance Schedule to determine how often to ch\
eck the lubricant. See “Periodic Maintenance Inspections” in the Index.
6-21
Page 257 of 340

Downloaded from www.Manualslib.com manuals search engine Other Maintenance Items
Front Suspension and Steering Linkage
Refer to the Maintenance Schedule to determine how often to lubricate the
fittings and what type
of lubricant to use.
Front Wheel Bearings (Two-Wheel Drive)
If your vehicle is two-wheel drive, it has wheel bearings that must be
cleaned and repacked.
Refer to the Maintenance Schedule to determine how often this must be
done.
Single Belt Accessory Drive
Your new vehicle uses a serpentine belt that is lighter, and more durable
than systc
.s with several belts.
The belt runs over or around the pulleys on the engine. A tensioner is used
to keep the belt tight at all times. The tensioner also makes replacing the
belt easier if you need to replace the belt, be sure
to get the correct
replacement belt. Your dealership or parts supplier can help you with this.
The Accessory Drive Belt Routing label on your vehicle will show y\
ou how
to route the belt your vehicle uses.
Windshield Wiper Blade Replacement
NOTICE:
Use care when removing or installing a blade assembly.
Accidental bumping can cause the arm to fall back and strike
the windshield.
6-39
Page 268 of 340

Downloaded from www.Manualslib.com manuals search engine You must weigh any accessories, trailer hitches or other equipment you a\
dd
to your vehicle. Then, subtract this extra weight from the CWR\
. This extra weight may shorten the center of gravity zone for your vehicle. Your dealer
can help you with this.
If your slide-in camper and its load weigh less than the CWR, the center of
gravity zone
for your vehicle may be larger.
Your dealer can help you make a good vehicle-camper match. He’ll also
help you determine your CWR.
After you’ve loaded your vehicle and camper, drive to a wei\
gh station and weigh on the front and rear wheels separately. This will tell you the loads on
your axles. The loads on the front and rear axles shouldn’t be more than
either
of the GAWRs. The total of the axle loads should not be more than
the GVWR.
Open your driver’s door and look at the door lock pillar for the
CertificationD‘ire label to find out your GAWR and GVWR.
11 you ve gone over ; Jr weight ratings, move or take out some things until
all the weights fall below the ratings. Of course, you should always tie down
any loose items when you load your vehicle or camper.
When you install and load your slide-in camper, check the manu\
facturer’s instructions.
If you want more information on curb weights, cargo weights, cargo weight
rating and the correct center of gravity zone for your vehicle, your dealer
can help you. Just ask for a copy of “Consumer Information, Truck
-
Camper Loading.”
Trailer Recommendations
You must subtract your hitch loads from the CWR for your vehicle. Weigh
your vehicle with your trailer attached,
so that you won’t go over the
GVWR or the GAWR.
You’ll get the best performance if you spread out the weight of your load
the right way, and if you choose the correct hitch and trailer brakes.
For more information, see “Trailer Towing’’ in the Index.
Pickup Conversion To Chassis Cab
General Motors is aware that some vehicle owners may consider having the
pickup
box removed and a commercial or recreational body installed.
However, we recommend that conversions of this type not be done to this
pickup. Owners should be aware that, as manufactured, there are differences
between a chassis cab and a pickup with the box removed which\
may affect vehicle safety.
For further information, contact the GM Zone Office for your
area. (See the “Warranty and Owner Assistance” booklet fo\
r Zone Office.)
6 --50