1994 CHEVROLET CORVETTE audio
[x] Cancel search: audioPage 2 of 274
Downloaded from www.Manualslib.com manuals search engine Corvette
Introduction
Part 1
Part 2
Part 3
Part 4
Part 5
Part 6
Part 7
Part 8
Part 9 '
1994 Owner's Manual
Table of Contents
How to Use This Manual 7 :!&$@
Seats & Restraint Systems 11
Features & Controls = = 35
Comfort Controls & Audio Systems 105
Your Driving and the Road = 121
Problems on the Road 141
Service & Appearance Care 171
Maintenance Schedule 229
Customer Assistance Information 251 m
Index .................... ............... 261
Service Station Information a Last Page
g%y,$pL%>
*"xr7*i.. * .?*2<;.piV$;'
Including "Reporting Safety Defects" on page 254.
Printed in U.S.A. Part No. 10260941 A Second Edition
1 ..
Page 8 of 274
Downloaded from www.Manualslib.com manuals search engine How to Us; This
Manual
5.-
Many people read their owner’s manual
from beginning to end when they first
receive their new vehicle. This will help
you learn about the features and controls
for your vehicle.
In this manual, you’ll
find that pictures and words work
together to explain things quickly.
Index: A good place to look for what
you need is the In-dex in back of the
manual. It’s an alphabetical list of all
that’s iq the manual, and the page
number where you’ll find it.
Parts 1-8: Each part of this manual
begins with a brief list of its contents,
so
you cap often find at a glance if a part
Eontains the information you want.
How to Use This Manual: This part
tells you how to use your manual and
includes safety and vehicle damage
warnings and symbols.
Part 1 - Seats & Restraint Systems:
This part tells you how to use your seats
and safety belts properly. It also
explains the
air bag system.
Part 2 - Features & Controls: This
part explains how to start and operate
your Corvette.
Part 3 - Comfort Controls & Audio
Systems:
This ,part tells you how to
adjust the comfort controls and
how to
operate your sound system.
Part 4 - Your Driving and the Road:
Here you’ll find helpful information
and tips about the road and how to drive
under different conditions.
Part 5 - Problems on the Road: This
>art tells you what to do if you have a
Jroblem while driving, such as a flat
:ire or engine overheating, etc.
Part 6 - Service & Appearance
Care:
Here the manual tells yqap how
:o keep your Corvette running ’’:;’.
properly and looking good. ’,:.
Part 7 - Maintenance Schedule:
This part tells when to perfom,,vehicle
maintenance and what fluids
a&l
lubricants to use.
Part 8 - Customer Assistanc?
~nformation:
This part includ&
important information about rdiorting
safety defects and gives you &$$ls
about the “Roadside Assistancq?
program. You will also find cG$@mer
satisfaction phone numbers (ir&luding
customer satisfaction numbers .for the
hearing and speech impaired),
&s well
as the mediationhrbitration prokedure.
We’ve also included ordering
information for service publicagions in
this part.
Service Station Information: This is
a quick reference of service
information. You can find it
on the last
page of this manual.
..
I ‘I ,
7 I ...
Page 48 of 274

Downloaded from www.Manualslib.com manuals search engine Ke
ma
ha! the
ou1
!y Release Button: If you have a
lnual transmission, your ignition lock
; a key release button. You must press
: button before you can take your key
t of the ignition lock.
NOTICE:
If your key seems stuck in “Lock”
and you can’t turn it, be sure it is all
the way in. If it is, then turn the steer-
ing wheel left and right while you
turn the key hard. But turn the key
only with your hand. Using a tool to
force it could break the key or the
ignition switch. If none of this works,
then your vehicle needs service.
Delayed Accessory Bus (DAB)
With DAB your power windows and the
audio system will continue to work up to
15 minutes after the ignition key is turnec
to “Off’ and neither door is opened.
If a
door is opened, the audio system and
power windows will shut
off.
Starting Your Engine
Automatic Transmission: Move your
shift lever to
“P’ (Park) or “N” (Neutral).
Your engine won’t start in any other
position
- that’s a safety feature. To
restart when you’re already moving,
use
“N” (Neutral) only.
NOTICE:
Don’t try to shift to “P” (Park) if your
Corvette is moving. If you do, you
could damage the transmission. Shift
to
“P” (Park) only when your vehicle
is stopped.
ManuaI Transmission: The gear selector
should be
in neutral. Hold the clutch
pedal to the
floor and start the engine.
Your vehicle won’t start if the clutch
pedal is not all the way down
- that’s a
safety feature.
To start your 5.7 Liter LTl engine:
1. Without pushing the accelerator pedal
turn the ignition key to “Start.” When
the engine starts, let go of the key. Thl
idle speed will go down as your
engine gets warm.
NOTICE:
Holding your key in “Start” for
longer than 15 seconds at a time will
cause your battery to be drained
much sooner. And the excessive heat
can damage your starter motor.
47 ...
Page 80 of 274

Downloaded from www.Manualslib.com manuals search engine Instrument Panel
1. Acceleration Slip Regulation Switch
2. Side Window Defogger Vent
3. Side Air Vent
4. Turn Signaweadlight Beam Lever
5. Tilt Lever
6. Instrument Cluster
7. Ignition Switch
8. Trip Monitor Controls
9. Solar Sensor
IO. Center Air Vent
11. Driver Information Center
12. Comfort Controls
13. Fuse Panel
14. Audio System
15. Ashtray/Lighter/Cupholder
16. Selective Ride Control (if equipped)
17. Power Seat Control (if equipped)
18. Shift Lever
19. Horn
20. Main Light Control
21. Fog Lamp Switch
79 ...
Page 91 of 274
Downloaded from www.Manualslib.com manuals search engine Features and Controls
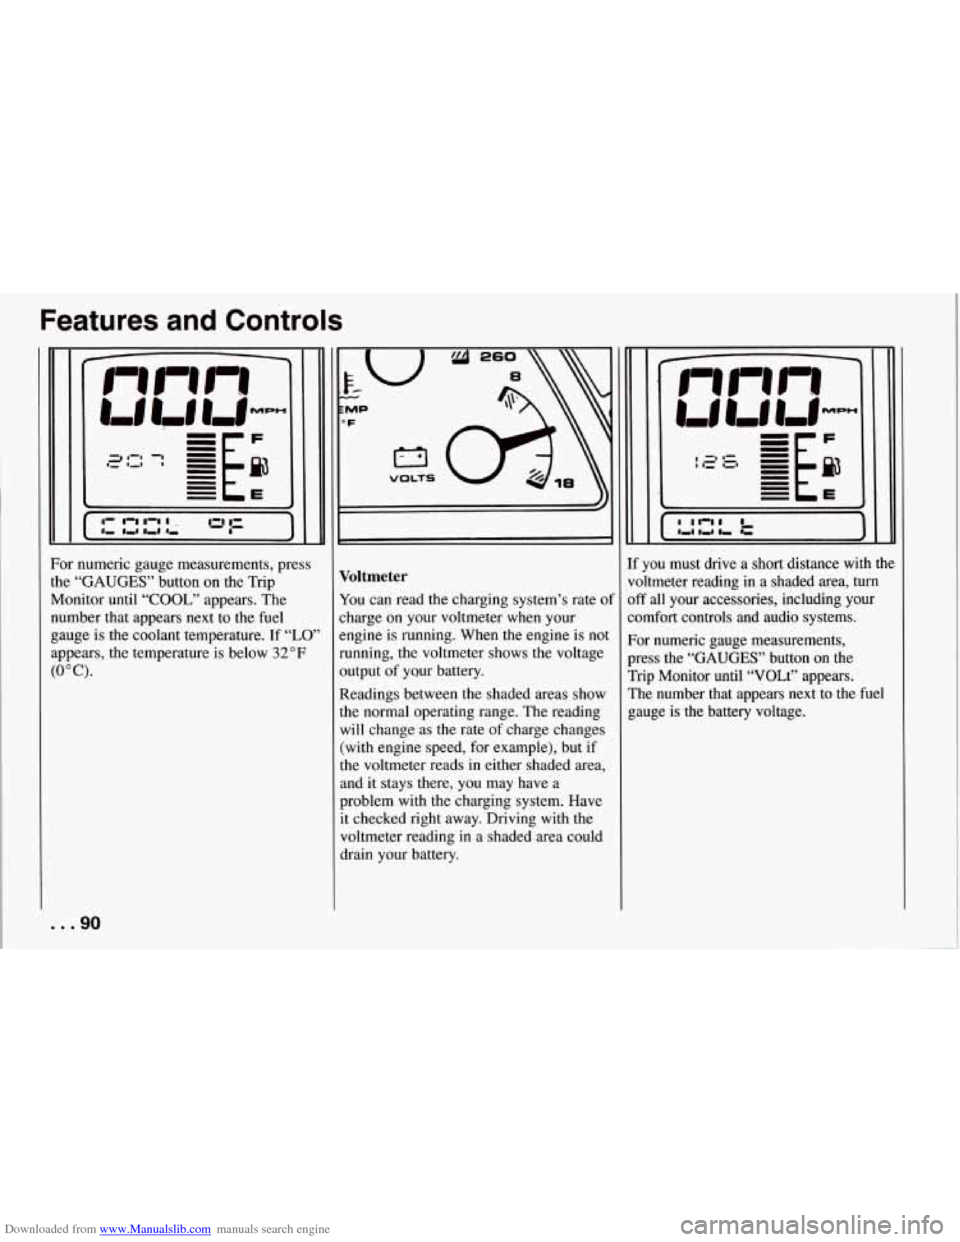
For numeric gauge measurements, press
the
“GAUGES” button on the Trip
Monitor until
“COOL,” appears. The
number that appears next to the fuel
gauge is the coolant temperature. If
“LO’
appears, the temperature is below 32°F
(0°C).
... 90
T VOLTS I
Voltmeter
You can read the charging system’s rate of
charge on your voltmeter when your
engine is running. When the engine is not
running, the voltmeter shows the voltage
output of yQur battery.
Readings between the shaded areas show
the normal operating range. The reading
will change as the rate of charge changes
(with engine speed, for example), but if
the voltmeter reads
in either shaded area,
and it stays there, you may have a
problem with the charging system. Have
it checked right away. Driving with the
voltmeter reading in a shaded area could
drain your battery. If you must
drive a short distance with the
voltmeter reading
in a shaded area, turn
off all your accessories, including your
comfort controls and audio systems.
For numeric gauge measurements,
press the
“GAUGES’’ button on the
Trip Monitor until “VOLt” appears.
The number that appears next to the fuel
gauge is
the battery voltage.
Page 106 of 274

Downloaded from www.Manualslib.com manuals search engine In this part you’ll find out how to
operate the comfort control
systems and audio systems
offered with your Corvette
. Be
sure to read about the particular
system supplied with your
vehicle
.
Part 3
Comfort Controls & Audio
Systems
Comfort Controls ................................................ 106
Air Conditioner Controls ........................................ 106
Automatic Electronic Climate Control .............................. 108
Rear Window Defogger ......................................... 111
Treated Windshield ............................................ 111
Flow-Through Ventilation System ................................. 111
Audio Systems .................................................. 112
Setting the Clock .............................................. 113
Noise Reduction ............................................... 113
AM/FM Stereo with Cassette Tape Player ........................... 113
DelcoBose AM/FM Stereo with Cassette Tape and
Compact Disc Player
......................................... 115
Understanding Radio Reception .................................. 117
Care of Your Cassette Tape Player ................................. 117
Care of Your Compact Discs ..................................... 118
Power Antenna Mast Care ................................... 118
105 ..
Page 107 of 274
Downloaded from www.Manualslib.com manuals search engine Comfort Controls and Audio Systems
0 00
0 0 0 0 0 0 0 a
Comfort Controls
With these systems, you can control the
heating, cooling and ventilation in your
Corvette.
Your vehicle also has
the flow-through
ventilation system described later in this
section.
Air Conditioner Controls
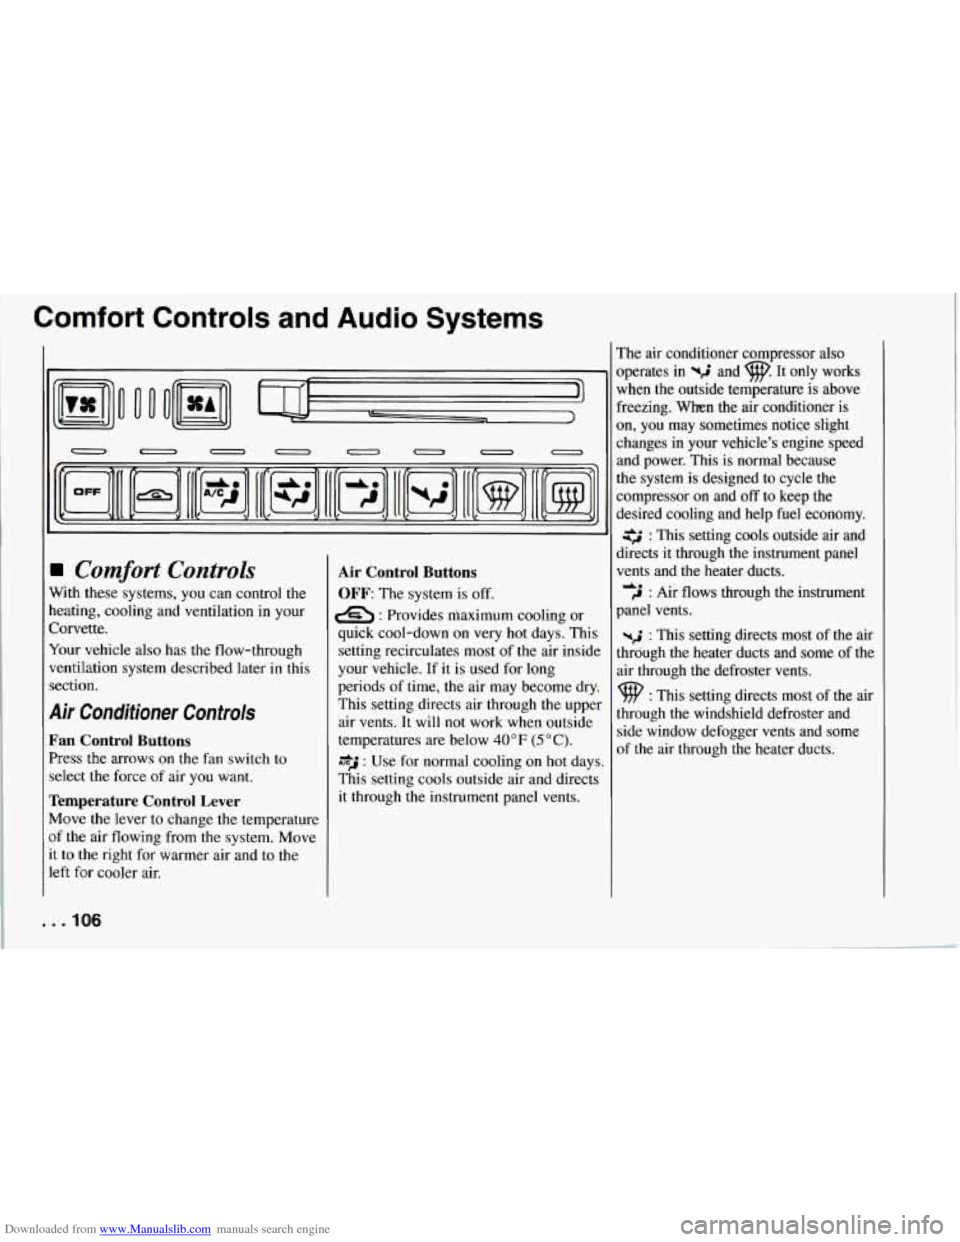
Fan Control Buttons
Press the arrows on the fan switch to
select the force of air you want.
Temperature Control Lever
Move the lever to change the temperature
of the air flowing from
the system. Move
it to the right for warmer air and to the
left for cooler air.
Air Control Buttons
OFF: The system is off.
e : Provides maximum cooling or
quick cool-down on very hot days. This
setting recirculates most of the air inside
your vehicle. If it is used for long
periods of time,
the air may become dry.
This setting directs air through the upper
air vents. It will not work when outside
temperatures are below
40 OF (5 O C).
*J : Use for normal cooling on hot days.
This setting cools outside air and directs
it through the instrument panel vents. The air conditioner compressor also
operates in
%$ and w. It only works
when the outside temperature is above
freezing. When the air conditioner is
on, you may sometimes notice slight
changes
in your vehicle’s engine speed
and power. This is normal because
the system is designed to cycle the
compressor on and
off to keep the
desired cooling and help fuel economy.
: This setting cools outside air and
directs it through the instrument panel
vents and the heater ducts.
,J : Air flows through the instrument
panel vents.
-2 : This setting directs most of the air
through the heater ducts and some of the
air through the defroster vents.
9 : This setting directs most of the air
through the windshield defroster and
side window defogger vents and some
of the air through the heater ducts.
de
. . .IO6
Page 109 of 274
Downloaded from www.Manualslib.com manuals search engine Comfort Controls and Audio Systems
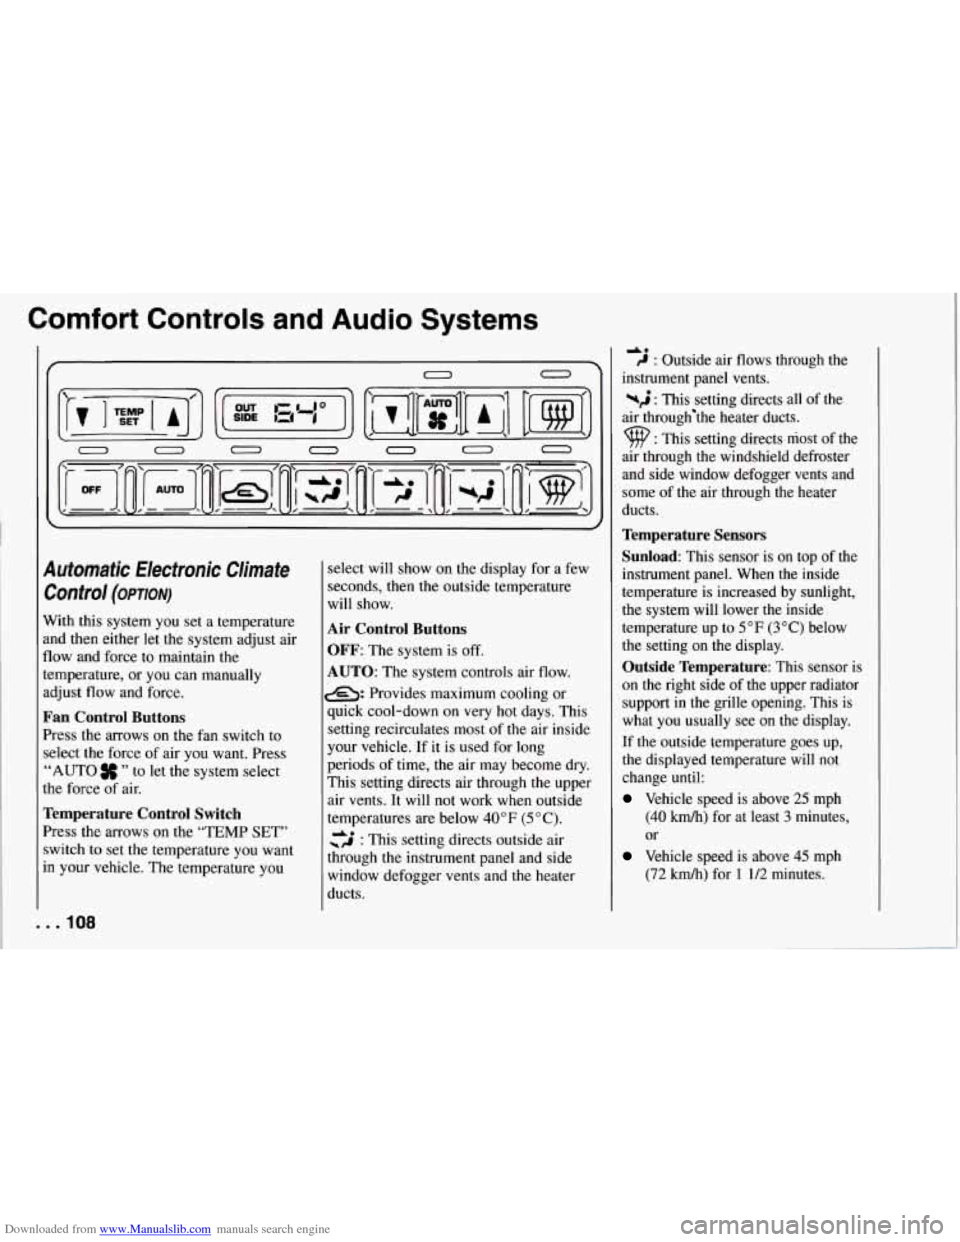
Automatic Electronic Climate Control
(OP~ON)
With this system you set a temperature
and then either let the system adjust air
flow and force to maintain
the
temperature, or you can manually
adjust flow and force.
Fan Control Buttons
Press the arrows on the fan switch to
select the force of air you want. Press
“AUTO
” to let the system select
the force of air.
Temperature Control Switch
Press the arrows on the “TEMP SET’’
switch to set the temperature you want
in your vehicle. The temperature you
. . .IO8
select will show on the display for a few
seconds, then the outside temperature
will show.
Air Control Buttons
OFF:
The system is off.
AUTO: The system controls air flow.
e: Provides maximum cooling or
quick cool-down on
very hot days. This
setting recirculates most of the air inside
your vehicle. If it is used for long
periods of time, the air may become dry.
This setting directs air through the upper
air vents. It will not work when outside
temperatures are below
40°F (5 “C).
cs : This setting directs outside air
through the instrument panel and side
window defogger vents and the heater
ducts.
40 C : Outside air flows through the
instrument panel vents.
%$ : This setting directs all of the
air through‘the heater ducts.
9 : This setting directs most of the
air through
the windshield defroster
and side window defogger vents and
some of the air through the heater
ducts.
Temperature Sensors
Sunload:
This sensor is on top of the
instrument panel. When the inside
temperature is increased by sunlight,
the system will lower the inside
temperature up to
5°F (3°C) below
the setting on the display.
Outside Temperature: This sensor is
on the right side of the upper radiator
support in the grille opening. This is
what you usually see on the display.
If the outside temperature goes up,
the displayed temperature will not
change until:
Vehicle speed is above 25 mph
(40 kmh) for at least 3 minutes,
or
Vehicle speed is above 45 mph
(72
km/h) for 1 1/2 minutes.