1994 CHEVROLET CORVETTE check engine
[x] Cancel search: check enginePage 50 of 274

Downloaded from www.Manualslib.com manuals search engine I NOTICE:
Your engine is designed to work with
the electronics in your vehicle. If you
add electrical parts or accessories,
you could change the way the fuel
injection system operates. Before
adding electrical equipment, check
with your dealer. If you don’t, your
engine might not perform properly.
If you ever have to have your vehicle
towed, see the part
of this manual
that tells how to do it without
damaging your vehicle. See “Towing
Your Vehicle” in the Index.
Engine Power Switch (ZR-I)
The LT5 engine in your ZR-1 has two sets
of intake runners and fuel injectors. The
primary set can be run alone for normal
engine power, or both sets can be used
for
full engine power.
Full power gives you extra power for
highway touring and off-road sports use
and reserve power for passing. With
normal power, you’ll notice less engine
and exhaust noise. To
change the power setting, put your
engine power key into the switch. Turn
the key to the setting you want and let
go
The key will return to the center position.
Your ZR-1 is able to run at full power
under the following conditions:
The engine coolant and oil
temperatures are greater than
68 OF
(20°C) but less than 302°F (150°C).
e System voltage is greater than ten
e The “SERVICE ENGINE SOON’
volts.
light is not on.
You can switch the setting at engine
speeds up to
4,000 rpm. When you
select the
“FULL” setting, a light near
[he switch will come on. It should go
>ut when you change back to the
“NORMAL” setting. When you turn the
ignition
off, the setting will go back to
normal power.
Off-Road Track Use
See your Warranty Book before using
your Corvette for off-road track use.
NOTICE:
If you use your Corvette for off-road
track use, your engine may use more
oil than it would with normal use.
Low oil levels can damage the
engine. Be sure to check the oil level
often during off-road track use.
You
may need to add additional oil. See
“Engine Oil” in the Index.
49 ...
Page 63 of 274

Downloaded from www.Manualslib.com manuals search engine Features and Controls
L L
c
L
A green arrow on the instrument panel
will flash in the direction of the
turn or
lane change.
To signal a lane change, just raise or
lower the lever until the green arrow start
to flash. Hold it there until you complete
your lane change. The lever will return b!
itself when you release
it.
As you signal a turn or a lane change, if
the arrows don’t flash but just stay on, a
signal bulb may be burned out and other
drivers won’t see your
turn signal.
If a bulb is burned out, replace it to help
avoid an accident.
If the green arrows
don’t go on at all when you signal a
turn,
check the fuse (see “Fuses” in the Index)
and for burned-out bulbs.
Headlight High/..ow Beam
To change the headlights from low beam
to high or high to low, pull the turn signal
lever all the way toward you. Then
release it. When the high beams are on,
this blue light on the instrument panel
also will be on.
Windshield Wipers
You control the windshield wipers by
turning the band with the wiper symbol
on it.
For a single wiping cycle,
turn the band
to “MIST.” Hold it there until the wipers
start, then let go. The wipers will stop
after one cycle. If you want more cycles,
hold the band on “MIST” longer.
You can set the wiper speed for a long or
short delay between wipes. This can be
very useful in light rain or snow. Turn the
band to choose the delay time. The closer
to
“LO,” the shorter the delay.
... 62
Page 67 of 274

Downloaded from www.Manualslib.com manuals search engine Features and Controls
Passing Another Vehicle While Using
Cruise Control
Use the accelerator pedal to increase your
speed. When you take your foot off the
pedal, your vehicle will slow down to the
Cruise Control speed you set earlier.
Using Cruise Control on Hills
How well your Cruise Control will work
on hills depends upon your speed, load,
and the steepness of the hills. When going
up steep hills, you may have to step on
the accelerator pedal to maintain your
speed. When going downhill, you may
have to brake or shift to a lower gear to
keep your speed down. Of course,
applying the brake takes you out of
Cruise Control. Many drivers find this to
be too much trouble and don’t use Cruise
Control on steep hills.
... 66
:o Get Out of Cruise Control
’here are several ways to turn off the
bise Control:
. Step lightly on the brake pedal or push
the clutch pedal, if you have a manual
transmission;
OR
!. Move the Cruise switch to “OFF.”
ro Erase Speed Memory
Nhen you turn off the Cruise Control or
he ignition, your Cruise Control set speed
nemory is erased.
Operation of Lights
4lthough your vehicle’s lighting system
:headlights, parking lights, fog lamps,
sidemarker lights and taillights) meets all
applicable federal lighting requirements,
2ertain states and provinces may apply
their own lighting regulations that may
require special attention before you
operate these lights.
For example, some jurisdictions may
require that you operate your fog lamps
only when your lower beam headlights
are also on, or that headlights be turned
on whenever you must use your
windshield wipers. In addition, most
jurisdictions prohibit driving solely with
parking lights, especially at dawn or dusk.
It is recommended that you check with
your own state or provincial highway
authority for applicable lighting
regulations.
Page 83 of 274

Downloaded from www.Manualslib.com manuals search engine Features and Controls
Warning Lights, Gauges
and Indicators
This section describes the warning lights
and gauges that may be on your vehicle.
The pictures will help you locate them.
Warning lights and gauges can signal that
something is wrong before it becomes
serious enough to cause an expensive
repair or replacement. Paying attention
to your warning lights and gauges could
also save you or others from injury.
Warning lights go on when there may be
or
is a problem with one of your vehicle’s
functions.
As you will see in the details
on the
next few pages, some warning
lights come on briefly when you turn the
ignition key just to let you know they’re
working. If you are familiar with this
section, you should not be alarmed when
this happens.
Gauges can indicate when there may be
or is a problem with one of your vehicle’s
functions. Often gauges and warning
lights work together to
let you know
when there’s a problem with your vehicle.
... 82
When one of the warning lights comes on
and stays on when you are driving, or
when one of the gauges shows there may
be a problem, check the section that tells
you what to do about
it. Please follow the
manual’s advice. Waiting to
do repairs
can be costly
- and even dangerous. So
please get to know your warning lights
and gauges. They’re a big help.
Your vehicle also has a driver information
center that works along with the warning
lights and gauges. See “Driver Information Center’’
in the Index.
System Problems
If “SYS” flashes on the display near your
fuel gauge, there may be a problem with
your Corvette’s electrical system. If the
“SECURITY” light flashes at the same
time, there is a problem with your theft
deterrent system. Have your vehicle
checked by your dealer
if “SYS’ keeps
appearing.
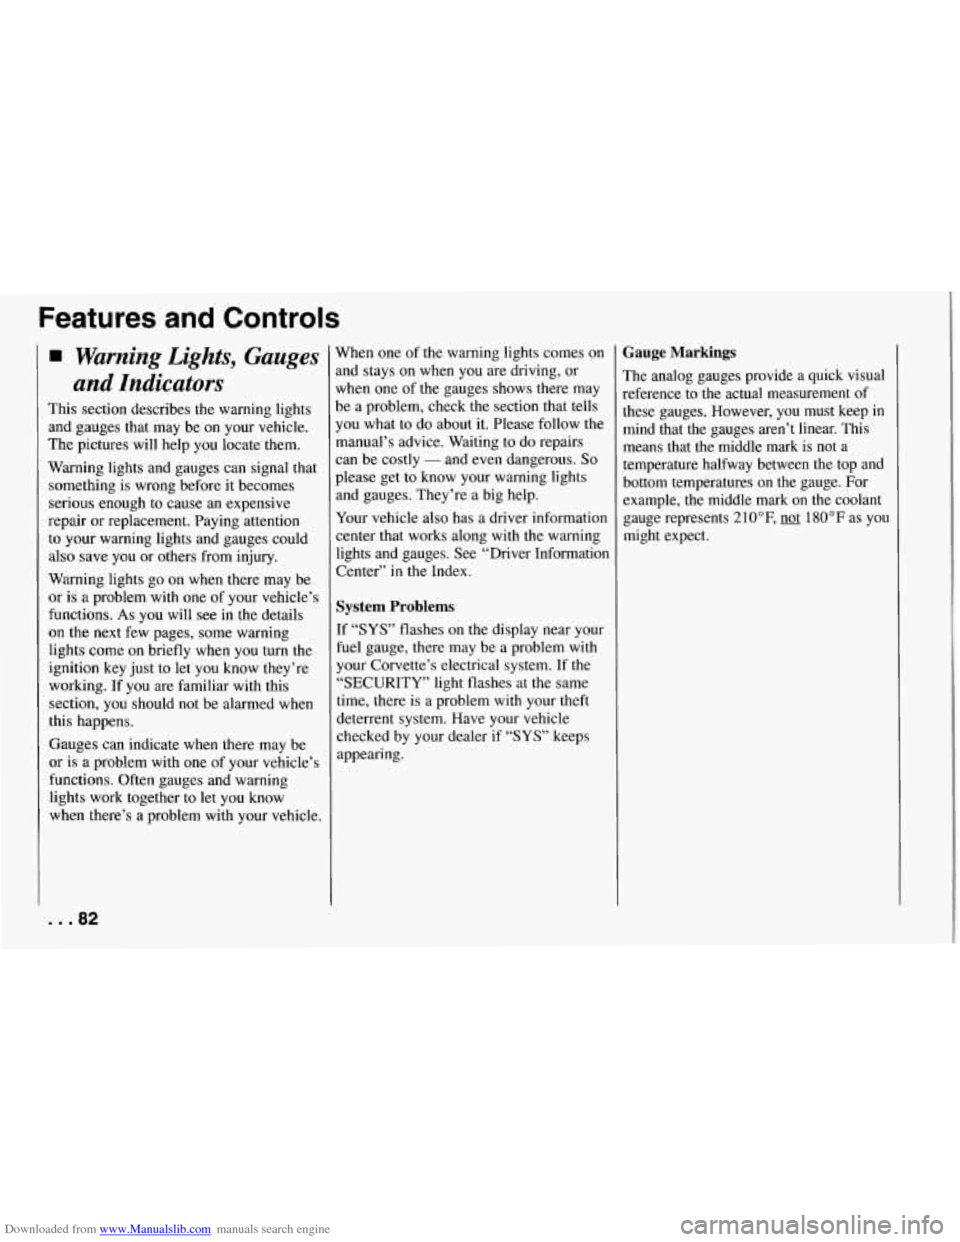
Gauge Markings
The analog gauges provide a quick visual
reference to the actual measurement of
these gauges. However, you must keep in mind that the gauges aren’t linear. This means that the middle mark is not
a
temperature halfway between the top and
bottom temperatures on the gauge. For
example, the middle mark on the coolant
gauge represents 210°F,
not 180°F as you
might expect.
Page 87 of 274

Downloaded from www.Manualslib.com manuals search engine Features and Controls
ABS
ACTIVE
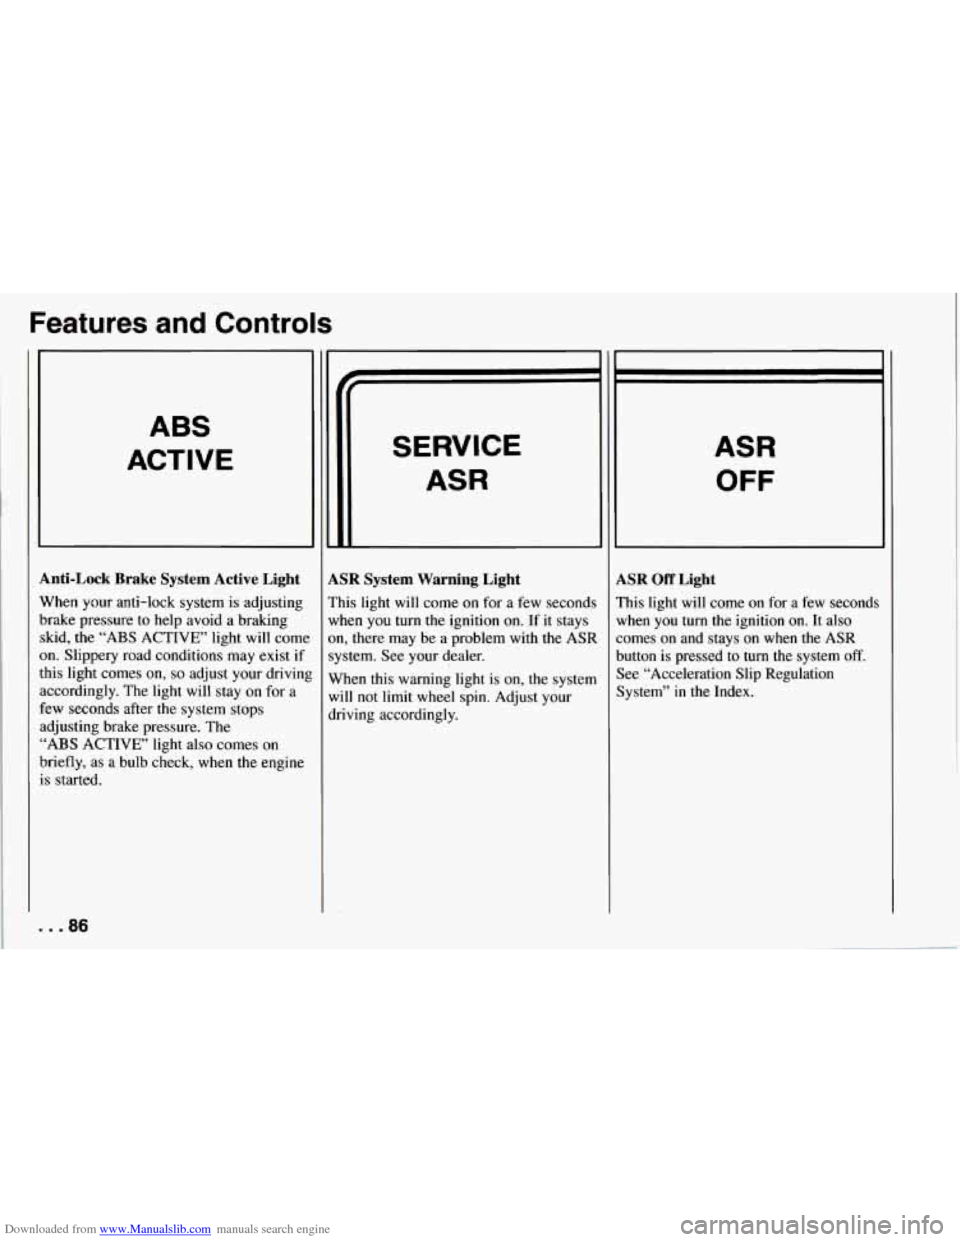
Anti-Lock Brake System Active Light
When your anti-lock system is adjusting
brake pressure to help avoid a braking skid, the
“ABS ACTIVE’ light will come
on. Slippery road conditions may exist if
this light comes
on, so adjust your drivinl
accordingly. The light will stay on for a
few seconds after the system stops
adjusting brake pressure. The
“ABS ACTIVE’ light also comes on
briefly, as a bulb check, when the engine
is started.
. . .86
SERVICE
ASR
LSR System Warning Light
’his light will come on for a few seconds
vhen you turn the ignition on. If it stays
m, there may be a problem with
the ASR
ystem. See your dealer.
Vhen this warning light is on, the system
vi11 not limit
wheel spin. Adjust your
lriving accordingly.
ASR
OFF
LSR Off Light
’his light will come on for a few seconds
lrhen you turn the ignition
on. It also
omes on and stays on when the ASR
lutton is pressed to turn the system
off.
lee “Acceleration Slip Regulation
lystem” in the Index.
Page 88 of 274

Downloaded from www.Manualslib.com manuals search engine ASR
ACTIVE
ASR Active Light
When your ASR system is limiting wheel
spin, the “ASR ACTIVE’ light will come
on. Slippery road conditions may exist if
this light comes
on, so adjust your driving
accordingly. The light will stay on for a
few seconds after the ASR system stops
limiting wheel spin. The “ASR ACTIVE’
light also comes
on briefly, as a bulb
check, when the engine is started.
Low Tire Pressure Warning Light
(Option)
The LTPWS has a sensor on each road
wheel that transmits to a receiver
on the
instrument panel. The system operates on
a radio frequency subject to Federal
Communications Commission (FCC)
Rules.
This device complies with Part
15 of the
FCC Rules. Operation
is subject to the
following two conditions:
1. This device may not cause harmful
2. This device must accept any
interference,
and
interference received, including
interference that may cause undesired
operation.
Changes or modifications to this system
by other than an authorized service
facility could void authorization to use
this equipment.
LOWIFLAT
TIRE
..
The Low Tire Pressure Warning System
(LTPWS) monitors air pressure in each
road tire while you’re driving your
Corvette. The “LOW/FLAT TIRE” light
will come
on whenever tire pressure in
any road tire goes below
25 psi (175 kPa)
and it will stay
on until you turn off the
ignition. The light may come on if any
LTPWS parts aren’t working properly.
..
8
87 ...
Page 89 of 274

Downloaded from www.Manualslib.com manuals search engine Features and Controls
For LTPWS to work properly, you must
drive your Corvette faster than
25 mph
(40 km/h) and for more than
2 miles
(4 km). The system will not warn you
before
you begin to drive that a tire is flat.
When the “LOW/FLAT TIRE’ light
comes on, check
the tire pressure in all
four road tires as soon as you can. Adjust
the tire pressure as needed to those shown
on the Tire-Loading Information label on
the driver’s door. If the light stays on after
the tire pressure is adjusted, see your
dealer.
NOTICE:
Driving with a flat tire may damage
the tire,
the wheel or the tire pressure
sensor installed inside the tire on the
wheel rim. Using tire sealants may
also damage
the sensor.
If you have EMTs, see “Extended
Mobility Tires”
in the Index. The
LTPWS sensor is directly opposite
the valve stem on the tire. Take care when
servicing or having your tires serviced.
The sensors may not work properly if
damaged. To prevent damage to the
sensors, see the 1994 Corvette Service
Manual for correct tire mounting and
dismounting procedures.
The “LOWRLAT TIRE” light may come
on if your vehicle is close to another
vehicle that has LTPWS and has a tire
with low pressure.
LTPWS can
warn you about a low tire,
but it does not replace normal tire
maintenance. See “Tires” in the Index.
. . .88
Page 91 of 274

Downloaded from www.Manualslib.com manuals search engine Features and Controls
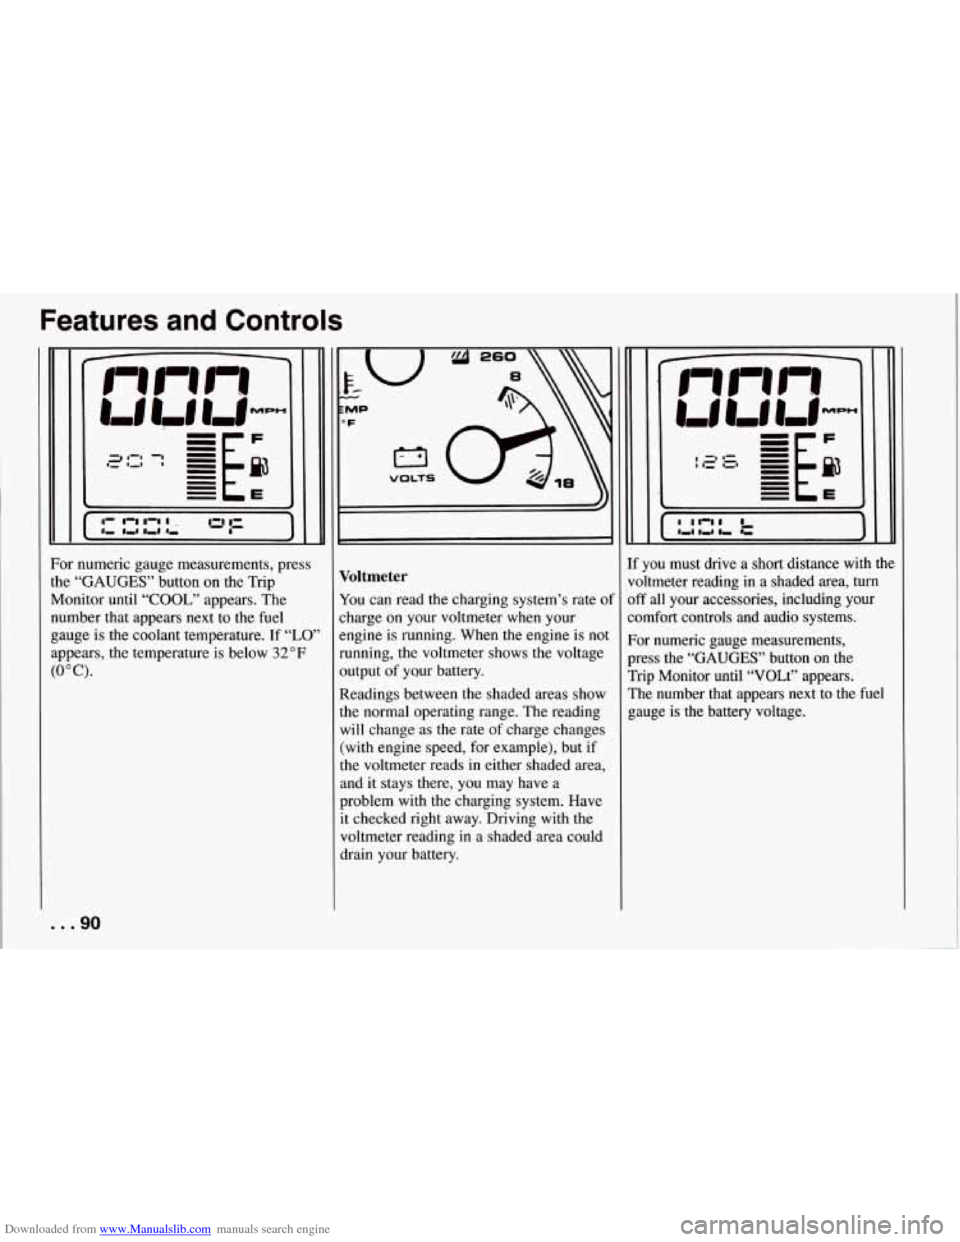
For numeric gauge measurements, press
the
“GAUGES” button on the Trip
Monitor until
“COOL,” appears. The
number that appears next to the fuel
gauge is the coolant temperature. If
“LO’
appears, the temperature is below 32°F
(0°C).
... 90
T VOLTS I
Voltmeter
You can read the charging system’s rate of
charge on your voltmeter when your
engine is running. When the engine is not
running, the voltmeter shows the voltage
output of yQur battery.
Readings between the shaded areas show
the normal operating range. The reading
will change as the rate of charge changes
(with engine speed, for example), but if
the voltmeter reads
in either shaded area,
and it stays there, you may have a
problem with the charging system. Have
it checked right away. Driving with the
voltmeter reading in a shaded area could
drain your battery. If you must
drive a short distance with the
voltmeter reading
in a shaded area, turn
off all your accessories, including your
comfort controls and audio systems.
For numeric gauge measurements,
press the
“GAUGES’’ button on the
Trip Monitor until “VOLt” appears.
The number that appears next to the fuel
gauge is
the battery voltage.