1994 CHEVROLET CAVALIER recommended oil
[x] Cancel search: recommended oilPage 122 of 243
Downloaded from www.Manualslib.com manuals search engine Reduce your speed according to your
speedometer, not to your sense of motion.
After driving for any distance at higher
speeds, you may tend
to think you are
going slower than you actually are.
Before Leaving on a Long
Trip
Make sure you’re ready. Try to be well
rested.
If you must start when you’re
not fresh
- such as after a day’s work
- don’t plan to make too many miles
that first part
of the journey. Wear
comfortable clothing and shoes you can
easily drive in.
Is your vehicle ready for a long trip? If
you keep it serviced and maintained, it’s
ready to
go. If it needs service, have it
done before starting out. Of course,
you’ll find experienced and able service
experts in Chevrolet dealerships all
across North America. They’ll be ready
and willing to help
if you need it.
Here are some things you can check
before a trip:
Windshield Washer Fluid Is the
reservoir full? Are all windows clean
inside and outside?
Wiper Blades: Are they in good
shape?
Fuel, Engine Oil, Other Fluids: Have
you checked all levels?
Lights: Are they all working? Are the
lenses clean?
Tires: They are vitally important to a
safe, trouble-free trip.
Is the tread
good enough for long-distance
driving? Are the tires all inflated to
the recommended pressure?
weather outlook along your route?
Should you delay your trip a short
time to avoid a major storm system?
Maps: Do you have up-to-date maps?
Weather Forecasts: What’s the
Highway Hypnosis
Is there actually such a condition as
“highway hypnosis”? Or is it just plain
falling asleep at the wheel? Call it
highway hypnosis, lack
of awareness, or
whatever.
There is something about an easy
stretch of road with the same scenery,
along with the hum of the tires on the
road, the drone
of the engine, and the rush
of the wind against the vehicle that
can make you sleepy. Don’t let it
happen to you! If it does, your vehicle
can leave the road in
less than a
second,
and you could crash and be
injured.
What can you do about highway
hypnosis? First, be aware that it can
happen.
Then here are some tips:
Make sure your vehicle is well
ventilated, with a comfortably cool
interior.
Keep your eyes moving. Scan the road
ahead and to the. sides. Check your
rearview mirrors and your
instruments frequently.
If you get sleepy, pull off the road into
a rest, service, or parking area and
take a nap, get some exercise, or both.
For safety, treat drowsiness
on the
highway as an emergency.
a
Page 164 of 243
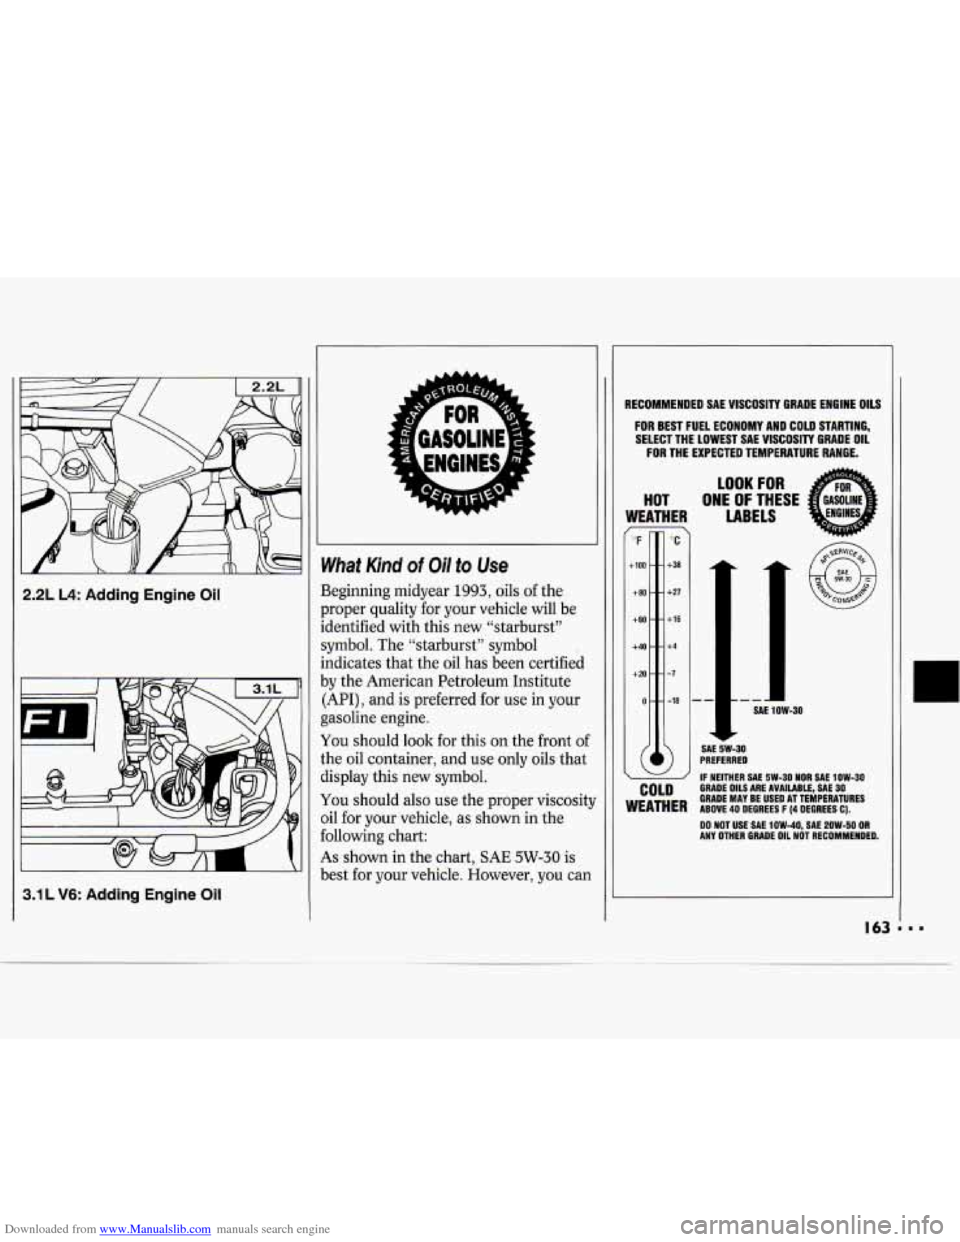
Downloaded from www.Manualslib.com manuals search engine 2.2L L4: Adding Engine Oil
3.1 L V6: Addlng Engine Oil
What Kind of Oil to Use
Beginning midyear 1993, oils of the
?roper quality for your vehicle will be
.dentified with this new “starburst”
iymbol. The “starburst” symbol
ndicates that the oil has been certified
~y the American Petroleum Institute
(API) , and is preferred for use in your
gasoline engine.
fou should
look for this on the front of
:he oil container, and use only oils that
iisplay this new symbol.
fou should also use the proper viscosit)
ail for your vehicle, as shown in the
following chart:
As shown in the chart, SAE 5W-30 is
best for your vehicle. However, you can
RECOMMENDED SAE VlSCOSlTy GRADE ENGINE OILS
FOR BEST FUEL ECONOMY AND COLD STARTING,
SELECT THE LOWEST SAE VISCOSITY GRADE
OIL
FORTHEEXPECTEDTEMPERATURERANGE.
Y
HOT
NE,
-
”F
tlOO
+ 80
+60
+40
4-20
0
’C
t38
t27
t16
t4
-1
-18
LOOK FOR
ONE OF THESE
LABELS
1
PREFERRED SAE
5W-30
IF NEITHER SAE 5W-30 NOR SAE 10W-30 COLD GRADE OILS ARE AVAILABLE, SAE 30 GRADE MAY BE USED AT TEMPERATURES WEATHER ABOVE 40 DEGREES F (4 DEGREES c).
DO NOT USE SAE 1OW-40, SAE 2OW-50 OR ANY OTHER GRADE OIL NOT RECOMMENDED.
Page 170 of 243
Downloaded from www.Manualslib.com manuals search engine Manual Transaxle Fluid
When to Check
A good time to have it checked is when
the engine oil is changed. However, the
fluid in your manual transaxle doesn't
require changing.
How to Check
Because this operation can be a little
difficult, you may choose to have this
done at a Chevrolet dealership Service
Department.
If you do it yourself, be sure to follow
all the instructions here, or you could
get a false reading on the dipstick.
NOTICE:
Too much or too little fluid can
damage your transaxle.
Too much
can mean that some of the fluid
could come out and fall on hot'
engine parts or exhaust system,
starting a fire. Be sure to get an
accurate reading if you check your
transaxle fluid. Check
the fluid level only when your
engine is off, the vehicle is parked on a
level place and the transaxle is cool
enough for you to rest your fingers on
the transaxle case.
Then, follow these steps:
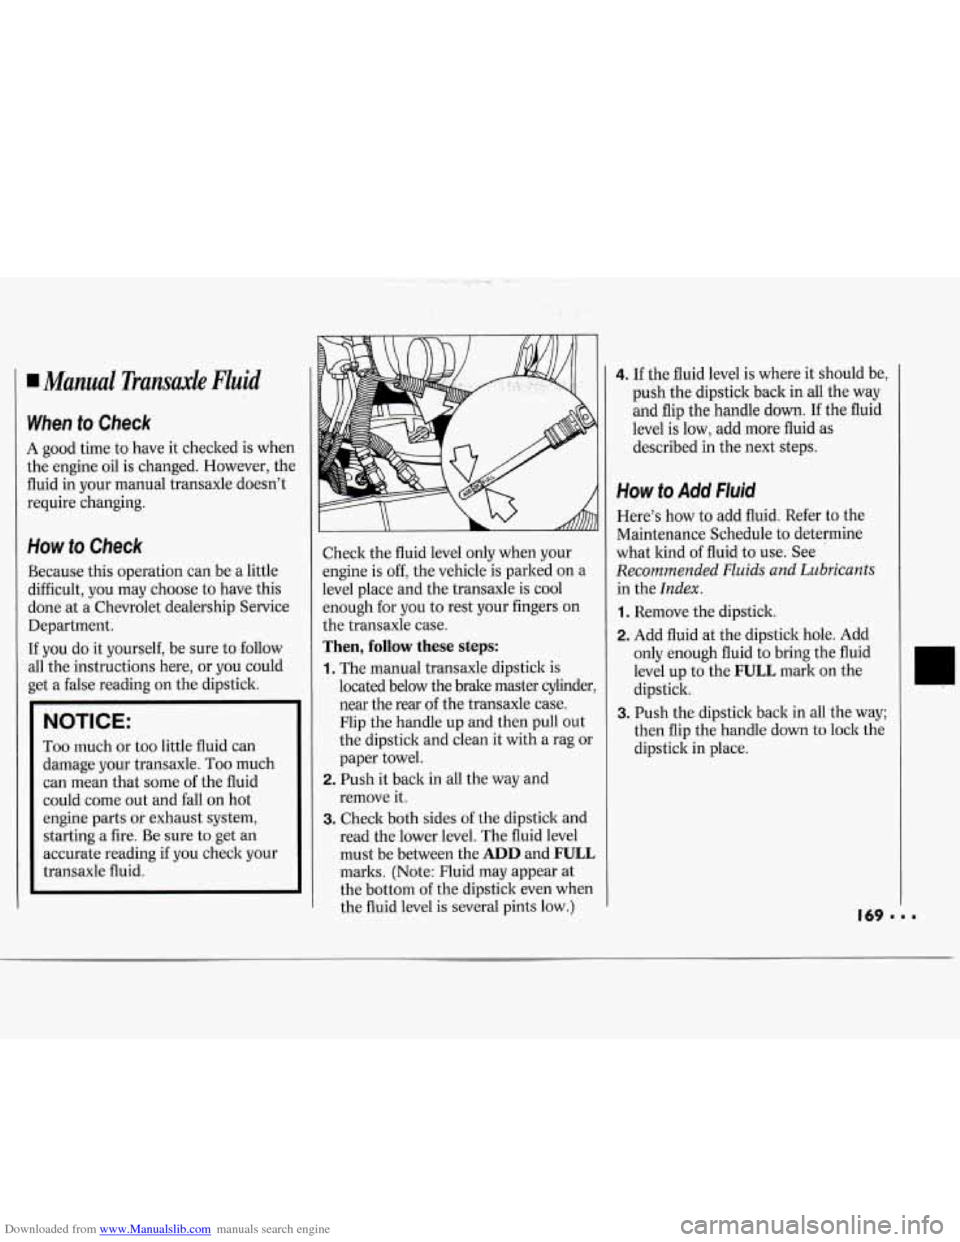
1. The manual transaxle dipstick is
located below the brake master cylinder
near the rear of the transaxle case.
Flip the handle up and then pull out
the dipstick and clean it with a rag or
paper towel.
2. Push it back in all the way and
remove it.
3. Check both sides of the dipstick and
read the lower level. The fluid level
must be between the
ADD and FULL
marks. (Note: Fluid may appear at
the bottom of the dipstick even when
the fluid level is several pints low.)
4. If the fluid level is where it should be,
push the dipstick back in all the way
and flip the handle down.
If the fluid
level is low, add more fluid as
described in the next steps.
How to Add Fluid
Here's how to add fluid. Refer to the
Maintenance Schedule to determine
what kind of fluid to use. See
Recommended Fluids and Lubricants
in the Index.
1. Remove the dipstick.
2. Add fluid at the dipstick hole. Add
only enough fluid to bring the fluid
level up to the
FULL mark on the
dipstick.
3. Push the dipstick back in all the way;
then flip the handle down
to lock the
dipstick in place.
Page 171 of 243
Downloaded from www.Manualslib.com manuals search engine ~~ ~ Service & Appearance Care
170
I Hydraulic Clutch
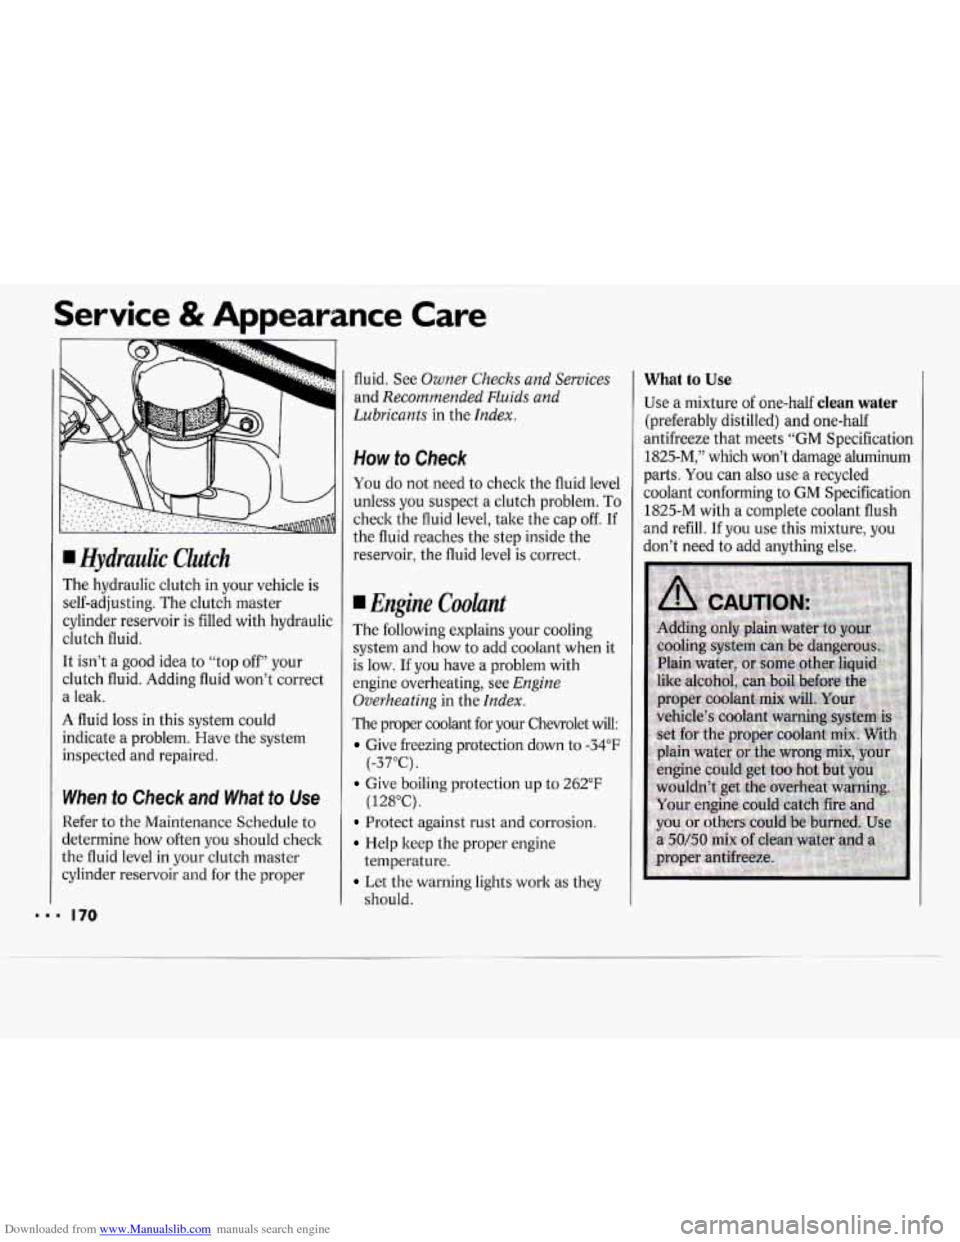
The hydraulic clutch
in your vehicle is
self-adjusting. The clutch master
cylinder reservoir is filled with hydraulic
clutch fluid.
It isn’t
a good idea to “top off” your
clutch fluid. Adding fluid won’t correct
a leak.
A fluid loss in this system could
indicate a problem. Have the system
inspected and repaired.
When to Check and What to Use
Refer to the Maintenance Schedule to
determine how often
you should check
the fluid level in your clutch master
cylinder reservoir and for the proper fluid. See
Owner Checks and
Services
and Recommended Fluids and
Lubricants
in the Index.
How to Check
You do not need to check the fluid level
unless you suspect a clutch problem.
To
check the fluid level, take the cap off. If
the fluid reaches the step inside the
reservoir, the fluid level is correct.
I Engine Coolunt
The following explains your cooling
system and how
to add coolant when it
is low.
If you have a problem with
engine overheating, see
Engine
Overheating
in the Index.
The proper coolant for your Chevrolet will:
Give freezing protection down to -34°F
Give boiling protection up to 262°F
Protect against rust and corrosion.
Help keep the proper engine
Let the warning lights work as they
(-37°C).
(128°C).
temperature.
should.
What to Use
Use a mixture
of one-half clean water
(preferably distilled) and one-half
antifreeze that meets “GM Specification
1825-M,” which won’t damage aluminum
parts. You can also use a recycled
coolant conforming to GM Specification
1825-M with
a complete coolant flush
and refill. If you use this mixture, you
don’t need to add anything else.
Page 192 of 243
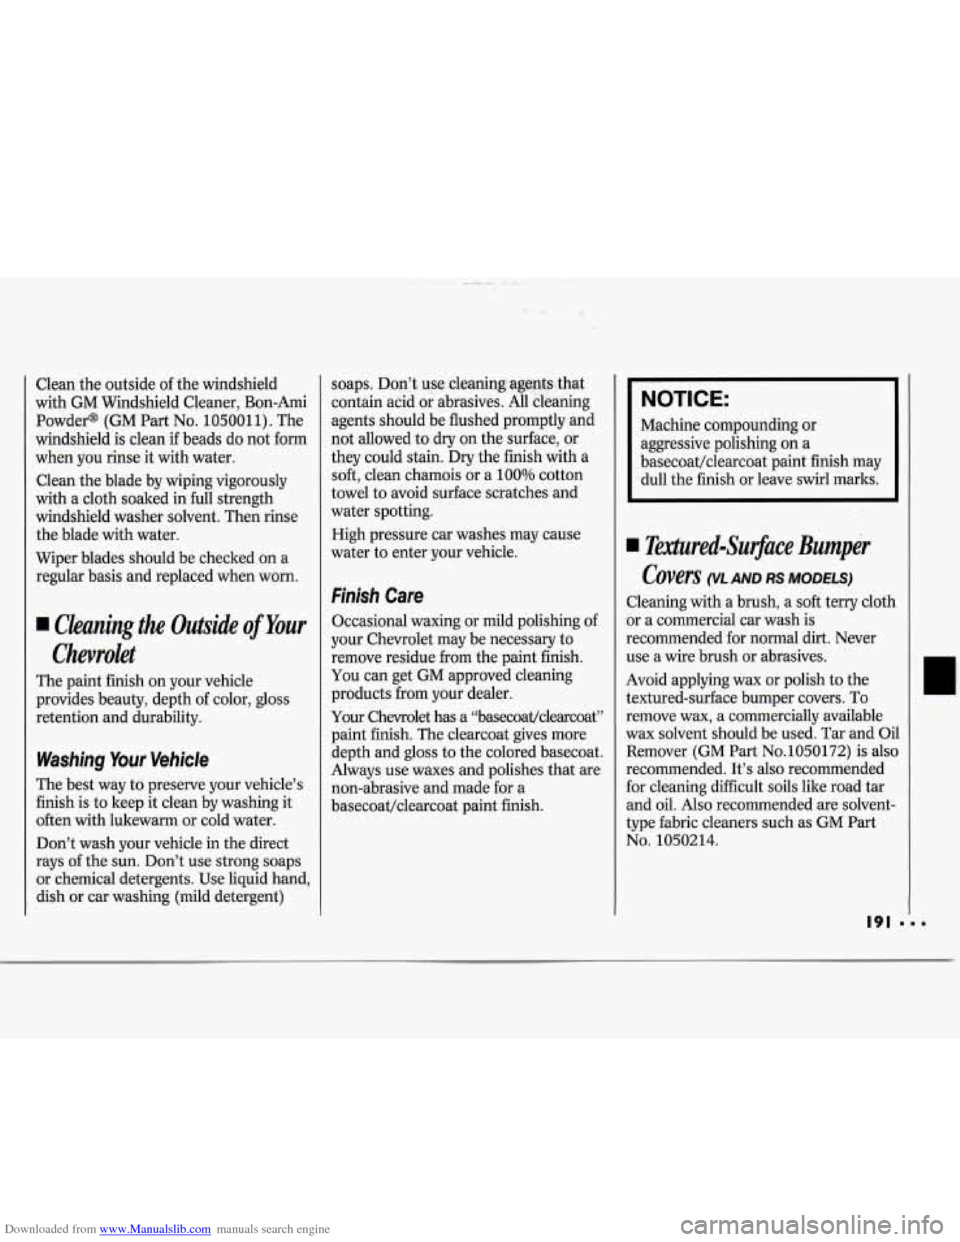
Downloaded from www.Manualslib.com manuals search engine Clean the outside of the windshield
with GM Windshield Cleaner, Bon-Ami
Powder@ (GM Part
No. 1050011). The
windshield is clean
if beads do not form
when you rinse it with water.
Clean the blade by wiping vigorously
with a cloth soaked in full strength
windshield washer solvent. Then rinse
the blade with water.
Wiper blades should be checked on a
regular basis and replaced when worn.
Cleuning tbe Outside of Your
Chevrolet
The paint finish on your vehicle
provides beauty, depth of color, gloss
retention and durability.
Washing Your Vehicle
The best way to preserve your vehicle’s
finish is to keep it clean by washing it
often with lukewarm or cold water.
Don’t wash your vehicle in the direct
rays
of the sun. Don’t use strong soaps
or chemical detergents. Use liquid hand,
dish or car washing (mild detergent) soaps. Don’t
usecleaning
8 @o&-that
contain acid
or abrasives. 31 cleaning
agents should be flushed promptly and
not allowed to dry on the surface, or
they could stain.
Dry the finish with a
soft, clean chamois or a 100% cotton
towel to avoid surface scratches and
water spotting.
High pressure car washes may cause
water to enter your vehicle.
Finish Care
Occasional waxing or mild polishing of
your Chevrolet may be necessary to
remove residue from the paint finish.
You can get GM approved cleaning
products from your dealer.
Your Chevrolet has a ‘Lbasecoat/clearcoat”
paint finish. The clearcoat gives more
depth and gloss to the colored basecoat.
Always use waxes and polishes that are
non-abrasive and made for a
basecoat/clearcoat paint finish.
NOTICE:
Machine compounding or
aggressive polishing on a
basecoat/clearcoat. paint finish may
dull the finish or leave swirl marks.
Rxtured-Surjace Bumper
Covers
WL AND RS MODELS)
Cleaning with a brush, a soft terry cloth
or a commercial car wash is
recommended for normal dirt. Never
use a wire brush or abrasives.
Avoid applying wax or polish to the
textured-surface bumper covers.
To
remove wax, a commercially available
wax solvent should be used. Tar and Oil
Remover (GM Part
No.1050172) is also
recommended. It’s also recommended
for cleaning difficult
soils like road tar
and oil.
Also recommended are solvent-
type fabric cleaners such as GM
Part
No. 1050214.
191 ...
Page 193 of 243
Downloaded from www.Manualslib.com manuals search engine Service & Appearance Care
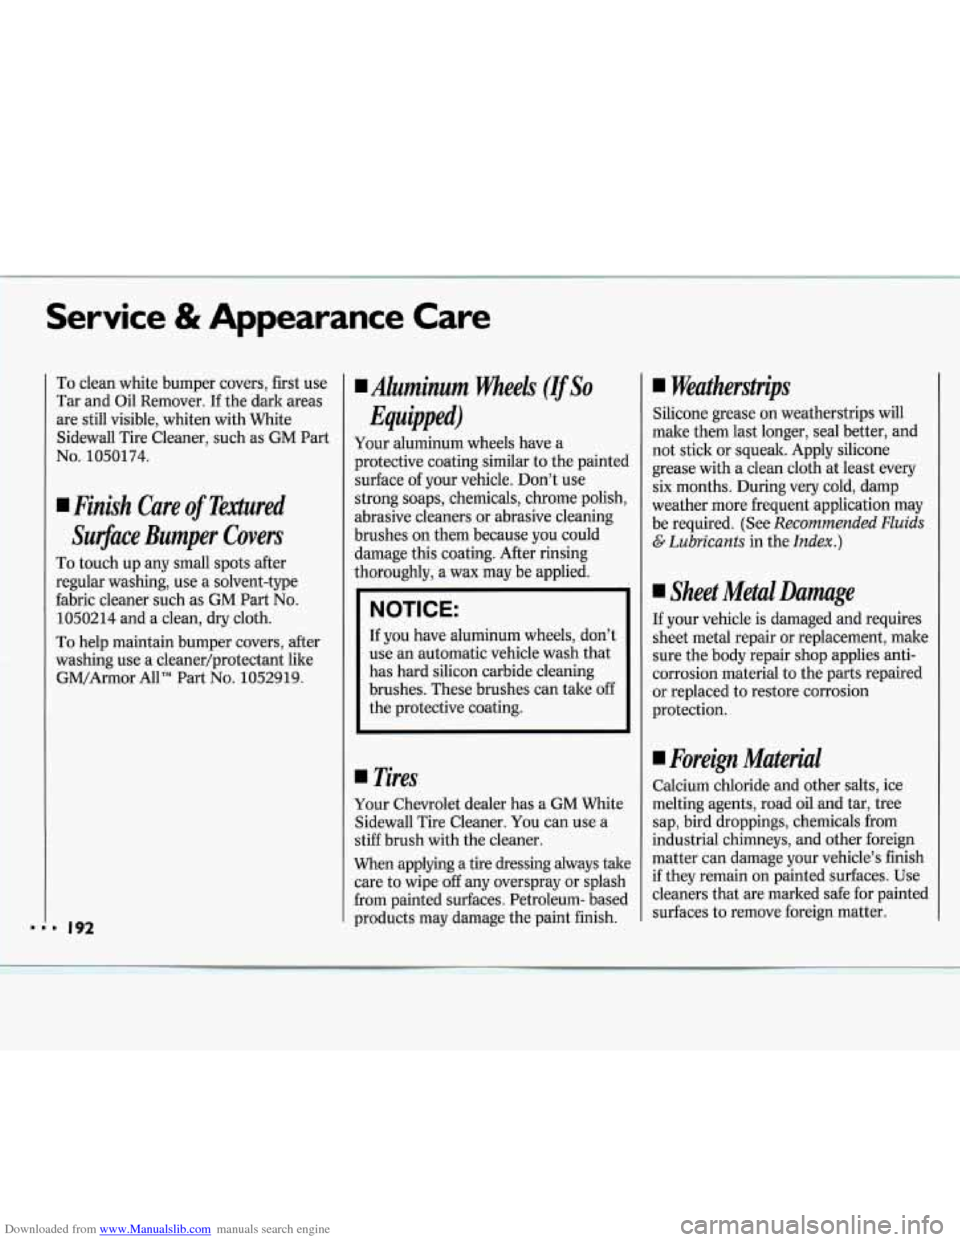
To clean white bumper covers, first use
Tar and Oil Remover. If the dark areas
are still visible, whiten with White
Sidewall Tire Cleaner, such as GM Part
No. 1050174.
Finish Care of Tdred
SurJace Bumper Covers
To touch up any small spots after
regular washing, use a solvent-type
fabric cleaner such as
GM Part No.
1050214 and a clean, dry cloth.
To help maintain bumper covers, after
washing use a cleaner/protectant like
GM/Armor All" Part
No. 1052919.
I Aluminum wheels (IfSo
Equipped)
Your aluminum wheels have a
protective coating similar to the painted
surface of your vehicle. Don't use
strong soaps, chemicals, chrome polish,
abrasive cleaners or abrasive cleaning
brushes on them because you could
damage this coating. After rinsing
thoroughly, a wax may be applied.
NOTICE:
If you have aluminum wheels, don't
use an automatic vehicle wash that
has hard silicon carbide cleaning
brushes. These brushes can take off
the protective coating.
Tires
Your Chevrolet dealer has a GM White
Sidewall Tire Cleaner. You can use a
stiff brush with the cleaner.
When applying a tire dressing always take
care to wipe
off any overspray or splash
from painted surfaces. Petroleum- based
products may damage the paint finish.
I Weatherstrips
Silicone grease on weatherstrips will
make them last longer, seal better, and
not stick or squeak. Apply silicone
grease with a clean cloth at least every
six months. During very cold, damp
weather more frequent application may
be required. (See
Recommended Fluids
G. Lubricants in the Index.)
Sheet Metal Damage
If your vehicle is damaged and requires
sheet metal repair or replacement, make
sure the body repair shop applies anti-
corrosion material to the parts repaired
or replaced to restore corrosion
protection.
I Foreign Material
Calcium chloride and other salts, ice
melting agents, road oil and tar, tree
sap, bird droppings, chemicals from
industrial chimneys, and other foreign
matter can damage your vehicle's finish
if they remain on painted surfaces. Use
cleaners that are marked safe for painted
surfaces to remove foreign matter.
Page 199 of 243
Downloaded from www.Manualslib.com manuals search engine Service & Appearance Care
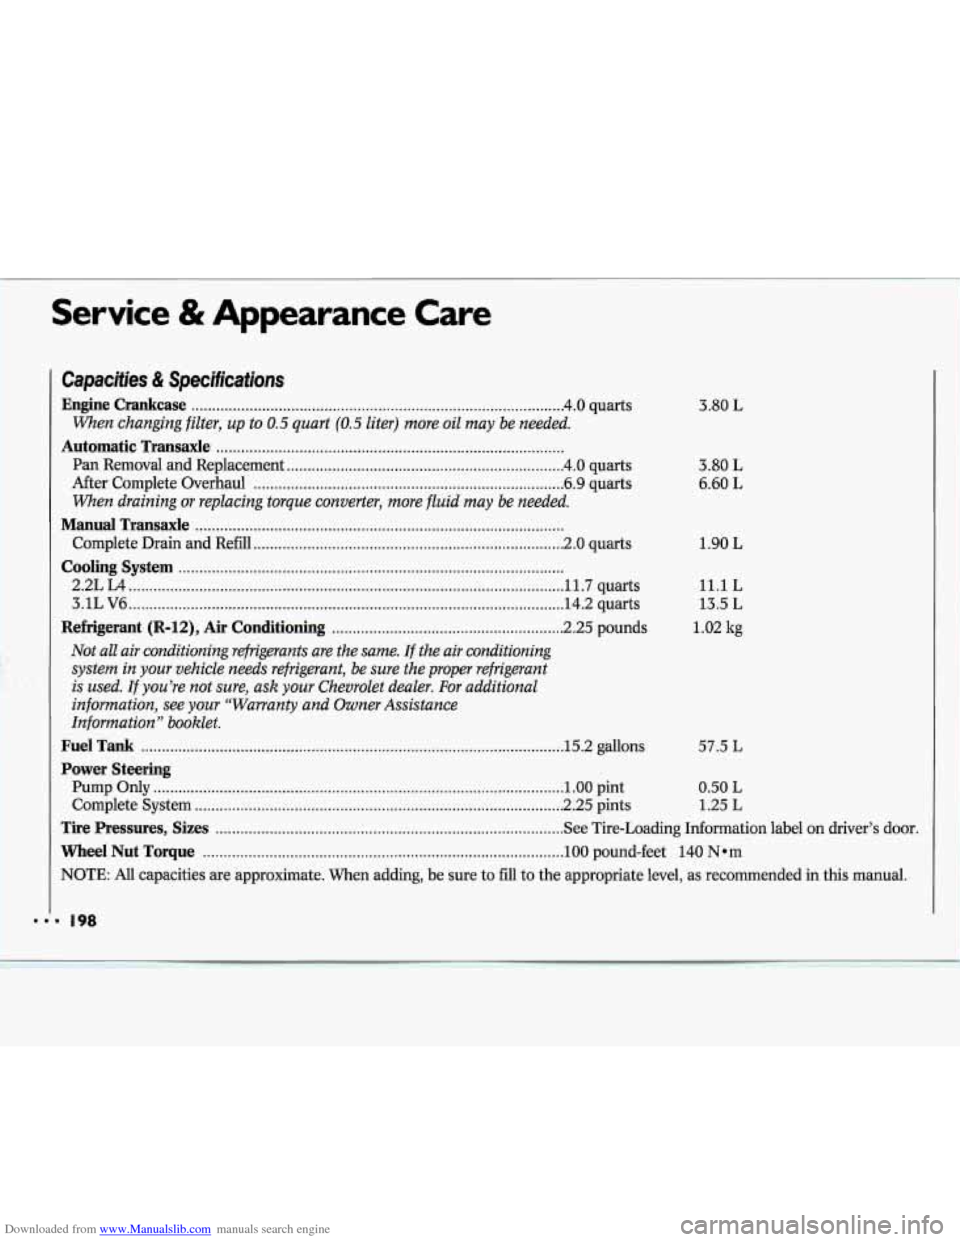
Capacities & Specifications
Engine Crankcase ........................................................................\
.................. 4.0 quarts
When changing filter, up to 0.5 quart (0.5 liter) more oil may be needed.
Automatic Transaxle ........................................................................\
............
Pan Removal and Replacement ................................................................... 4.0 quarts
After Complete Overhaul
........................................................................\
... 6.9 quarts
When draining or replacing torque converter, more fluid may be needed.
Manual Transaxle ........................................................................\
.................
Complete Drain and Refill ........................................................................\
... 2.0 quarts
Cooling System ........................................................................\
.....................
2.2L L4 ........................................................................\
................................. 11.7 quarts
3.1L V6
........................................................................\
................................. 14.2 quarts
Refrigerant (R-12), Air Conditioning ........................................................ 2.25 pounds
Not all air conditioning refrigerants are the same. If the air conditioning
system in your vehicle needs refrigerant, be sure the proper refrigerant
is used. If you’re not sure, ask your Chevrolet dealer. For additional
information, see
your “Warranty and Owner Assistance
Information
” booklet.
Fuel Tank ........................................................................\
............................. .15.2 gallons
Power Steering
Pump Only ........................................................................\
........................... 1.00 pint
Complete System
........................................................................\
................. 2.25 pints 3.80
L
3.80
L
6.60 L
1.90
L
11.1 L
13.5 L
1.02 kg
57.5 L
0.50 L
1.25 L
Tire Pressures, Sizes ........................................................................\
............ See Tire-Loading Information label on driver’s door.
Wheel Nut Torque ........................................................................\
............... 100 pound-feet 140 Nom
NOTE: All capacities are approximate. When adding, be sure to fill to the appropriate level, as recommended in this manual.
Page 207 of 243
Downloaded from www.Manualslib.com manuals search engine Maintenance Schedule
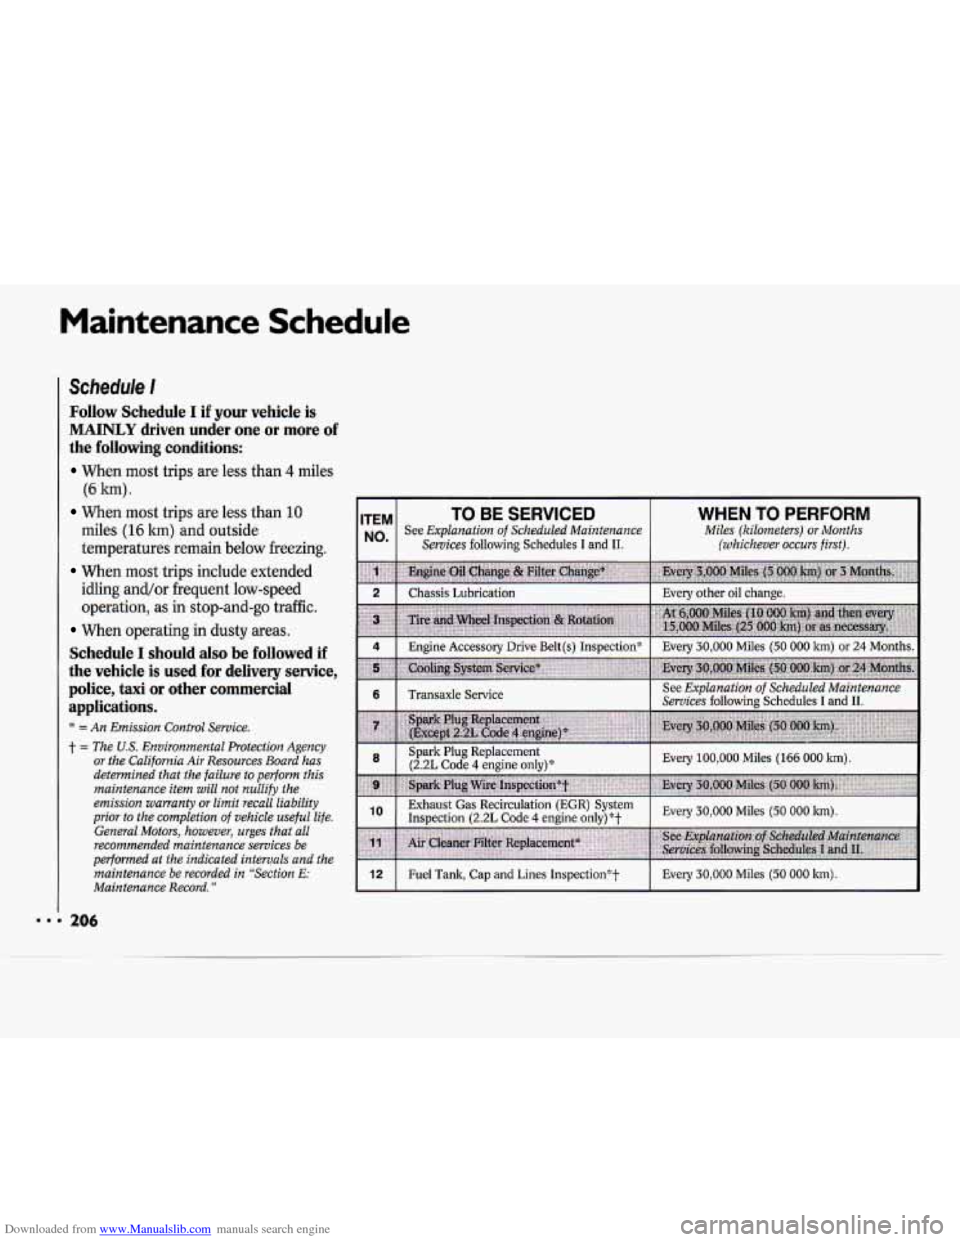
Schedule I
Follow Schedule I if your vehicle is
MAINLY driven under one or more of
the following conditions:
When most trips are less than 4 miles
When most trips are less than 10
(6
km).
miles
(16 ltm) and outside
temperatures remain below freezing.
When most trips include extended
idling and/or frequent low-speed
operation, as in stop-and-go traffic.
When operating in dusty areas.
Schedule I should also be followed if
the vehicle is used for delivery service,
police, taxi
or other commercial
applications.
* = An Emission Control Service.
t = The US. Environmental Protection Agency
or the California Air Resources Board has
determined that the failure to perform this
maintenance item
will not nullify the
emission warranty
or limit recall liability
prior to the completion
of vehicle useful life.
General Motors, however, urges that all
recommended maintenance services be
performed at the indicated intervals and the maintenance be recorded in “Section
E:
Maintenance Record. ”
ITEM
Services following Schedules I and 11. Nom
TO BE SERVICED
See Explanation of Scheduled Maintenance
WHEN TO PERFORM
Miles (kilometers) or Months
(whichever occurs first).
I 2 I Chassis Lubrication I Every other oil change. I
I 4 I Engine Accessory Drive Belt(s) Inspection* I Every 30,000 Miles (50 000 km) or 24 Months. I