1994 CADILLAC SEVILLE lights
[x] Cancel search: lightsPage 219 of 399
Downloaded from www.Manualslib.com manuals search engine when you remove the hitch. If you don’t seal them, deadly carbon
monoxide (CO) from your exhaust can get into your vehicle (see
Index under “Carbon Monoxide”). Dirt and water can, too.
NOTICE:
-
The bumpers on your vehicle are not intended for hitches. Do
not attach rental hitches or other bumper-type hitches to them. I-
Safety Chains
You should always attach chains between your vehicle and your trailer.
Cross the safety chains under the tongue-of the trailer so that the tongue
will not drop to the road if it becomes separated from the hitch. Follow
the manufacturer’s recommendation for attaching safety chains. Always
leave just enough slack
so you can turn with your rig. And, never allow
safety chains
to drag on the ground.
Trailer Brakes
Be sure to read and follow the instructions for the trailer brakes so you’ll
be able to install, adjust and maintain them properly.
Driving with a Trailer
Towing a trailer requires a certain amount of experience. Before setting
out for the open road, you’ll want to get to know your rig. Acquaint
yourself with the feel
of handling and braking with the added weight of
the trailer. And always keep in mind that the vehicle you are driving is
now a good deal longer and not nearly
so responsive as your vehicle is by
itself.
Before you start, check the trailer hitch and platform, safety chains,
electrical connector, lights, tires and mirror adjustment. If the trailer has
electric brakes, start your vehicle and trailer moving and then apply the
trailer brake controller
by hand to be sure the brakes are working. This
lets you check your electrical connection at the same time.
206
Page 220 of 399
Downloaded from www.Manualslib.com manuals search engine During your trip, check occasionally to be sure that the load is secure,
and that the lights and any trailer brakes are still working.
Following Distance
Stay at least twice as far behind the vehicle ahead as you would when
driving your vehicle without a trailer. This can help you avoid situations
that require heavy braking,and sudden turns.
Passing
You’ll need more passing distance up ahead when you’re towing a trailer.
And, because you’re a good deal longer, you’ll need to go much farther
beyond the passed vehicle before you can return to your lane.
Backing Up
Hold the bottom of the steering wheel with one hand. Then, to move the
trailer to the left, just move that hand to the left. To move the trailer to
the right, move your hand
to the right. Always back up slowly and, if
possible, have someone guide you.
Making Turns
When you’re turning with a trailer, make wider turns than normal. Do
this so your trailer won’t strike soft shoulders, curbs, road signs, trees, or
other objects. Avoid jerky or sudden maneuvers. Signal well in advance.
Turn Signals When Towing a Trailer
When you tow a trailer, your vehicle has to have a different turn signal
flasher and extra wiring. The green arrows on your instrument panel will
flash whenever you signal a turn or lane change. Properly hooked up, the
trailer lights will also flash, telling
other drivers you’re about to turn,
change lanes or stop.
When towing
a trailer, the green arrows on your instrument panel will
flash for turns even if the bulbs on the trailer are burned out. Thus, you
may think drivers behind you are seeing your signal when they are not.
It’s important to check occasionally to be sure the trailer bulbs are still
working.
207
Page 224 of 399

Downloaded from www.Manualslib.com manuals search engine H4ZARD WMING FLASHERS
Your hazard warning flashers let you warn others. They also let police
know you have a problem. Your front and rear turn signal lights
will flash
on and off.
Press the button in to
make your front and
rear turn signal lights
flash on and
off.
211
Page 227 of 399
Downloaded from www.Manualslib.com manuals search engine 2. Get the vehicles close enough so the jumper cables can reach, but be
sure the vehicles aren’t touching each other.
If they are, it could cause
a ground connection you don’t want.
You wouldn’t be able to start
your Cadillac, and the bad grounding could damage the electrical
systems.
3. Turn off the ignition on both vehicles. Turn off all lights, radio, or any
accessories that are in use on both vehicles. This will avoid sparks and
help save both batteries. And it could avoid damage to any
of the
accessories.
NOTICE:
If you leave your radio on, it could be badly damaged. The
repairs wouldn’t be covered by your warranty.
4. Open the hoods and locate the batteries.
Find the positive
(+) and negative (-) terminals on each battery.
214
Page 260 of 399
Downloaded from www.Manualslib.com manuals search engine -
The test used to determine me city fuel economy estimate simulates a
7.5 mile
(12 km), stop and go trip with an average speed of 20 mph
(32 km/h). The trip takes 23 minutes and has 18 stops. About one fifth
of the time is spent idling, as in waiting at traffic lights or in rush hour
traffic. Two kinds
of engine starts are used: a cold start, which is similar to
starting a car in the morning after it has been parked all night and a hot
start, which is similar to restarting
a vehicle after it has been warmed up,
driven and stopped for a short time.
The test used to determine the highway fuel economy estimate represents
a mixture
of “non-city” driving. Segments corresponding to different
kinds of rural roads and interstate highways are included. The test
simulates a
10 mile (17 km) trip with an average speed of 48 mph
(77
km/h). The test is run from a hot start and has little idling time and
no stops.
To assure that the fuel economy numbers are most useful for consumers,
the EPA adjusts these laboratory test results to account for the difference
between controlled laboratory conditions and actual driving on the road.
The laboratory fuel economy results are adjusted downward to arrive at
the estimates on the fuel economy window sticker and the Gas Mileage
Guide. The
city estimate is lowered by 10 percent and the highway
estimate is lowered by
22 percent from the laboratory test results.
Experience has proven that these adjustments make the mileage
estimates correspond more closely to the actual fuel economy realized by
the average driver.
Even though these figures are adjusted, they still represent what the
average driver will get. Your fuel economy may be significantly higher or
lower, depending on how, when, and where your vehicle is driven. Here
are some things you can do to increase fuel economy;
Combine errands into one trip.
Turn the engine off rather than letting it idle for more than a minute.
Have your Cadillac serviced as described in the maintenance booklet.
Keep tires inflated to recommended pressures.
0 Anticipate traffic stops.
247
Page 278 of 399
Downloaded from www.Manualslib.com manuals search engine ENGINE COOLANT
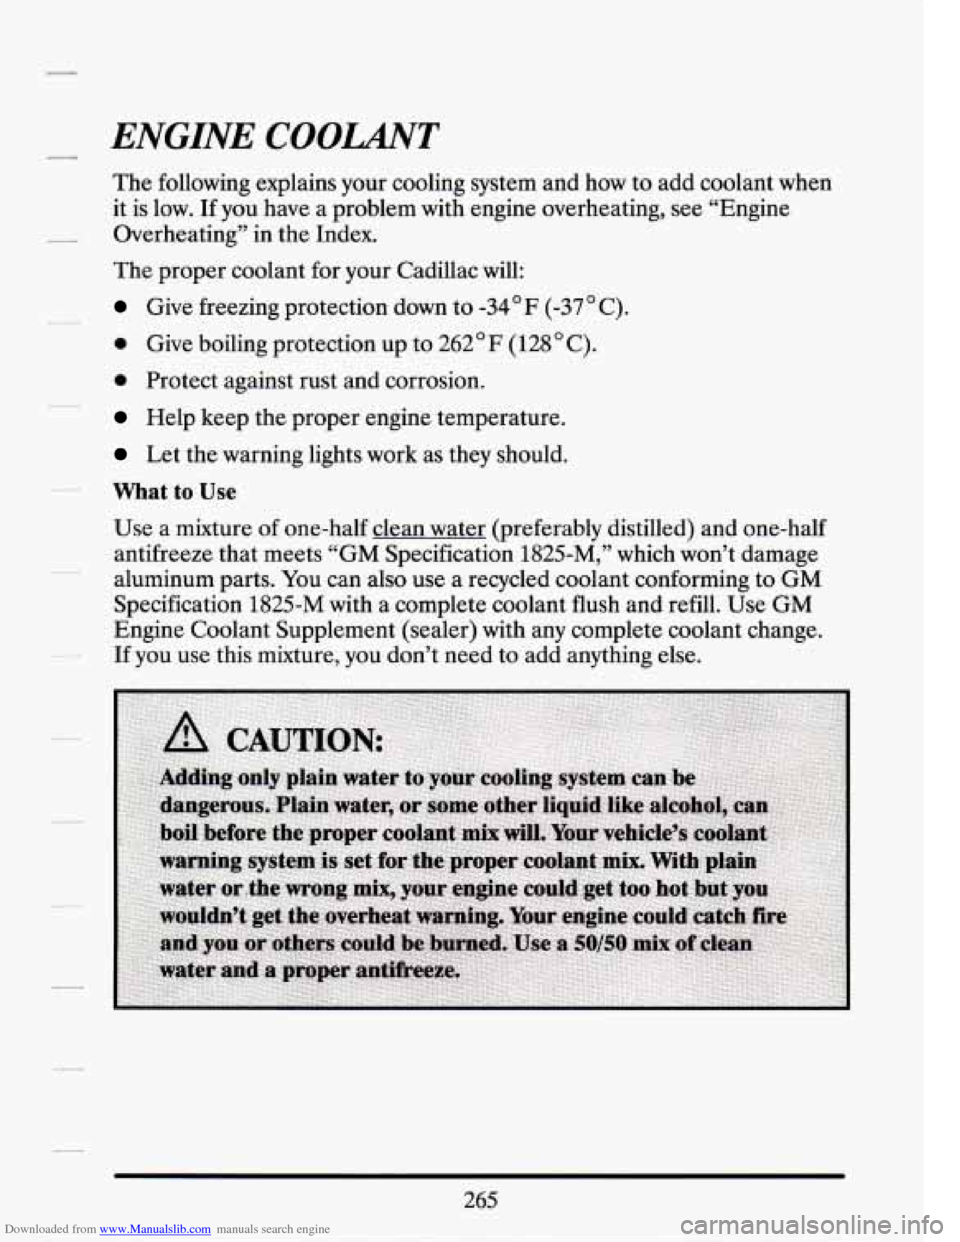
The following explains your cooling system and how to add coolant when
it is low. If you have a problem with engine overheating, see “Engine
Overheating” in the Index.
The proper coolant for your Cadillac will:
Give freezing protection down to -34OF (-37 C).
0 Give boiling protection up to 262OF (128OC).
0 Protect against rust and corrosion.
Help keep the proper engine temperature.
Let the warning lights work as they should.
What to Use
Use a mixture of one-half clean water (preferably distilled) and one-half
antifreeze that meets “GM Specification 1825-M,” which won’t damage
aluminum parts. You can also use a recycled coolant conforming to GM
Specification 1825-M with a complete coolant flush and refill. Use GM
Engine Coolant Supplement (sealer) with any complete coolant change.
If you use this mixture, you don’t need to add anything else.
265
Page 290 of 399
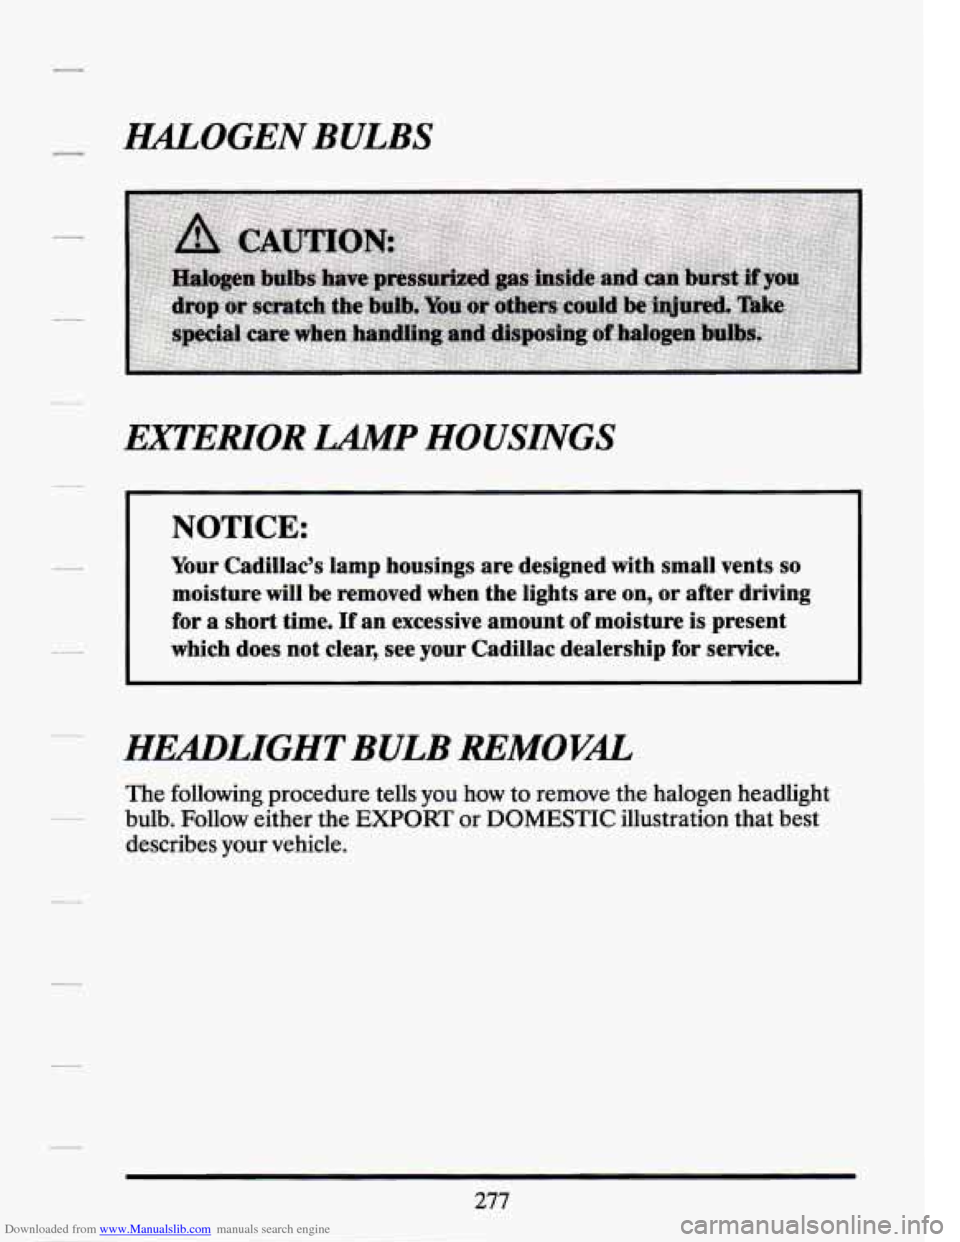
Downloaded from www.Manualslib.com manuals search engine I€4L,OGEN BULBS
EXTENOR
MP HOUSINGS
NOTICE:
Your Cadillac’s lamp housings are designed with small vents so
moisture will be removed when the lights are on, or after driving
for a short time.
If an excessive amount of moisture is present
which does not clear, see
your Cadillac dealership for service.
HEmLIGHT BULB REMOVL
The following procedure tells you how to remove the halogen headlight
bulb. Follow either the
EXPORT or DOMESTIC illustration that best
describes your vehicle.
277
Page 325 of 399
Downloaded from www.Manualslib.com manuals search engine DISTR PCM (IGN) IGN 1
, PC';":"), RTD BATT
~-1nmmmrl
A/C COMP HDLPS STOP LP TURNIHAZ
HTD
W/S LR STRUT RR STRUT LF STRUT RFSTRUT
LHDLPLO RHDLPLO LHDLPHI RHDLPHI
IGN
3 COOL FAN TRANS
~mmmrnmm~
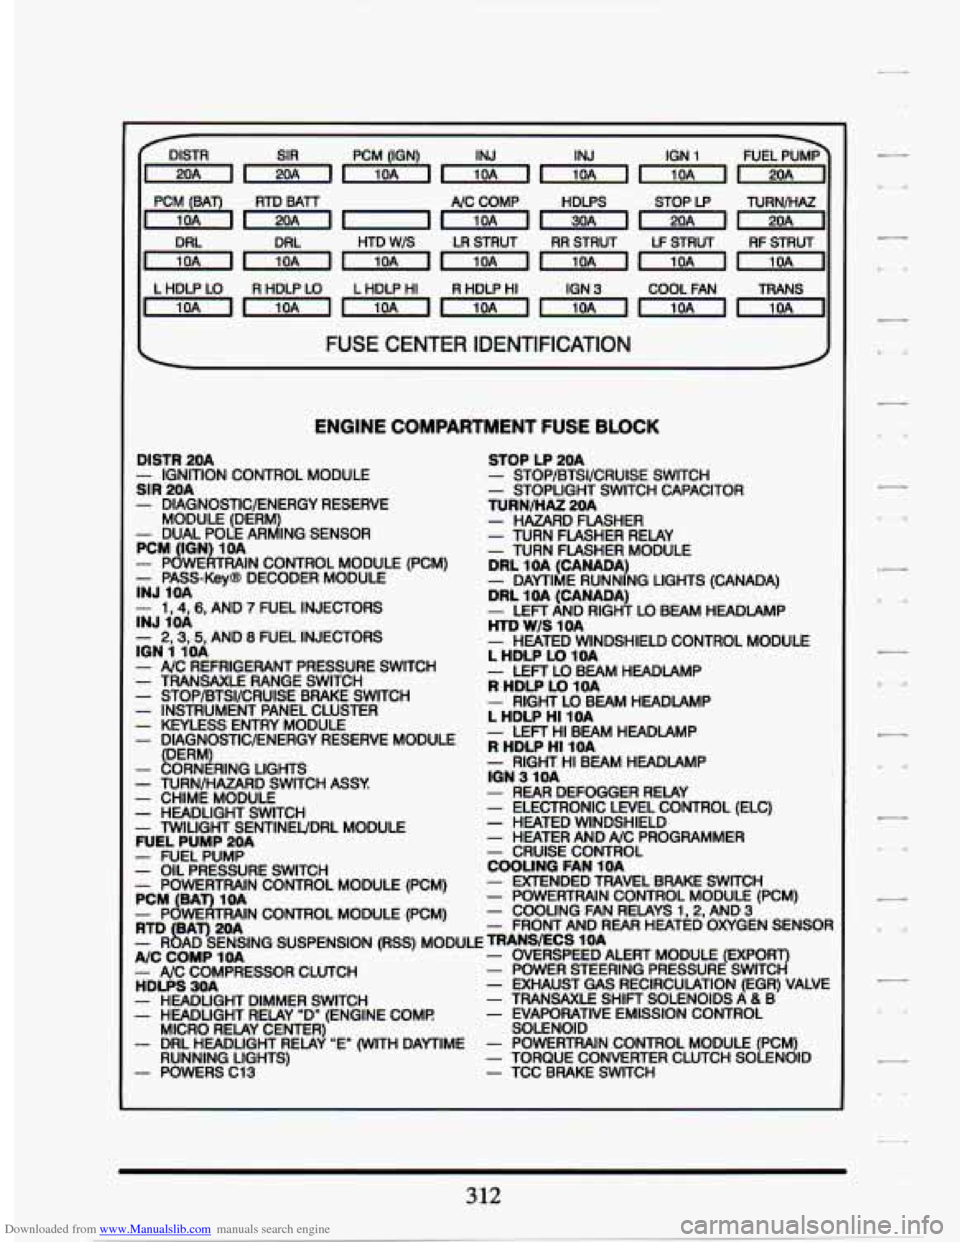
FUSE CENTER IDENTIFICATION I
ENGINE COMPARTMENT FUSE BLOCK
DISTR 20A
SIR 20A - IGNITION CONTROL MODULE
- DIAGNOSTIC/ENERGY RESERVE
- DUAL POLE AR d ING SENSOR
MODULE (DERM PCM
(ION 1OA - PowEATmIN CONTROL MODULE - PASS-KevB DECODER MODULE INJ 1OA
- 1,4,6, AND 7 FUEL INJECTORS
- 2,3,5, AND 8 FUEL INJECTORS
- - - - - __ -
INJ 1OA
ION 1 1OA
- NC REFRIGERANT PRESSURE SWITCH ~~ ~
- TRANSAXLE RANGE SWITCH - STOP/BTSI/CRUISE BRAKE SWITCH - INSTRUMENT PANEL CLUSTER - KEYLESS ENTRY MODULE - DIAGNOSTWENERGY RESERVE MODULE
FERMl ~ ~. - ORN RING LIGHTS
- TURN/HAZARD SWITCH ASSY - CHIME MODULE - HEADLIGHT SWITCH - mlUGHT SEUTINEUDRL MODULE FUEL PUMP 20A
STOP LP 20A - STOP/BTSI/CRUISE SWITCH - STOPLIGHT SWITCH CAPACITOR TURN/HAZ 20A - HAZARD FLASHER - TURN FLASHER RELAY - TURN FLASHER MODULE ~ ~~ ~ ~~ DRL 1 OA (CANADA)
DRL 1OA (CANADA)
HTD
W/S 1OA
- DAMIME RUNNING LIGHTS (CANADA)
- LEFT AND RIGHT LO BEAM HEADLAMP
- HEATED WINDSHIELD CONTROL MODULE L HDLP LO 10A
R HDLP LO 1OA - LEFT LO BEAM HEADLAMP
- RIGHT LOBEAM HEADLAMP L HDLP HI 10A
R HDLP HI 1OA - LEFT HI BEAM HEADLAMP
- RIGHT HI BEAM HEADLAMP ION 3 -1 OA - REAR DEFOGGER RELAY - ELECTRONIC LEVEL CONTROL (ELC) - HEATED WINDSHIELD - HEATER AND A/C PROGRAMMER
COOLING FAN 10A - CRUISE CONTROL
- EXTENDED TRAVEL BRAKE SWITCH - POWERTRAIN CONTROL MODULE (PCM) - COOLING FAN RELAYS 1.2. AND 3
- PUMP^
- OIL PRESSURE SWITCH - POWERTRAIN CONTROL MODULE (PCM)
- POWERTRAIN CONTROL MODULE (PCM) PCM (BAT) 1OA
RTD BAT) 20A - FRONT AND REAR HEATED-OXYGEN SENSOR
A/C COMP 10A
HDLPS 3OA - EXHAUST GAS RECIRCULATION (EGR) VALVE
- SENSING SUSPENSlON (RSS) MODULE MODULE (EXPORT)
- NC COMPRESSOR CLUTCH - POWER STEERING PRESSURE SWITCH
- HEADLIGHT DIMMER SWITCH - TRANSAXLE SHIFT SOLENOIDS A & B - HEADLIGHT RELAY "D" (ENGINE COME - EVAPORATIVE EMISSION CONTROL
- DRL HEADLIGHT RELAY "E" (WITH DAYTIME - POWERTRAIN CONTROL MODULE (PCM)
- POWERS C13 - TCC BRAKE SWITCH
MICRO RELAY CENTER)
SOLENOID
RUNNING LIGHTS) - TORQUE CONVERTER CLUTCH SOLENOID
312