1994 CADILLAC ELDORADO buttons
[x] Cancel search: buttonsPage 152 of 398
Downloaded from www.Manualslib.com manuals search engine reading may change as your driving habits change (going from city to
highway driving may increase the range reading).
If the range display shows
“Lo”, you should stop for fuel as soon as
possible.
Your computer needs enough data for
the “RANGE” reading to work,
however,
so it will read “Lo” for a while when your vehicle is brand new
(under
25 miles). Also, it may show “Lo” for a while if your battery has
been disconnected.
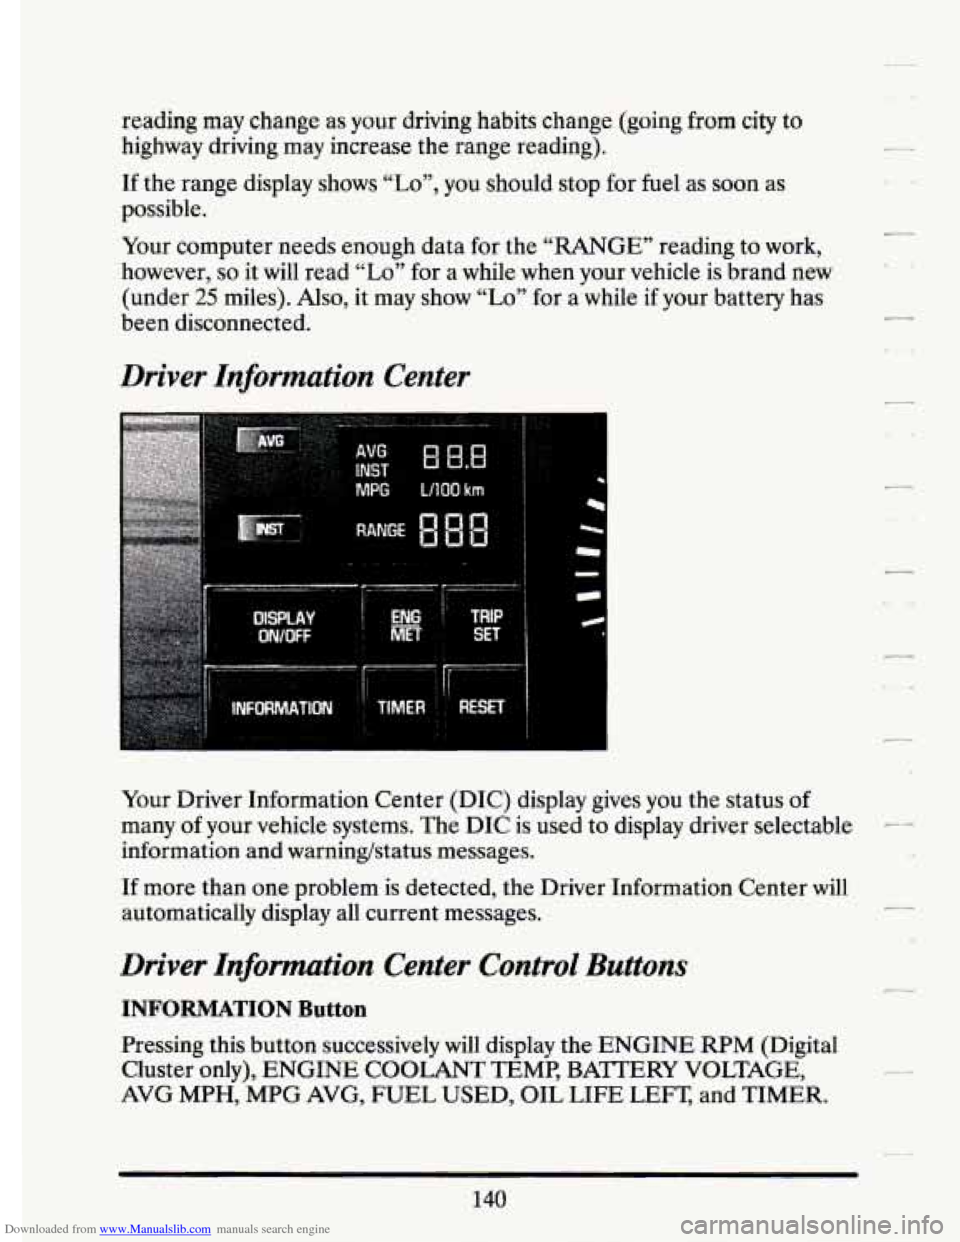
Driver Information Center
// RhNGE
ii
E 8.8 1
I
Your Driver Information Center (DIC) display gives you the status of
many of your vehicle systems. The DIC is used to display driver selectable --
information and warninghtatus messages.
If more than one problem is detected, the Driver Information Center will
automatically display all current messages.
.L1
Driver Information Center Control Buttons
INFORMATION Button
Pressing this button successively will display the ENGINE RPM (Digital
Cluster only),
ENGINE COOLANT TEMP, BA?TERY VOLTAGE,
AVG MPH, MPG AVG, FUEL USED, OIL LIFE LEFT, and TIMER.
Page 154 of 398
Downloaded from www.Manualslib.com manuals search engine DISPLAY ON/OFF Button
Pressing this button will turn off the Driver Information Center,
Electronic Climate Control and Fuel Data Center displays. If
you have
the digital cluster the
fuel gage, Trip and odometer will also turn off.
While displays are off, pressing the INFORMATION button will turn on
only the Driver Information Center. If any other button is pressed or a
driving warning message needs to be displayed, or fuel level falls below
4 gallons, all the displays will come back on.
TRIP SET Button
Press and hold this button to set the Trip Odometer back to zero.
ENG/MET (English/Metric Button)
Press this button to switch from English (miles) and Degrees
(Fahrenheit), to Metric (kilometers) and Degrees (Celsius).
Driver Information Center Messages
These messages will appear if there is a problem sensed in one of your
vehicle’s systems. Vehicles that are first sold
in Canada or are export
vehicles will have a number after each message. This number he\
lps to
identify that message, which is only displayed
in English.
APPLY BRAKE TO SHIFT - 46
This message will appear if your vehicle is in “P” (Park) for about 15
seconds and the brake is not depressed. If you do not want this message
to appear,
you can cancel this message by holding the “OFF” and the
Blue (cooler) button on the Electronic Climate Control panel for about
5 seconds. Hold the same two buttons again to have this message
displayed again.
A/C OVERHEATED - A/C COMPRESSOR OFF - 15
If the refrigerant system ever reaches an over-pressure condition, this \
message will appear to tell you that the air conditioning compressor has
been turned off. Air conditioned air will not be delivered to cool your
vehicle. If the pressure returns to a normal operating range,
you must
select
“AUTO”, “DEFOG”, or Defrost to start the compressor. If this
message continues to appear, have the system repaired as
soon as
possible to avoid compressor damage.
142
Page 159 of 398

Downloaded from www.Manualslib.com manuals search engine TRANSFLUJJlRESET=48. .2. .. .. 1 ., . _,,. . :A -. v-. . .. .. , .- .
With the engine not running and the ignition ON, press and hold the
OFF and REAR DEFOG buttons until the TRANS FLUID'RESET
message appears in the Information Center (between 5 and 20 seconds).
TURN SIGNAL ON. - 20
This message is a reminder, after driving about a mile, that you have your
turn signal on.
TRUNK OPEN - 24
k
r
f
I
I
f L,
P
F
r
r
Speed Sensitive Steering (11 5s)
This system varies the amount of steering effort proportiabate to
your vehicle speed. Steering
is eesier at a lower speed for increased
maneuverability and parking ease.
As your vehicle speed increases, the'"-:
steering effort is also increased proportionately. At highway speeds the
amount
of steering effort is increased to provide a manual like steering
feel for maximum control and enhanced vehicle stability.
. ./ ; .
.. ..
Road Sensing Suspension
The Road Sensing Suspension automatically controls the ride of your
vehicle. The system controls damping
forces in the shock absorbers and
struts
in response to various road and driving conditions. The system is
capable
of making these changes within milli-seconds.
The Road Sensing Suspension controller is a computer used to control and
monitor the system. The computer receives inputs from vertical acceleration
sensors, wheel to body position sensors, vehicle speed sensor, lift and dive
signals,
and determines optimum strut valving or (suspension stiffness) for
your current operating conditions. The computer a1,so receives feedback
Page 161 of 398

Downloaded from www.Manualslib.com manuals search engine n n
r
I-- .,
I
r
r
r
The system probably will say. to change .& d between ,3000 miles
(5000 km) and ,7500 *miles. (125OO km), but it may even sary to change it
before
3000 under very severe conditions. It all depends on .your drivirrg
pattims.
If it’s been 7500 miles (12500 km) it,always says to’ change the oil.
There are two.thingslhe system doesn?t do:
0 It can’t sense. heavy dust in the.places where you- drive. If you -drive in
a dusty area, you should change your
oil -every 3000 miles (5000 km)
or 3 months (whichever comes first), unless the display says to chinge
it even sooner than that.
I
It doesn’t check how much oil you have, so you’ll still have to check
for that. To see how, see “Engine Oil.’’ in the Index.
men You’ve Changed the Oil
When new oi€ is,put in, you’ll need .to reset.your.system. To: do it, display
the “OIL LIFE
.INDEX’’ by pressing the INFORMATION button. Then
press -and;hold the RESET buttons until the display shows “POO-OIL
LIFE LEFT.”
Electronic Level .Control
This keeps your car level.
The ignition’has to be
“ON” for the level control to work. When,you turn
the ignition off, you may hear the level control exhausting. The,system
consists
of an electronic rear position sensor, a smalldectric air
compressor, and air adjustable
SI kabsorbers mounted on the rear of
the vehicle.
If the system has .a slight leak, the air compressor will run frequently for a
few seconds each time.
i For a massive air leak, the air ‘compressor will stay on for. approximately
7 minutes. You should see your.deal.er for service, but.you can keep
driving ,your Cadillac.
149
Page 166 of 398
Downloaded from www.Manualslib.com manuals search engine controler will allow the fan to ramp up to a higher speed. This prevents
cold air from blowing into the passenger compartment.
If you want the blower fan to run only at a fixed high speed, push the
(upper) button until you see
“HI” on the display.
If you want the fan speed to be automatic, but you like the fan speed to
be higher than the AUTO setting, just push the buttons until “HI/AUTO”
is shown
on the display.
If you want the blower to run only at a fixed low speed, push the (low)
button until
“LO” is shown on the display. I
If you want the fan speed to run lower than the “AUTO” setting, push the -
button until “AUTO LO” is shown on the display.
DEFROSTER
-1
Push this button to
remove fog
or frost from
the windshield.
This setting sends most
of the air flow to the windshield with only a small
amount to the
floor outlets. In some cold start conditions, the “AUTO”
blower fan speed may be limited until the cooling system warms up. This
is normal to prevent windshield fogging.
L I,
-
The fan speed will work automatically to maintain your requested interior
temperature.
If you need more air to your windshield, you should select a
higher fan speed.
-
\,
It will help a lot if you first clear any ice and snow from the hood and the -
air inlet (it’s between the hood and the windshield).
REAR DEFOGGER
-1 Push this button to turn
I I on the rear defogger.
With it,
your rear window and both outside rearview mirrors are heated.
The system will automatically shut off after
10 minutes. If further
defrosting is desired, simply push the button again.
154
Page 174 of 398
Downloaded from www.Manualslib.com manuals search engine Export Radio Only
The SCAN and SEEK function selects stations only in one direction.
Pushbuttons
You can set the push buttons to get up to ten favorite stations (Five on
AM and five more on FM). Just:
Choose either AM or FM
Tune in the station.
Push the SET button.
0 Within 5 seconds, push one of the five pushbuttons.
0 Repeat these steps for each of the five pushbuttons.
BASS
The slide control increases or decreases the bass response tone. Moving
the control to the right increases bass while moving it to the left
decreases it.
TREBLE
The slide control increases or decreases the treble response tone. Moving
the control to the right increases the treble while moving it to the left
decreases it.
Your Cassette Tape Phyer
Your cassette tape player works best with tapes that are 30 to 45 minutes
long on each side. Tapes longer than that are
so thin that they may not
work well in this player.
If you look at the tape, or on its label or box, it should say whether its bias,
“equalization” is
70 microseconds (70 p) or 120 microseconds (120 p).
Chrome and metal tapes are 70 p sec and standard iron tapes are 120 p sec.
Your tape player will adjust automatically for either
type of cassette tape.
162
Page 175 of 398
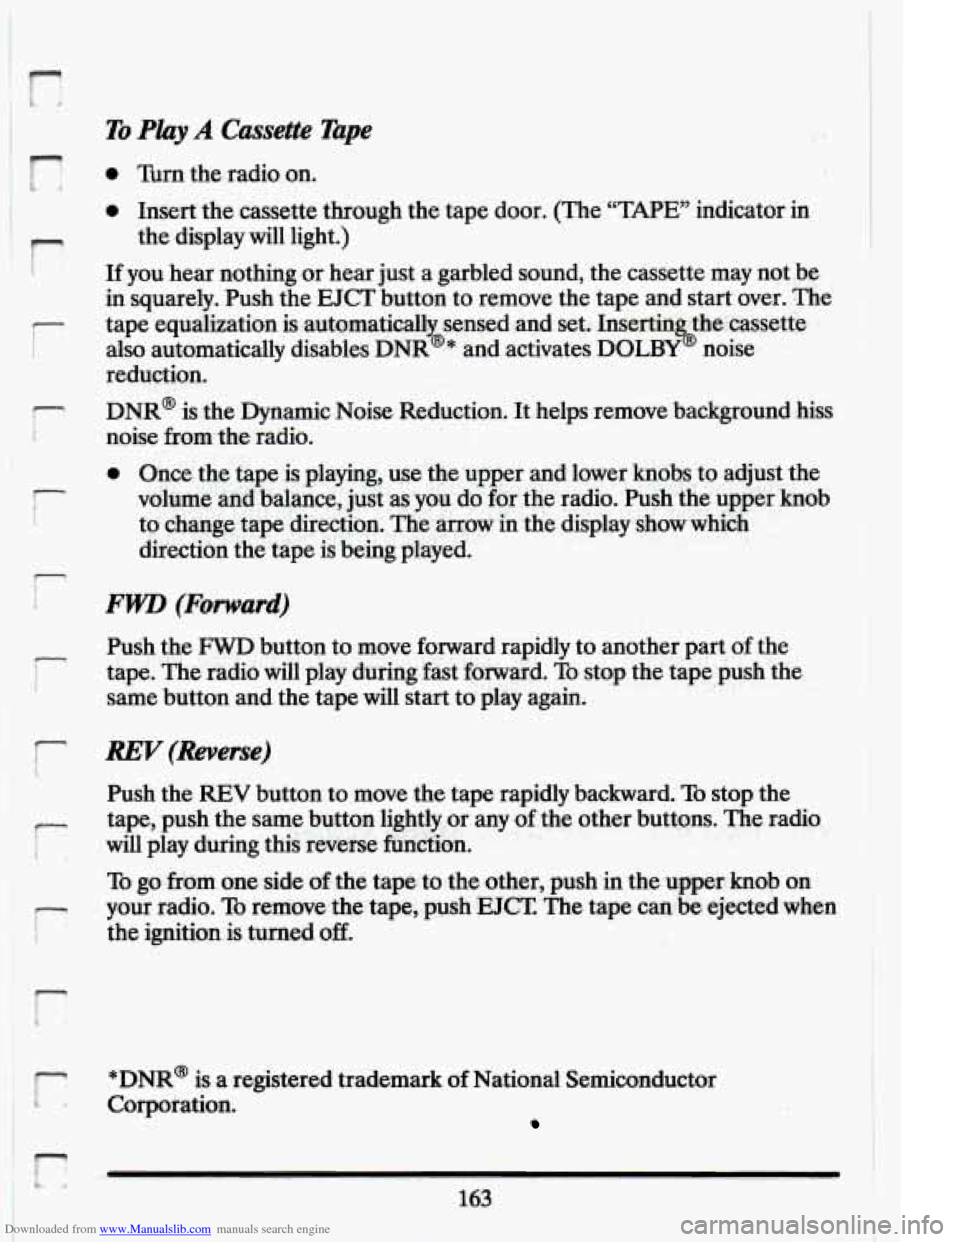
Downloaded from www.Manualslib.com manuals search engine To Play A Cassette Tape
F
0 Turn the radio on.
0 Insert the cassette through the tape door. (The “TAPE” indicator in
the display will light.)
1 If you hear nothing or hear just a garbled sound, the cassette may not be
7 tape equalization is automatically sensed and set. Insertin thecassette
in squarely. Push
the
EJCT button to remove the tape and start over. The
I also automatically disables DNR@* and activates DOLBY noise 0
reduction.
noise from the radio.
- DNR@ is the Dynamic Noise Reduction. It helps remove background hiss, a
Push the FWD button to move forward rapidly to another part of the
same button and the tape will start to play again.
7 tape. The radio will play during fast forward. To stop the tape push the i
r- REV (Reverse)
1 Push the REV button to move the tape rapidly backward. To stop the
r i. will play during this reverse function.
tape,
push the same button lightly or any of the other buttons. The radio
To go from one side of the tape to the other, push in the upperAnob on
your radio.
To remove the tape, push EJCT. The tape can be ejected when
i the ignition is turned off.
*DNR@ is a registered trademark of National Semiconductor
r corporation.
Page 274 of 398
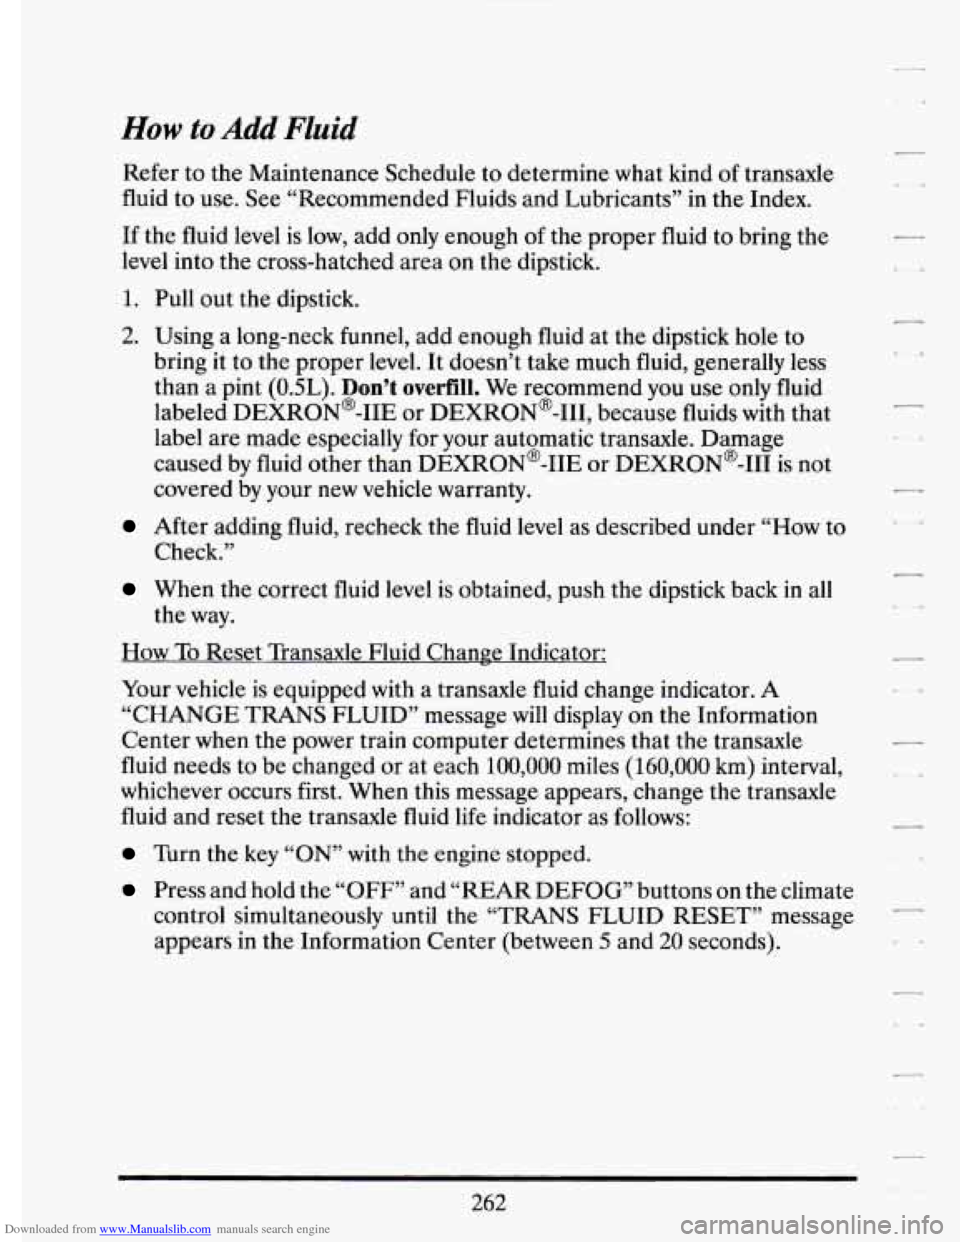
Downloaded from www.Manualslib.com manuals search engine How to Add Fluid
Refer to the Maintenance Schedule to determine what kind of transaxle
fluid
to use. See “Recommended Fluids and Lubricants” in the Index.
If
the fluid level is low, add only enough of the proper fluid to bring the
level into the cross-hatched area on the dipstick.
1. Pull out the dipstick.
2. Using a long-neck funnel, add enough fluid at the dipstick hole to
bring it to
the proper level. It doesn’t take much fluid, generally less
than
a pint (OSL). Don’t overfill. We recommend you use only fluid
labeled DEXRON@-IIE or DEXRON@-111, because fluids with that
label are made especially for your automatic transaxle. Damage
caused by fluid other than DEXRON@-IIE or DEXRON@-I11 is not
covered by your
new vehicle warranty.
After adding fluid, recheck the fluid level as described under “How to
When the correct fluid level is obtained, push the dipstick back in all
Check.”
the way.
How To Reset Transaxle Fluid Change Indicator:
Your vehicle is equipped
with a transaxle fluid change indicator. A
“CHANGE TRANS FLUID” message will display on the Information
Center when the power train computer determines that the transaxle
fluid needs to be changed or at each
100,000 miles (160,000 km) interval,
whichever occurs first. When this message appears, change the transaxle
fluid and reset the transaxle fluid life indicator as follows:
Turn the key “ON” with the engine stopped.
Press and hold the “OFF” and “REAR DEFOG” buttons on the climate
control simultaneously until the “TRANS FLUID RESET” message
appears in the Information Center (between
5 and 20 seconds).
262