1993 PONTIAC GRAND-PRIX tires
[x] Cancel search: tiresPage 208 of 338

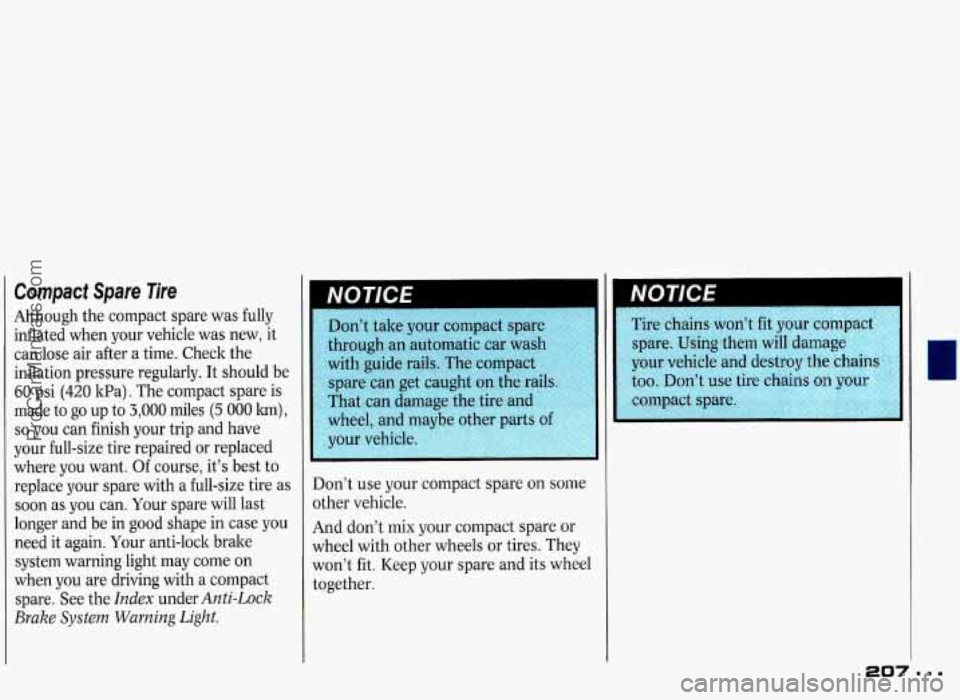
Compact Spare Tire
Although the compact spare was fully
inflated when your vehicle was new, it
can lose air after a time. Check the
inflation pressure regularly. It should be
60 psi (420 1tPa). The compact spare is
made to go up to 3,000 miles (5 000 lm),
so you can finish your trip and have
your full-size tire repaired or replaced
where you want. Of course, it’s best to
replace your spare with a full-size tire as
soon as you can. Your spare will last
longer and be in good shape in case you
need it again. Your anti-lock brake
system warning light may come on
when
you are driving with a compact
spare. See the
Index under Anti-Lock
Brake System Warning Light.
take your compact spare
through an automatic car wash
with guide rails. The compac
spare can get caught
on the r
That can damage the tire and
wheel, and ma
your vehicle
Don’t use your compact spare on some
other vehicle.
And don’t mix your compact spare or
wheel with other wheels or tires. They
won’t fit. Keep your spare and its wheel
together.
NU I IL‘t
Tire chains won’t fit your compact
spare. Using
them will damage
your vehicle and destroy the chains
too. Don’t use tire chai
ProCarManuals.com
Page 209 of 338

Problems on the Road
if You’re Stuck: In Sand, Mud, Ice
~ or Snow
What you don’t want to do when your
vehicle is stuck
is to spin your wheels.
The method known as “rocking” can
help
you get out when you’re stuck, but
you must use caution.
CAUTION
~ Spinning your wheels can destroy
parts
of your vehicle as well as the
tires.
If you spin the wheels too
fast while shifting your transaxle
back and forth, you can destroy
your transaxle.
If
you let your tires spin at
b high speed, they can explode
llyu you or others could be injured.
And, the transaxle or other parts of
the vehicle can overheat. That
could cause an engine compartment
fire
or other damage. When you’re
stuck, spin the wheels as little
as
possible. Don’t spin the wheels
above
35 mph (56 h/h) as shown
on the speedometer.
I
Rocking Your Vehicle to Get it Out:
First, turn your steering wheel left and
right. That will clear the area around
your front wheels. Then shift back and
forth between
R (Reverse) and a
forward gear (or with a manual
transaxle, between First or Second gear
and Reverse), spinning the wheels as
little as possible. Release the accelerator
pedal while you shift, and press lightly
on the accelerator pedal when the
transaxle is in gear.
If that doesn’t get
you out after a few tries, you may need
to be towed out.
If you do need to be towed out, see the
Index under Towing Your Pontiac.
ProCarManuals.com
Page 212 of 338

Part 6
Here you will find information
about the care
of your Pontiac . This
part begins with service
and fuel
information. and then it
shows how
to check important fluid and lubricant levels
. There is also
technical information about your
vehicle. and a section devoted
to its
appearance care
.
81 1
Service & Appearance Care
Service ........................................................................\
...................................... 212
Fuel ........................................................................\
............................................ 213
Hood Release ........................................................................\
............................ 216
Engine Oil
........................................................................\
................................ 220
Air Cleaner ........................................................................\
............................... 224
Transaxle
Fluid ........................................................................\
........................ 225
Engine Coolant ........................................................................\
........................ 230
Power Steering Fluid ........................................................................\
............... 233
Windshield Washer
Fluid ........................................................................\
........ 233
Brakes
.......... .......................... ........................................................................\
... 234
Battery
........................................................................\
........................ .... .......... 236
Bulb Replacement ........................................................................\
.................... 236
Loading
Your Vehicle ........................................................................\
.............. 252
Vehicle Identification Number (VIN) ............................................................. 268
Capacities
& Specifications ........................................................................\
..... 276
Replacement
Bulbs ................................................................... .......- ............... 280
Windshield Wiper
Blade Replacement ............................................................ 252
Tires ........................................................................\
.......................................... 254
Appearance Care ........................................................................\
...................... 261
Add-on Electrical Equipment ........................................................................\
. 269
Fuses & Circuit Breakers ........................................................................\
........ 270
Fluids
& Lubricants ........................................................................\
................. 278
Normal Maintenance Replacement Parts ....................................................... 284
ProCarManuals.com
Page 238 of 338

Halogen Bulbs
Halogen bulbs have
L b pressurized gas inside and
can burst if you drop or scratch the
bulb. You or others could be injured. Take special care when
handling and disposing of halogen
bulbs.
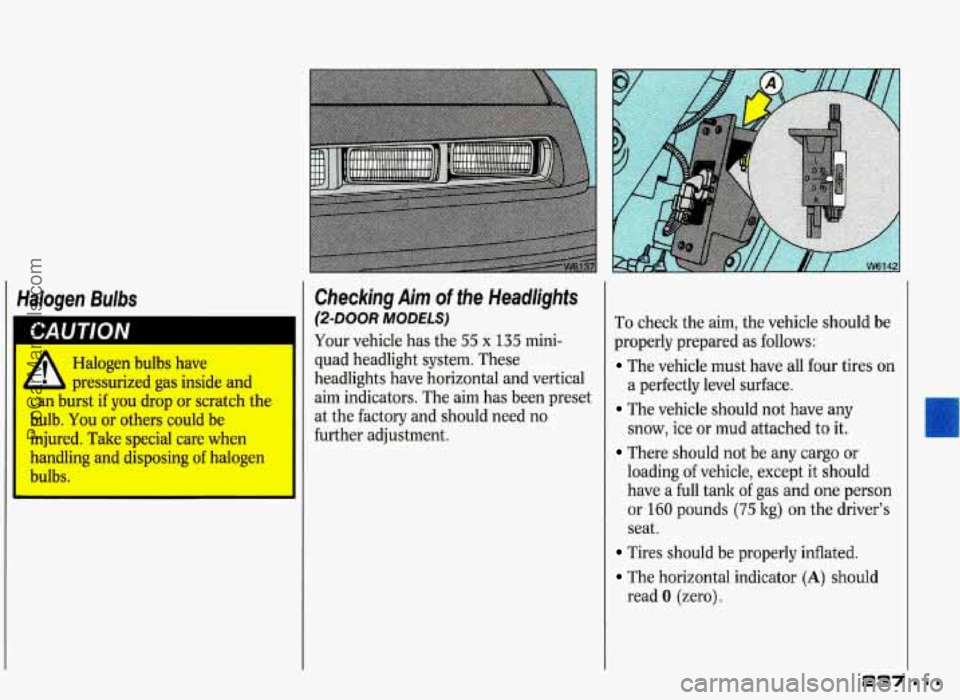
Checking Aim of the Headlights
@-DOOR MODELS)
Your vehicle has the 55 x 135 mini-
quad headlight system. These
headlights have horizontal and vertical
aim indicators. The aim has been preset
at the factory and should need no
further adjustment.
To check the aim, the vehicle should be
properly prepared as follows:
The vehicle must have all four tires on
a perfectly level surface.
The vehicle should not have any
snow, ice or mud attached to it.
There should not be any cargo or
loading of vehicle, except it should
have a full tank of gas and one person
or
160 pounds (75 kg) on the driver’s
seat.
Tires should be properly inflated.
The horizontal indicator (A) should
read
0 (zero).
ProCarManuals.com
Page 239 of 338

Service lS Appearance C
Checking Aim of the Headlights
(CONT.)
To make sure your headlights are
aimed properly, read all the
instructions before beginning.
Failure to follow these instructlons
could cause damage to headlight
parts.
State inspection stations will allow a
vertical reading of up plus .76 degrees
or down minus
.76 degrees €or the
center of the bubble.
It is recommended that the upper limit
not exceed up plus
.4 degrees for the
center of the bubble. There may be
an
increased chance of being flashed if
adjustment is much above
up plus
.4 degrees.
Aiming HeadJishts
(2-DOOR MODELS)
To check the aim, the vehicle should be
properly prepared as follows:
The vehicle must have all four tires on
a perfectly level surface.
The vehicle should not have any
snow, ice or mud attached to it.
There should not be any cargo or
loading
of vehicle, except it should
have a full tank
of gas and one person
or
160 pounds (75 kg) on the driver’s
seat.
Tires should be properly inflated.
The horizontal indicator should read
0 (zero).
ProCarManuals.com
Page 244 of 338

13. Plug the wiring connector into the
headlight socket. Snap the locking
tabs onto the socket.
14. Lower the headlight assembly into
position. Make sure the two guide
tabs
drop into their holes in the
headlight support panel.
15. Insert the two bottom screws. Make
sure the guide tabs are still in place
before tightening the screws. Use a
magnetic screwdriver or hold the
screw onto the screwdriver with a
small piece
of masking tape.
16. Insert the top screw and tighten
securely. To check
the aim, the vehicle should be
properly prepared as follows:
The vehicle must have all four tires on
a perfectly level surface.
The vehicle should not have any
snow, ice or mud attached to it.
There should not be any cargo or
loading of vehicle, except it should
have a full tank of gas and one person
or
160 pounds (75 kg) on the driver’s
seat.
Tires should be properly inflated.
The horizontal indicator (A) should
read
0 (zero). If
your vehicle
is damaged in an
accident and the headlight aim seems to
be affected, see your Pontiac dealer.
Headlights on damaged vehicles may
require recalibration of the horizontal
aim by your Pontiac dealer.
U
ProCarManuals.com
Page 253 of 338

aam
Service & Appearance Care
Windshield Wiper Blade
Replacement
Replacement blades come in different
types and are removed in different
ways. Here’s how to remove the type
with
a release clip:
1. Pull the windshield wiper arm away
2. Lift the release clip with a
from the
windshield.
screwdriver and pull the blade
assembly off the wiper arm.
the wiper arm.
3. Push the new wiper blade securely on
252
Loading Your Vehicle
Two labels on your vehicle show how
much weight it may properly carry. The
Tire-Loading Information label found
on the inside of the trunk lid tells you
the proper size, speed rating and
recommended inflation pressures for
the tires on your vehicle. It also gives
you important information about the
number of people that can be in your
vehicle and the total weight that you
can carry. This weight is called the
Vehicle Capacity Weight and includes
the weight of all occupants, cargo, and
all nonfactory-installed options.
The other label is the Certification label,
found on the rear edge of the driver’s
door. It tells you the gross weight
capacity of your vehicle, called the GVWR
(Gross Vehicle Weight Rating).
The GVWR includes the weight of the
vehicle, all occupants, fuel and cargo.
Never exceed the GVWR for your
vehicle, or the Gross Axle Weight
Rating (GAWR) for either the front or
rear axle.
And,
if you do have a heavy load, you
should spread it out. Don’t carry more
than
167 lbs. (75 kg) in your trunk.
ProCarManuals.com
Page 255 of 338

Service & Appearance Care
4 Tires
We don't make tires. Yo'ur new vehicle
comes with
high quality tires made by a
leading tire manufacturer. These tires
are warranted
by the tire manufacturers
and their warranties are delivered with
every
new Pontiac. If your spare tire is a
different brand than your road tires, you
will have a tire warranty folder from
each of these manufacturers.
254
1 A, Poorly maintained armd improperly used tires are dangerous.
b Overloading your tires can cause overheating as a result of too much
friction. YOU could have an &-out and a serious accident. See Loading Your
Vehicle earlier in this section.
accident
could cause serious injury. Check all tires frequently to maintain the
recommended
pressure. Tire pressure should be checked when your tires are
cold.
Overinflated tires are more Likely to be cut, punctured, or broken by a sudden
impact, such as when you hit a pothole. Keep tires at the recommended
pressure.
Worn, old tires can cause accidents. If your tread is badly worn, or if your
tires have been damaged, replace them.
Underinflated tires pose the same danger as overloaded tires. The resulting
ProCarManuals.com