Page 65 of 324
Downloaded from www.Manualslib.com manuals search engine CAUTION I
A
If you skip more than one
gear when you downshift,
you could lose control of the
vehicle. And you could injure
yourself or others. Don’t shift from
5 to 2, or 4 to 1.
I
transaxle.
Pump-to-Set Parking Brake
The parking brake uses the brakes on
the rear wheels.
To Set the Parking Brake:
Hold the regular brake pedal down with
your right
foot. Pump your parking
brake pedal several times with your left
foot until the pedal feels firm. If the
ignition is on, the brake system warning
light will come
on.
Over time, more pumps may be needed
to set the parking brake firmly.
If it ever takes more than two full
pumps, have the brake system adjusted
by your dealer.
Page 67 of 324
Downloaded from www.Manualslib.com manuals search engine 2. Move the shift lever into P (Park)
position like this:
Pull the lever towards you.
Move the lever up as far as it will go.
3. Move the ignition key to Lock.
4. Remove the key and take it with you.
If you can walk away from your
vehicle with the ignition key in your
hand, your vehicle
is in P (Park).
Shifting Into P (Park)-Console
Shift (AUTOMATIC TRANSAXLE)
A
1s not hlly in P (Park) with the
parking brake firmly set, Your
vehicle can roll. If you have left the
engine nmning, the vehicle can
mm suddenly. You or others
could be injured. To be sure your
vehicle won’t move, when yodre
on fairly level ground, use the steps
that follow. If you are parking on a
hill, or if you’re pulling a trailer,
also see the Index under Parking
on Hih ~r Towing a Trailer.
A It is dangerous to get out of
L your ve~e the shift lever I
1. Hold the brake pedal down with your
right foot and set the parking brake.
Page 68 of 324

Downloaded from www.Manualslib.com manuals search engine I..
Features & Controls
6
Shifting Into P (Park)-Console
shift (CONT.)
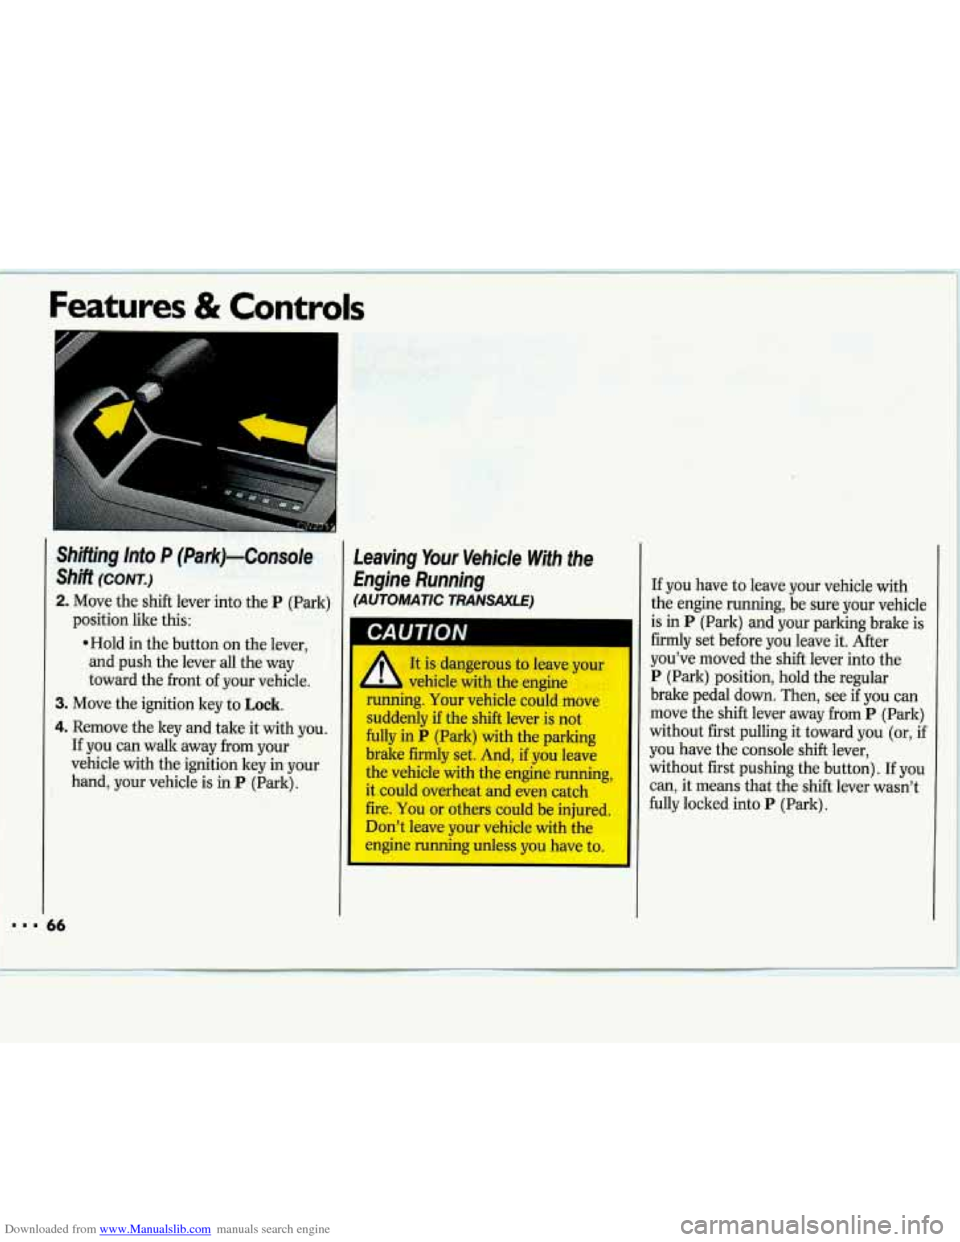
2. Move the shift lever into the P (Park)
*Hold in the button on the lever,
and push the lever all the way
toward the front of your vehicle.
position like this:
3. Move
the ignition key to Lock.
4. Remove the key and take it with you.
If you can walk away from your
vehicle with the ignition key in your
hand, your vehicle is in
P (Park).
i6
Leaving Your Vehicle With the
Engine Running
(AUTOMATIC TRANSAXLE)
If you have to leave your vehicle with
the engine running, be sure your vehicle
is
in P (Park) and your parking brake is
firmly set before you leave it. After
you’ve moved the shift lever into the
P (Park) position, hold the regular
brake pedal down. Then, see
if you can
move the shift lever away from
P (Park)
without first pulling
it toward you (or, if
you have the console shift lever,
without first pushing the button).
If you
can, it means that the shift lever wasn’t
fully locked into
P (Park).
Page 71 of 324
Downloaded from www.Manualslib.com manuals search engine Tilt Steering Wheel (OPTION)
A tilt steering wheel allows you to
adjust the steering wheel before
you
drive. You can also raise it to the
highest level to give
your legs more
room when
you exit and enter the
vehicle.
To tilt the wheel, hold the steering
wheel and pull the lever. Move the
steering wheel to a comfortable level,
then release the lever to lock the wheel
in place.
Windows
On a vehicle with manual windows, use
the window crank to open and close
each window.
Power Windows (OPTION)
With power windows, switches on the
driver’s armrest control each of the
windows when the ignition is on.
In
addition, each passenger door has a
control switch for its
own window.
Page 76 of 324

Downloaded from www.Manualslib.com manuals search engine ..I
Features & Controls
Passing Another Vehicle While Using Cruise Control
Use the accelerator pedal to increase
your speed. When you take your foot
off
the pedal, your vehicle will slow down
to the cruise control speed you set
earlier.
74
Using Cruise Control on Hills
How well your cruise control will work
on hills depends upon your speed, load,
and the steepness
of the hills. When
going up steep hills, you may have to
step on the accelerator pedal to
maintain your speed. When going
downhill, you may have to brake or
shift to a lower gear to keep your speed
down. Of course, applying the brake or
clutch pedal takes you out of cruise
control. Many drivers find this
to be too
much trouble and don't use cruise
control on steep hills.
To Get Out of Cruise Control
There are two ways to turn off the
cruise control:
Step lightly on the brake pedal; or
push the clutch pedal, if you have a
manual transaxle;
OR
Move the cruise switch to OFF.
To Erase Cruise Speed Memory
When you turn off the cruise control or
the ignition, your cruise control set
speed memory is erased.
Page 79 of 324

Downloaded from www.Manualslib.com manuals search engine Headlights
The main light controls are on the left
side of the instrument panel. Push the
switch marked
pf to turn on your:
Parking Lights
Side Marker Lights
Taillights
License Plate Lights
Instrument Panel Lights
Push the switch again to turn them off. Push
the switch marked
-g- to turn on
your headlights, together with your:
Parking Lights
Side Marker Lights
Taillights
License Plate Lights
Instrument Panel Lights
Push the switch again to turn them off.
Operation of Lights
Although your vehicle’s lighting system
(headlamps, parking lamps, fog lamps,
side marker lamps and tail lamps) meets
all applicable federal lighting
requirements, certain states and
provinces may apply their
own lighting
regulations that may require special
attention before
you operate these
lamps. For example, some jurisdictions
may require that you operate your lower
beam lamps with fog lamps
at all times,
or that headlamps be turned on
whenever you must use your windshield
wipers. In addition, most jurisdictions
prohibit drively solely with parking
lamps, especially at dawn or
dusk. It is
recommended that you check with your
own state or provincial highway
authority for applicable lighting
regulations.
Lights On Reminder
If you open the door with the ignition
off and the lights on, you will hear
a
warning chime.
Page 80 of 324

Downloaded from www.Manualslib.com manuals search engine Features & Controls
Daytime Running Lights
(CANADA ONLY)
The Canadian Federal Government has decided that
Daytime Running Lights
(DRL) are a useful feature, in that DRL
can make your vehicle more visible to
pedestrians and other drivers during daylight hours. DRL are required
on
new vehicles sold in Canada.
Your DRL work with a light sensor on
top
of the instrument panel. Don’t
cover it up.
The low beam headlights will come
on
at reduced brightness in daylight when:
The ignition is on
The headlight switch is off, and
The parking brake is released. At dusk,
the exterior lights will come on
automatically and the low beams will
change to full brightness. At dawn, the
exterior lights will go out and the low
beams will change to the reduced
brightness of DRL (if the headlight
switch is
off).
Of course, you may still turn on the
headlights any time you need to.
To idle your vehicle with the
DRL off,
set the parking brake while the ignition
is in the
Off or Lock position. Then
start the vehicle. The DRL will stay
off
until you release the parking brake.
L I
c
Headlight High-Low Beam
Changer
I
To change the headlights from low
beam to high
or high to low, pull the
turn signal lever all the way toward you.
I
Then release it.
When the high beams are
on, a blue
light on the instrument panel also will
be on.
78
Page 87 of 324
Downloaded from www.Manualslib.com manuals search engine The Instrument Panel-
Your Information System
Your instrument panel is designed to let
you know at
a glance how your vehicle
is running. You’ll know how fast you’re
going, how much. fuel you’re using, and
many other things you’ll need to drive
safely and economically.
The main components
of your
instrument panel are:
1. Vents
2. Turn SignaVHeadlight Beam Lever
3. Tilt Steering Wheel Lever
4. Instrument Cluster
5. Hazard Warning Flashers Switch
6. Vents
7. Climate ControWRear Window
8. Vents
9. Vents Defogger
10. Glove
BodFuse Panel
11. Audio System
12. Gearshift Lever
13. Ashtray and Lighter
14. Ignition Switch
15. Horn
16. Remote Trunk Release (Option)
17. Brake Release
18. Light Controls
19. Hood Release (on floor by driver’s
door)