1993 CHEVROLET CAVALIER brake fluid
[x] Cancel search: brake fluidPage 156 of 308
Downloaded from www.Manualslib.com manuals search engine Your Driving and the Road
mmm ‘I
”- .
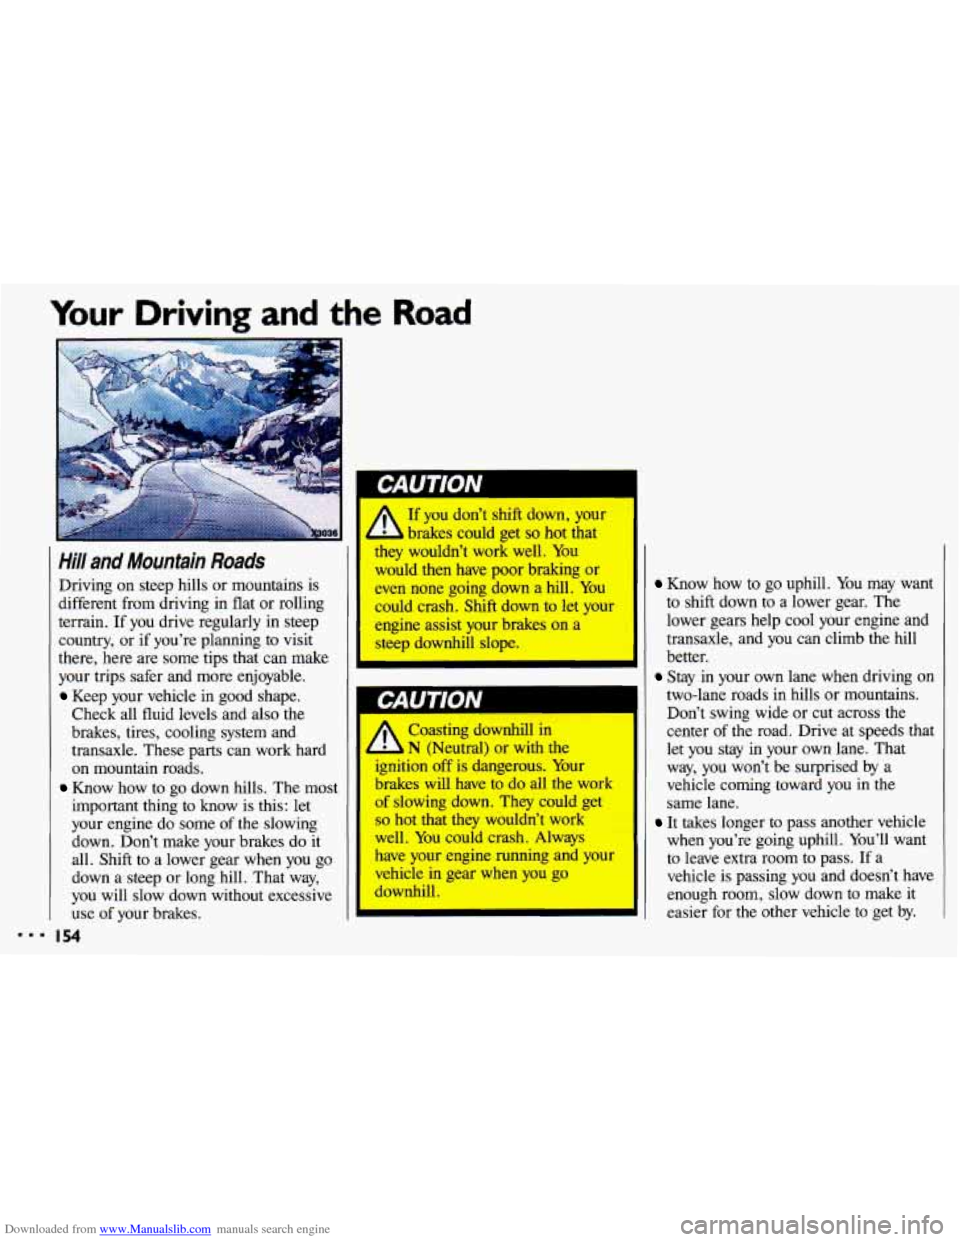
Hill and Mountain Roads
Driving on steep hills or mountains is
different from driving in flat or rolling
terrain. If you drive regularly in steep
country, or if you’re planning to visit
there, here are some tips that can make
your trips safer and more enjoyable.
Keep your vehicle in good shape.
Check all fluid levels and
also the
brakes, tires, cooling system and
transaxle. These parts can work hard
on mountain roads.
Know how to go down hills. The most
important thing to know is this: let
your engine do some
of the slowing
down. Don’t make your brakes do it
all. Shift to a lower gear when you go
down a steep or long hill. That way,
you will slow down without excessive use of your brakes.
I 54
r If you don’t shift down, your
brakes could get
so hot that
they wouldn’t work well. You
would then have poor braking or
even none going down a hill. You
could crash. Shift down to let your
engine assist your brakes on a
steep downhill slope.
Coasting downhill in
N (Neutral) or with the
ignition
off is dangerous. Your
brakes will have
to do all the work
of slowing down. They could get
so hot that they wouldn’t work
well.
You could crash. Always
have
your engine running and your
vehicle in gear when you go
downhill.
Know how to go uphill. You may want
to shift down to a lower gear. The
lower gears help cool your engine and
transaxle, and
you can climb the hill
better.
Stay in your own lane when driving on
two-lane roads in hills or mountains.
Don’t swing wide or cut across the
center of the road. Drive at speeds that
let you stay in your own lane. That
way, you won’t be surprised by a
vehicle coming toward you in the
same lane.
It takes longer to pass another vehicle
when you’re going uphill. You’ll want
to leave extra room to pass.
If a
vehicle is passing you and doesn’t have
enough room, slow down to make it
~ easier for the other vehicle to get by.
Page 159 of 308

Downloaded from www.Manualslib.com manuals search engine Torque Lock
(AUTOMATIC TRANSAXLE)
If you are parking on a hill and you
don’t shift
your transaxle into P (Park)
properly, the weight of the vehicle may
put too much force on the parking pawl
in the transaxle. You may find it difficult
to pull the
shift lever out of P (Park).
This
is called “torque lock.” To prevent
torque lock, always be sure to shift into
P (Park) properly before you leave the
driver’s seat.
To find out how, see the
Index under Shiftirtg Into P (Park),
When you are ready to drive, move the
shift lever out
of P (Park) before you
release the parking brake.
If torque lock does occur, you may need
to have another vehicle push yours a
little uphill to take some
of the pressure
from the transaxle,
so you can pull the
shift lever out
of P (Park).
Winter Driving
Here are some tips for winter driving:
Have your Chevrolet in good shape for
winter. Be sure your engine coolant
mix is correct.
Snow tires can help in loose snow, but
they may give you less traction on ice
than regular tires.
If you do not expect
to be driving in deep snow, but may
have to travel over ice,
you may not
want to switch to snow tires at all.
You may want to put winter
emergency supplies in your trunk or
rear area.
Include an ice scraper, a small brush
or broom, a supply of windshield
washer fluid, a rag, some winter outer
clothing, a small shovel, a flashlight,
a
red cloth, and a couple of reflective
warning triangles. And, if you will be
driving under severe conditions,
include a small bag
of sand, a piece of
old carpet or a couple
of burlap bags
to help provide traction. Be sure you
properly secure these items
in your
vehicle.
I57
Page 197 of 308
Downloaded from www.Manualslib.com manuals search engine i
.....
.................................. ...................
........ ... . &5
..... ..... .... .. --
' . I .. ~
Here you wit1 find information
about the care
of your Chevrolet .
This part begins with service and
fuel information. and then
it shows
how to check important fluid and
lubricant levels
. There is also
technical information about your
vehicle. and
a section devoted to its
appearance care
.
Part 6
Service & Appearance Care
Service ......................................................... 196
Fuel ........................................................... 197
HoodRelease
.................................................... 201
EngineOil
...................................................... 205
Aircleaner
..................................................... 209
Transaxle Fluid
................................................... 211
Engine Coolant
................................................... 216
Power Steering Fluid
.............................................. 219
Windshield Washer Fluid
........................................... 220
Brakes
......................................................... 221
Battery
......................................................... 223
BulbReplacement
................................................ 224
Windshield Wiper Blade Replacement
................................. 227
Loading
Your Vehicle ............................................. 227
Vehicle Identification Number (VIN)
................................. 246
Add-on Electrical Equipment
....................................... 247
Fuses
& Circuit Breakers ........................................... 247
Capacities & Specifications ......................................... 250
Fluids & Lubricants ............................................... 252
Replacement Bulbs
............................................... 253
Engine Specifications
............................................. 255
Normal Maintenance Replacement
Parts ............................... 256
Tires .......................................................... 229
Appearancecare
................................................. 236
I95
Page 204 of 308
Downloaded from www.Manualslib.com manuals search engine Service & Appearance Care
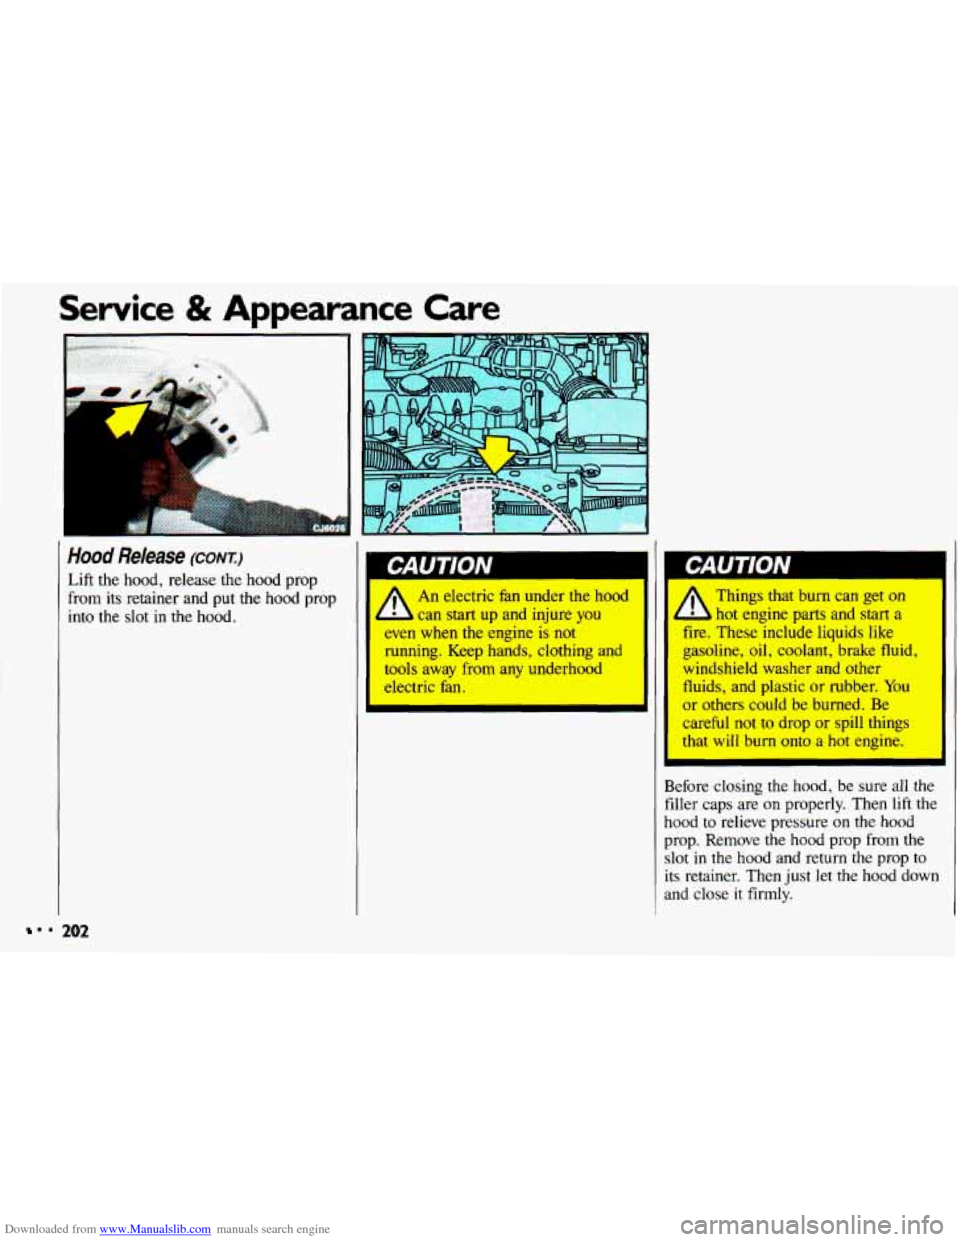
Hood Release (CONI)
Lift the hood, release the hood prop
from its retainer and put the hood prop
into the slot in the hood.
1 I
I An electric fan under the hood
can start up and injure you
even when the engine is not
running. Keep hands, clothing and
tools away from
any underhood
electric fan.
b
B
fi
h
P
S:
it
a Things that burn can get on
L hot engine parts and start a
me. These include liquids like
gasoline,
oil, coolant, brake fluid,
windshield washer and other
fluids, and plastic or rubber.
You
or others could be burned. Be
careful not to drop or spill things
that will burn onto a hot engine.
lefore closing the hood, be sure all the
iller caps are on properly. Then
lift the
ood to relieve pressure
on the hood
rop. Remove the hood prop from the
lot in the hood and return the prop to
:s retainer. Then just let the hood down
nd close
it firmly.
. 202
Page 205 of 308
Downloaded from www.Manualslib.com manuals search engine d
56053
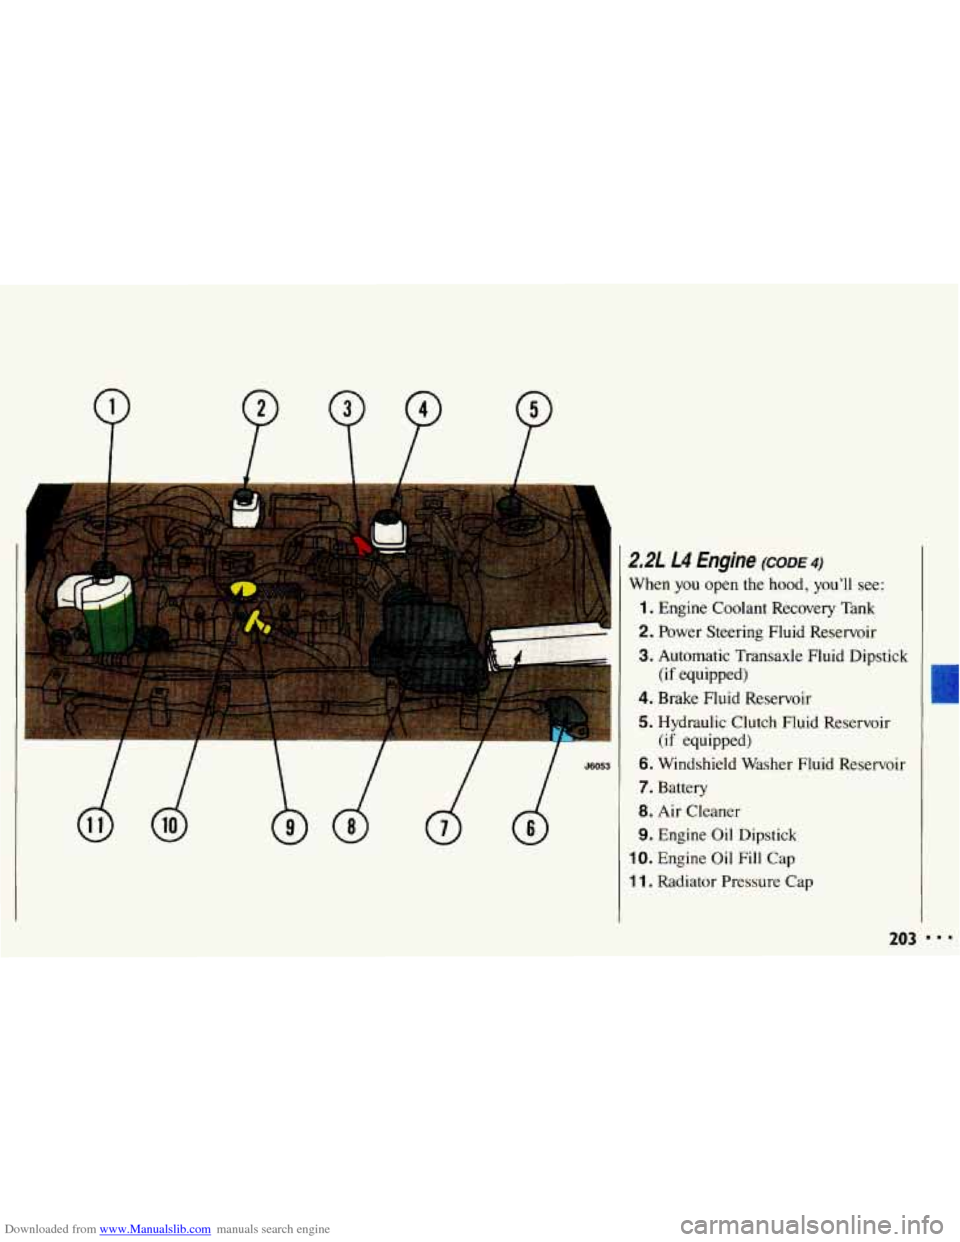
2.21 L4 Engine (CODE 4)
When you open the hood, you’ll see:
1. Engine Coolant Recovery Tank
2. Power Steering Fluid Reservoir
3. Automatic Transaxle Fluid Dipstick
4. Brake Fluid Reservoir
5. Hydraulic Clutch Fluid Reservoir
6. Windshield Washer Fluid Reservoir
7. Battery
8. Air Cleaner
9. Engine Oil Dipstick
IO. Engine Oil Fill Cap
1 1. Radiator Pressure Cap
(if equipped)
(if equipped)
203
Page 206 of 308
Downloaded from www.Manualslib.com manuals search engine Service & Appearance Care
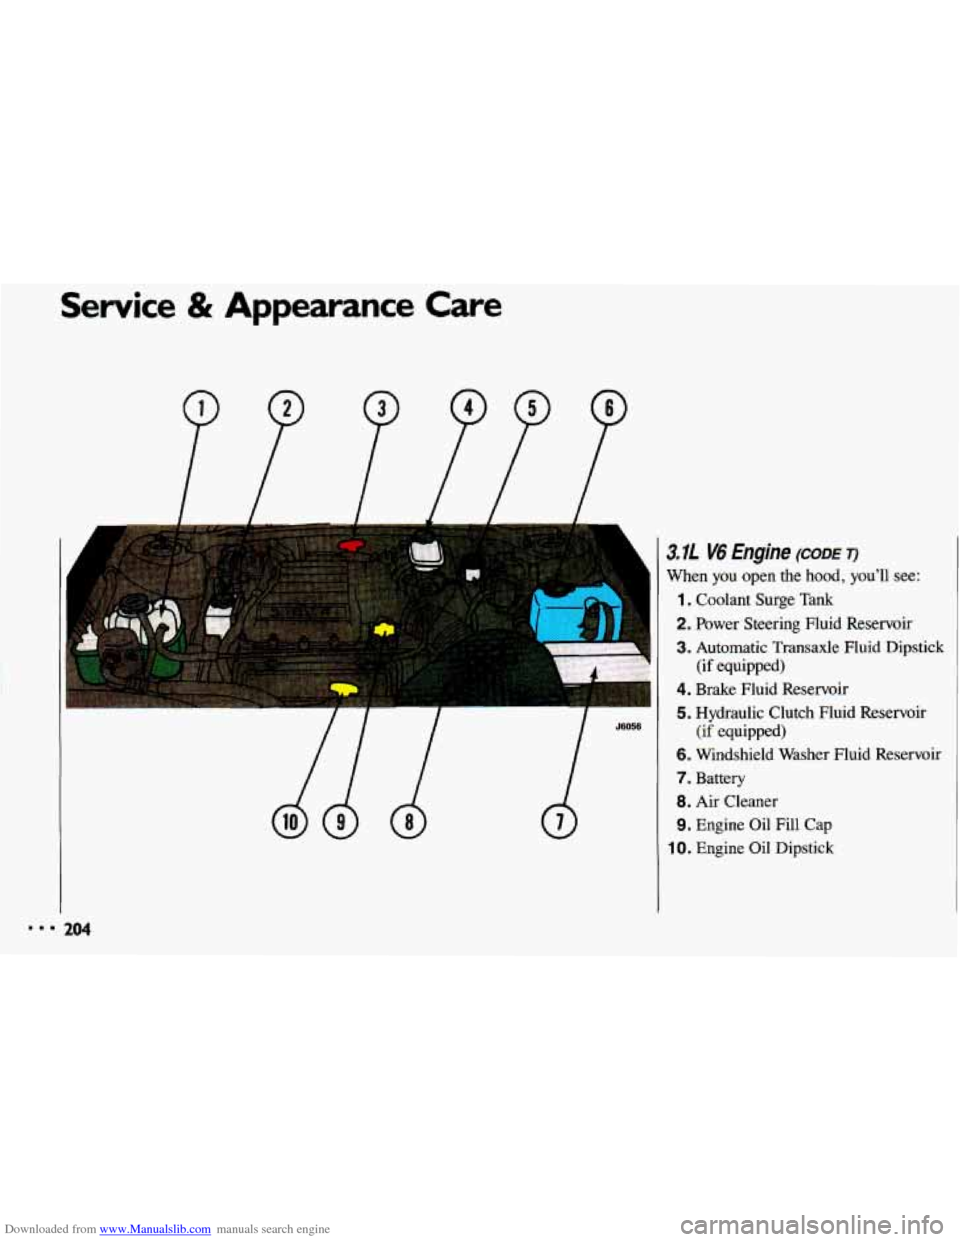
' 3.11 V6 Engine (CODE T)
1
When you open the hood, you'll see:
1. Coolant Surge Tank
2. Power Steering Fluid Reservoir
3. Automatic Transaxle Fluid Dipstick
4. Brake Fluid Reservoir
5. Hydraulic Clutch Fluid Reservoir
6. Windshield Washer Fluid Reservoir
7. Battery
8. Air Cleaner
9. Engine Oil Fill Cap
10. Engine Oil Dipstick
(if equipped)
(if equipped)
rn 204
Page 214 of 308
Downloaded from www.Manualslib.com manuals search engine Service & Appearance Care
Automatic Transaxle Fluid (CONT.)
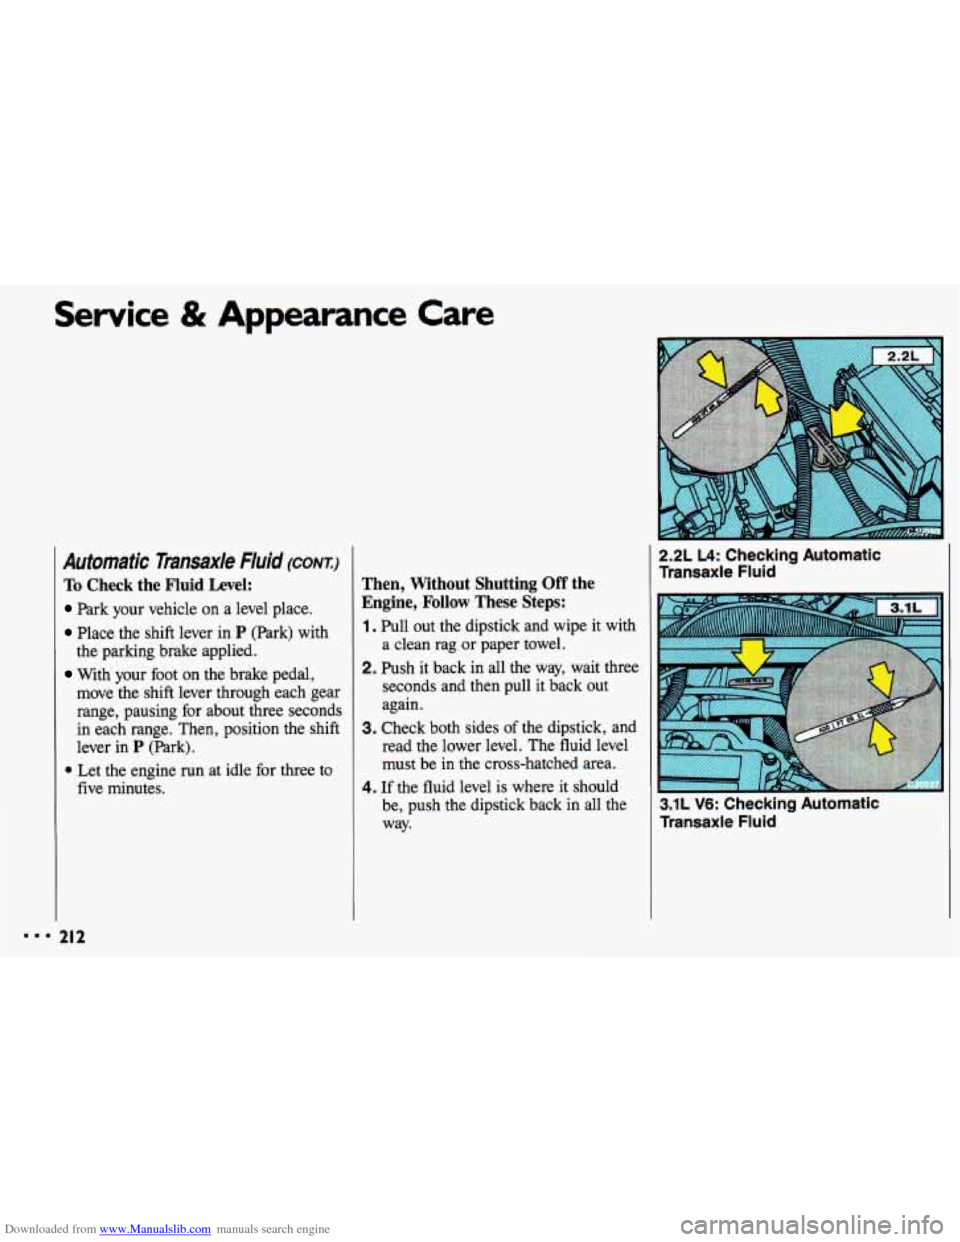
To Check the Fluid Level:
Park your vehicle on a level place.
Place the shift lever in P (Park) with
With your foot on the brake pedal,
the
parking brake applied.
move the shift lever through each gear
range, pausing for about three seconds
in each range. Then, position the shift
lever in
P (Park).
Then, Without Shutting Off the
Engine,
Follow These Steps:
1. Pull out the dipstick and wipe it with
a clean rag or paper towel.
2. Push it back in all the way, wait three
seconds and then pull it back out
again.
3. Check both sides of the dipstick, and
read the lower level. The fluid level
must be in the cross-hatched area.
4. If the fluid level is where it should
be, push the dipstick back in all the
way.
2.2L L4: Checking Automatic
Transaxle Fluid
3.1L V6: Checking Automatic
Transaxle Fluid
Page 223 of 308
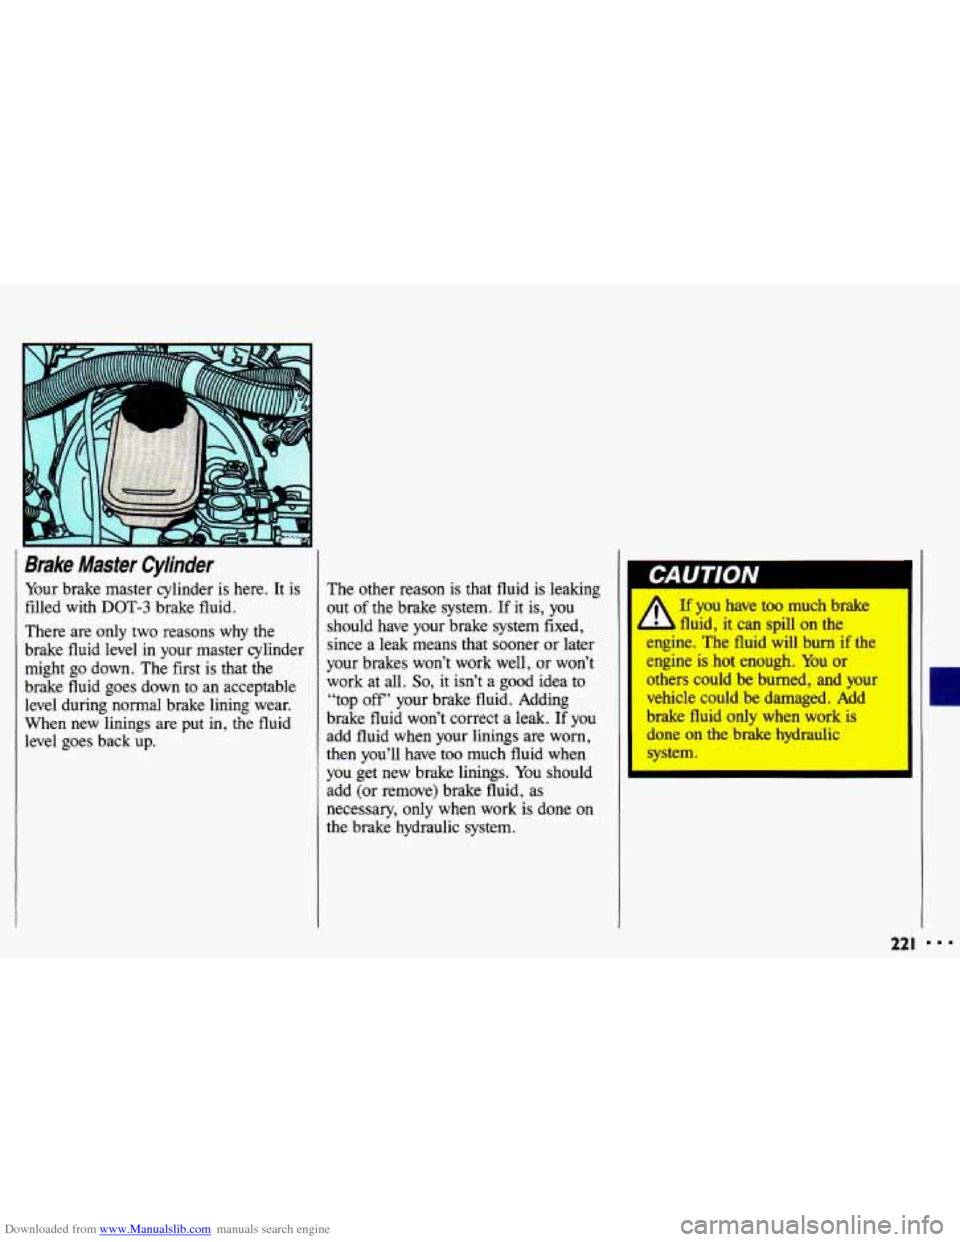
Downloaded from www.Manualslib.com manuals search engine Brake Master Cylinder
Your brake master cylinder is here. It is
filled with
DOT-3 brake fluid.
There are only two reasons why the
brake fluid level in your master cylinder
might go down. The first is
that the
brake fluid goes down to an acceptable
level during normal brake lining wear.
When
new linings are put in, the fluid
level goes back up. The other
reason is that fluid is leaking
out
of the brake system. If it is, you
should have
your brake system fixed,
since a leak means that sooner or later
your brakes won’t work well, or won’t
work at all.
So, it isn’t a good idea to
“top off’ your brake fluid. Adding
brake fluid won’t correct a leak.
If you
add fluid when your linings are
worn,
then you’ll have too much fluid when
you get new brake linings. You should
add (or remove) brake fluid,
as
necessary, only when work is done on
the brake hydraulic system.
I
A
If you have too much brake
fluid,
it can spill on the
engine. The fluid will burn
if the
engine
is hot enough. You or
others could be burned, and your
vehicle could be damaged. Add
brake fluid
only when work is
done
on the brake hydraulic
system.
22 !I ’
I
I..