Page 121 of 308
To Play This Radio
On-Off
Press Off-Vol knob to turn the radio on or off when the
ignition is on.
Volume
The volume knob increases and decreases volume when
it is held slightly rotated against the spring load.
%ne
The tune knob increases and decreases station frequency
when it is held slightly rotated against the spring load.
Fade
The fade control fades the sound between your front and
rear speakers. It operates like the volume and tune
controls.
Balance
The control behind the fade control allows you to
balance the sound between the right and
left speakers. It
operates like the fade control.
AMIFM
Press the AM/FM button to select either AM or FM
radio band. The band you select will be displayed along
with
the frequency of the station. If the station is in
stereo, a
STEREO indicator will also be displayed.
Seek
Press the SEEK button to search for the next station up
the AM or FM radio band. Press it again to go to the
next higher station.
119
ProCarManuals.com
Page 122 of 308

Scan
Press the SCAN button to hear each station for a few
seconds. Push it again to stop scanning.
Pushbuttons
The five buttons can be used to preset ten radio stations
(5 AM and 5 FM stations.)
0
0
0
0
Tune in the desired station.
Press SET. (The SET indicator will appear on the
screen for five seconds.)
While the
SET indicator is displayed, press one of
the five buttons. Whenever you press that button
again,
the preset station will return.
Repeat these steps for each
of 5 AM and 5 FM
stations.
Loud
Press LD to increase the bass response.
Mute
Pressing Mute allows you to silence the radio or tape
player; press again to listen. During mute, only volume
up works.
Clock
With the ignition on and the radio off, press SET. The
set indicator will appear on the display for five seconds.
During that five seconds, press SCAN to set the
0 Press SET again. Within 5 seconds, press SEEK to
minute.
set the hour.
To Play A Cassette Player
To turn the system on, the radio power must be on. The
radio will play until a cassette is pushed into the cassette
entry door
(the tape side goes in first). Do not use tapes
that are longer than
92 minutes (46 minutes on each
side.)
120
___ ~ -
ProCarManuals.com
Page 123 of 308

Once the tape is playing, use the volume, balance, and
fade controls just like
you did for radio.
Equalizer
The EQUALIZER enables you to adjust five separate
sound frequencies
to your individual taste.
Slide an EQUALIZER control up to emphasize a
frequency, down to de-emphasize it. It’s best to begin
with all the controls in the middle position, then adjust
each control as
you like.
FWD
Press to advance the tape rapidly. Press again to play the
tape. (The radio plays while a tape is advancing.)
REV
Press to reverse the tape rapidly. Press again to play the
tape.
(The radio plays while a tape is rewinding.)
SEEK
To search for the next selection on the tape, press SEEK
then press either FWD
or REV. For the SEEK to stop,
there must be at least
a 4-second gap between selections
on
the tape.
PROG
Press PROG to change the side of the tape being played.
When the
A is lit, the selections listed on the top side of
the tape are played. When the is lit, selections listed
on the bottom side
of the tape are played. When the end
of a tape is reached, the other side will then play.
00 Dolby
Press 00 to remove unwanted noise on tapes.
CrO2
When playing high bias chrome or metal tapes, press
CrO2. This button sets tape bias. When playing standard
tapes, press again.
EJCT
Press EJCT to eject the cassette tape from the tape
player.
121
ProCarManuals.com
Page 124 of 308
Steering Wheel Controls
If your car has this feature, you can also control certain
functions at the steering wheel.
On/Off
Press ON/OFF to turn the radio on or off.
Vol
To increase or decrease the volume, press VOL A or v.
AM/FM
Press this to choose AM or FM.
Seek
Press 4 to go to a lower frequency station. Press b to
go to a higher frequency station.
Prog
Press 4 or to hear the stations preset on your radio
pushbuttons. Press
five times to hear them all.
fine
Press 4 or b to tune up or down, only as long as the
button
is held.
122
ProCarManuals.com
Page 126 of 308

Care of Your Compact Discs
Handle discs carefully. Store them in their original cases
or other protective cases and away from direct sunlight
and dust. If the surface of a disc is soiled, dampen a
clean, soft cloth in a mild, neutral detergent solution and
clean it, wiping from the center to the edge.
Be sure never to touch the signal surface when handling
discs. Pick up discs by grasping the outer edges or the
edge
of the hole and the outer edge.
Fixed Mast Antenna
The fixed mast antenna can withstand most car washes
without being damaged. If the mast should ever become
slightly bent, you can straighten it
out by hand. If the
mast is badly bent, as it might be by vandals,
you should
replace it.
Power Antenna Mast Care
Your power antenna will look its best and work well if
it’s cleaned from time to time.
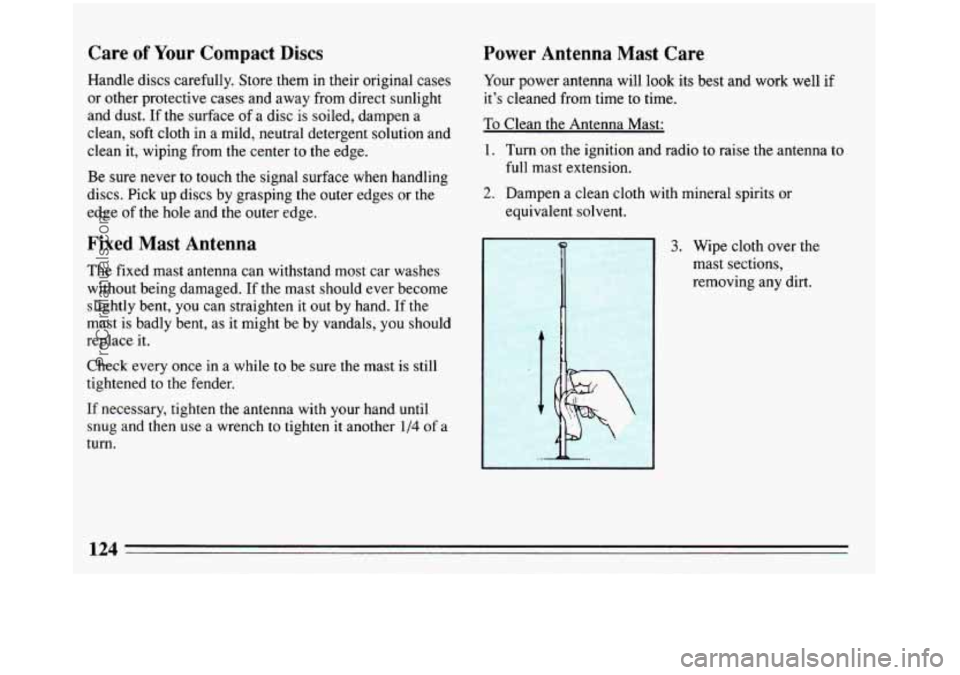
To Clean the Antenna Mast:
1. Turn on the ignition and radio to raise the antenna to
full mast extension.
2. Dampen a clean cloth with mineral spirits or
equivalent solvent.
3. Wipe cloth over the
mast sections,
removing any dirt.
Check every once in a while
to be sure the mast is still
tightened to the fender,
If necessary, tighten the antenna with your hand until
snug and then use a wrench to tighten it another
1/4 of a
turn.
124
ProCarManuals.com
Page 127 of 308
4. Wipe dry with clean cloth before retracting.
5. Make the antenna go up and down by turning the
6. Then repeat if necessary.
radio or ignition on and
off.
Don’t
lubricate your radio to make the power antenna go down.
This
will prevent the mast from possibly getting
damaged.
If the antenna does not go down when
you turn the radio
off, it may be damaged or need
to be cleaned. In either case, lower the antenna
If the mast portion of your antenna is damaged, you can
easily replace
it. See your dealer for a replacement kit
and follow the instructions in the kit.
125
ProCarManuals.com
Page 183 of 308
1 CAUTION:
You could be injured if the vehicles roll. Set the
parking brake firmly on each vehicle. Put an
automatic transaxle
in “P” (Park) or a manual
transaxle
in “N” (Neutral).
3. Turn off the ignition on both vehicles. Turn off all
lights that aren’t needed, and radios. This will avoid
sparks and help save both batteries. And it could
save your radio!
4. Open the hoods and locate the batteries.
I
I A CAUTION:
An electric fan can start up even wheVv the engine
is not running and can injure you. Keep hands,
clothing and
tools away from any underhooc‘
electric
fan.
Find the positive (+) and negative (-) terminals on
each battery.
Your Buick has a remote positive (+)jump starting
terminal. The terminal is on the same side
of the
engine compartment as your battery.
You should always use the remote positive (+)
terminal instead of the positive (+) terminal on your
battery.
To uncover the remote positive (+) terminal, lift the
red plastic cap.
181
ProCarManuals.com
Page 259 of 308

Fuses and Circuit Breakers
The wiring circuits in your car are protected from short
circuits by a combination
of fuses, circuit breakers, and
fusible themdi links in the wiring itself.
This greatly
reduces the chance
of fires caused by electrical problems.
This fuse panel is inside the
glove box. Pull the cover
down for access. Some
spare fuses and
a fuse
puller are included.
Be sure
to use the correct fuse. If you ever have a problem
on the road and don’t have
a spare fuse, you can “borrow”
one of the correct value. Just pick some feature of your car
that you can get along without
-- like the radio or cigarette
lighter
-- and use its fuse, if it is of the value you need.
Replace
it as soon as you can.
Fuse Usage
Amp Description
1.
2.
3.
10
15
15
4.
5.
6.
7.
8.
9.
10.
11.
12.
13.
14.
1s.
16.
17.
18.
25
10
1s
15
20
15
10
5
25
10
10
Radio & Clock
Radio
& Clock; Instrument Cluster; Passive
Restraint Timer
Courtesy, Glove Box, Underhood, Trunk, Header
Lights; Cigarette Lighter; Lighted Inside Rearview Mirror; Power Door Locks; Power Mirrors
Windshield Wiper
& Washer
Cruise Control: DRL Module; Instrument Cluster;
HVAC
Brake Lights;
ABS Control Module; Chime Module
Engine Control Module
Taillights; DRL Module
Hazard Warning Flasher
Rear Defogger Timer Relay: Instrument Cluster;
Chime Module; Cruise Control; DRL Module; Lamp
Driver
Module; ABS Lamp Driver
Instrument Panel. Console, Switch Lights
Blower Motor
Turn Signals
Not Used ABS Control Module
Not Used Not Used
Not Used
257
ProCarManuals.com