1993 BUICK LESABRE light
[x] Cancel search: lightPage 229 of 324
Compact Spare Tire
Although the compact spare was fully inflated when
your vehicle was new, it can lose air after a time. Check
the inflation pressure regularly. It should be
60 psi (420
Wa). The compact spare is made to go up to 3,000 miles
(5000 km), so you can finish your trip and have your
full-size tire repaired or replaced where you want. Of
course, it’s best
to replace your spare with a full-size tire
as soon as
you can. Your spare will last longer and be in
good shape in case you need it again.
Your anti-lock brake system warning light may come
on
when you are driving with a compact spare. See
“Anti-Lock Brake System Warning Light” in the Index. Don’t
use your
compact spare on some other vehicle.
And don’t mix your compact spare or wheel with other
wheels or tires. They won’t fit. Keep your spare and its
wheel together.
Tire chains wo
them will damage
y
chains too. Do
compact spar I
A CnUTION:
Storing a jack, a tire, or other equipment in the
passenger compartment of the vehicle could
cause injury. In a sudden stop or colllsian, loose
mwipment could strike someone. Store all these
.__ the proper place.
I
227
Page 230 of 324
If You’re Stuck: In Sand, Mud, Ice or
Snow
What you don’t want to do when your vehicle is stuck is
to spin your wheels. The method known as “rocking”
can help you get out when you’re stuck, but you must
use caution.
1 LAUTION:
If you let your tires spin at high speed, they can
explode and you or others could be injured. And,
the transaxle or other parts of the vehicle can
overheat. That could cause an engine
compartment fire or other damage. When you’re
stuck, spin the wheels as little as possible. Don’t
spin the wheels above 35 mph (55 km/h) as
own on the speedometer.
I
I AOTICE:
Spinning your troy pal I
vehicle as well as the tires. If you spin the wheels
too fast while shifting your transaxle
forth, you can destroy your transaxle.
Rocking your vehicle to get it out:
First, turn your steering wheel left and right. That will
clear the area around your front wheels. Then shift back
and forth between
“R” (Reverse) and a forward gear ,
spinning the wheels as little as possible. Release the
accelerator pedal while you shift, and press lightly on
the accelerator pedal when the transaxle
is in gear. If
that doesn’t get
you out after a few tries, you may need
to be towed out. If you do need to be towed out, see
“Towing Your Car” in the Index.
Page 245 of 324
3.
4.
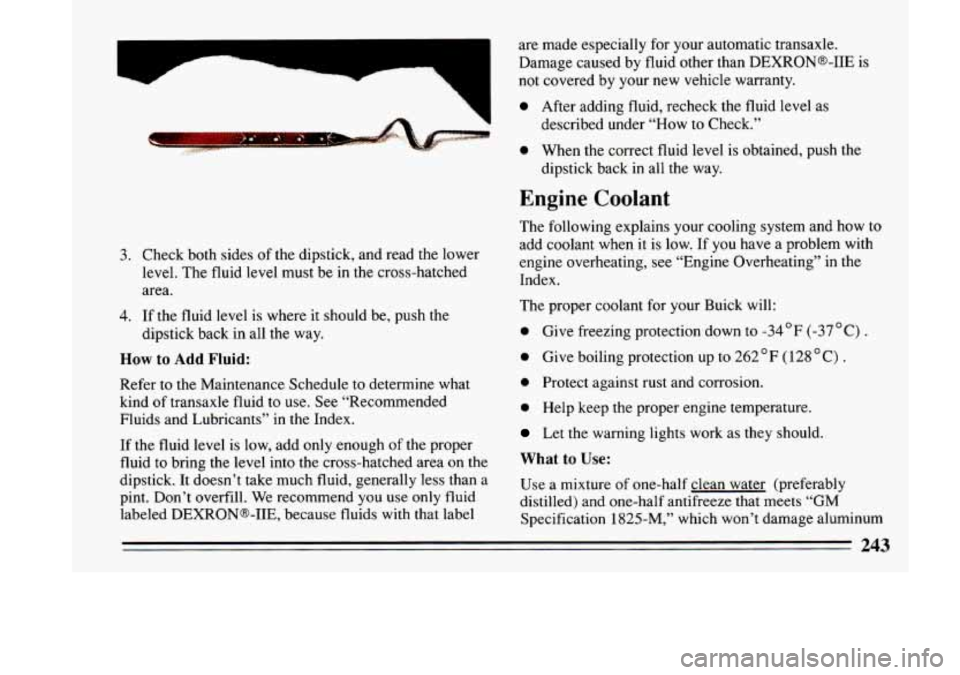
Check both sides of the dipstick, and read the lower
level. The fluid level must be in the cross-hatched
area.
If the fluid level is where it should be, push the
dipstick back in all the way.
How to Add Fluid:
Refer to the Maintenance Schedule to determine what
kind
of transaxle fluid to use. See “Recommended
Fluids and Lubricants” in the Index.
If the fluid level
is low, add only enough of the proper
fluid to bring the level into the cross-hatched area on the
dipstick. It doesn’t take much fluid, generally less than a
pint. Don’t overfill. We recommend you use only fluid
labeled DEXRONa-IIE, because fluids with that label are made especially for your automatic transaxle.
Damage caused by fluid other than DEXRONs-IIE
is
not covered by your new vehicle warranty.
0 After adding fluid, recheck the fluid level as
described under “How to Check.”
0 When the correct fluid level is obtained, push the
dipstick back in all the way.
Engine Coolant
The following explains your cooling system and how to
add coolant when it is low. If you have a problem with
engine overheating, see “Engine Overheating” in the
Index.
The proper coolant for your Buick will:
0 Give freezing protection down to -34OF (-37OC) .
0 Give boiling protection up to 262°F (128 “C) .
0 Protect against rust and corrosion.
0 Help keep the proper engine temperature.
Let the warning lights work as they should.
What to Use:
Use a mixture of one-half clean water (preferably
distilled) and one-half antifreeze that meets
“GM
Specification 1825-M,” which won’t damage aluminum
243
Page 250 of 324

Brake Master Cylinder
Your brake master cylinder is here. It is filled with
DOT-3 brake fluid. won’t
work at all.
So, it isn’t a good idea to “top off’
your brake fluid. Adding brake fluid won’t correct a
leak.
If you add fluid when your linings are worn, then
you’ll have too much fluid when you get new brake
linings. You should add (or remove) brake fluid, as
necessary, only when work
is done on the brake
hydraulic system.
A CAUTION:
If you have too much brake fluid, it can spill on
the engine. The fluid will burn if the engine is hat
,..ough. You or others could be burned, and you1
vehicle could be damaged. Add brake fluid only
when work is done on the brake hydraulic
system.
There are only two reasons why the brake fluid level in
your master cylinder might
go down. The first is that the
brake fluid goes down to an acceptable level during
normal brake lining wear. When new linings are put in,
the fluid level goes back up.
The other reason is that
fluid
is leaking out of the brake system. If it is, you
should have your brake system fixed, since a leak means
that sooner
or later your brakes won’t work well, or When your brake
fluid falls to a low level, your brake
warning light will come on. See “Brake System Warning
Light” in the Index.
When your brake fluid falls to a low
level, your brake
warning light will come
on and a chime will sound.
248
Page 263 of 324
‘A CAUTION:
0
Using the wrong replacement wheels, wheel
bolts,
or whwl nuts on your vehicle can be
dangerous. It could affect the braking and
handling
of your vehicle, make your tires lose air
and make you lose control.
You could have a
collision in which you or others could be injured.
Always use the correctwheel, wheel bolts, and
wheel
nuts for replacement.
NOTICE:
I
The wrong wheel can also cause problems with
bearing life, brake cooling,
speedometerlodometer calibration, headlight
aim, bumper height, vehicle ground clearance,
and tire
or tire chai
Used Rep1 Vheels - - -
’A CAUTION:
Putting a used wheel on your vehicle is
dangerous. You can’t know how it’s been used or
how many miles it’s been driven.
It could fail
suddenly and cause an accident. If you have to
replace a wheel use anew
GM original
equipment wheel.
I
Tire Chains
NOTICE
Use tire chains
SAE Class “S”
size for your
and tighten them as tightly as possible with
ends securely fastened. Drive
slowly and fol
the chain ma
hear the chai
retighten them.
If the contact continues, .elow
down until it stops. Driving ton fast with 4
on will damage your vehicle.
261
Page 265 of 324
0 Use solvent-type cleaners in a well-ventilated area
only. If you use them, don’t saturate the stained area.
0 If a ring forms after spot cleaning, clean the entire
area immediately or it will set.
Using Foam-Type Cleaner on Fabric
0
0
0
0
0
0
0
0
0
0
Vacuum and brush the area to remove any loose dirt.
Always clean a whole trim panel or section. Mask
surrounding trim along stitch or welt lines.
Mix Multi-Purpose Powdered Cleaner following the
directions on the container label.
Use suds
only and apply with a clean sponge.
Don’t saturate the material.
Don’t rub it roughly.
As soon as you’ve cleaned the section, use a sponge
to remove the suds.
Rinse the section with
a clean, wet sponge.
Wipe off what’s left with a slightly damp paper towel
or cloth.
Then dry
it immediately with an air hose, a hair
dryer
or a heat lamp.
I
Wipe with a clean cloth.
Using Solvent-Type Cleaner on
Fabric
First, see if you have to use solvent-type cleaner at all.
Some spots and stains will clean off better with just
water and mild soap.
If you need
to use it, then:
0
0
Gently scrape excess soil from the trim material with
a clean, dull knife or scraper. Use very little cleaner,
light pressure and clean cloths (preferably
cheesecloth). Cleaning should start
at the outside of
the stain, “feathering” toward the center. Keep
changing to a clean section of the cloth.
When you clean a stain from fabric, immediately dry
the area with an air hose, hair dryer, or heat lamp to
help prevent a cleaning ring. (See the previous
NOTICE.)
263
Page 266 of 324
Special Cleaning Problems
Greasy or Oily Stains: Like grease, oil, butter,
margarine, shoe polish, coffee with cream, chewing
gum, cosmetic creams, vegetable oils, wax crayon, tar
and asphalt.
Carefully scrape off excess stain.
Then follow the solvent-type instructions above.
Shoe polish, wax crayon, tar and asphalt will stain if
left on a vehicle seat fabric. They should be removed
as soon as possible. Be careful, because the cleaner
will dissolve them and may cause them to bleed.
Non-Greasy Stains: Like catsup, coffee (black), egg,
fruit, fruit juice, milk, soft drinks, wine, vomit, urine and
blood.
Carefully scrape off excess stain, then sponge the
soiled area with cool water.
If a stain remains, follow the foam-type instructions
above.
If an odor lingers after cleaning vomit or urine, treat
the area with a waterbaking soda solution:
1
teaspoon (5 ml) of baking soda to 1 cup (250 ml) of
lukewarm water.
0 Finally, if needed, clean lightly with solvent-type
cleaner.
Combination Stains: Like candy, ice cream,
mayonnaise, chili sauce and unknown stains.
Carefully scrape off excess stain, then clean with
cool water
and allow to dry.
0 If a stain remains, clean it with solvent-type cleaner.
Cleaning Vinyl or Leather
Just use warm water and a clean cloth.
Rub with a clean, damp cloth to remove dirt. You
Things like tar, asphalt and shoe polish will stain if may have to do it more than once.
you don’t get them
off quickly. Use a clean cloth and
solvent-type vinylbeather cleaner.
Cleaning the Top of the Instrument
Panel
Use only mild soap and water to clean the top surfaces
of the instrument panel. Sprays containing silicones or
waxes may cause annoying reflections in the windshield
and even make it difficult to see through the windshield
under certain conditions.
264
Page 272 of 324
Fuses and Circuit Breakers
The wiring circuits in your car are protected from short
circuits by a combination
of fuses, circuit breakers, and
fusible thermal links
in the wiring itself. This greatly
reduces the chance
of fires caused by electrical
problems.
You’ll find some spare
fuses in the fuse block. Be sure
to use the correct fuse.
If you ever have a problem on
the road and don’t have a spare fuse,
you can “borrow”
one
of the correct value. Just pick some feature of your
car that
you can get along without -- like the radio or
cigarette lighter
-- and use its fuse, if it is of the value
you need. Replace it as soon as you can.
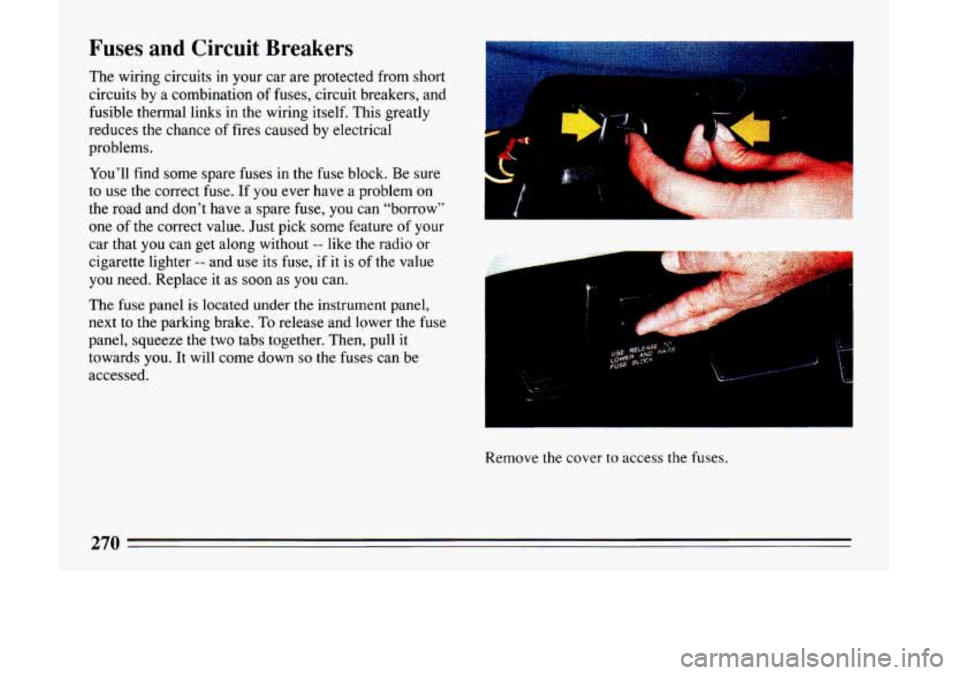
The fuse panel
is located under the instrument panel,
next to the parking brake.
To release and lower the fuse
panel, squeeze the two tabs together. Then, pull it
towards you.
It will come down so the fuses can be
accessed.
c m
k
Remove the cover to access the fuses.
270