1992 VOLKSWAGEN TRANSPORTER ECU
[x] Cancel search: ECUPage 115 of 164

Downloaded from www.Manualslib.com manuals search engine
GENERAL
MAINTENANCE
•
Knowing
the
tyre
lettering and its
meaning
makes
the
selection
of the correct
tyres
easier.
Radial
ply tyres
have
the
fol
lowing
lettering on the
sidewall:
e.g.:
195 / 70 R 15 97 S reinforced
195 =
Tyre
width in mm
70 = Height/width ratio in %
R
=
Radial
construction
code
letter
=
Radial
15 =
Wheel
diameter in
inches
97 =
Carrying
capability
code
S
=
Speed
code
letter
rein =
Reinforced
version
The manufacturing date is
also
to be
seen
on the tyre wall
(possibly
only on inner
side
of
wheel):
DOT
... 120 ...
means
that the tyre was
pro
duced
in the 12th
week
of 1990.
Attention
Tyres
which are more than 6 years old should only be used in
an emergency and then
with
a particularly careful style of driv
ing.
If you wish to fit your car
with
non
standard wheels or tyres please note:
Attention
•
For technical reasons it is not normally possible to use wheels
from other vehicles - in certain
circumstances
not even wheels
from the same vehicle model!
•
Wheels and wheel bolts are matched to one another.
On
changing to a different type
of wheel (e.g. alloy wheels or
wheels
with
winter
tyres) the cor rect bolt
with
the proper length
and conical shape must be
used.
The security of the wheels and
the functioning of the brake
sys
tem depend on this!
•
Using types of wheel and or
tyres which have not been ap
proved
by us for your vehicle
model can be detrimental tc thi
safety of the vehicle. It can also
affect the vehicle under the
Con
struction and Use regulations.
•
If wheel
trim
discs
are
subse
quently installed it is essential to
ensure
that
the air flow remains
adequate to cool the brakes.
Volkswagen
dealers
have
a :ne
~e:e;5;~
information
about the
poss
;e :
~
of
wheels,
tyres and
wheel
trims.
www.vwT4camper.info - a useful website for owners and enthusiasts of VW T4 Transporter Campervans
Page 120 of 164

Downloaded from www.Manualslib.com manuals search engine
DO-IT-YOURSELF
First
aid kit.
Warning
triangle
Vehicle
tools
The First Aid Kit and warning triangle can be
secured
under the
front
passenger's seat mot on vehicles
with
swivelling seats).
Note:
The
first
aid kit and warning triangle are not part of vehicle equipment.
Double
Cab
under rear seat
1 Pick-up behind the driver's seat
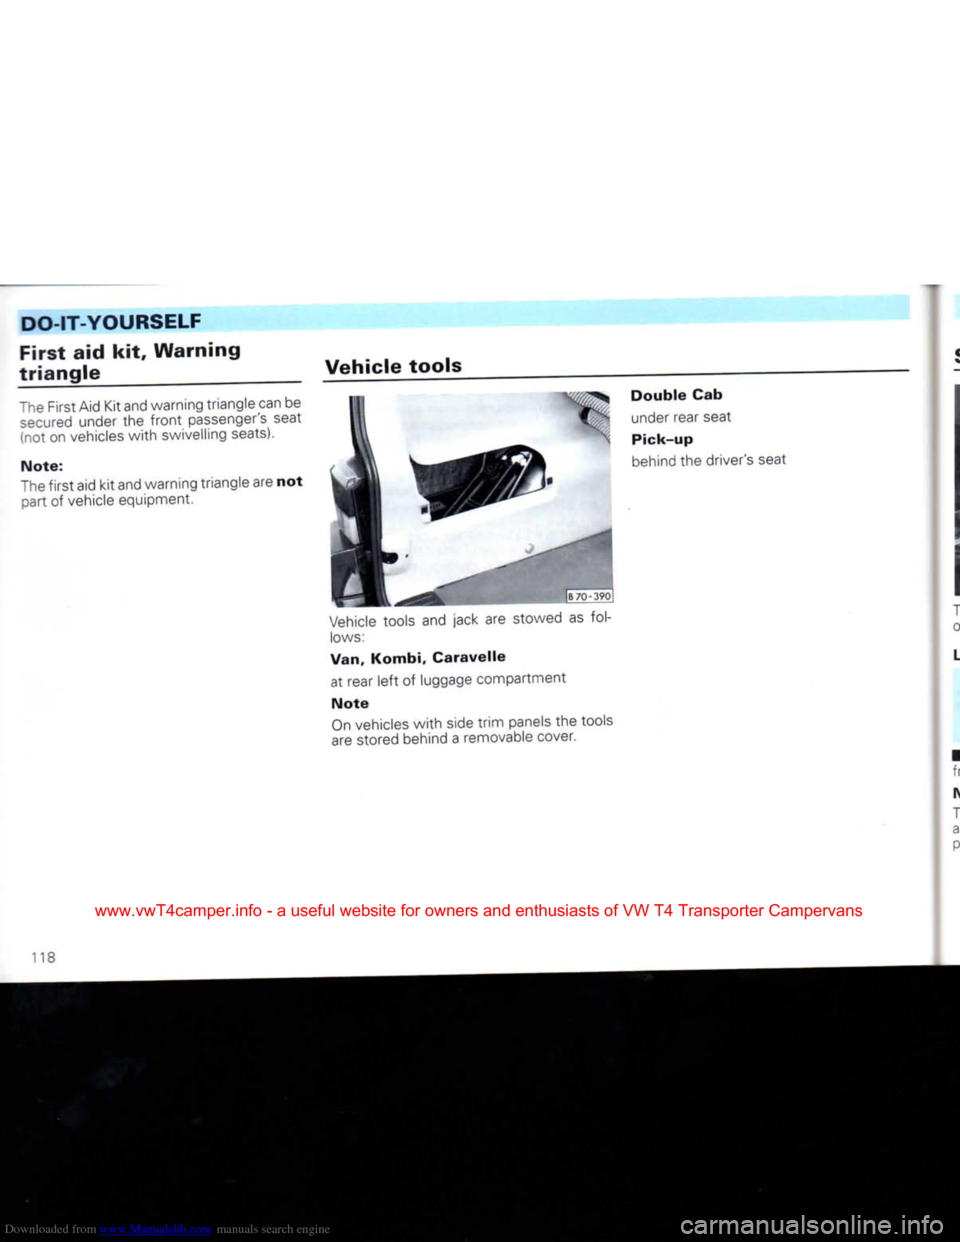
Vehicle
tools and jack are stowed as fol
lows:
Van, Kombi,
Caravelle
at rear
left
of luggage compartment
Note
On
vehicles
with
side
trim
panels the tools
are stored behind a removable cover.
118
www.vwT4camper.info - a useful website for owners and enthusiasts of VW T4 Transporter Campervans
Page 121 of 164

Downloaded from www.Manualslib.com manuals search engine
DO-IT-YOURSELF
Spare
wheel
The spare wheel is secured under the rear of the vehicle in a special hinged carrier.
Lowering
spare
wheel
carrier
Attention
When
loosening the screws it is
essential
to
keep
to the
following
sequence:
• Loosen safety screw B
until
it turns freely.
Note
The safety screw B is held at the end
with
a
clip so
that
it cannot be screwed out
com
pletely. • Remove securing screw A completely.
The spare wheel carrier then rests on the safety screw B.
Attention
If the screws are loosened in the
opposite
sequence, the
carrier
can
fall
off
screw
B.
• Then insert the wheel spanner in the carrierto the stop as shown in illustration on
the
right.
• Grip wheel spanner
firmly
with
both
hands,
lift
slightly and swing to the
right
until
the large hole in the carrier can be swung
over the safety screw and down.
• Take spare wheel out.
Lifting
spare
wheel
carrier
•
Insert
wheel spanner in spare carrier.
•
Place
wheel on carrier
with
well up wards, swing carrier up
with
wheel spanner
and hook it on the safety screw.
• Screw in securing screw A
first,
then
.safety screw B.
• Then tighten both screws fully.
Attention
For
safety
reasons the
spare
wheel
carrier
must
always
be
firmly
secured so
that
the
spare
wheel
cannot
fall
down
acciden
tally.
Note
The rear mounting of the spare wheel
carrier can be adjusted in height to cater for
tyres of different widths.
www.vwT4camper.info - a useful website for owners and enthusiasts of VW T4 Transporter Campervans
Page 123 of 164

Downloaded from www.Manualslib.com manuals search engine
DO-IT-YOURSELF
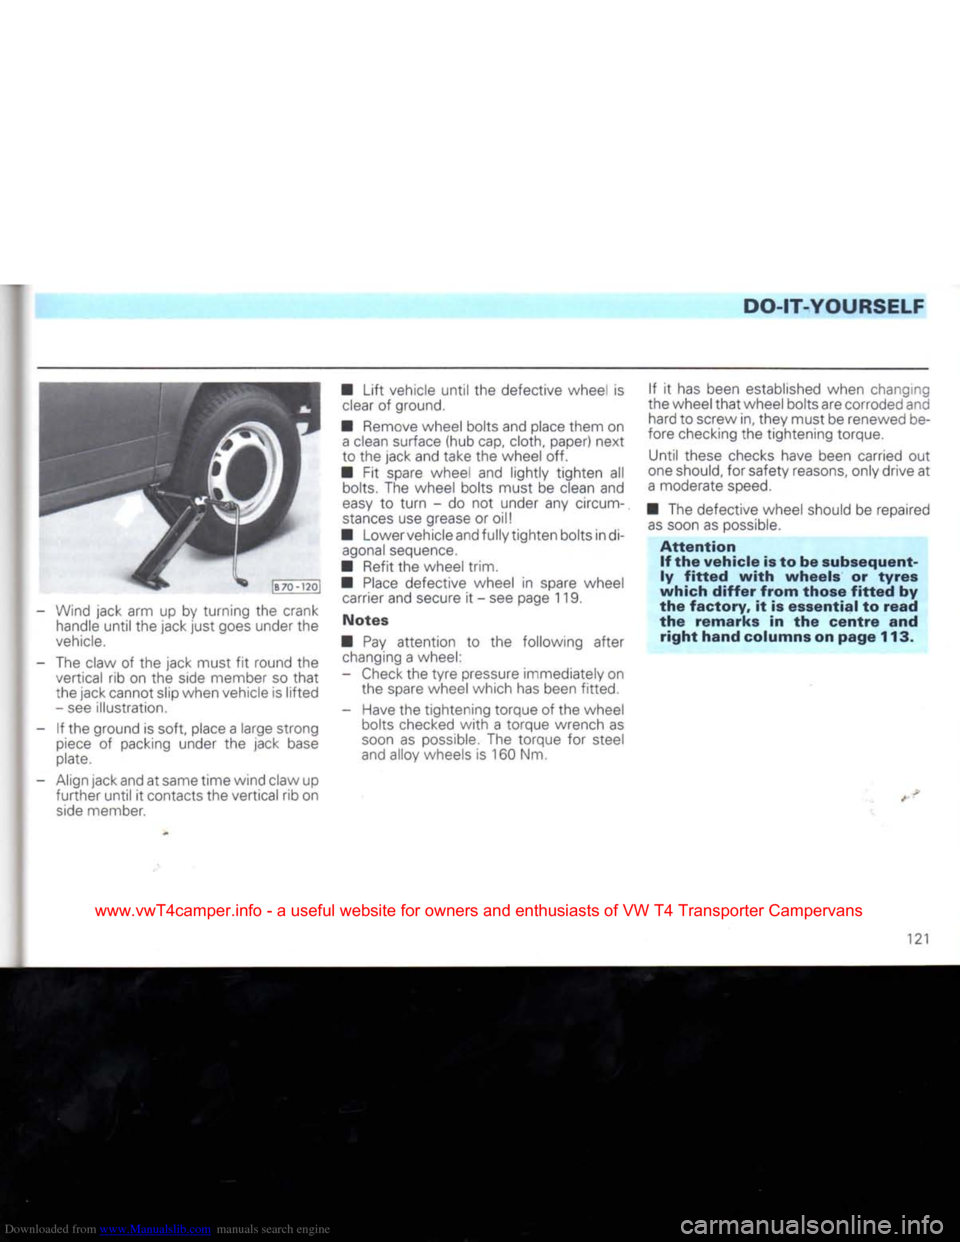
- Wind jack arm up by turning the crank handle
until
the jack
just
goes under the
vehicle.
- The claw of the jack must fit round the vertical rib on the side member so
that
the jack cannot slip when vehicle is
lifted
- see illustration.
- If the ground is soft, place a large strong
piece
of packing under the jack base
plate.
- Align jack and at same time wind claw up
further
until
it contacts the vertical rib on
side
member. •
Lift
vehicle
until
the defective wheel is
clear
of ground.
• Remove wheel bolts and place them on
a
clean surface (hub cap, cloth, paper) next
to the jack and take the wheel off.
• Fit spare wheel and lightly tighten all bolts. The wheel bolts must be clean and
easy
to
turn
- do not under any circum
stances
use grease or oil!
• Lowervehicleand fully tighten bolts indi- agonal sequence.
• Refit the wheel trim.
•
Place
defective wheel in spare wheel carrier and secure it - see page 119.
Notes
• Pay attention to the following after changing a wheel:
- Check the
tyre
pressure immediately on the spare wheel which has been fitted.
- Have the tightening torque of the wheel bolts checked
with
a torque wrench as
soon
as possible. The torque for steel
and alloy wheels is 160 Nm. If it has been established when changing
the wheel
that
wheel bolts are corroded and hard to screw in, they must be renewed be
fore checking the tightening torque.
Until these checks have been carried out
one should, for safety reasons, only drive at
a
moderate
speed.
• The defective wheel should be repaired
as
soon as possible.
Attention
If the
vehicle
is to be
subsequent
ly
fitted
with
wheels
or
tyres
which
differ
from
those
fitted
by
the
factory,
it is
essential
to
read
the
remarks
in the
centre
and
right
hand
columns on
page
113.
121
www.vwT4camper.info - a useful website for owners and enthusiasts of VW T4 Transporter Campervans
Page 127 of 164

Downloaded from www.Manualslib.com manuals search engine
DO-IT-YOURSELF
Front
turn
signals
To
change a bulb the
turn
signal housing must be taken out to the
front.
•
Insert
the
flat
blade of a screwdriver be tween headlight and
turn
signal
with
bonnet
open.
This presses the securing tabs which hold the
turn
signal housing to the
side.
• Swing screwdriver to
front
as shown in illustration so
that
the
turn
signal housing is
pressed
out forward. • Turn bulb holder out to the
left.
• Turn bulb out and renew.
•
Insert
bulb holder. •
Insert
turn
signal housing in the grooves provided (top and
bottom)
and press it in
until
the securing tabs engage.
Fog
lights*
The foglight bulbs can betaken out from un
derneath the bumper.
• Turn cap on rear of fog
light
to the
left
to remove it.
• Unhook spring clip of bulb holder and swing it away.
• Take bulb out.
•
Insert
new bulb so
that
the locating lug on bulb plate engages
recess
in the reflec
tor.
• Swing spring clip over bulb plate,
squeeze
it together and engage it in the re
taining lugs.
• Fit cap again.
• Have beam alignment
checked.
Rear
lights
Renewal
of the bulbs for the rear lights is
done from the luggage compartment
through the rear panel trim.
•
Reach
into
the hole in the rear panel
trim
with
one hand and squeeze the two retaining tabs of bulb carrier together.
• Take bulb carrier out (illustration). •
Press
defective bulb
into
holder slightly,
turn
it to the
left
and take it out.
•
Insert
new bulb and
turn
fully to the
right
• Install bulb carrier.
125
www.vwT4camper.info - a useful website for owners and enthusiasts of VW T4 Transporter Campervans
Page 128 of 164

Downloaded from www.Manualslib.com manuals search engine
DO-IT-YOURSELF
Rear
fog
light
• Renewal of the bulbs for the rear lights
is
done from the luggage compartment
through the rear panel trim.
• Take housing out.
• Turn bulb holder out to the
left.
• Take bulb out and renew.
• Turn bulb holder back in.
•
Insert
left
side of housing in the recess
first
and press in
firmly
until
the tabs en
gage.
Number
plate
lights
The lights are secured
with
2 screws.
• Take lens off
• Pull complete
light
out
• Pull bulb housing out • Pull defective bulb out and renew
•
Insert
bulb housing
• Secure lens
firmly
Interior
and
reading
light*
Interior
light
(A)
•
r.sert
a knife blade or something similar
into
gap between housing and lens and
carefully lever lens off.
• Change bulb.
• Dress lens
into
housing again, when doing this the lug on the lens must fit in the
recess
in the housing.
'26
www.vwT4camper.info - a useful website for owners and enthusiasts of VW T4 Transporter Campervans
Page 156 of 164

Downloaded from www.Manualslib.com manuals search engine
TECHNICAL DATA
Vehicle
identification
data
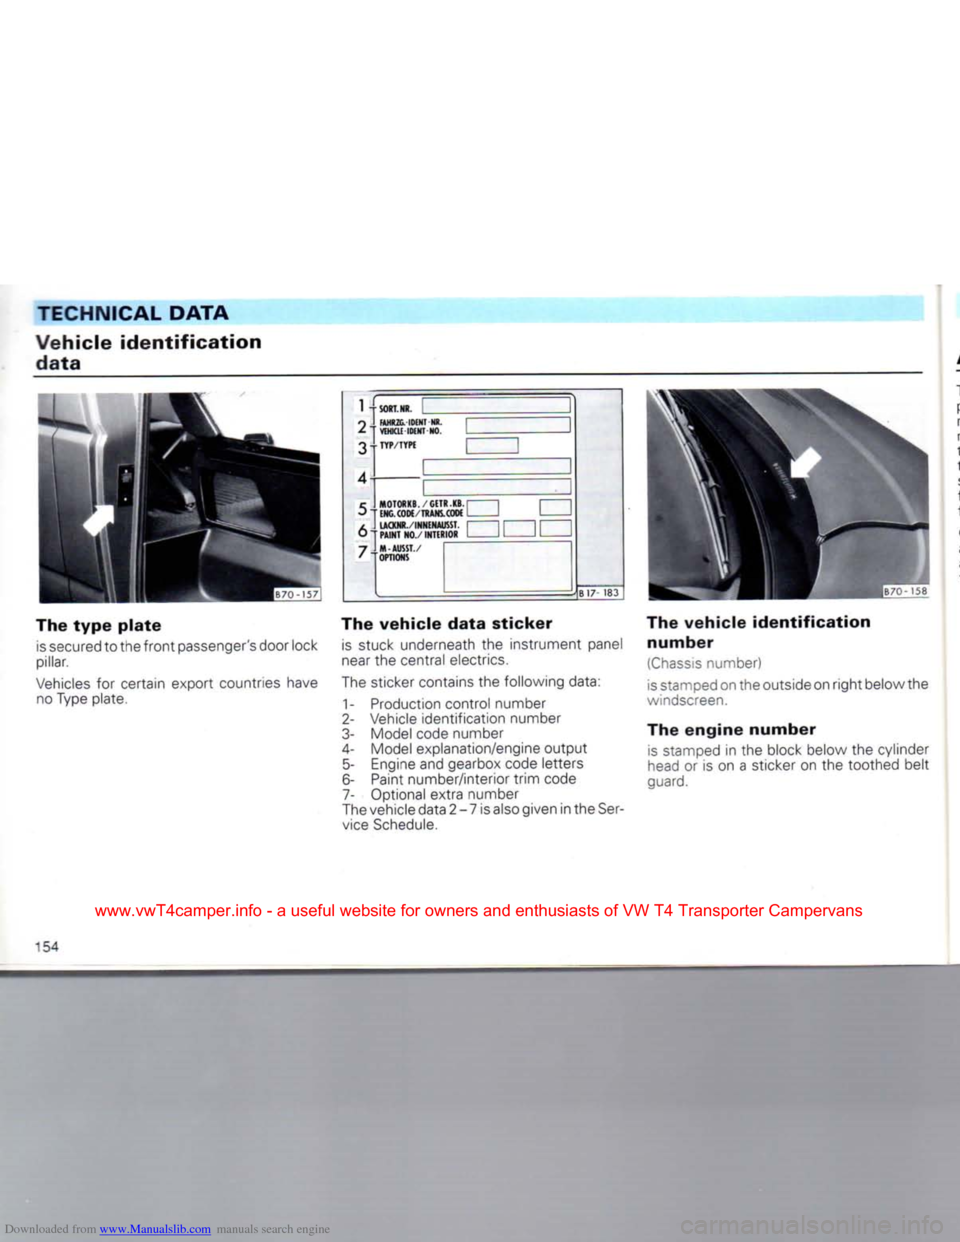
The
type
plate
is
secured to the
front
passenger's door lock
pillar.
Vehicles
for
certain export countries have no Type plate. 2
3
FAHRZG.
IDENT -NR.
VEHICLE
IDENT NO.
MOTORKB.
/ GtTR
-KB.
[
[NC.COM/TRANS.C0M
I
LACXNR./INNENAUSST.
[
PAINT
NO./
INTERIOR i
M-AUSST./
OPTIONS
8 17
183
The
vehicle
data
sticker
is
stuck underneath
the
instrument panel
near
the central electrics.
The sticker contains the following data: 1- Production control number
2-
Vehicle identification number
3-
Model code number
4-
Model explanation/engine
output
5-
Engine and gearbox code letters
6- Paint number/interior
trim
code
7- Optional extra number
The vehicle data 2-7 is also given in the
Ser
vice
Schedule. The
vehicle
identification
number
(Chassis
number)
is
stamped on the outside on
right
below the
windscreen.
The
engine
number
is
stamped
in the
block below the cylinder
head
or is on a
sticker on
the
toothed belt
guard.
154
www.vwT4camper.info - a useful website for owners and enthusiasts of VW T4 Transporter Campervans