Page 61 of 225
Mirrors, Parking Brake
Available on all Canadian models
The outside mirrors are heated to
remove fog and frost. Press the
mirror defroster button to turn on
the heaters. The light in the button
comes on as a reminder. Press the
button again to turn the heaters off.
Parking Brake
To apply the parking brake, pull
the lever up fully. To release it, pull
up slightly, push the button, and lower the lever. The parking brake
light on the instrument panel
should go out when the parking
brake is fully released (see page 33).
If you try to drive the car without
releasing the parking brake, the
ABS cannot work properly. Driving the car with the parking
brake applied can damage the rear brakes and axles.
Instruments and Controls
NOTICE
PARKING BRAKE LEVERProCarManuals.comMain Menu Table of Contents s t
Page 76 of 225

Audio System (S)
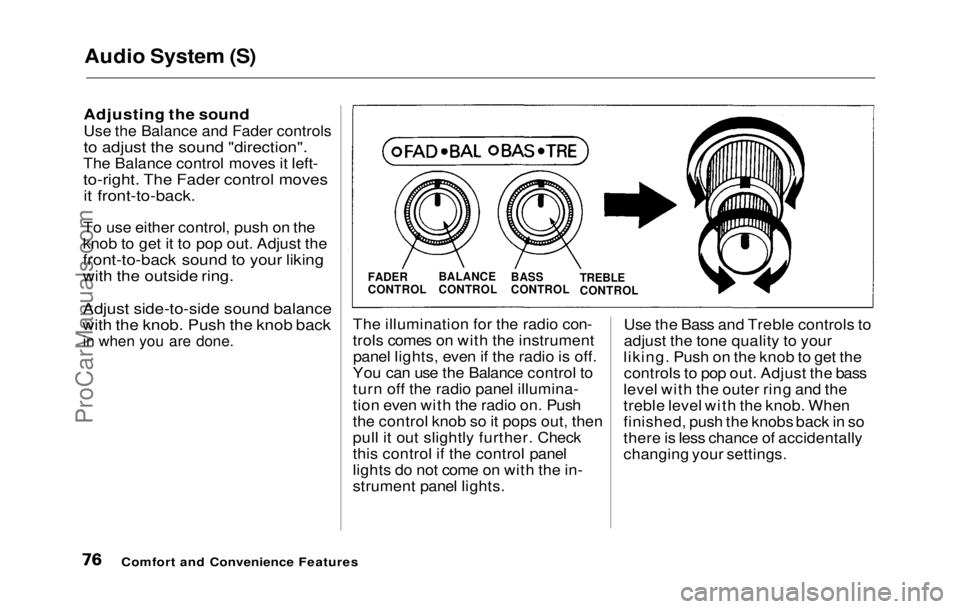
Adjusting the soundUse the Balance and Fader controls
to adjust the sound "direction".
The Balance control moves it left-
to-right. The Fader control moves it front-to-back.
To use either control, push on the
knob to get it to pop out. Adjust the
front-to-back sound to your liking
with the outside ring.
Adjust side-to-side sound balance
with the knob. Push the knob back
in when you are done.
The illuminatio n
for the radio con-
trols comes on with the instrument panel lights, even if the radio is off.
You can use the Balance control to
turn off the radio panel illumina-
tion even with the radio on. Push
the control knob so it pops out, then
pull it out slightly further. Check
this control if the control panel
lights do not come on with the in-
strument panel lights. Use the Bass and Treble controls to
adjust the tone quality to your
liking. Push on the knob to get the controls to pop out. Adjust the bass
level with the outer ring and the
treble level with the knob. When
finished, push the knobs back in so
there is less chance of accidentally
changing your settings.
Comfort and Convenience Features
FADER
CONTROL
BALANCE
CONTROL
BASS
CONTROL
TREBLE
CONTROLProCarManuals.comMain Menu Table of Contents s t
Page 85 of 225

Audio System (Si, SR)
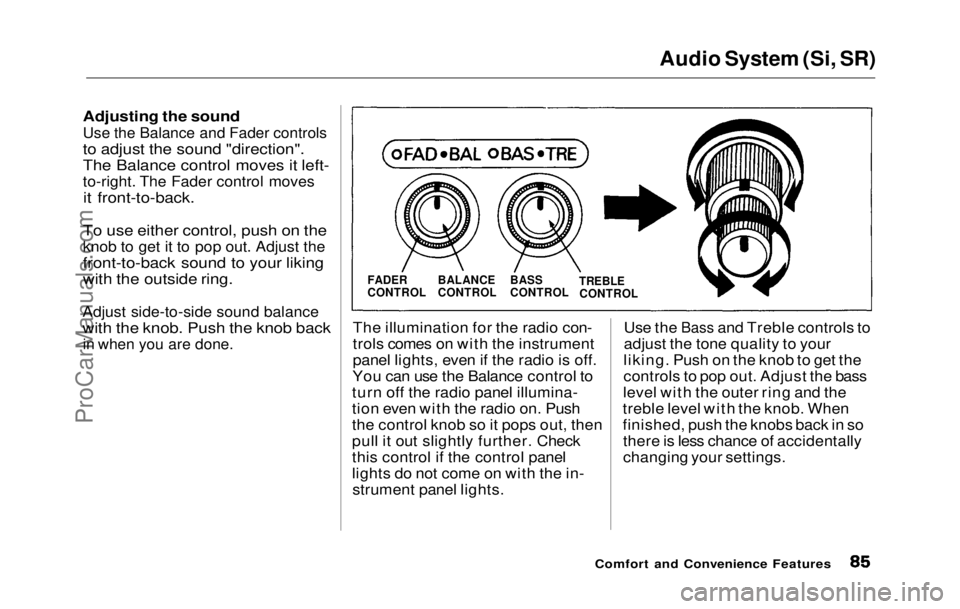
Adjusting the soundUse the Balance and Fader controls
to adjust the sound "direction".
The Balance control moves it left-
to-right. The Fader control moves
it front-to-back.
To use either control, push on the
knob to get it to pop out. Adjust the
front-to-back sound to your liking
with the outside ring.
Adjust side-to-side sound balance
with the knob. Push the knob back
in when you are done.
The illuminatio n
for the radio con-
trols comes on with the instrument
panel lights, even if the radio is off.
You can use the Balance control to
turn off the radio panel illumina-
tion even with the radio on. Push
the control knob so it pops out, then
pull it out slightly further. Check
this control if the control panel
lights do not come on with the in- strument panel lights. Use the
Bass and Treble controls to
adjust th e
tone quality to your
liking. Push on the knob to get the
controls to pop out. Adjust the bass
level with the outer ring and the
treble level with the knob. When
finished, push the knobs back in so there is less chance of accidentally
changing your settings.
Comfort and Convenience Features
FADER
CONTROL
BALANCE
CONTROL
BASS
CONTROL
TREBLE
CONTROLProCarManuals.comMain Menu Table of Contents s t
Page 107 of 225
Preparing to Drive
You should do the following checks and adjustments every day before
you drive your car.
1. Make sure all windows, mirrors, and outside lights are clean and
unobstructed. Remove frost,
snow, or ice.
2. Check that the hood and trunk are fully closed.
3. Check that any items you may be carrying with you inside are
stored properly or fastened down
securely. 4. Check the adjustment of the seat
(see page 51 ).
5. Check the adjustment of the
inside and outside mirrors (see
page 59 ).
6. Chec k
the adjustment of the
steering wheel (see page 43 ).
7. Make sure the doors are securely
closed and locked.
8. Fasten your seat belt. Check that your passengers have fastened
their seat belts (see page 7 ). 9. Turn the ignition ON (II). Check
the indicator lights in the instru-
ment panel.
10.Start th
e
engine.
11.Check the gauges and indicator
lights in the instrument panel
(see page 31 ).
Driving
ProCarManuals.comMain Menu Table of Contents s t
Page 112 of 225

Automatic Transmission
This display is on the instrument panel. It shows you the position of
the shift lever. It also indicates a
possible problem in the transmis-
sion if the "D4" indicator light
flashes.
The shift lever has seven positions. It must be in Park or Neutral to
start the engine. When you are
stopped in D4, D3, 2, 1 or R, press
firmly on the brake pedal and keep
your foot off the accelerator pedal. Park (P) — This position mechani-
cally locks the transmission. Use
Park whenever you are turning off
or starting the engine. To shift out
of Park, you must press on the
brake pedal and have your foot off
the accelerator pedal. Press the
release button on the side of the shift lever to move it. You must also press the release
button to shift into Park. To avoid
transmission damage, come to a
complete stop before shifting into
Park. The shift lever must be in
Park before you can remove the
key from the ignition switch.
If you have done all of the above
and still cannot move the lever out
of Park, see Shift Lock Release on
page 115.
Driving
SHIFT
LEVER
CONTINUEDProCarManuals.comMain Menu Table of Contents s t
Page 117 of 225

The Braking System, Four Wheel Steering
The ABS is self-checking. If
anything goes wrong, the ABS indi-
cator on the instrument panel
comes on (see page 34 ). This means
the Anti-lock function of the brak-
ing system has shut down. The
brakes still work like a convention-
al system, providing normal stop- ping ability. You should have the
dealer inspect your car as soon as
possible.
The ABS works by comparing the
speed of the wheels. When re-
placing tires, use the same size
originally supplied with the car.
Tire size and construction can
affect wheel speed and may cause
the system to work inconsistently.
A car with ABS may require a
longer distance to stop on loose or
uneven surfaces than an equivalent
car without Anti-lock. The ABS
cannot make up for road conditions
or bad judgment. It is still yourresponsibility to drive at reasonable
speeds for weather and
traffic
conditions, and to leave a margin of
safety.
For a technical description of the
Anti-lock brake system hardware,
refer to page 208 . Four Wheel Steering
The Si 4WS and SR 4WS models
feature an electronically controlled
system that steers the rear wheels
as you steer the front wheels.
It uses the car's speed, angle of the
front wheels, and the rate that you
turn the steering wheel to steer the
rear wheels in the appropriate
direction and angle.
DrivingProCarManuals.comMain Menu Table of Contents s t
Page 118 of 225

Four Wheel Steering, Driving in Bad Weather
At very slow speeds, the rear
wheels steer in the opposite direction to the front wheels. This
helps in maneuvers such as parallelparking and U-turns.
At higher speeds, the rear wheels
first steer in the same direction as the front wheels. This aids with
changing lanes. As you turn the
steering wheel more, the rear
wheels return to straight ahead and
then steer in the opposite direction
to the front wheels. This givesimproved handling when going
around curves at highway speeds. The rear wheels return to the
straight ahead position when you
turn off the engine. They also
return to straight ahead if you sit
still for more than two minutes
with the engine running. They
return to steering mode as soon as
you move the steering wheel or
start to drive away.
The 4WS system is self-checking.
If it detects a problem anywhere in
the system, it turns on the 4WS indicator on the instrument panel
(see page 35) and points the rear
wheels straight ahead. Your car
will then drive like a conventional car without 4WS.
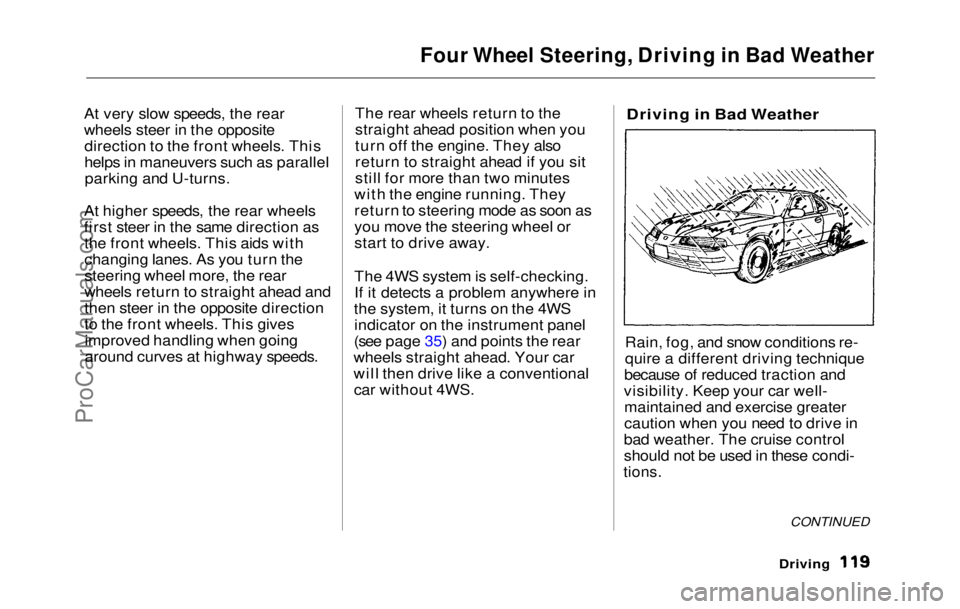
Driving in Bad Weather
Rain, fog, and snow conditions re-
quire a different driving technique
because of reduced traction and
visibility. Keep your car well- maintained and exercise greater
caution when you need to drive in
bad weather. The cruise control
should not be used in these condi-
tions.
CONTINUED
DrivingProCarManuals.comMain Menu Table of Contents s t
Page 204 of 225

Anti-lock Brake System
The Anti-lock Brake System (ABS) is standard equipment on the
Prelude Si, Si 4WS sold in the U.S.
and SR, SR 4WS sold in Canada. It
is not available on any other models.
The ABS works by measuring how
fast the wheels are turning during
braking and comparing their speed.If any wheel is rotating much
slower than the others (on the
verge of locking up and skidding),
the system reduces hydraulicpressure to that wheel's brake
caliper. When that wheel's speed
matches the other wheels, the
system applies normal hydraulic pressure. This can take place
several times per second at each
wheel. You feel the ABS working as rapid pulsations in the brake
pedal.
Each wheel has a wheel speed
sensor assembly. As the wheel
rotates, the sensor sends electrical
pulses to the ABS control unit. The
pulse frequency varies with the
wheel speed.
The electrical output of the ABScontrol unit is connected to the
modulator/solenoid unit. During
braking, the ABS control unit monitors the pulse frequencies
from the four wheels. When the control unit detects a wheel locking
up, it energizes the appropriate
solenoid in the modulator/solenoid
unit. There are three solenoids: one
for each front wheel, and one for
the rear wheels. The energized solenoid reduces hydraulic pres-
sure to one side of a modulator
valve. This, in turn, reduces hydrau- lic pressure in the brake line going
to the affected wheel. When that
wheel speeds up because of the re- duced braking effort, the control unit de-energizes the solenoid. This
builds hydraulic pressure on the
modulator valve. The pressure in-
creases in the hydraulic line to the
wheel.
For the system to react quickly, the
modulator/solenoid unit must have
brake fluid under high pressure.
This is supplied by an accumulator
that is pressurized by an electric pump. A pressure-sensing switch
on the accumulator controls this
pump.
The control unit also contains error detection circuitry. It monitors the
operation of the wheel sensors, solenoids, pump, and electronics. If
the control unit detects any faults,
it shuts off power to the pump
motor and solenoids. The light on
the instrument panel comes on.
The brakes then work like a conventional system without anti-
lock capabilities.
Technical InformationProCarManuals.comMain Menu Table of Contents s t