1991 LEXUS SC400 oil level
[x] Cancel search: oil levelPage 1647 of 4087

The 1 UZ±FE engine has 8±cylinders in a V±arrangement at a bank an\
gle of 905. From the front of the RH
bank cylinders are numbered 2±4±6±8, and from the front of the LH b\
ank cylinders are numbered 1 ±3±5±7.
The crankshaft is supported by 5 bearings specified by the inside of the cr\
ankcase. These bearings are made
of a copper and lead alloy. The crankshaft is integrated with 8 weights which are cast along with it\
for balancing. Oil holes are built
into the center of the crankshaft for supplying oil to the connecting ro\
ds, pistons and other components. The ignition order is 1±8±4±3±6±5±7±2. The cylinder\
head is made of aluminum alloy, with a cross flow
type intake and exhaust layout and with pent±roof type combustion chambers. The spark plugs are loca\
ted in
the center of the combustion chambers.
At the front and rear of the intake manifold, a water passage has been p\
rovided which connects the RH
and LH cylinder heads. Exhaust and intake valves are equipped with irregular pitch springs made\
of special valve spring carbon
steel which are capable of following no matter what the engine speed.
The RH and LH intake camshafts are driven by a single timing belt, and a ge\
ar on the intake camshaft en-
gages with a gear on the exhaust camshaft to drive it. The camshaft jour\
nal is supported at 5 (intake) or 4 (ex-
haust) places between the valve lifters of each cylinder and on the front end of the cylinder \
head. Lubrication
of the cam journal gear is accomplished by oil being supplied through the \
oiler port in the center of the camshaft. Adjustment of the valve clearance is done by means of an outer shim type\
system, in which valve adjusting
shims are located above the valve lifters. This permits replacement of the sh\
ims without removal of the cam-
shafts. Pistons are made of high temperature±resistant aluminum alloy, and a depression is built into the piston
head to prevent interference with valves.
Piston pins are the full±floating type, with the pins fastened to neither the piston boss nor the connecting
rods. Instead, snap rings are fitted on both ends of the pins, preventing the\
pins from falling out. The No.1 compression ring is made of steel and the No.2 compression ring\
is made of cast iron. The oil
ring is m ade of a combination of steel and stainless steel. The outer diameter of\
each piston ring is slightly larger
than the diameter of the piston and the flexibility of the rings allows them\
to hug the cylinder walls when they
are mounted on the piston. Compression rings No.1 and No.2 work to prevent \
the leakage of gas from the cylin-
der and the oil ring works to scrape oil off the cylinder walls to prevent it from entering the combustion chamber. The cylinder block is made of aluminum alloy with a bank angle of 90 5. Cast iron cylinders are installed
inside the cylinder block. It has 8 cylinders which are approximately twice the length of th\
e piston stroke. The
top of each cylinder is closed off by the cylinder heads and the lower end of the cylinders becomes the crank-
case, in which the crankshaft is installed. In addition, the cylinder bl\
ock contains a water jacket, through which
coolant is pumped to cool the cylinders. The No.1 and No.2 oil pans are bolted onto the bottom of the cylinder block\
. The No.1 oil pan is made of
aluminum alloy. The No.2 oil pan is an oil reservoir made of pressed steel sheet. An o\
il level sensor is installed
in the No.1 oil pan (If the oil level drops below a set level, a warnin\
g light lights up.). A oil pan baffle plate keeps
sufficient oil in the bottom of the No.2 oil pan even when the vehicle is tilted. \
This dividing plate also prevents
the oil from making waves when the vehicle is stopped suddenly and the oil \
shifts away from the oil pump suction
pipe. Plastic region tightening bolts are used for the cylinder head, main bearing ca\
p and connecting rod.
EM±4
±
ENGINE MECHANICAL Operation
WhereEverybodyKnowsYourName
Page 1654 of 4087
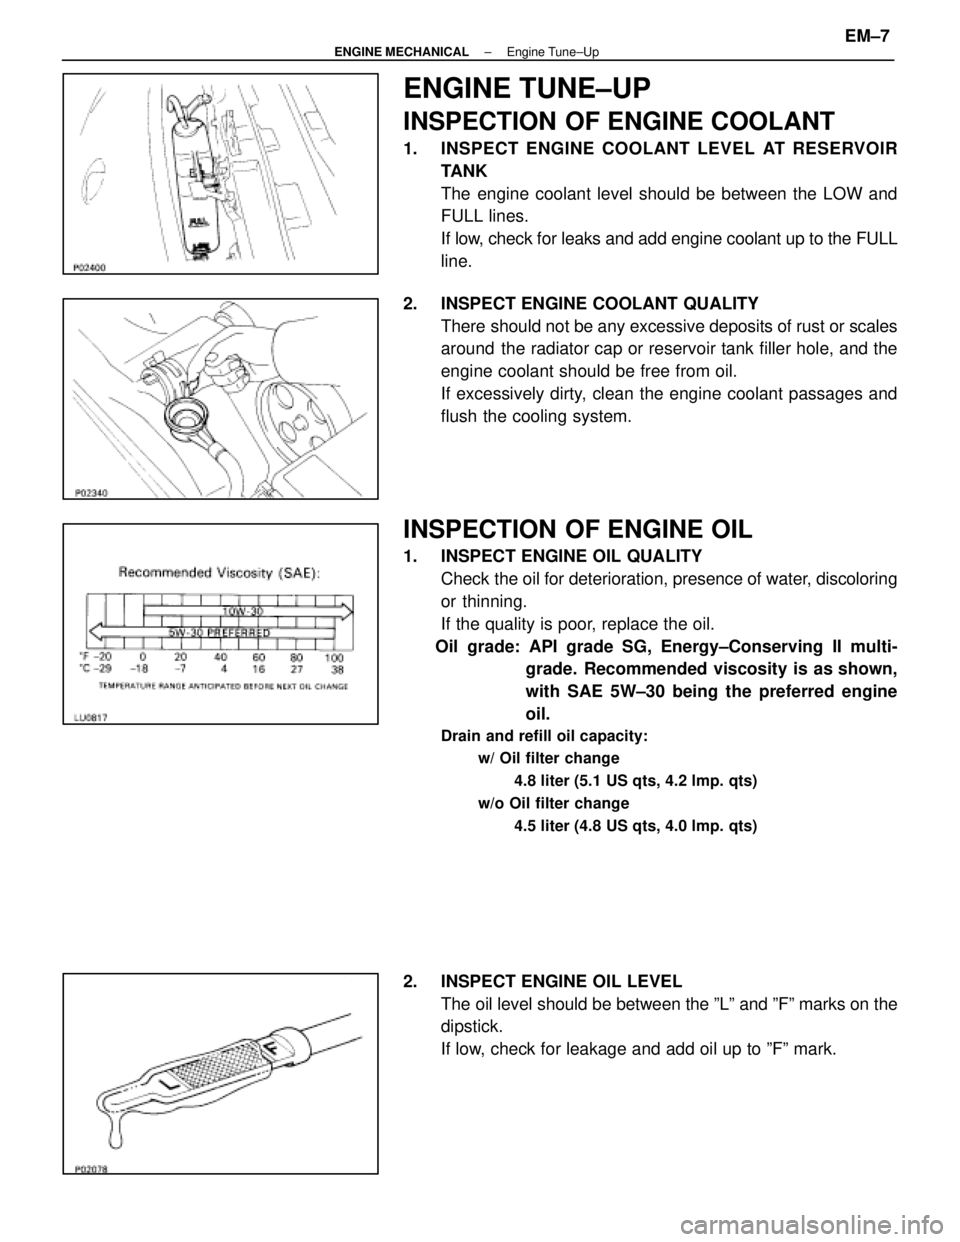
ENGINE TUNE±UP
INSPECTION OF ENGINE COOLANT
1. INSPECT ENGINE COOLANT LEVEL AT RESERVOIRTANK
The engine coolant level should be between the LOW and
FULL lines.
If low, check for leaks and add engine coolant up to the FULL
line.
2. INSPECT ENGINE COOLANT QUALITY There should not be any excessive deposits of rust or scales
around the radiator cap or reservoir tank filler hole, and the
engine coolant should be free from oil.
If excessively dirty, clean the engine coolant passages and
flush the cooling system.
INSPECTION OF ENGINE OIL
1. INSPECT ENGINE OIL QUALITYCheck the oil for deterioration, presence of water, discoloring
or thinning.
If the quality is poor, replace the oil.
Oil grade: API grade SG, Energy±Conserving II multi- grade. Recommended viscosity is as shown,
with SAE 5W±30 being the preferred engine
oil.
Drain and refill oil capacity:
w/ Oil filter change
4.8 liter (5.1 US qts, 4.2 lmp. qts)
w/o Oil filter change 4.5 liter (4.8 US qts, 4.0 lmp. qts)
2. INSPECT ENGINE OIL LEVELThe oil level should be between the ºLº and ºFº marks on the
dipstick.
If low, check for leakage and add oil up to ºFº mark.
±
ENGINE MECHANICAL Engine Tune±UpEM±7
WhereEverybodyKnowsYourName
Page 1655 of 4087
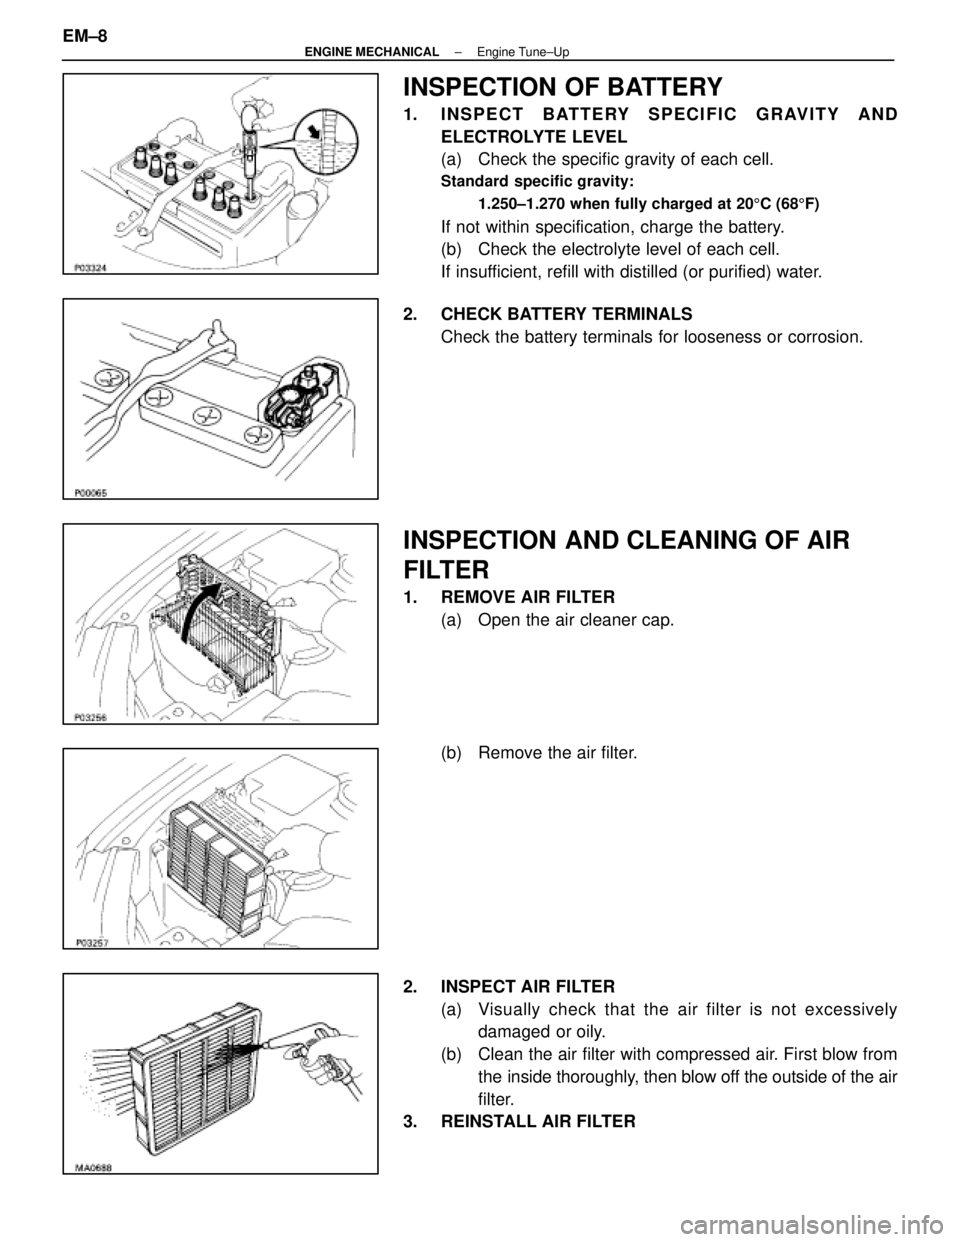
INSPECTION OF BATTERY
1. INSPECT BATTERY SPECIFIC GRAVITY ANDELECTROLYTE LEVEL
(a) Check the specific gravity of each cell.
Standard specific gravity:
1.250±1.270 when fully charged at 20 5C (68 5F)
If not within specification, charge the battery.
(b) Check the electrolyte level of each cell.
If insufficient, refill with distilled (or purified) water.
2. CHECK BATTERY TERMINALS Check the battery terminals for looseness or corrosion.
INSPECTION AND CLEANING OF AIR
FILTER
1. REMOVE AIR FILTER(a) Open the air cleaner cap.
(b) Remove the air filter.
2. INSPECT AIR FILTER (a) Visually check that the air filter is not excessivelydamaged or oily.
(b) Clean the air filter with compressed air. First blow from the inside thoroughly, then blow off the outside of the air
filter.
3. REINSTALL AIR FILTER
EM±8
±
ENGINE MECHANICAL Engine Tune±Up
WhereEverybodyKnowsYourName
Page 1667 of 4087
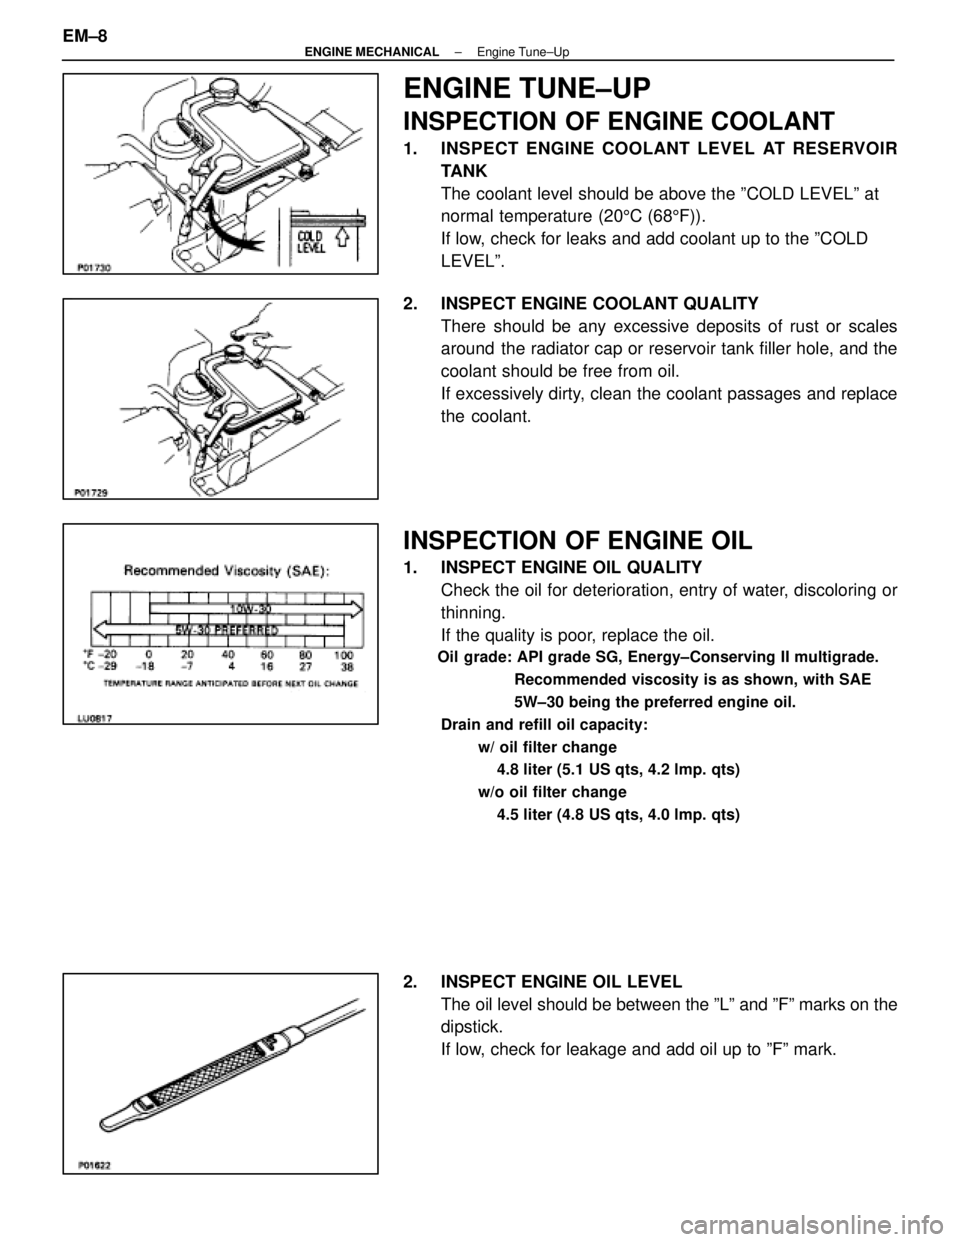
ENGINE TUNE±UP
INSPECTION OF ENGINE COOLANT
1. INSPECT ENGINE COOLANT LEVEL AT RESERVOIRTANK
The coolant level should be above the ºCOLD LEVELº at
normal temperature (20 5C (68 5F)).
If low, check for leaks and add coolant up to the ºCOLD
LEVELº.
2. INSPECT ENGINE COOLANT QUALITY There should be any excessive deposits of rust or scales
around the radiator cap or reservoir tank filler hole, and the
coolant should be free from oil.
If excessively dirty, clean the coolant passages and replace
the coolant.
INSPECTION OF ENGINE OIL
1. INSPECT ENGINE OIL QUALITYCheck the oil for deterioration, entry of water, discoloring or
thinning.
If the quality is poor, replace the oil.
Oil grade: API grade SG, Energy±Conserving II multigrade.
Recommended viscosity is as shown, with SAE
5W±30 being the preferred engine oil.
Drain and refill oil capacity: w/ oil filter change4.8 liter (5.1 US qts, 4.2 lmp. qts)
w/o oil filter change 4.5 liter (4.8 US qts, 4.0 lmp. qts)
2. INSPECT ENGINE OIL LEVEL The oil level should be between the ºLº and ºFº marks on the
dipstick.
If low, check for leakage and add oil up to ºFº mark.
EM±8
±
ENGINE MECHANICAL Engine Tune±Up
WhereEverybodyKnowsYourName
Page 1668 of 4087
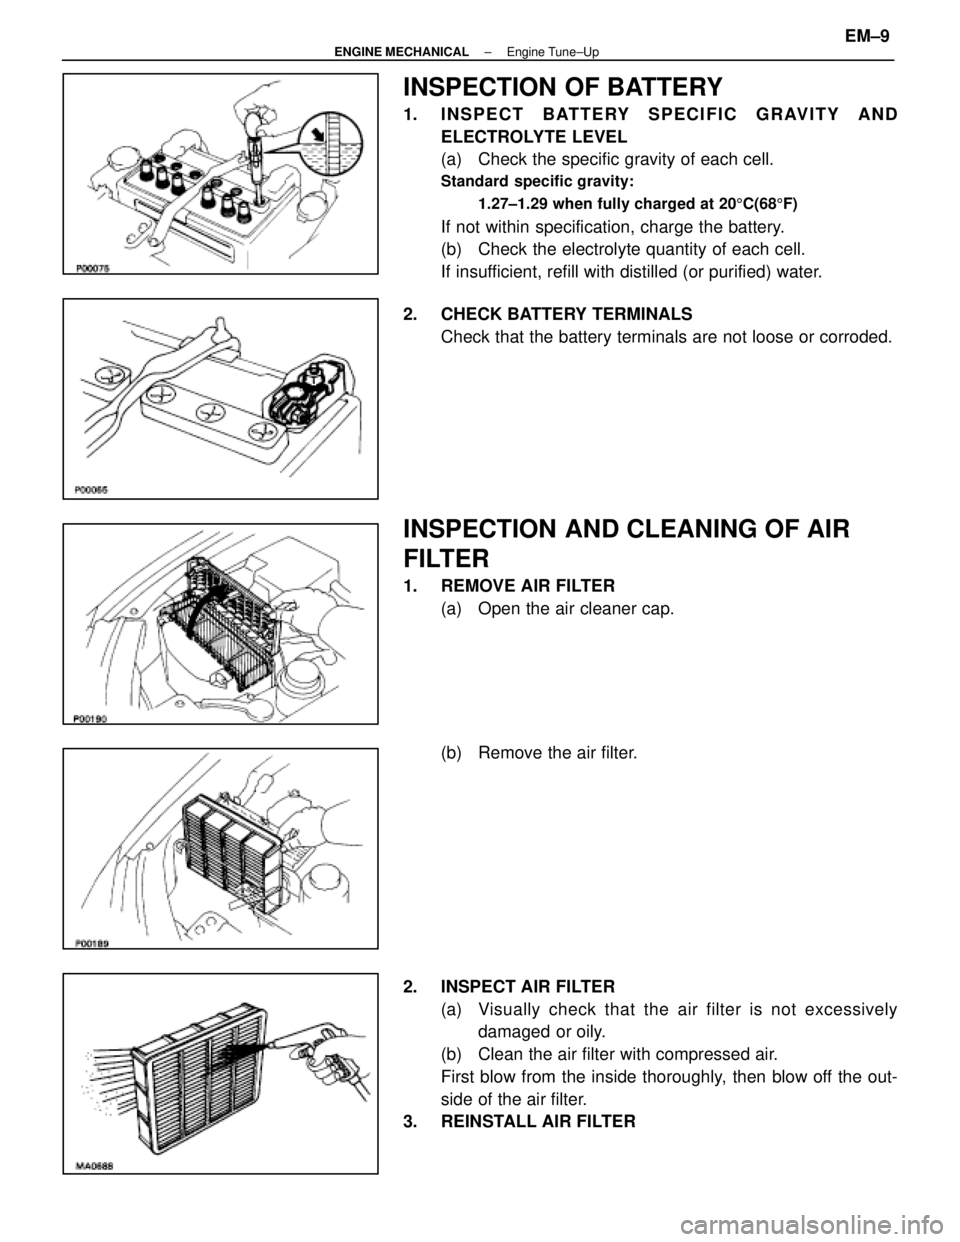
INSPECTION OF BATTERY
1. INSPECT BATTERY SPECIFIC GRAVITY ANDELECTROLYTE LEVEL
(a) Check the specific gravity of each cell.
Standard specific gravity:
1.27±1.29 when fully charged at 20 5C(68 5F)
If not within specification, charge the battery.
(b) Check the electrolyte quantity of each cell.
If insufficient, refill with distilled (or purified) water.
2. CHECK BATTERY TERMINALS Check that the battery terminals are not loose or corroded.
INSPECTION AND CLEANING OF AIR
FILTER
1. REMOVE AIR FILTER(a) Open the air cleaner cap.
(b) Remove the air filter.
2. INSPECT AIR FILTER (a) Visually check that the air filter is not excessivelydamaged or oily.
(b) Clean the air filter with compressed air.
First blow from the inside thoroughly, then blow off the out-
side of the air filter.
3. REINSTALL AIR FILTER
±
ENGINE MECHANICAL Engine Tune±UpEM±9
WhereEverybodyKnowsYourName
Page 1700 of 4087

14. INSTALL NO. 2 AND NO. 3 TIMING BELT COVERS(a) Install the gasket on the timing belt cover.
(b) Using a 5 mm hexagon wrench, install the belt coverswith the nine bolts.
(c) Install the oil filler cap.
15. INSTALL RADIATOR AND WATER PUMP PULLEY (See steps 15, 16, 19 and 24 on pages EM±110 to 112)
16. FILL ENGINE WITH COOLANT (See page CO±5)
Capacity (w/ Heater):
M/T 8.5 liters (9.0 US qts, 7.5 Imp. qts)
A/T 8.4 liters (8.9 US qts, 7.4 Imp. qts)
17. (A/T)CHECK AUTOMATIC TRANSMISSION FLUID LEVEL
(See page MA±11)
NOTICE: Do not overfill.
18. START ENGINE AND CHECK FOR LEAKS
19. CHECK IGNITION TIMING (See page IG±14)
Ignition timing:
105 BTDC @ idle
(w/ Terminals TE1 and E1 connected)
20. PERFORM ROAD TEST Check for abnormal noise, shock, slippage, correct shift
points and smooth operation.
21. RECHECK ENGINE COOLANT LEVEL
±
ENGINE MECHANICAL Timing BeltEM±33
WhereEverybodyKnowsYourName
Page 1735 of 4087
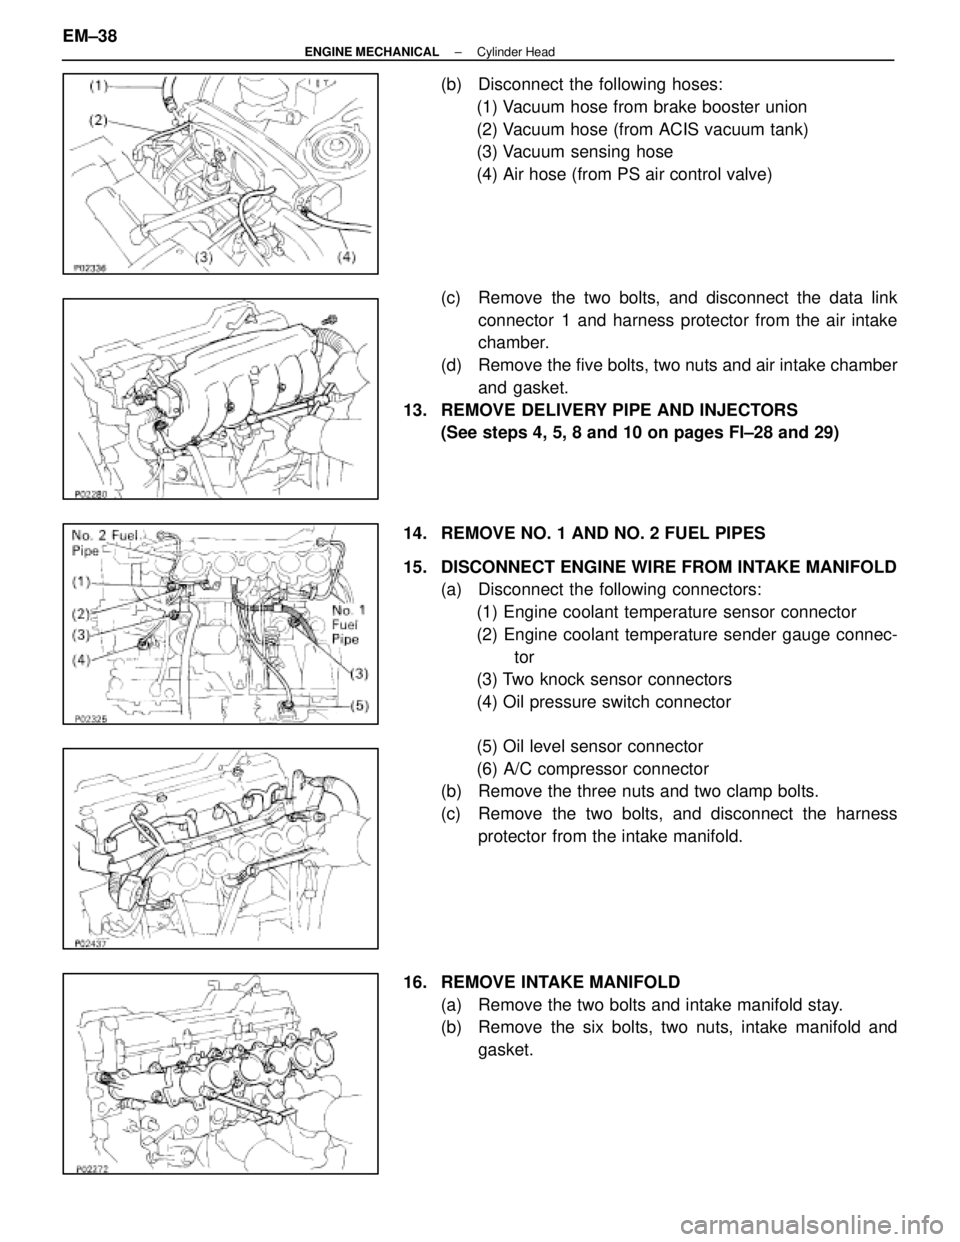
(b) Disconnect the following hoses:(1) Vacuum hose from brake booster union
(2) Vacuum hose (from ACIS vacuum tank)
(3) Vacuum sensing hose
(4) Air hose (from PS air control valve)
(c) Remove the two bolts, and disconnect the data link connector 1 and harness protector from the air intake
chamber.
(d) Remove the five bolts, two nuts and air intake chamber and gasket.
13. REMOVE DELIVERY PIPE AND INJECTORS (See steps 4, 5, 8 and 10 on pages FI±28 and 29)
14. REMOVE NO. 1 AND NO. 2 FUEL PIPES
15. DISCONNECT ENGINE WIRE FROM INTAKE MANIFOLD (a) Disconnect the following connectors:
(1) Engine coolant temperature sensor connector
(2) Engine coolant temperature sender gauge connec- tor
(3) Two knock sensor connectors
(4) Oil pressure switch connector
(5) Oil level sensor connector
(6) A/C compressor connector
(b) Remove the three nuts and two clamp bolts.
(c) Remove the two bolts, and disconnect the harness
protector from the intake manifold.
16. REMOVE INTAKE MANIFOLD (a) Remove the two bolts and intake manifold stay.
(b) Remove the six bolts, two nuts, intake manifold andgasket.
EM±38
±
ENGINE MECHANICAL Cylinder Head
WhereEverybodyKnowsYourName
Page 1756 of 4087
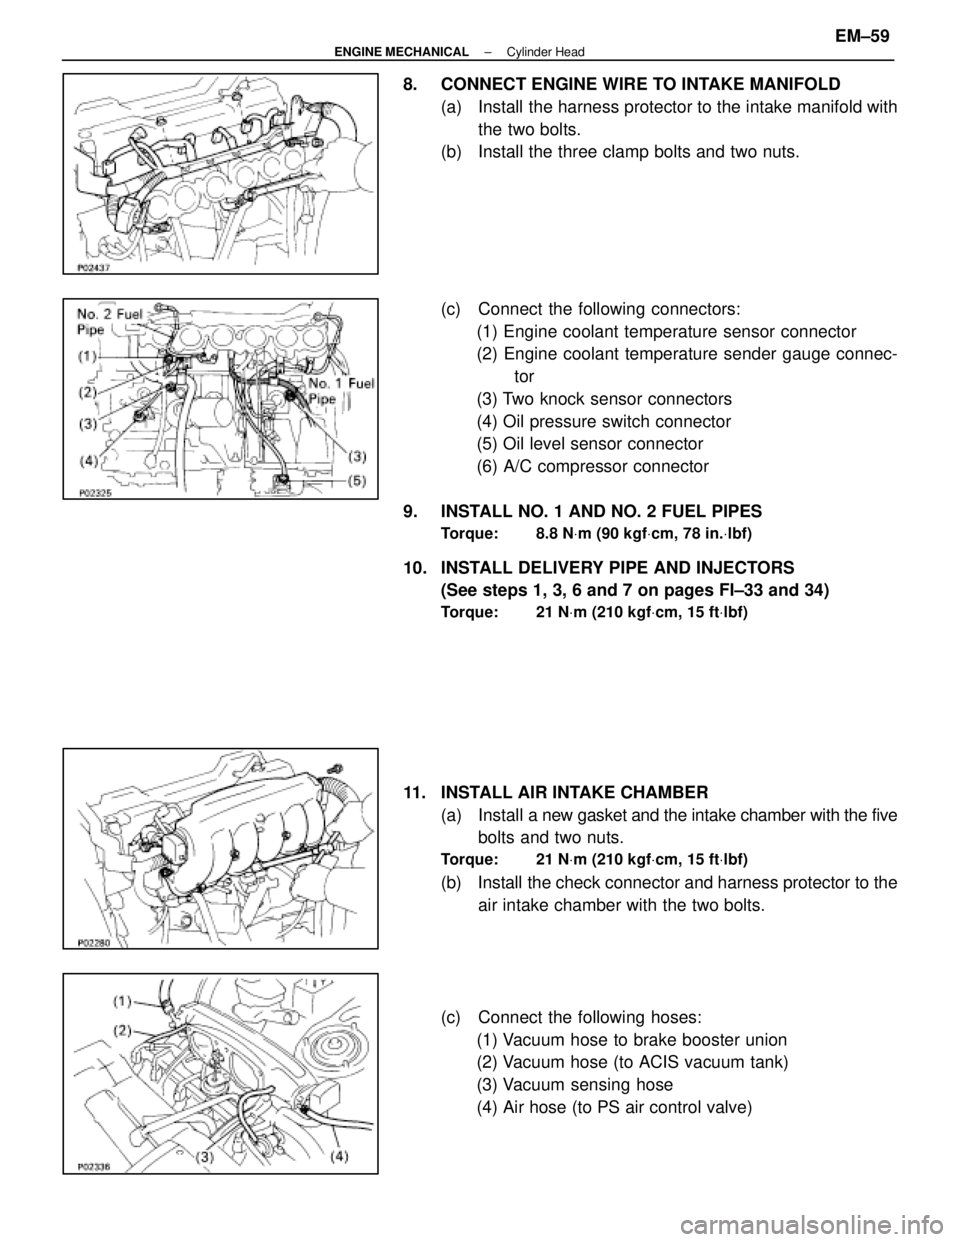
8. CONNECT ENGINE WIRE TO INTAKE MANIFOLD(a) Install the harness protector to the intake manifold withthe two bolts.
(b) Install the three clamp bolts and two nuts.
(c) Connect the following connectors:
(1) Engine coolant temperature sensor connector
(2) Engine coolant temperature sender gauge connec- tor
(3) Two knock sensor connectors
(4) Oil pressure switch connector
(5) Oil level sensor connector
(6) A/C compressor connector
9. INSTALL NO. 1 AND NO. 2 FUEL PIPES
Torque: 8.8 N Vm (90 kgf Vcm, 78 in. Vlbf)
10. INSTALL DELIVERY PIPE AND INJECTORS
(See steps 1, 3, 6 and 7 on pages FI±33 and 34)
Torque: 21 N Vm (210 kgf Vcm, 15 ft Vlbf)
11. INSTALL AIR INTAKE CHAMBER
(a) Install a new gasket and the intake chamber with the five
bolts and two nuts.
Torque: 21 N Vm (210 kgf Vcm, 15 ft Vlbf)
(b) Install the check connector and harness protector to the
air intake chamber with the two bolts.
(c) Connect the following hoses: (1) Vacuum hose to brake booster union
(2) Vacuum hose (to ACIS vacuum tank)
(3) Vacuum sensing hose
(4) Air hose (to PS air control valve)
±
ENGINE MECHANICAL Cylinder HeadEM±59
WhereEverybodyKnowsYourName