Page 43 of 136

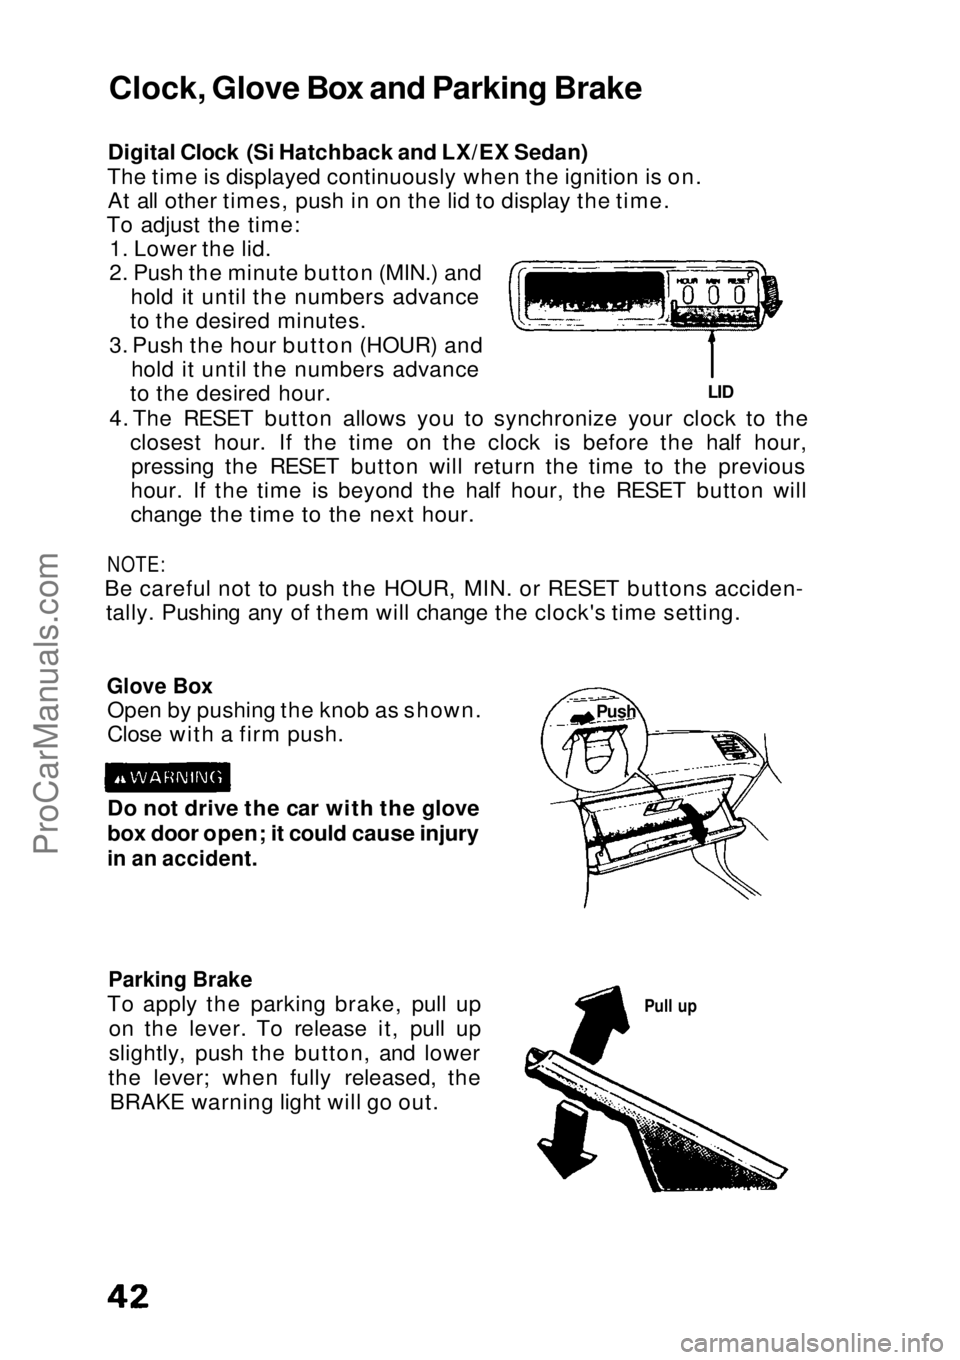
Digital Clock (Si Hatchback and LX/EX Sedan)
The time is displayed continuously when the ignition is on. At all other times, push in on the lid to display the time.
To adjust the time: 1. Lower the lid.
2. Push the minute button (MIN.) and hold it until the numbers advance
to the desired minutes.
3. Push the hour button (HOUR) and hold it until the numbers advance
to the desired hour.
4. The RESET button allows you to synchronize your clock to the closest hour. If the time on the clock is before the half hour,pressing the RESET button will return the time to the previous
hour. If the time is beyond the half hour, the RESET button will
change the time to the next hour.
NOTE:
Be careful not to push the HOUR, MIN. or RESET buttons acciden- tally. Pushing any of them will change the clock's time setting.
Glove Box
Open by pushing the knob as shown.
Close with a firm push.
Parking Brake
To apply the parking brake, pull up on the lever. To release it, pull up
slightly, push the button, and lower
the lever; when fully released, the BRAKE warning light will go out.
Pull up
Do not drive the car with the glove
box door open; it could cause injury
in an accident.
LID
Clock, Glove Box and Parking Brake
PushProCarManuals.comMain Menu s t
Page 48 of 136
Fan Switch
Switch the fan to low ( 1 ), medium ( 2 ), medium high ( 3 ) or high
speed ( 4 ), to circulate warm, cool, or outside air, depending on
where the temperature control dial and function levers are set.
Function Lever
Slide the lever right or left to direct outside air or recirculated (inside) air to and from the heater, air conditioner and vents.
Temperature Control Dial
Turn the dial clockwise to make air warmer with the function lever in any position.
Air Conditioner Switch (optional)
With the fan on, push the A/C switch to operate the air conditioner;
the indicator light will come on. Push the switch again to turn the air conditioner off.
(cont'd)
What the Controls Do:
TEMPERATURECONTROL DIAL RECIRCULATION
LEVER
FAN SWITCH
FUNCTION LEVER AIR CONDITIONER SWITCH
and INDICATOR LIGHT
(optional)ProCarManuals.comMain Menu s t
Page 51 of 136

Heating and Cooling (cont'd)
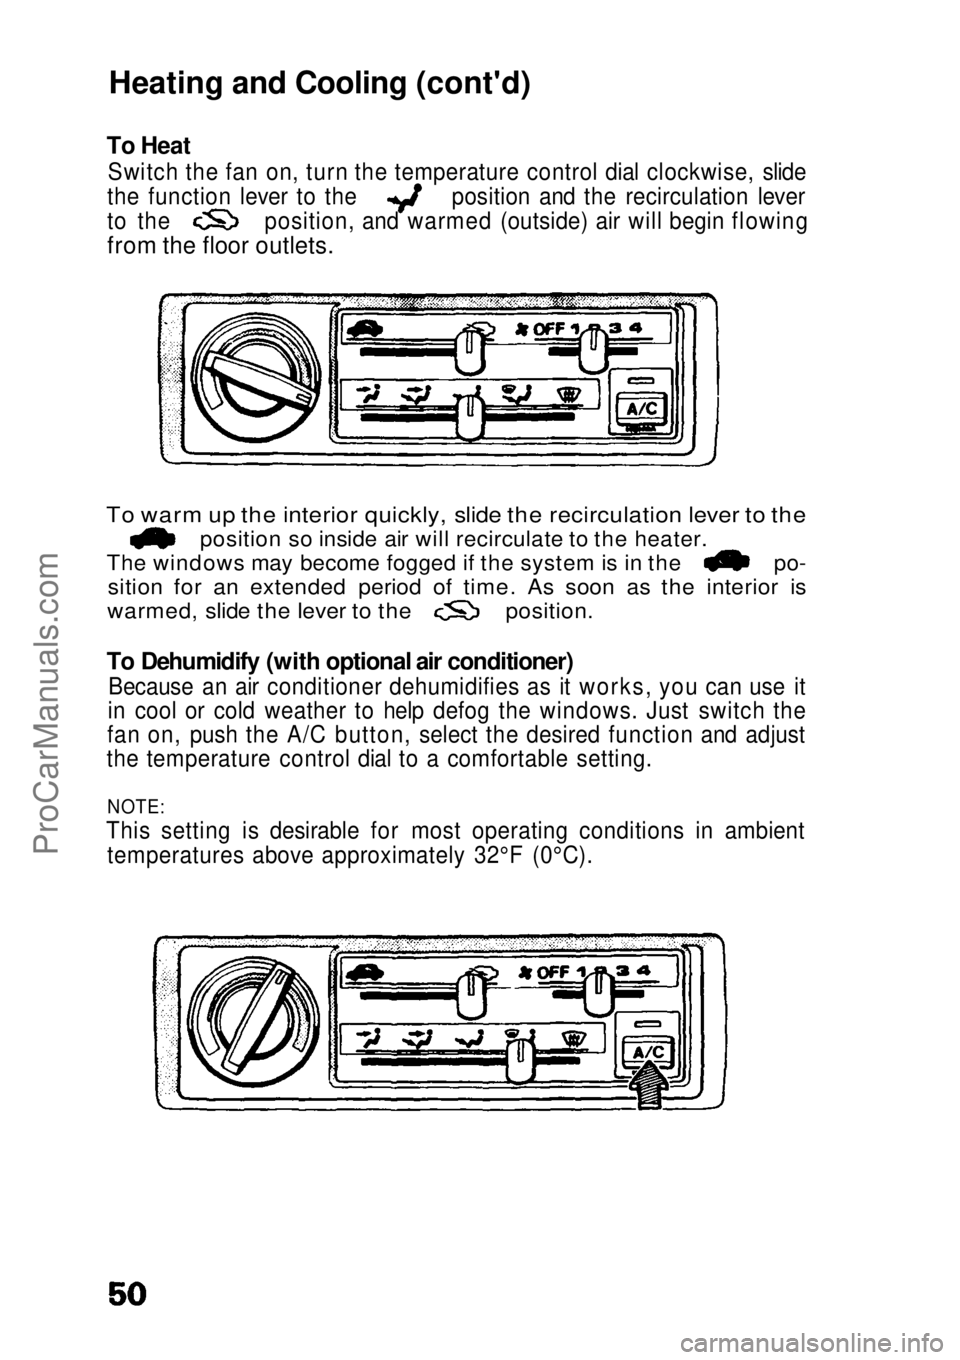
To Heat
Switch the fan on, turn the temperature control dial clockwise, slide the function lever to the position and the recirculation lever
to the position, and warmed (outside) air will begin flowing
from the floor outlets.
To warm up the interior quickly, slide the recirculation lever to the
position so inside air will recirculate to the heater.
The windows may become fogged if the system is in the po-
sition for an extended period of time. As soon as the interior is
warmed, slide the lever to the position.
To Dehumidify (with optional air conditioner)
Because an air conditioner dehumidifies as it works, you can use it
in cool or cold weather to help defog the windows. Just switch the
fan on, push the A/C button, select the desired function and adjust
the temperature control dial to a comfortable setting.
NOTE:
This setting is desirable for most operating conditions in ambient temperatures above approximately 32°F (0°C).ProCarManuals.comMain Menu s t
Page 52 of 136
To Defrost
To defrost or defog the windshield and door windows, turn the
temoerature control dial clockwise, slide the function lever to the
(defrost) position, and switch the fan on.
If there is actual frost on the windows, first select the posi-
tion.
If the windows are fogged, select the position. Warmed air
will then flow from the windshield and side defroster vents.
To Turn Everything OFF
Slide all levers to the left, turn the temperature control dial
counterclockwise all the way, and push the A/C switch off.
NOTE:
This setting should only be used in cold weather for the first fewminutes of driving to prevent cold air from blowing into the cabin.
Under normal operating conditions, the fan should always be kept
ON to prevent the accumulation of stale air in the system.ProCarManuals.comMain Menu s t
Page 107 of 136
To reduce the possibility of injury, be sure to use the jack provided
with the car and the correct jacking points; never use any otherpart of the car for jack support.
6. Set the jack handle extension in the connector on the end of the jack and install the lug wrench/jack handle. Turn the lug wrench/
jack handle clockwise until the tire is slightly off the ground.
JACK HANDLE EXTENSION
LUG WRENCH/JACK HANDLE
7. Remove the center cap by turning
the lock to 90°.
(Center cap: EX Sedan)
8. Remove the lug nuts, wheel cover and wheel.
(Wheel cover: Si/DX Hatchback
and LX/EX Sedan)
(cont'd)
VALVE
LUG NUTS
WHEEL COVERProCarManuals.comMain Menu s t
Page 114 of 136
5. Set the wrench extension into the wrench grip (both provided in
the tool bag) then insert the wrench into the socket and turn it
counterclockwise until the shoulder belt buckle reaches its rear locked position.
WRENCHEXTENSION WRENCH
NOTE:
After the manual operation, make sure that the seat belt warning light is off and the shoulder belt buckle is seated properly in its
locked position.
6. Replace the cover on the center pillar.7. Reinstall the fuse, the fuse remover and both fuse box covers.
Shoulder Belt Buckle (cont'd) (Sedan)
4. Remove the cover located on the center pillar.
COVER
WRENCH GRIPProCarManuals.comMain Menu s t