Page 61 of 136

Engine Exhaust Gas Warning
A properly maintained car is your best protection against exhaust
gas entering the passenger compartment.
The exhaust system should be thoroughly inspected by a compe-
tent mechanic whenever:
The car is raised for oil change.You notice a change in the sound of the exhaust. The exhaust system or the rear or underside of the car is
damaged.
Avoid breathing exhaust gases. They contain carbon monoxide,
which is a colorless, odorless gas that can cause loss of con-
sciousness and eventual death. If you suspect that exhaust gas is entering the passenger compartment, have the cause deter-mined and corrected as soon as possible. If you must driveunder these conditions, drive only with all windows fully open. Do not drive with the hatch/trunk lid open. An open hatch/trunk
may draw exhaust gases into the passenger compartment. If
you must drive with the hatch/trunk open, drive only with all the
windows wide open. Do not run the engine in confined areas, such as garages, any
longer than necessary to move the car in or out.
If you must sit in a parked car with the engine running for more
than a short time, adjust the heating/ventilation system as
follows:
1.Set the function lever to the position.
2.Set the temperature control dial for best comfort. 3.Set the recirculation lever to the position.
4.Turn the fan to the highest speed.
NOTE:
To insure proper operation of the car's ventilation system, keep the
front air inlet clear of snow, mud, leaves or other obstructions.ProCarManuals.comMain Menu s t
Page 76 of 136

Engine Oil and Filter (cont'd)
Fuel Efficient Oil For the best fuel economy from your car, it is recommended that
you use a fuel efficient SG grade oil. This oil is usually identified by
the words such as: "Energy Conserving II," "Gas Saving," and "Fuel Saving," etc.
Changing Oil and Filter
Engine oil and filter should be changed together every 6 months or
7,500 miles (12,000 km), whichever comes first. The filter is located
on the engine block, below the intake manifold. A special "cap
type" oil filter wrench is required (available from your Honda dealer). Use only a genuine Honda filter or its equivalent.
CAUTION:
The oil filter cannot easily be removed from above the engine. For
this reason it is recommended that the oil filter change be done by a skilled mechanic.
1. Start the car to warm up the engine, then shut it off.
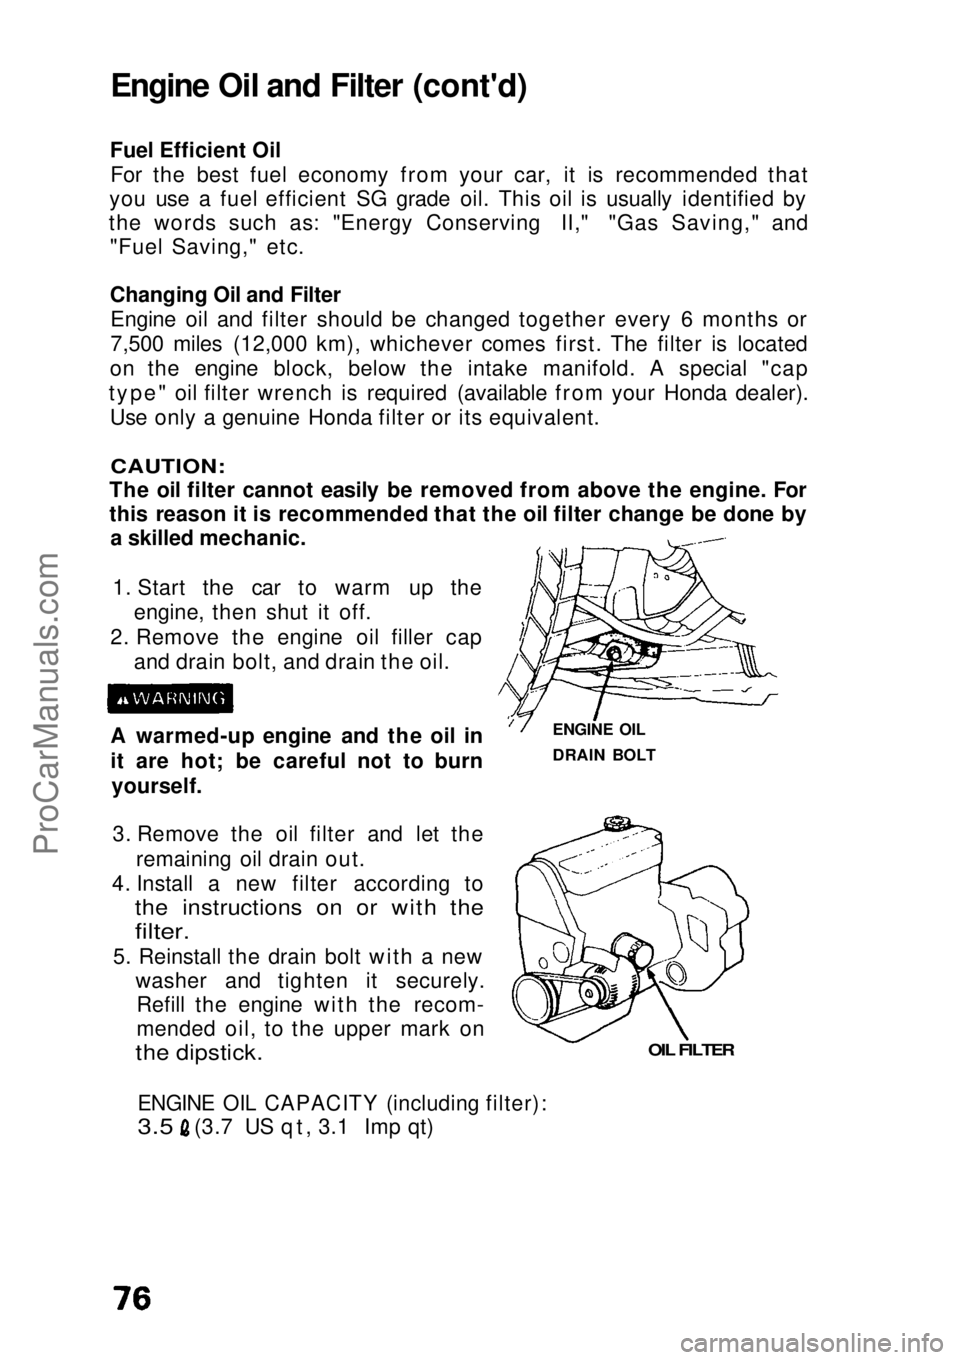
2. Remove the engine oil filler cap and drain bolt, and drain the oil.
A warmed-up engine and the oil in
it are hot; be careful not to burn yourself.
3. Remove the oil filter and let the remaining oil drain out.
4. Install a new filter according to
the instructions on or with the
filter.
5. Reinstall the drain bolt with a new washer and tighten it securely.Refill the engine with the recom-
mended oil, to the upper mark on
the dipstick.
ENGINE OIL CAPACITY (including filter):
3.5
(3.7 US qt, 3.1 Imp qt)
OIL FILTER
ENGINE OIL
DRAIN BOLTProCarManuals.comMain Menu s t
Page 78 of 136

Transmission Oil/Fluid Check
Transmission oil/fluid must be checked with the engine off and the
car on level ground.
If the engine has been running, some engine components may be
hot enough to burn you.
CAUTION:
If the oil/fluid level is low, check for possible leaks before adding
oil. Do not overfill.
Since the transmission and differential are in the same housing, you
are actually checking both oil/fluid levels in one procedure. Change
transmission oil/fluid according to the Maintenance Schedule on
page 70.
Manual
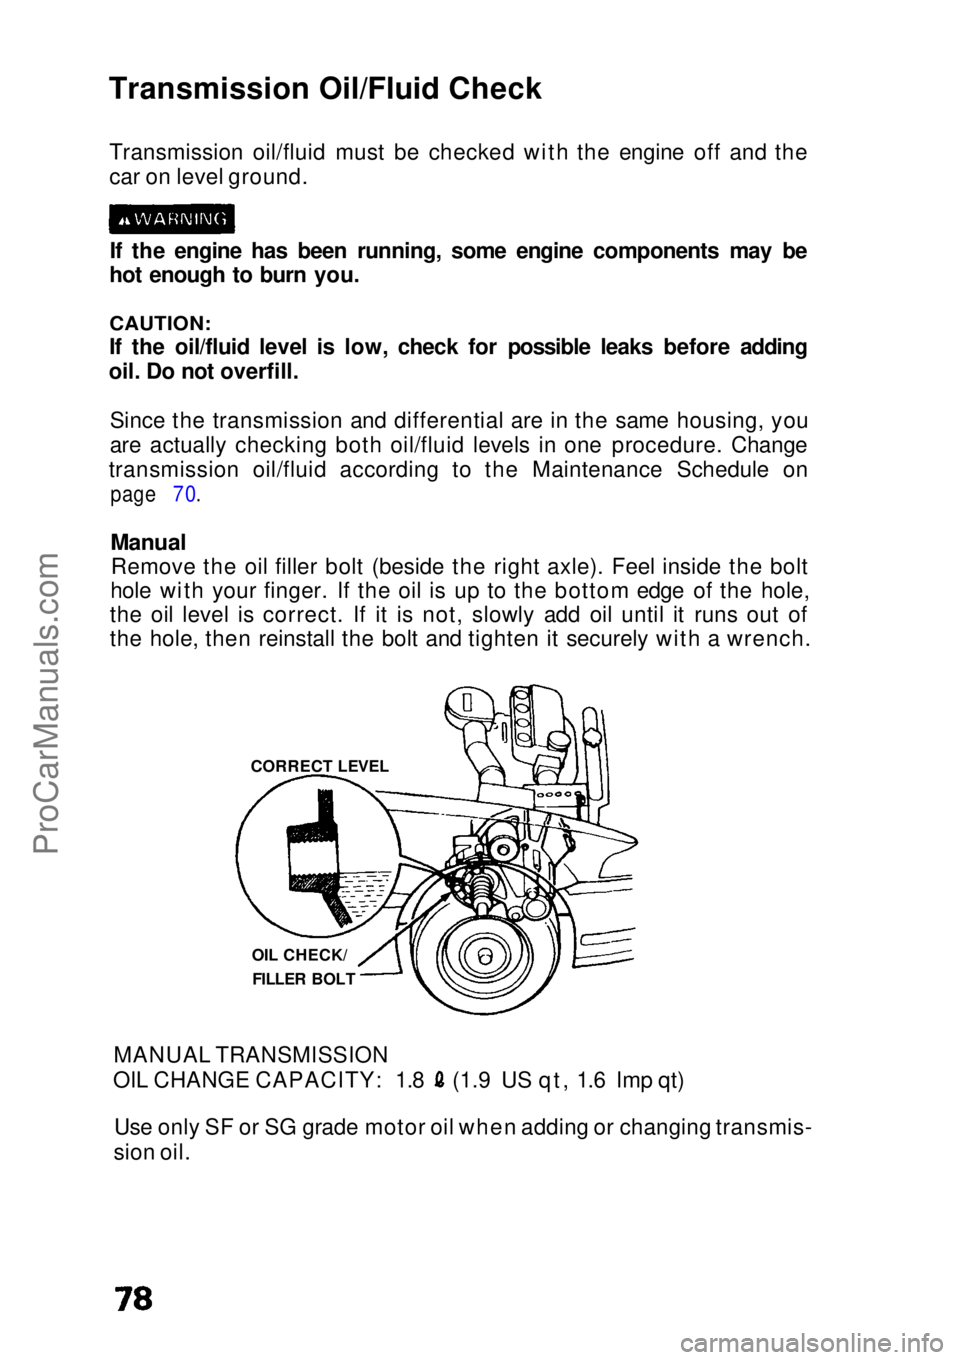
Remove the oil filler bolt (beside the right axle). Feel inside the bolt
hole with your finger. If the oil is up to the bottom edge of the hole,
the oil level is correct. If it is not, slowly add oil until it runs out of
the hole, then reinstall the bolt and tighten it securely with a wrench.
MANUAL TRANSMISSION OIL CHANGE CAPACITY: 1.8 (1.9 US qt, 1.6 Imp qt)
Use only SF or SG grade motor oil when adding or changing transmis-
sion oil. OIL CHECK/
FILLER BOLT
CORRECT LEVELProCarManuals.comMain Menu s t
Page 79 of 136
Use the proper viscosity oil
for the climate in which
you drive:
Ambient Temperature
Automatic
The automatic transmission fluid level is checked (with the engine off and the car on level ground) using the dipstick on the passenger
side of the transmission housing. Remove the dipstick and wipe it
DIPSTICK
UPPER
LOWER
Insert the dipstick and remove it. The fluid level should be between
the upper and lower marks. If necessary, add fluid and recheck. Use only DEXRON
Automatic Transmission Fluid (A.T.F.) when adding or changing fluid.
After checking the fluid level, push the dipstick in securely
AUTOMATIC TRANSMISSION FLUID CHANGE CAPACITY: 2.4 (2.5
US qt, 2.1 Imp qt)ProCarManuals.comMain Menu s t