1988 OPEL VECTRA ignition
[x] Cancel search: ignitionPage 156 of 525
4B
cruising and accelerating. The injector earth is
also switched off on the overrun to improve
fuel economy and reduce exhaust emissions.
Additionally, on the X16 SZ engine, the ECU
also controls the operation of the charcoal
canister purge valve in the evaporative
emission control system.
10The oxygen sensor screwed into the
exhaust manifold provides the ECU with a
constant feedback signal. This enables it to
adjust the mixture (closed-loop control) to
provide the best possible conditions for the
catalytic converter to operate effectively.
11Until the oxygen sensor is fully warmed up
it gives no feedback so the ECU uses
pre-programmed values (open-loop control) to
determine the correct injector pulse width.
When the sensor reaches its normal operating
temperature, its tip (which is sensitive to
oxygen) sends the ECU a varying voltage
depending on the amount of oxygen in the
exhaust gases. If the inlet air/fuel mixture is too
rich, the exhaust gases are low in oxygen so the
sensor sends a low-voltage signal. The voltage
rises as the mixture weakens and the amount of
oxygen rises in the exhaust gases. Peak
conversion efficiency of all major pollutants
occurs if the inlet air/fuel mixture is maintained
at the chemically correct ratio for the complete
combustion of petrol of 14.7 parts (by weight) of
air to 1 part of fuel (the “stoichiometric” ratio).
The sensor output voltage alters in a large step
at this point, the ECU using the signal change
as a reference point and correcting the inlet
air/fuel mixture accordingly by altering the fuel
injector pulse width.
12In addition, the ECU senses battery
voltage, incorporates diagnostic capabilities,
and can both receive and transmit information
by way of the diagnostic connector, thus
permitting engine diagnosis and tuning by
Vauxhall’s TECH1, test equipment.
Motronic system
13The Motronic type is available in several
different versions, depending on model. The
system is under the overall control of the
Motronic engine management system (Chapter
5), which also controls the ignition timing.
14Fuel is supplied from the rear-mounted
fuel tank by an electric fuel pump mounted
under the rear of the vehicle, through a
pressure regulator, to the fuel rail. The fuel rail
acts as a reservoir for the four fuel injectors,
which inject fuel into the cylinder inlet tracts,
upstream of the inlet valves. On SOHC
engines, the fuel injectors receive an electrical
pulse once per crankshaft revolution, which
operates all four injectors simultaneously. On
DOHC engines, sequential fuel injection is
used, whereby each injector receives an
individual electrical pulse allowing the four
injectors to operate independently, which
enables finer control of the fuel supply to each
cylinder. The duration of the electrical pulse
determines the quantity of fuel-injected, and
pulse duration is computed by the Motronic
module, based on the information received
from the various sensors.15On SOHC engines, inlet air passes from
the air cleaner through a vane type airflow
meter, before passing to the cylinder inlet
tracts through the throttle valve. A flap in the
vane airflow meter is deflected in proportion
to the airflow; this deflection is converted into
an electrical signal, and passed to the
Motronic module. A potentiometer screw
located on the airflow meter provides the
means of idle mixture adjustment, by altering
the reference voltage supplied to the Motronic
module.
16On DOHC engines, inlet air passes from
the air cleaner through a hot wire type air
mass meter, before passing to the cylinder
inlet tracts through a two-stage throttle body
assembly. The electrical current required to
maintain the temperature of the hot wire in the
air mass meter is directly proportional to the
mass flow rate of the air trying to cool it. The
current is converted into a signal, which is
passed to the Motronic module. The throttle
body contains two throttle valves that open
progressively, allowing high torque at part
throttle, and full-throttle, high-speed
“breathing” capacity. A potentiometer screw
located on the air mass meter provides the
means of idle mixture adjustment, by altering
the reference voltage supplied to the Motronic
module.
17A throttle position sensor enables the
Motronic module to compute the throttle
position, and on certain models, its rate of
change. Extra fuel can thus be provided for
acceleration when the throttle is opened
suddenly. Information from the throttle
position sensor is also used to cut off the fuel
supply on the overrun, thus improving fuel
economy and reducing exhaust gas
emissions.
18Idle speed is controlled by a variable-
orifice solenoid valve, which regulates the
amount of air bypassing the throttle valve. The
valve is controlled by the Motronic module;
there is no provision for direct adjustment of
the idle speed.
19Additional sensors inform the Motronic
module of engine coolant temperature, air
temperature, and on models fitted with a
catalytic converter, exhaust gas oxygen
content.
20A fuel filter is incorporated in the fuel
supply line, to ensure that the fuel supplied to
the injectors is clean.
21A fuel pump cut-off relay is controlled by
the Motronic module, which cuts the power to
the fuel pump should the engine stop with the
ignition switched on, if there is an accident. All
1993-onwards models equipped with
Motronic systems, have their fuel pump
located inside the fuel tank.
22The later M2.8 system is basically the
same as the earlier M2.5 system apart from
the following:
a)Hot Film Mass Airflow Meter - The hot
wire type unit used previously is replaced
on the M2.8 system by a hot film mass
airflow meter. The operation is the sameexcept that a thin, electrically heated plate
rather than a wire is used. The plate is
maintained at a constant temperature by
electric current as the inlet air mass
passing over the plate tries to cool it. The
current required to maintain the
temperature of the plate is directly
proportional to the mass flow rate of the
inlet air. The current is converted to a
signal that is passed to the Motronic
module.
b)Inlet Air Temperature Sensor -The sensor
is located in the hose between the hot
film mass airflow meter and the air cleaner
for precise monitoring of inlet air
temperature. Signals from the sensor are
used in conjunction with other sensors to
indicate the occurrence of a hot start
condition. The Motronic module then
interprets these signals to alter injector
duration accordingly.
c)Throttle Valve Potentiometer -On the
M2.8 system a throttle valve
potentiometer replaces the throttle valve
switch used previously.
Simtec system
23An increased amount of electronic
components are used instead of mechanical
parts as sensors and actuators with the
Simtec engine management system. This
provides more precise operating data as well
as greater problem free motoring.
24The control unit is equipped with
electronic ignition control. Called ‘Micropro-
cessor Spark Timing System, inductive
triggered’, (or MSTS-i), and means that the
mechanical high voltage distributor is no
longer needed. It is located behind the trim
panel, on the right-hand side footwell (door
pillar).
25The ignition coil is replaced by a dual
spark ignition coil, which is switched directly
by the output stages in the control unit.
26A camshaft sensor will maintain
emergency operation, should the crankshaft
inductive pulse pick-up, malfunction. These
sense TDC (‘Top Dead Centre’), crankshaft
angle and engine speed. The signals are used
by the control unit to calculate ignition point
and for fuel injection.
27The ‘hot film airflow meter’ determines the
mass of air taken in by the engine. The system
uses this information to calculate the correct
amount of fuel needed for injection in the
engine.
28The air inlet temperature sensor (NTC), is
fitted in the air inlet duct between the air
cleaner and the hot mass air flow meter.
29A controlled canister purge valve is
actuated by the system. The tank ventilation is
monitored closely with the Lambda control (or
oxygen sensor) and adaptation by the
computer within the control unit.
30A knock control system is also fitted. This
eliminates the need for octane number
adjustment, as it is performed automatically
through the control unit.
Fuel and exhaust systems - fuel injection models 4B•3
Page 157 of 525
31This engine is also fitted with an EGR
(exhaust gas recirculation) valve and
secondary air injection (AIR - Air Injection
Reactor), to conform to the latest European
exhaust emission limits (as from 1996). The
EGR returns a specific amount of exhaust gas
into the combustion process. This in turn
reduces the formation of nitrogen oxides
(No
x). The secondary air injection system has
an electrically driven air pump that injects air
into the exhaust manifold, reducing the
amount of CO and HC emissions.
2Fuel injection system -
precautions
The fuel injection system is pressurised,
therefore extra care must be taken when
disconnecting fuel lines. When disconnecting
a fuel line union, loosen the union slowly, to
avoid a sudden release of pressure that may
cause fuel to spray out.
Fuel pressure checking must be entrusted
to a Vauxhall dealer, or other specialist, who
has the necessary special equipment.
3System testing - general
3
General
1Apart from basic electrical tests, there is
nothing that can be done by the owner to test
individual fuel system components.2If a fault arises, check first that it is not due
to poor maintenance. Check that the air
cleaner filter element is clean, the spark plugs
are in good condition and correctly gapped.
Check also that the engine breather hoses are
clear and undamaged and that the throttle
cable is correctly adjusted. If the engine is
running very roughly, check the compression
pressures (Chapter 1) and remember the
possibility that one of the hydraulic tappets
might be faulty, producing an incorrect valve
clearance.
3If the fault is thought to be due to a dirty
injector, it is worth trying one of the
established injector-cleaning treatments
before renewing, perhaps unnecessarily, the
injector.
4If the fault persists, check the ignition
system components (as far as possible).
5If the fault is still not eliminated, work
methodically through the system, checking all
fuses, wiring connectors and wiring, looking
for any signs of poor connections, dampness,
corrosion, dirt or other faults.
6Once the system components have been
checked for signs of obvious faults, take the
vehicle to a Vauxhall dealer for the full system
to be tested on special equipment.
7Do not attempt to “test” any component,
but particularly the ECU, with anything other
than the correct test equipment, available at a
Vauxhall dealer. If any of the wires to be
checked lead to a component such as the
ECU, always first unplug the relevant
connector from the system components so
that there is no risk of the component being
damaged by the application of incorrect
voltages from test equipment.
4Air cleaner - removal and
refitting
2
Note:If ‘round type’ air filter is fitted, follow
procedure in Chapter 4A.
Removal
1Unclip the coolant expansion tank hose
from the air cleaner cover, and move it to one
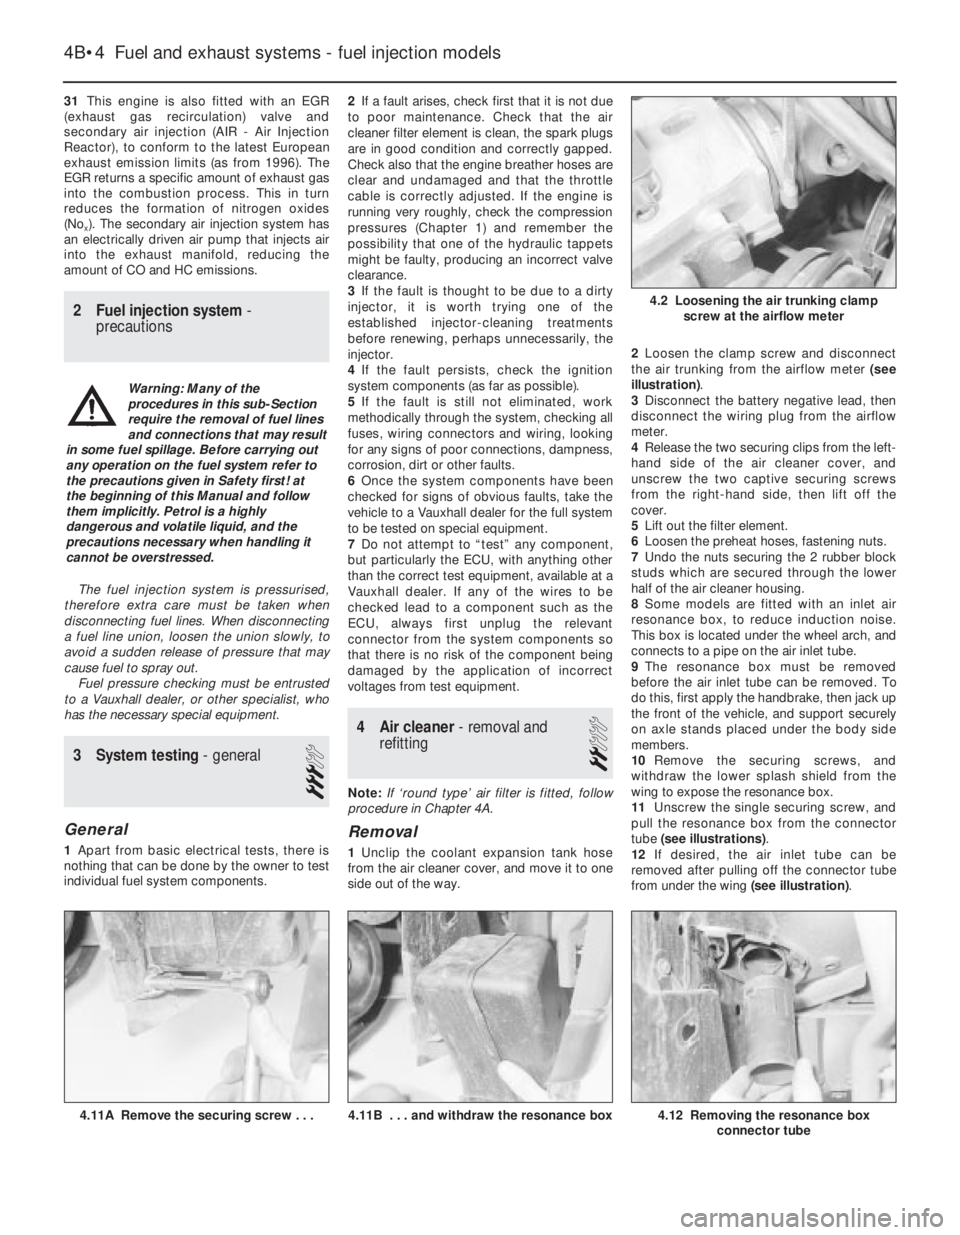
side out of the way.2Loosen the clamp screw and disconnect
the air trunking from the airflow meter (see
illustration).
3Disconnect the battery negative lead, then
disconnect the wiring plug from the airflow
meter.
4Release the two securing clips from the left-
hand side of the air cleaner cover, and
unscrew the two captive securing screws
from the right-hand side, then lift off the
cover.
5Lift out the filter element.
6Loosen the preheat hoses, fastening nuts.
7Undo the nuts securing the 2 rubber block
studs which are secured through the lower
half of the air cleaner housing.
8Some models are fitted with an inlet air
resonance box, to reduce induction noise.
This box is located under the wheel arch, and
connects to a pipe on the air inlet tube.
9The resonance box must be removed
before the air inlet tube can be removed. To
do this, first apply the handbrake, then jack up
the front of the vehicle, and support securely
on axle stands placed under the body side
members.
10Remove the securing screws, and
withdraw the lower splash shield from the
wing to expose the resonance box.
11Unscrew the single securing screw, and
pull the resonance box from the connector
tube (see illustrations).
12If desired, the air inlet tube can be
removed after pulling off the connector tube
from under the wing (see illustration).
4B•4Fuel and exhaust systems - fuel injection models
4.12 Removing the resonance box
connector tube4.11B . . . and withdraw the resonance box4.11A Remove the securing screw . . .
4.2 Loosening the air trunking clamp
screw at the airflow meter
Warning: Many of the
procedures in this sub-Section
require the removal of fuel lines
and connections that may result
in some fuel spillage. Before carrying out
any operation on the fuel system refer to
the precautions given in Safety first! at
the beginning of this Manual and follow
them implicitly. Petrol is a highly
dangerous and volatile liquid, and the
precautions necessary when handling it
cannot be overstressed.
Page 158 of 525

4B
13Manipulate the air inlet tube to release the
securing lugs from the front body panel. This
is a tricky operation, and patience will be
required. For improved access, the headlamp
can be removed, as described in Chapter 12.
Refitting
14Refitting of all components is a reversal of
removal, noting that the air cleaner element
fits with the rubber locating flange uppermost.
5Air box - removal and refitting
2
Removal
1The air box, if fitted, is secured by two or
three bolts to the top of the throttle body.
Take note of the routing and connections of
the inlet air temperature control system
vacuum pipes.
2Disconnect the engine breather hose from
the air box and the vacuum pipe from the
rearmost of the throttle body’s three unions
(see illustration).
3Do not lose the sealing ring as the air box is
withdrawn.
Refitting
4On refitting, ensure that the sealing ring is
seated correctly in the slot in the underside of
the air box, tighten the screws, and reconnect
the vacuum pipe and breather hose (see
illustrations).
6Air temperature control -
description and testing
3
Description
1Fitted to models with Multec systems, air
temperature is controlled by a thermac switch
(thermostat), mounted in the air box. When
the engine is started from cold, the switch is
closed to allow inlet manifold depression to
act on the air temperature control valve in the
air cleaner assembly. This uses a vacuum
servo in the valve assembly to draw a flap
valve across the cold air inlet thus allowing
only (warmed) air from the exhaust manifold to
enter the air cleaner.2As the temperature of the exhaust warmed
air in the air box rises, a bi-metallic strip in the
thermac switch deforms. This opens the
switch to shut off the depression in the air
temperature control valve. The flap is then
lowered gradually across the hot air inlet. Until
the engine is fully warmed up to normal
operating temperature, only cold air from the
front of the vehicle is entering the air cleaner.
Testing
3To check the system, allow the engine to
cool down completely, then remove the air
cleaner cover; the flap valve should be
securely seated across the hot air inlet. Start
the engine. The flap should immediately rise to
close off the cold air inlet. It should then lower
steadily as the engine warms until it is
eventually seated across the hot air inlet again.
4To check the thermac switch, disconnect
the control valve vacuum pipe from the switch
union (on the rear face of the air box) when the
engine is running. With the engine cold, full
inlet manifold depression should be felt
sucking at the union; none at all should be felt
when the engine is fully warmed up.
5To check the air temperature control valve,
remove the air cleaner cover; the flap valve
should be securely seated across the hot air
inlet. Disconnect the control valve vacuum
pipe from the switch union on the rear face of
the air box and suck hard on its end; the flap
should rise to shut off the cold air inlet.
6If either component is faulty, it must be
renewed. This means renewing the air cleaner
lower casing to obtain a new air temperature
control valve, or renewing the air box in the
case of the thermac switch.
7Air temperature sensor (later
models) - removal and
refitting
2
Removal
1Disconnect the battery negative lead.
2Disconnect the wiring plug at the inlet air
temperature sensor.
3Release the hose clips and remove the air
trunking then remove the inlet air temperature
sensor from the trunking.
Refitting
4Refitting is a reversal of removal but ensure
that the air trunking is connected to the
airflow meter as shown (see illustration).
8Depressurising the fuel
system - general
2
General
1The fuel system consisting of the
tank-mounted fuel pump, the fuel filter, the
fuel injector and the pressure regulator in the
throttle body. Metal pipes and flexible hoses
of the fuel lines connect these components.
All these contain fuel that will be under
pressure while the engine is running and/or
while the ignition is switched on.
2The pressure will remain for some time after
the ignition has been switched off and must
be relieved before any of these components
are disturbed.
3Remove either the fuel pump fuse (num-
ber 11) or the fuel pump relay and start the
engine. Allow the engine to idle until it cuts
out. Turn the engine over once or twice on the
starter to ensure that all pressure is released,
then switch off the ignition.
4Do not forget to refit the fuse or relay when
work is complete.
Fuel and exhaust systems - fuel injection models 4B•5
5.4B Do not overtighten the air box
screws
7.4 Removing the intake air temperature
sensor from the air trunking - later models
5.4A Ensure the sealing ring is located in
the air box groove5.2 Vacuum pipe connections to air box
A To throttle body B To air cleaner
Warning: The following
procedures will merely relieve
the pressure in the fuel system.
Remember that fuel will still be
present in the system components, so
take precautions before disconnecting
any of them. Refer to Section 2.
Page 159 of 525

9Fuel filter (‘Out-of-tank’ fuel
pump models) - removal and
refitting
3
Note: Refer to Section 2 before proceeding
Removal
1The fuel filter is located on the fuel pump
bracket under the rear of the vehicle. Either on
the right-hand side of the spare wheel well or
in front of the fuel tank, depending on model
(see illustrations).
2Disconnect the battery negative lead.
3Have a container to hand, to catch the fuel
that will be released as the filter is removed.
4Clamp the fuel hoses on either side of the
filter, to minimise fuel loss when the hoses are
disconnected.
5Loosen the clamp screws, and disconnect
the fuel hoses from the filter. Be prepared for
fuel spillage, and take adequate fire
precautions.
6Loosen the clamp bolt(s), and withdraw the
fuel filter from its bracket. Note the orientation
of the flow direction arrow on the body of the
filter, and the position of the “AUS” (out)
marking on the filter end face.
Refitting
7Refitting is a reversal of removal, ensuring
that the flow direction markings are correctly
orientated.
8Run the engine and check for leaks on
completion. If leakage is evident, stop the
engine immediately, and rectify the problem
without delay.
10Fuel filter (‘In-tank’ fuel
pump models) - removal and
refitting
3
Note: Refer to Section 2 before proceeding
Removal
1Depressurise the fuel system (Section 8).
2Chock the front wheels, jack up the rear of
the vehicle and support it on axle stands
placed under the body side members. (see
“Jacking and Vehicle Support”). The fuel filter
is located at the rear of the fuel tank, on the
right-hand side.3Unclip the fuel hose from the filter mounting
bracket.
4Note carefully any markings on the fuel filter
casing. There should be at least an arrow
(showing the direction of fuel flow) pointing in
the direction of the fuel supply hose leading to
the engine compartment. There may also be
the words “EIN” (in) and “AUS” (out)
embossed in the appropriate end of the
casing.
5Clamp the fuel filter hoses, then slacken the
clips and disconnect the hoses.
6Undo the single screw to release the
mounting bracket, then open the clamp with a
screwdriver to remove the fuel filter (see
illustration).
Refitting
7Fit the new fuel filter using a reversal of the
removal procedure, but ensure that the fuel
flow direction arrow or markings point in the
correct direction. Switch on the ignition and
check carefully for leaks; if any signs of
leakage are detected, the problem must be
rectified before the engine is started.
11Fuel pump - testing
2
Testing
1If the fuel pump is functioning, it should be
possible to hear it “buzzing” by listening
under the rear of the vehicle when the ignition
is switched on. Unless the engine is started,
the fuel pump should switch off after
approximately one second. If the noise
produced is excessive, this may be due to a
faulty fuel flow damper. The damper can be
renewed referring to Section 18, if necessary.
2If the pump appears to have failed
completely, check the appropriate fuse and
relay.
3To test the fuel pump, special equipment is
required, and it is recommended that any
suspected faults are referred to a Vauxhall
dealer.
12Fuel pump (‘Out-of-tank’ fuel
pump models) - removal and
refitting
3
Note: Refer to Section 2 before proceeding
Removal
1The fuel pump is located on a bracket
under the rear of the vehicle, either on the
right-hand side of the spare wheel well or in
front of the fuel tank on other models.
2Disconnect the battery negative lead.
3Have a container to hand, to catch the fuel
that will be released as the damper is
removed.
4Disconnect the wiring plug(s) from the fuel
pump (see illustration).
5Clamp the fuel hoses on either side of the
damper, to minimise fuel loss when the hoses
are disconnected.
6Loosen the clamp screws, and disconnect
the fuel hoses from the pump. Be prepared for
fuel spillage, and take adequate fire
precautions.
7Loosen the clamp bolt, and slide the pump
from its bracket.
Refitting
8Refitting is a reversal of removal, ensuring
that the pump is fitted the correct way round
in its bracket. Push the pump into the rubber
clamping sleeve as far as the rim on the pump
body (see illustration).
4B•6Fuel and exhaust systems - fuel injection models
9.1A Fuel filter (arrowed) - ‘out of tank’,
fuel pump models10.6 Fuel filter - ‘in tank’, fuel pump type
A Clamp screwB Hose clips
12.4 Disconnecting a fuel pump wiring
plug - ‘out of tank’, fuel pump model
9.1B Fuel component assembly - ‘out of
tank’, fuel pump models
1 Fuel filter
2 Fuel flow damper3 Fuel pump
Page 163 of 525
4Where applicable, the only test of the
catalytic converter’s efficiency is to check the
level of CO in the exhaust gas. This is
measured at the tailpipe with the engine
running (with no load) at 3000 rpm. If the CO
level exceeds the specified value, the Vauxhall
test equipment must be used to check the
entire fuel injection/ignition system. If the
engine is mechanically sound, once the
system has been eliminated, the fault must lie
in the converter, which must be renewed.
Motronic systems
Checking
5In order to check the idle mixture adjustment,
the following conditions must be met:
a)The engine must be at normal operating
temperature
b)All electrical consumers (cooling fan,
heater blower, headlamps etc.) must be
switched off
c)The spark plug gaps must be correctly
adjusted see Chapter 1
d)The throttle cable free play must be
correctly adjusted - see Section 19
e)The air inlet trunking must be free from
leaks, and the air filter must be clean
Adjustment
6Connect a tachometer and an exhaust gas
analyser to the vehicle in accordance with the
equipment manufacturer’s instructions.
7Start the engine and turn it at 2000 rpm for
approximately 30 seconds, then allow it to
idle. Check that the idle speed is within the
specified limits. No adjustment of idle speed
is possible, and if outside the specified limits,
the problem should be referred to a dealer.
8With the idle speed correct, check the CO
level in the exhaust gas. If it is outside the
specified limits, adjust by means of the idle
mixture adjustment screw in the airflow meter
or air mass meter, as applicable. In
production, the screw is covered by a
tamperproof plug; ensure that no local or
national laws are being broken before
removing the plug.9If the cooling fan cuts in during the
adjustment procedure, stop the adjustments,
and proceed when the cooling fan stops.
10When the idle mixture is correctly set,
stop the engine and disconnect the test
equipment.
Simtec systems
11Adjustment is not possible on these
models.
21Fuel pressure regulator -
removal and refitting
3
Note:Refer to Section 2 before proceeding
Removal
SOHC models (except Multec systems)
1Disconnect the battery negative lead.
2For improved access, remove the idle
speed adjuster as described in Section 22.
Disconnect the wiring harness housing from
the fuel injectors and move it to one side,
taking care not to strain the wiring. Pull up on
the wiring harness housing, and compress the
wiring plug retaining clips to release the
harness housing from the injectors.
3Position a wad of rag beneath the pressure
regulator, to absorb the fuel that will be
released as the regulator is removed.
4Loosen the clamp screws and disconnect
the fuel hoses from the regulator. Be prepared
for fuel spillage, and take adequate fire
precautions.
5Disconnect the vacuum pipe from the top
of the pressure regulator and withdraw the
regulator.
SOHC models (with Multec system)
6Depressurise the fuel system, as described
in Section 8.
7Remove the air box. Refer to Section 5, if
necessary.
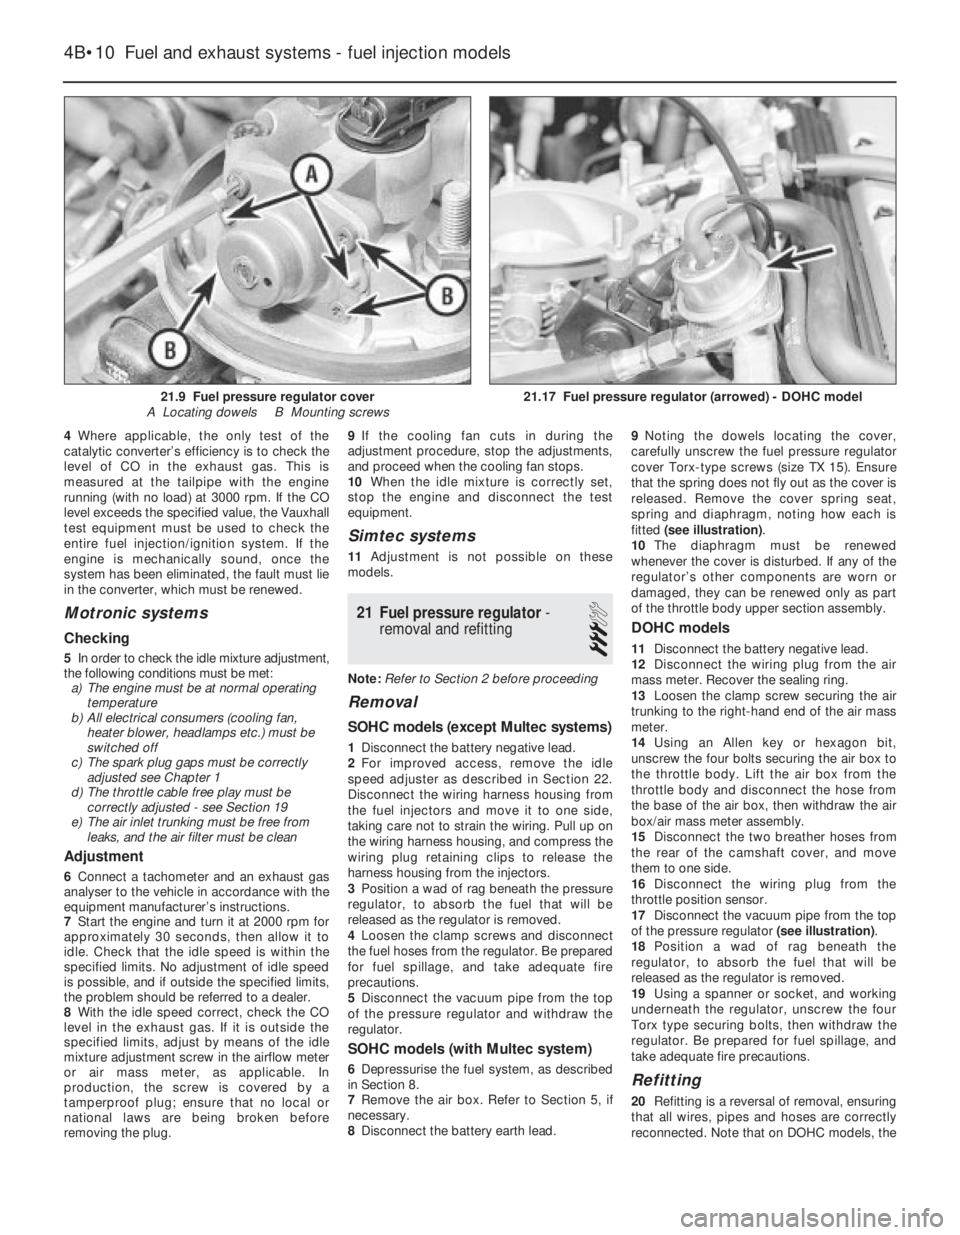
8Disconnect the battery earth lead.9Noting the dowels locating the cover,
carefully unscrew the fuel pressure regulator
cover Torx-type screws (size TX 15). Ensure
that the spring does not fly out as the cover is
released. Remove the cover spring seat,
spring and diaphragm, noting how each is
fitted (see illustration).
10The diaphragm must be renewed
whenever the cover is disturbed. If any of the
regulator’s other components are worn or
damaged, they can be renewed only as part
of the throttle body upper section assembly.
DOHC models
11Disconnect the battery negative lead.
12Disconnect the wiring plug from the air
mass meter. Recover the sealing ring.
13Loosen the clamp screw securing the air
trunking to the right-hand end of the air mass
meter.
14Using an Allen key or hexagon bit,
unscrew the four bolts securing the air box to
the throttle body. Lift the air box from the
throttle body and disconnect the hose from
the base of the air box, then withdraw the air
box/air mass meter assembly.
15Disconnect the two breather hoses from
the rear of the camshaft cover, and move
them to one side.
16Disconnect the wiring plug from the
throttle position sensor.
17Disconnect the vacuum pipe from the top
of the pressure regulator (see illustration).
18Position a wad of rag beneath the
regulator, to absorb the fuel that will be
released as the regulator is removed.
19Using a spanner or socket, and working
underneath the regulator, unscrew the four
Torx type securing bolts, then withdraw the
regulator. Be prepared for fuel spillage, and
take adequate fire precautions.
Refitting
20Refitting is a reversal of removal, ensuring
that all wires, pipes and hoses are correctly
reconnected. Note that on DOHC models, the
4B•10Fuel and exhaust systems - fuel injection models
21.17 Fuel pressure regulator (arrowed) - DOHC model21.9 Fuel pressure regulator cover
A Locating dowels B Mounting screws
Page 164 of 525

regulator vacuum pipe should be routed over
the top of the camshaft cover breather hoses.
21On models with the Multec system note
also the following:
a)Fit the new diaphragm so that it locates in
the throttle body groove.
b)Ensure that the spring and spring seat are
correctly engaged with each other and
with the diaphragm and regulator cover.
Then press the cover over its locating
dowels and hold it in place while the
screws are tightened.
c)Tighten the screws carefully to the
specified torque wrench setting.
22On completion, check the regulator for
leaks, pressurising the system by switching
the ignition on and off several times, before
the engine is started.
22Idle speed adjuster - removal
and refitting
3
Note:Idle speed adjustment on models fitted
with Multec systems, is not possible, as it is
controlled by the ECU. Refer to Section 1.
Removal
SOHC models (except Multec system)
1Disconnect the battery negative lead.
2Disconnect the wiring plug from the idle
speed adjuster (see illustration).
3The adjuster can be removed complete with
its connecting hoses, or separately, leaving
the hoses in place.4Loosen the relevant clamp screws, then
disconnect the hoses, and withdraw the idle
speed adjuster (see illustration).
DOHC models
5Disconnect the battery negative lead.
6Loosen the clamp screw, and disconnect
the hose from underneath the air box on the
throttle body. Remove the clamp from the
hose.
7Apply the handbrake, then jack up the front
of the vehicle, and support securely on axle
stands (see “Jacking and Vehicle Support”)
placed under the body side members.
8Remove the engine undershield, as
described in Chapter 11.
9Working underneath the vehicle,
disconnect the wiring plug from the idle speed
adjuster, which is located underneath the inlet
manifold above the starter motor (see
illustration).
10Loosen the clamp screw and disconnect
the remaining idle speed adjuster hose from
the inlet manifold, then withdraw the adjuster
downwards complete with the hoses.
11If the hoses are to be removed from the
adjuster, mark their locations before removal
so that they can be correctly reconnected.
Once the adjuster has been refitted, it is
impossible to swap the hose positions.
Refitting
12Refitting is a reversal of removal. On
DOHC models ensure that the idle speed
adjuster rests horizontally, with the wiring
routed over the top of the coolant hose. If thewiring is routed under the coolant hose, this
may cause the idle speed adjuster to be bent
downwards, resulting in a restriction or
fracture in the air hose to the inlet manifold.
23Throttle position sensor -
removal and refitting
3
Removal
SOHC models
1Disconnect the battery negative lead.
2Disconnect the wiring plug from the throttle
position sensor (see illustration).
3Remove the two securing screws and
withdraw the sensor from the throttle body
(see illustration).
DOHC models
4Disconnect the battery negative lead.
5Disconnect the wiring plug from the air
mass meter. Recover the sealing ring.
6Loosen the clamp screw securing the air
trunking to the right-hand end of the air mass
meter.
7Using an Allen key or hexagon bit, unscrew
the four bolts securing the air box to the
throttle body. Lift the air box from the throttle
body, and disconnect the hose from the base
of the air box, then withdraw the air box/air
mass meter assembly.
8Disconnect the wiring plug from the throttle
position sensor wiring plug (see illustration).
Fuel and exhaust systems - fuel injection models 4B•11
22.9 Idle speed adjuster (arrowed) viewed
from underneath vehicle -
DOHC model
23.8 Disconnecting the throttle position
sensor wiring plug - DOHC model23.3 Removing a throttle position sensor
securing screw - SOHC early model23.2 Disconnecting the throttle position
sensor wiring plug - early SOHC models
22.4 Withdrawing the idle speed adjuster
complete with hoses - SOHC model
(except with Multec systems)22.2 Disconnecting the idle speed adjuster
wiring plug - SOHC models (except with
Multec systems)
4B
Page 167 of 525
23Disconnect the wiring harness housing
from the fuel injectors, and move it to one
side, taking care not to strain the wiring. Pull
up on the wiring harness housing, and
compress the wiring plug retaining clips to
release the housing from the injectors.
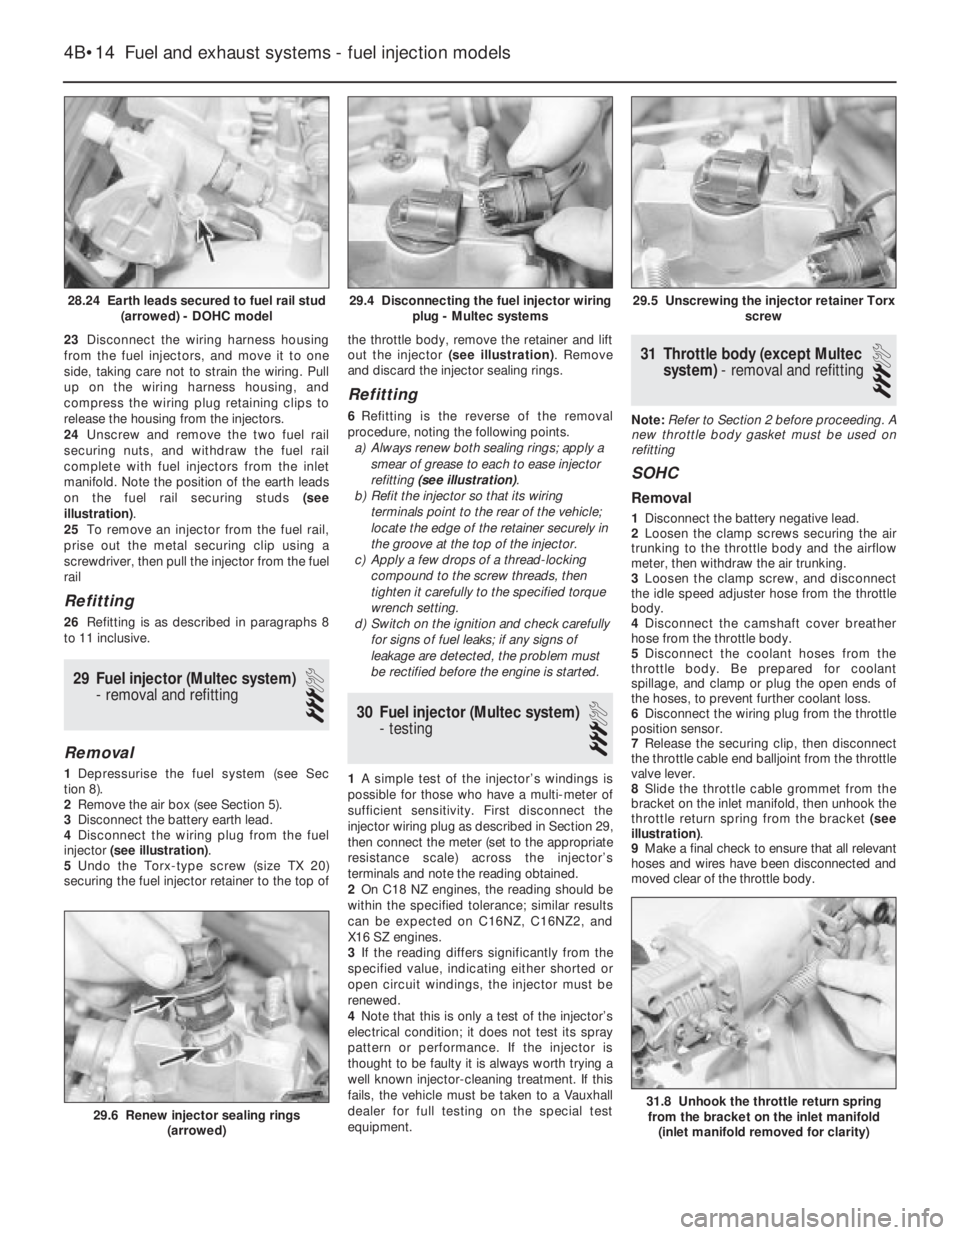
24Unscrew and remove the two fuel rail
securing nuts, and withdraw the fuel rail
complete with fuel injectors from the inlet
manifold. Note the position of the earth leads
on the fuel rail securing studs (see
illustration).
25To remove an injector from the fuel rail,
prise out the metal securing clip using a
screwdriver, then pull the injector from the fuel
rail
Refitting
26Refitting is as described in paragraphs 8
to 11 inclusive.
29Fuel injector (Multec system)
- removal and refitting
3
Removal
1Depressurise the fuel system (see Sec
tion 8).
2Remove the air box (see Section 5).
3Disconnect the battery earth lead.
4Disconnect the wiring plug from the fuel
injector (see illustration).
5Undo the Torx-type screw (size TX 20)
securing the fuel injector retainer to the top ofthe throttle body, remove the retainer and lift
out the injector (see illustration). Remove
and discard the injector sealing rings.
Refitting
6Refitting is the reverse of the removal
procedure, noting the following points.
a)Always renew both sealing rings; apply a
smear of grease to each to ease injector
refitting (see illustration).
b)Refit the injector so that its wiring
terminals point to the rear of the vehicle;
locate the edge of the retainer securely in
the groove at the top of the injector.
c)Apply a few drops of a thread-locking
compound to the screw threads, then
tighten it carefully to the specified torque
wrench setting.
d)Switch on the ignition and check carefully
for signs of fuel leaks; if any signs of
leakage are detected, the problem must
be rectified before the engine is started.
30Fuel injector (Multec system)
- testing
3
1A simple test of the injector’s windings is
possible for those who have a multi-meter of
sufficient sensitivity. First disconnect the
injector wiring plug as described in Section 29,
then connect the meter (set to the appropriate
resistance scale) across the injector’s
terminals and note the reading obtained.
2On C18 NZ engines, the reading should be
within the specified tolerance; similar results
can be expected on C16NZ, C16NZ2, and
X16 SZ engines.
3If the reading differs significantly from the
specified value, indicating either shorted or
open circuit windings, the injector must be
renewed.
4Note that this is only a test of the injector’s
electrical condition; it does not test its spray
pattern or performance. If the injector is
thought to be faulty it is always worth trying a
well known injector-cleaning treatment. If this
fails, the vehicle must be taken to a Vauxhall
dealer for full testing on the special test
equipment.
31Throttle body (except Multec
system) - removal and refitting
3
Note:Refer to Section 2 before proceeding. A
new throttle body gasket must be used on
refitting
SOHC
Removal
1Disconnect the battery negative lead.
2Loosen the clamp screws securing the air
trunking to the throttle body and the airflow
meter, then withdraw the air trunking.
3Loosen the clamp screw, and disconnect
the idle speed adjuster hose from the throttle
body.
4Disconnect the camshaft cover breather
hose from the throttle body.
5Disconnect the coolant hoses from the
throttle body. Be prepared for coolant
spillage, and clamp or plug the open ends of
the hoses, to prevent further coolant loss.
6Disconnect the wiring plug from the throttle
position sensor.
7Release the securing clip, then disconnect
the throttle cable end balljoint from the throttle
valve lever.
8Slide the throttle cable grommet from the
bracket on the inlet manifold, then unhook the
throttle return spring from the bracket (see
illustration).
9Make a final check to ensure that all relevant
hoses and wires have been disconnected and
moved clear of the throttle body.
4B•14Fuel and exhaust systems - fuel injection models
28.24 Earth leads secured to fuel rail stud
(arrowed) - DOHC model29.5 Unscrewing the injector retainer Torx
screw
31.8 Unhook the throttle return spring
from the bracket on the inlet manifold
(inlet manifold removed for clarity)29.6 Renew injector sealing rings
(arrowed)
29.4 Disconnecting the fuel injector wiring
plug - Multec systems
Page 169 of 525
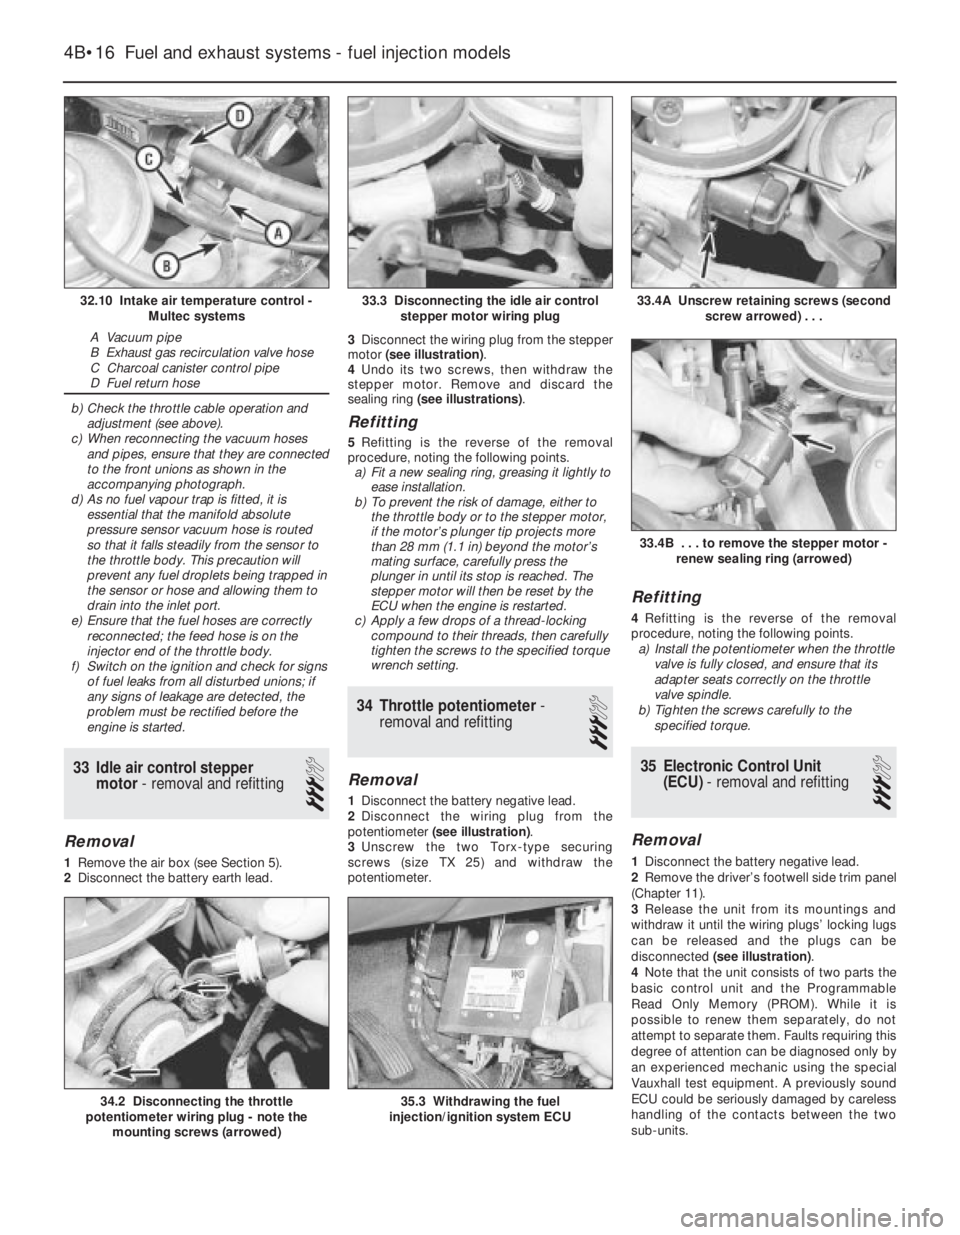
b)Check the throttle cable operation and
adjustment (see above).
c)When reconnecting the vacuum hoses
and pipes, ensure that they are connected
to the front unions as shown in the
accompanying photograph.
d)As no fuel vapour trap is fitted, it is
essential that the manifold absolute
pressure sensor vacuum hose is routed
so that it falls steadily from the sensor to
the throttle body. This precaution will
prevent any fuel droplets being trapped in
the sensor or hose and allowing them to
drain into the inlet port.
e)Ensure that the fuel hoses are correctly
reconnected; the feed hose is on the
injector end of the throttle body.
f)Switch on the ignition and check for signs
of fuel leaks from all disturbed unions; if
any signs of leakage are detected, the
problem must be rectified before the
engine is started.
33Idle air control stepper
motor - removal and refitting
3
Removal
1Remove the air box (see Section 5).
2Disconnect the battery earth lead.3Disconnect the wiring plug from the stepper
motor (see illustration).
4Undo its two screws, then withdraw the
stepper motor. Remove and discard the
sealing ring (see illustrations).
Refitting
5Refitting is the reverse of the removal
procedure, noting the following points.
a)Fit a new sealing ring, greasing it lightly to
ease installation.
b)To prevent the risk of damage, either to
the throttle body or to the stepper motor,
if the motor’s plunger tip projects more
than 28 mm (1.1 in) beyond the motor’s
mating surface, carefully press the
plunger in until its stop is reached. The
stepper motor will then be reset by the
ECU when the engine is restarted.
c)Apply a few drops of a thread-locking
compound to their threads, then carefully
tighten the screws to the specified torque
wrench setting.
34Throttle potentiometer -
removal and refitting
3
Removal
1Disconnect the battery negative lead.
2Disconnect the wiring plug from the
potentiometer (see illustration).
3Unscrew the two Torx-type securing
screws (size TX 25) and withdraw the
potentiometer.
Refitting
4Refitting is the reverse of the removal
procedure, noting the following points.
a)Install the potentiometer when the throttle
valve is fully closed, and ensure that its
adapter seats correctly on the throttle
valve spindle.
b)Tighten the screws carefully to the
specified torque.
35Electronic Control Unit
(ECU) - removal and refitting
3
Removal
1Disconnect the battery negative lead.
2Remove the driver’s footwell side trim panel
(Chapter 11).
3Release the unit from its mountings and
withdraw it until the wiring plugs’ locking lugs
can be released and the plugs can be
disconnected (see illustration).
4Note that the unit consists of two parts the
basic control unit and the Programmable
Read Only Memory (PROM). While it is
possible to renew them separately, do not
attempt to separate them. Faults requiring this
degree of attention can be diagnosed only by
an experienced mechanic using the special
Vauxhall test equipment. A previously sound
ECU could be seriously damaged by careless
handling of the contacts between the two
sub-units.
4B•16Fuel and exhaust systems - fuel injection models
32.10 Intake air temperature control -
Multec systems
A Vacuum pipe
B Exhaust gas recirculation valve hose
C Charcoal canister control pipe
D Fuel return hose
33.4A Unscrew retaining screws (second
screw arrowed) . . .
35.3 Withdrawing the fuel
injection/ignition system ECU34.2 Disconnecting the throttle
potentiometer wiring plug - note the
mounting screws (arrowed)
33.4B . . . to remove the stepper motor -
renew sealing ring (arrowed)
33.3 Disconnecting the idle air control
stepper motor wiring plug