1988 OPEL VECTRA fuel tank removal
[x] Cancel search: fuel tank removalPage 154 of 525
4B
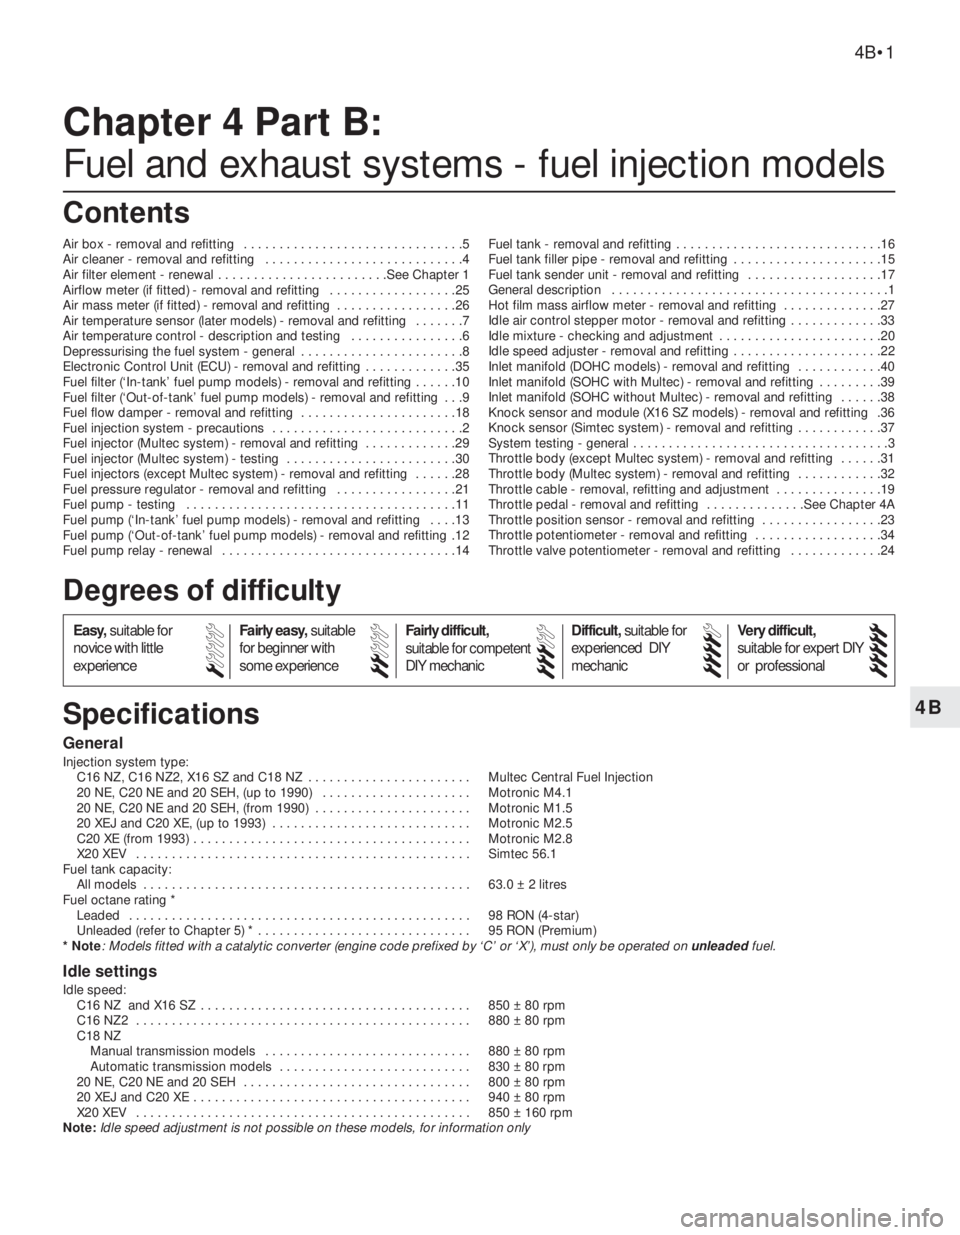
General
Injection system type:
C16 NZ, C16 NZ2, X16 SZ and C18 NZ . . . . . . . . . . . . . . . . . . . . . . . Multec Central Fuel Injection
20 NE, C20 NE and 20 SEH, (up to 1990) . . . . . . . . . . . . . . . . . . . . . Motronic M4.1
20 NE, C20 NE and 20 SEH, (from 1990) . . . . . . . . . . . . . . . . . . . . . . Motronic M1.5
20 XEJ and C20 XE, (up to 1993) . . . . . . . . . . . . . . . . . . . . . . . . . . . . Motronic M2.5
C20 XE (from 1993) . . . . . . . . . . . . . . . . . . . . . . . . . . . . . . . . . . . . . . . Motronic M2.8
X20 XEV . . . . . . . . . . . . . . . . . . . . . . . . . . . . . . . . . . . . . . . . . . . . . . . Simtec 56.1
Fuel tank capacity:
All models . . . . . . . . . . . . . . . . . . . . . . . . . . . . . . . . . . . . . . . . . . . . . . 63.0 ± 2 litres
Fuel octane rating *
Leaded . . . . . . . . . . . . . . . . . . . . . . . . . . . . . . . . . . . . . . . . . . . . . . . . 98 RON (4-star)
Unleaded (refer to Chapter 5) * . . . . . . . . . . . . . . . . . . . . . . . . . . . . . . 95 RON (Premium)
* Note
: Models fitted with a catalytic converter (engine code prefixed by ‘C’ or ‘X’), must only be operated on unleadedfuel.
Idle settings
Idle speed:
C16 NZ and X16 SZ . . . . . . . . . . . . . . . . . . . . . . . . . . . . . . . . . . . . . . 850 ± 80 rpm
C16 NZ2 . . . . . . . . . . . . . . . . . . . . . . . . . . . . . . . . . . . . . . . . . . . . . . . 880 ± 80 rpm
C18 NZ
Manual transmission models . . . . . . . . . . . . . . . . . . . . . . . . . . . . . 880 ± 80 rpm
Automatic transmission models . . . . . . . . . . . . . . . . . . . . . . . . . . . 830 ± 80 rpm
20 NE, C20 NE and 20 SEH . . . . . . . . . . . . . . . . . . . . . . . . . . . . . . . . 800 ± 80 rpm
20 XEJ and C20 XE . . . . . . . . . . . . . . . . . . . . . . . . . . . . . . . . . . . . . . . 940 ± 80 rpm
X20 XEV . . . . . . . . . . . . . . . . . . . . . . . . . . . . . . . . . . . . . . . . . . . . . . . 850 ± 160 rpm
Note:Idle speed adjustment is not possible on these models, for information only
Chapter 4 Part B:
Fuel and exhaust systems - fuel injection models
Air box - removal and refitting . . . . . . . . . . . . . . . . . . . . . . . . . . . . . . .5
Air cleaner - removal and refitting . . . . . . . . . . . . . . . . . . . . . . . . . . . .4
Air filter element - renewal . . . . . . . . . . . . . . . . . . . . . . . .See Chapter 1
Airflow meter (if fitted) - removal and refitting . . . . . . . . . . . . . . . . . .25
Air mass meter (if fitted) - removal and refitting . . . . . . . . . . . . . . . . .26
Air temperature sensor (later models) - removal and refitting . . . . . . .7
Air temperature control - description and testing . . . . . . . . . . . . . . . .6
Depressurising the fuel system - general . . . . . . . . . . . . . . . . . . . . . . .8
Electronic Control Unit (ECU) - removal and refitting . . . . . . . . . . . . .35
Fuel filter (‘In-tank’ fuel pump models) - removal and refitting . . . . . .10
Fuel filter (‘Out-of-tank’ fuel pump models) - removal and refitting . . .9
Fuel flow damper - removal and refitting . . . . . . . . . . . . . . . . . . . . . .18
Fuel injection system - precautions . . . . . . . . . . . . . . . . . . . . . . . . . . .2
Fuel injector (Multec system) - removal and refitting . . . . . . . . . . . . .29
Fuel injector (Multec system) - testing . . . . . . . . . . . . . . . . . . . . . . . .30
Fuel injectors (except Multec system) - removal and refitting . . . . . .28
Fuel pressure regulator - removal and refitting . . . . . . . . . . . . . . . . .21
Fuel pump - testing . . . . . . . . . . . . . . . . . . . . . . . . . . . . . . . . . . . . . .11
Fuel pump (‘In-tank’ fuel pump models) - removal and refitting . . . .13
Fuel pump (‘Out-of-tank’ fuel pump models) - removal and refitting .12
Fuel pump relay - renewal . . . . . . . . . . . . . . . . . . . . . . . . . . . . . . . . .14Fuel tank - removal and refitting . . . . . . . . . . . . . . . . . . . . . . . . . . . . .16
Fuel tank filler pipe - removal and refitting . . . . . . . . . . . . . . . . . . . . .15
Fuel tank sender unit - removal and refitting . . . . . . . . . . . . . . . . . . .17
General description . . . . . . . . . . . . . . . . . . . . . . . . . . . . . . . . . . . . . . .1
Hot film mass airflow meter - removal and refitting . . . . . . . . . . . . . .27
Idle air control stepper motor - removal and refitting . . . . . . . . . . . . .33
Idle mixture - checking and adjustment . . . . . . . . . . . . . . . . . . . . . . .20
Idle speed adjuster - removal and refitting . . . . . . . . . . . . . . . . . . . . .22
Inlet manifold (DOHC models) - removal and refitting . . . . . . . . . . . .40
Inlet manifold (SOHC with Multec) - removal and refitting . . . . . . . . .39
Inlet manifold (SOHC without Multec) - removal and refitting . . . . . .38
Knock sensor and module (X16 SZ models) - removal and refitting .36
Knock sensor (Simtec system) - removal and refitting . . . . . . . . . . . .37
System testing - general . . . . . . . . . . . . . . . . . . . . . . . . . . . . . . . . . . . .3
Throttle body (except Multec system) - removal and refitting . . . . . .31
Throttle body (Multec system) - removal and refitting . . . . . . . . . . . .32
Throttle cable - removal, refitting and adjustment . . . . . . . . . . . . . . .19
Throttle pedal - removal and refitting . . . . . . . . . . . . . .See Chapter 4A
Throttle position sensor - removal and refitting . . . . . . . . . . . . . . . . .23
Throttle potentiometer - removal and refitting . . . . . . . . . . . . . . . . . .34
Throttle valve potentiometer - removal and refitting . . . . . . . . . . . . .24
4B•1
Specifications Contents
Easy,suitable for
novice with little
experienceFairly easy,suitable
for beginner with
some experienceFairly difficult,
suitable for competent
DIY mechanic
Difficult,suitable for
experienced DIY
mechanicVery difficult,
suitable for expert DIY
or professional
Degrees of difficulty
54321
Page 157 of 525
31This engine is also fitted with an EGR
(exhaust gas recirculation) valve and
secondary air injection (AIR - Air Injection
Reactor), to conform to the latest European
exhaust emission limits (as from 1996). The
EGR returns a specific amount of exhaust gas
into the combustion process. This in turn
reduces the formation of nitrogen oxides
(No
x). The secondary air injection system has
an electrically driven air pump that injects air
into the exhaust manifold, reducing the
amount of CO and HC emissions.
2Fuel injection system -
precautions
The fuel injection system is pressurised,
therefore extra care must be taken when
disconnecting fuel lines. When disconnecting
a fuel line union, loosen the union slowly, to
avoid a sudden release of pressure that may
cause fuel to spray out.
Fuel pressure checking must be entrusted
to a Vauxhall dealer, or other specialist, who
has the necessary special equipment.
3System testing - general
3
General
1Apart from basic electrical tests, there is
nothing that can be done by the owner to test
individual fuel system components.2If a fault arises, check first that it is not due
to poor maintenance. Check that the air
cleaner filter element is clean, the spark plugs
are in good condition and correctly gapped.
Check also that the engine breather hoses are
clear and undamaged and that the throttle
cable is correctly adjusted. If the engine is
running very roughly, check the compression
pressures (Chapter 1) and remember the
possibility that one of the hydraulic tappets
might be faulty, producing an incorrect valve
clearance.
3If the fault is thought to be due to a dirty
injector, it is worth trying one of the
established injector-cleaning treatments
before renewing, perhaps unnecessarily, the
injector.
4If the fault persists, check the ignition
system components (as far as possible).
5If the fault is still not eliminated, work
methodically through the system, checking all
fuses, wiring connectors and wiring, looking
for any signs of poor connections, dampness,
corrosion, dirt or other faults.
6Once the system components have been
checked for signs of obvious faults, take the
vehicle to a Vauxhall dealer for the full system
to be tested on special equipment.
7Do not attempt to “test” any component,
but particularly the ECU, with anything other
than the correct test equipment, available at a
Vauxhall dealer. If any of the wires to be
checked lead to a component such as the
ECU, always first unplug the relevant
connector from the system components so
that there is no risk of the component being
damaged by the application of incorrect
voltages from test equipment.
4Air cleaner - removal and
refitting
2
Note:If ‘round type’ air filter is fitted, follow
procedure in Chapter 4A.
Removal
1Unclip the coolant expansion tank hose
from the air cleaner cover, and move it to one
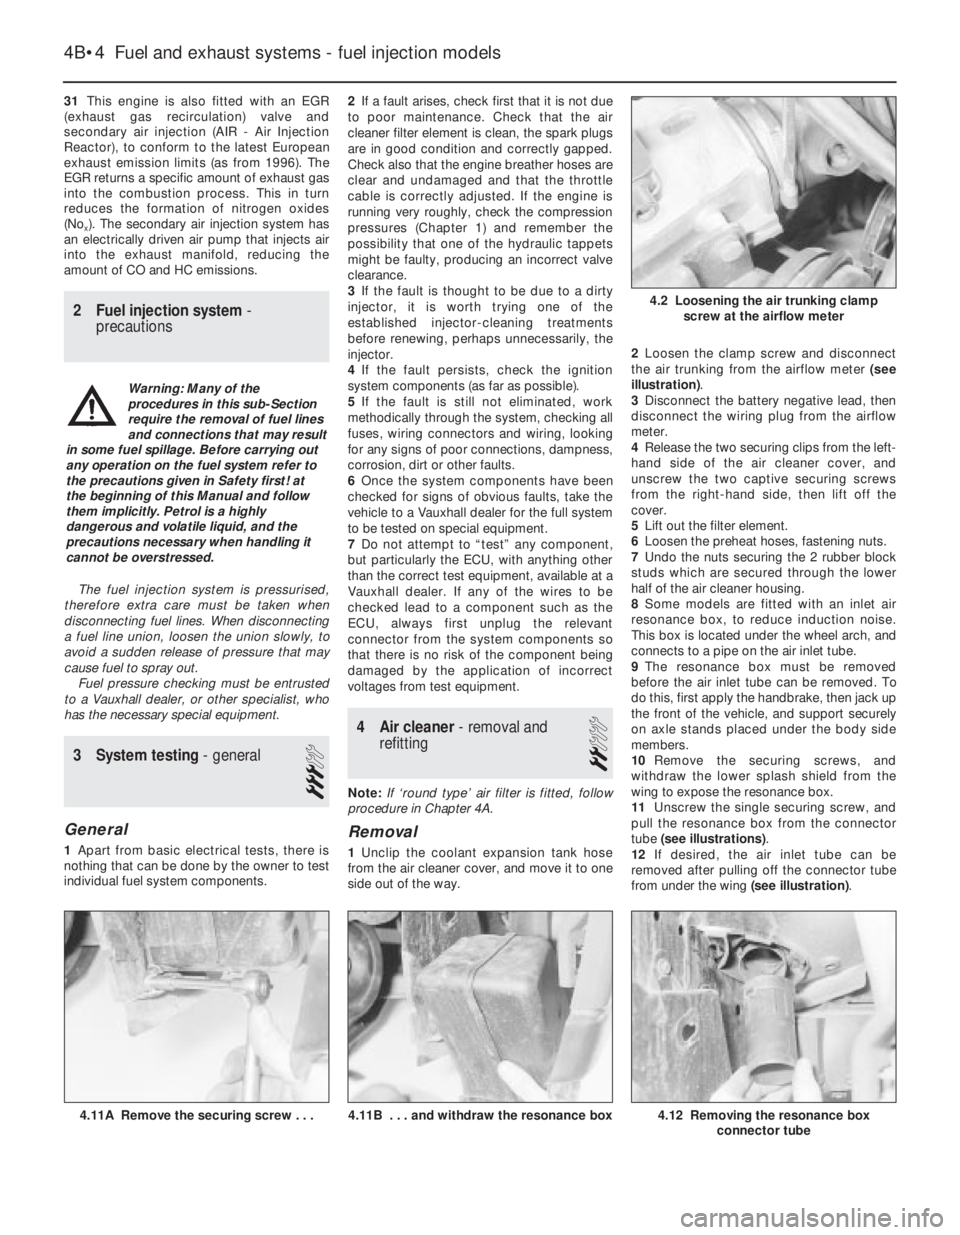
side out of the way.2Loosen the clamp screw and disconnect
the air trunking from the airflow meter (see
illustration).
3Disconnect the battery negative lead, then
disconnect the wiring plug from the airflow
meter.
4Release the two securing clips from the left-
hand side of the air cleaner cover, and
unscrew the two captive securing screws
from the right-hand side, then lift off the
cover.
5Lift out the filter element.
6Loosen the preheat hoses, fastening nuts.
7Undo the nuts securing the 2 rubber block
studs which are secured through the lower
half of the air cleaner housing.
8Some models are fitted with an inlet air
resonance box, to reduce induction noise.
This box is located under the wheel arch, and
connects to a pipe on the air inlet tube.
9The resonance box must be removed
before the air inlet tube can be removed. To
do this, first apply the handbrake, then jack up
the front of the vehicle, and support securely
on axle stands placed under the body side
members.
10Remove the securing screws, and
withdraw the lower splash shield from the
wing to expose the resonance box.
11Unscrew the single securing screw, and
pull the resonance box from the connector
tube (see illustrations).
12If desired, the air inlet tube can be
removed after pulling off the connector tube
from under the wing (see illustration).
4B•4Fuel and exhaust systems - fuel injection models
4.12 Removing the resonance box
connector tube4.11B . . . and withdraw the resonance box4.11A Remove the securing screw . . .
4.2 Loosening the air trunking clamp
screw at the airflow meter
Warning: Many of the
procedures in this sub-Section
require the removal of fuel lines
and connections that may result
in some fuel spillage. Before carrying out
any operation on the fuel system refer to
the precautions given in Safety first! at
the beginning of this Manual and follow
them implicitly. Petrol is a highly
dangerous and volatile liquid, and the
precautions necessary when handling it
cannot be overstressed.
Page 158 of 525

4B
13Manipulate the air inlet tube to release the
securing lugs from the front body panel. This
is a tricky operation, and patience will be
required. For improved access, the headlamp
can be removed, as described in Chapter 12.
Refitting
14Refitting of all components is a reversal of
removal, noting that the air cleaner element
fits with the rubber locating flange uppermost.
5Air box - removal and refitting
2
Removal
1The air box, if fitted, is secured by two or
three bolts to the top of the throttle body.
Take note of the routing and connections of
the inlet air temperature control system
vacuum pipes.
2Disconnect the engine breather hose from
the air box and the vacuum pipe from the
rearmost of the throttle body’s three unions
(see illustration).
3Do not lose the sealing ring as the air box is
withdrawn.
Refitting
4On refitting, ensure that the sealing ring is
seated correctly in the slot in the underside of
the air box, tighten the screws, and reconnect
the vacuum pipe and breather hose (see
illustrations).
6Air temperature control -
description and testing
3
Description
1Fitted to models with Multec systems, air
temperature is controlled by a thermac switch
(thermostat), mounted in the air box. When
the engine is started from cold, the switch is
closed to allow inlet manifold depression to
act on the air temperature control valve in the
air cleaner assembly. This uses a vacuum
servo in the valve assembly to draw a flap
valve across the cold air inlet thus allowing
only (warmed) air from the exhaust manifold to
enter the air cleaner.2As the temperature of the exhaust warmed
air in the air box rises, a bi-metallic strip in the
thermac switch deforms. This opens the
switch to shut off the depression in the air
temperature control valve. The flap is then
lowered gradually across the hot air inlet. Until
the engine is fully warmed up to normal
operating temperature, only cold air from the
front of the vehicle is entering the air cleaner.
Testing
3To check the system, allow the engine to
cool down completely, then remove the air
cleaner cover; the flap valve should be
securely seated across the hot air inlet. Start
the engine. The flap should immediately rise to
close off the cold air inlet. It should then lower
steadily as the engine warms until it is
eventually seated across the hot air inlet again.
4To check the thermac switch, disconnect
the control valve vacuum pipe from the switch
union (on the rear face of the air box) when the
engine is running. With the engine cold, full
inlet manifold depression should be felt
sucking at the union; none at all should be felt
when the engine is fully warmed up.
5To check the air temperature control valve,
remove the air cleaner cover; the flap valve
should be securely seated across the hot air
inlet. Disconnect the control valve vacuum
pipe from the switch union on the rear face of
the air box and suck hard on its end; the flap
should rise to shut off the cold air inlet.
6If either component is faulty, it must be
renewed. This means renewing the air cleaner
lower casing to obtain a new air temperature
control valve, or renewing the air box in the
case of the thermac switch.
7Air temperature sensor (later
models) - removal and
refitting
2
Removal
1Disconnect the battery negative lead.
2Disconnect the wiring plug at the inlet air
temperature sensor.
3Release the hose clips and remove the air
trunking then remove the inlet air temperature
sensor from the trunking.
Refitting
4Refitting is a reversal of removal but ensure
that the air trunking is connected to the
airflow meter as shown (see illustration).
8Depressurising the fuel
system - general
2
General
1The fuel system consisting of the
tank-mounted fuel pump, the fuel filter, the
fuel injector and the pressure regulator in the
throttle body. Metal pipes and flexible hoses
of the fuel lines connect these components.
All these contain fuel that will be under
pressure while the engine is running and/or
while the ignition is switched on.
2The pressure will remain for some time after
the ignition has been switched off and must
be relieved before any of these components
are disturbed.
3Remove either the fuel pump fuse (num-
ber 11) or the fuel pump relay and start the
engine. Allow the engine to idle until it cuts
out. Turn the engine over once or twice on the
starter to ensure that all pressure is released,
then switch off the ignition.
4Do not forget to refit the fuse or relay when
work is complete.
Fuel and exhaust systems - fuel injection models 4B•5
5.4B Do not overtighten the air box
screws
7.4 Removing the intake air temperature
sensor from the air trunking - later models
5.4A Ensure the sealing ring is located in
the air box groove5.2 Vacuum pipe connections to air box
A To throttle body B To air cleaner
Warning: The following
procedures will merely relieve
the pressure in the fuel system.
Remember that fuel will still be
present in the system components, so
take precautions before disconnecting
any of them. Refer to Section 2.
Page 159 of 525

9Fuel filter (‘Out-of-tank’ fuel
pump models) - removal and
refitting
3
Note: Refer to Section 2 before proceeding
Removal
1The fuel filter is located on the fuel pump
bracket under the rear of the vehicle. Either on
the right-hand side of the spare wheel well or
in front of the fuel tank, depending on model
(see illustrations).
2Disconnect the battery negative lead.
3Have a container to hand, to catch the fuel
that will be released as the filter is removed.
4Clamp the fuel hoses on either side of the
filter, to minimise fuel loss when the hoses are
disconnected.
5Loosen the clamp screws, and disconnect
the fuel hoses from the filter. Be prepared for
fuel spillage, and take adequate fire
precautions.
6Loosen the clamp bolt(s), and withdraw the
fuel filter from its bracket. Note the orientation
of the flow direction arrow on the body of the
filter, and the position of the “AUS” (out)
marking on the filter end face.
Refitting
7Refitting is a reversal of removal, ensuring
that the flow direction markings are correctly
orientated.
8Run the engine and check for leaks on
completion. If leakage is evident, stop the
engine immediately, and rectify the problem
without delay.
10Fuel filter (‘In-tank’ fuel
pump models) - removal and
refitting
3
Note: Refer to Section 2 before proceeding
Removal
1Depressurise the fuel system (Section 8).
2Chock the front wheels, jack up the rear of
the vehicle and support it on axle stands
placed under the body side members. (see
“Jacking and Vehicle Support”). The fuel filter
is located at the rear of the fuel tank, on the
right-hand side.3Unclip the fuel hose from the filter mounting
bracket.
4Note carefully any markings on the fuel filter
casing. There should be at least an arrow
(showing the direction of fuel flow) pointing in
the direction of the fuel supply hose leading to
the engine compartment. There may also be
the words “EIN” (in) and “AUS” (out)
embossed in the appropriate end of the
casing.
5Clamp the fuel filter hoses, then slacken the
clips and disconnect the hoses.
6Undo the single screw to release the
mounting bracket, then open the clamp with a
screwdriver to remove the fuel filter (see
illustration).
Refitting
7Fit the new fuel filter using a reversal of the
removal procedure, but ensure that the fuel
flow direction arrow or markings point in the
correct direction. Switch on the ignition and
check carefully for leaks; if any signs of
leakage are detected, the problem must be
rectified before the engine is started.
11Fuel pump - testing
2
Testing
1If the fuel pump is functioning, it should be
possible to hear it “buzzing” by listening
under the rear of the vehicle when the ignition
is switched on. Unless the engine is started,
the fuel pump should switch off after
approximately one second. If the noise
produced is excessive, this may be due to a
faulty fuel flow damper. The damper can be
renewed referring to Section 18, if necessary.
2If the pump appears to have failed
completely, check the appropriate fuse and
relay.
3To test the fuel pump, special equipment is
required, and it is recommended that any
suspected faults are referred to a Vauxhall
dealer.
12Fuel pump (‘Out-of-tank’ fuel
pump models) - removal and
refitting
3
Note: Refer to Section 2 before proceeding
Removal
1The fuel pump is located on a bracket
under the rear of the vehicle, either on the
right-hand side of the spare wheel well or in
front of the fuel tank on other models.
2Disconnect the battery negative lead.
3Have a container to hand, to catch the fuel
that will be released as the damper is
removed.
4Disconnect the wiring plug(s) from the fuel
pump (see illustration).
5Clamp the fuel hoses on either side of the
damper, to minimise fuel loss when the hoses
are disconnected.
6Loosen the clamp screws, and disconnect
the fuel hoses from the pump. Be prepared for
fuel spillage, and take adequate fire
precautions.
7Loosen the clamp bolt, and slide the pump
from its bracket.
Refitting
8Refitting is a reversal of removal, ensuring
that the pump is fitted the correct way round
in its bracket. Push the pump into the rubber
clamping sleeve as far as the rim on the pump
body (see illustration).
4B•6Fuel and exhaust systems - fuel injection models
9.1A Fuel filter (arrowed) - ‘out of tank’,
fuel pump models10.6 Fuel filter - ‘in tank’, fuel pump type
A Clamp screwB Hose clips
12.4 Disconnecting a fuel pump wiring
plug - ‘out of tank’, fuel pump model
9.1B Fuel component assembly - ‘out of
tank’, fuel pump models
1 Fuel filter
2 Fuel flow damper3 Fuel pump
Page 160 of 525

4B
9Run the engine and check for leaks on
completion. If leakage is evident, stop the
engine immediately, and rectify the problem
without delay.
13Fuel pump (‘In-tank’ fuel
pump models) - removal and
refitting
3
Removal
1Depressurise the fuel system (Section 8),
then remove and refit the fuel filler cap to
ensure that the pressure is equalised inside
and outside the tank.
2Disconnect the battery negative terminal.
3Fold forwards the rear seat cushion. Peel
back the floor covering beneath it, then
remove the cover plug from the vehicle floor
to reach the pump mountings (see
illustration).
4Noting exactly how it is connected, and
making your own marks or notes to ensure
that it can be reconnected the same way
round, disconnect the wiring plug from the
pump.
5Release the securing clip and disconnect
the fuel hose from the pump. Clamp or plug
the hose to prevent the loss of fuel and the
entry of dirt.
6Undo the pump mounting bracket screws,
then withdraw the mounting bracket and
pump assembly from the tank. Note the
position of the sealing ring and discard it, then
cover the tank opening as a safety measure
and to prevent the entry of dirt.
7If the pump is to be renewed, first move it to
a clean working area and carry out the
following.
8Prise off the filter at the base of the pump
assembly, then release the securing clamp
and disconnect the mounting
bracket-to-pump fuel hose.
9Making your own marks or notes to ensure
that they can be reconnected the same way
round, unsolder the wires connecting the
pump to the mounting bracket.
10Press the pump out of the rubber sleeve.
Refitting
11Reassembly and refitting are the reverse
of the removal and dismantling procedures,
noting the following points.a)Ensure that the pump is seated correctly
in the sleeve and that the hose is securely
fastened.
b)Ensure that the wires are correctly
reconnected and securely soldered.
c)Always renew the pump mounting
bracket’s sealing ring.
d)Apply a few drops of sealing compound
(i.e. Vauxhall part no. 90485251) to the
threads of the screws, then tighten them
securely, but take care not to distort the
sealing ring.
14Fuel pump relay - renewal
2
The relay is mounted in the engine
compartment relay box (Chapter 12). Where
more than one relay is fitted, the fuel pump
relay is the one with the black base.
15Fuel tank filler pipe - removal
and refitting
3
Removal
1Syphon out any remaining fuel in the tank
into a clean container that is designed for
carrying petrol and is clearly marked as such.
2Raise the bottom edge of the seal
surrounding the filler neck and undo the single
securing screw beneath.
3Chock the front wheels, jack up the rear of
the vehicle and support it securely on axle
stands (see “Jacking and Vehicle Support”)
placed under the body side members.
4Unscrew the single filler pipe mounting bolt
from the underbody, then work along the
length of the pipe, cutting or releasing any
clips or ties securing other pipes or hoses to
it. Releasing their clips, disconnect the filler
and vent hoses from the pipe’s lower end and
the small-bore vent hoses from the unions at
its upper end.
5Having ensured that all components have
been removed or disconnected which mightprevent its removal, manoeuvre the pipe away
from the vehicle’s underside.
6To check the operation of the pipe’s
anti-leak valve, invert the filler pipe and fill the
lower union (now uppermost) with petrol. If
the valve is functioning correctly, no petrol will
leak from the other union. If petrol leaks from
the other union the valve is faulty and the
complete filler pipe must be renewed.
Refitting
7Refitting is the reverse of the removal
procedure, noting the following.
a)Check the condition of all hoses and
clips, renewing any components that are
found to be worn or damaged
b)When reconnecting the small-bore vent
hoses to the unions at the pipe’s upper
end, connect the hose from the charcoal
canister to the uppermost union and the
vent hose from the tank itself to the lower
union (see illustration).
c)Replacing any that were cut on removal
use the clips or ties provided to secure
any other pipes or hoses to the filler pipe.
d)Check carefully for signs of leaks on
refilling the tank; if any signs of leakage
are detected, the problem must be
rectified immediately.
16Fuel tank - removal and
refitting
4
Note: Refer to Section 2 before proceeding
Removal
SOHC models
1The procedure is similar as for models with
carburettors. Refer to Chapter 4A, however
note the following:
a)Depressurise the fuel system (Section 8).
b)On models with C16 NZ and X16 SZ
engines, disconnect the exhaust system
from the manifold.
c)When working on the fuel tank sender
unit, note that there is only one hose to be
disconnected.
Fuel and exhaust systems - fuel injection models 4B•7
15.7 Vent hose connections at fuel tank
filler pipe
A Charcoal canister hose
B Tank vent hose
13.3 Fuel pump - ‘in-tank’, fuel pump
model
A Wiring connector
B Fuel hose clampC Mounting bracket
screws
12.8 Fuel pump clamping sleeve should
rest against rim (arrowed)
Page 161 of 525
d)Disconnect the fuel pump hose and wiring
as described in Section 12.
e)When releasing the tank mounting straps,
note that the fuel filter must either be
moved aside or removed completely,
whichever is most convenient
f)One of the fuel hoses connects to a pipe
in the side of the tank.
DOHC models
2Disconnect the battery negative lead.
3Siphon out any remaining fuel in the tank
through the filler pipe. Siphon the fuel into a
clean metal container that can be sealed.
4Chock the front wheels, then jack up the
rear of the vehicle, and support on axle stands
placed under the body side members (see
“Jacking and Vehicle Support”).
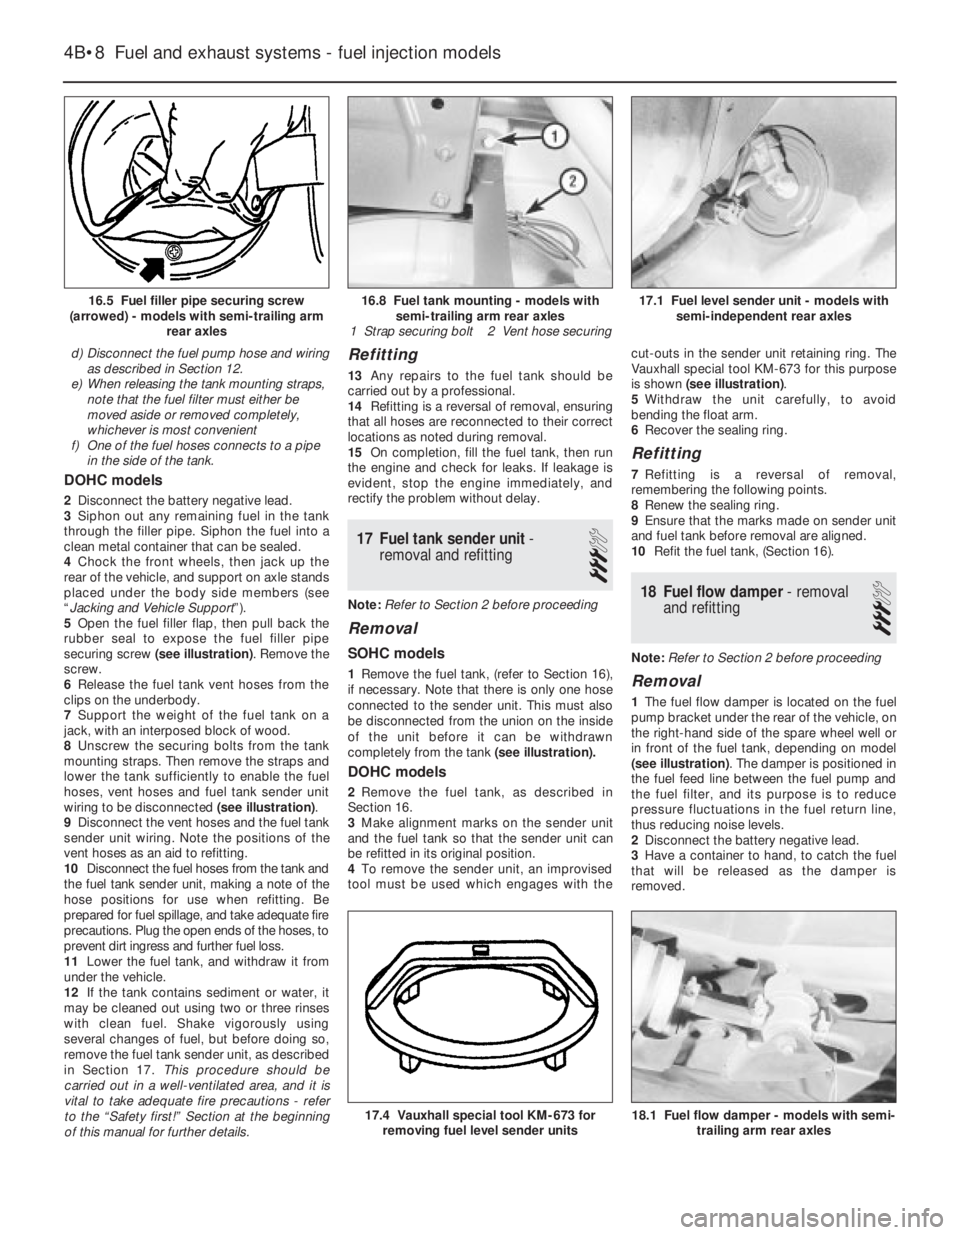
5Open the fuel filler flap, then pull back the
rubber seal to expose the fuel filler pipe
securing screw (see illustration). Remove the
screw.
6Release the fuel tank vent hoses from the
clips on the underbody.
7Support the weight of the fuel tank on a
jack, with an interposed block of wood.
8Unscrew the securing bolts from the tank
mounting straps. Then remove the straps and
lower the tank sufficiently to enable the fuel
hoses, vent hoses and fuel tank sender unit
wiring to be disconnected (see illustration).
9Disconnect the vent hoses and the fuel tank
sender unit wiring. Note the positions of the
vent hoses as an aid to refitting.
10Disconnect the fuel hoses from the tank and
the fuel tank sender unit, making a note of the
hose positions for use when refitting. Be
prepared for fuel spillage, and take adequate fire
precautions. Plug the open ends of the hoses, to
prevent dirt ingress and further fuel loss.
11Lower the fuel tank, and withdraw it from
under the vehicle.
12If the tank contains sediment or water, it
may be cleaned out using two or three rinses
with clean fuel. Shake vigorously using
several changes of fuel, but before doing so,
remove the fuel tank sender unit, as described
in Section 17. This procedure should be
carried out in a well-ventilated area, and it is
vital to take adequate fire precautions - refer
to the “Safety first!” Section at the beginning
of this manual for further details.
Refitting
13Any repairs to the fuel tank should be
carried out by a professional.
14Refitting is a reversal of removal, ensuring
that all hoses are reconnected to their correct
locations as noted during removal.
15On completion, fill the fuel tank, then run
the engine and check for leaks. If leakage is
evident, stop the engine immediately, and
rectify the problem without delay.
17Fuel tank sender unit -
removal and refitting
3
Note:Refer to Section 2 before proceeding
Removal
SOHC models
1Remove the fuel tank, (refer to Section 16),
if necessary. Note that there is only one hose
connected to the sender unit. This must also
be disconnected from the union on the inside
of the unit before it can be withdrawn
completely from the tank (see illustration).
DOHC models
2Remove the fuel tank, as described in
Section 16.
3Make alignment marks on the sender unit
and the fuel tank so that the sender unit can
be refitted in its original position.
4To remove the sender unit, an improvised
tool must be used which engages with thecut-outs in the sender unit retaining ring. The
Vauxhall special tool KM-673 for this purpose
is shown (see illustration).
5Withdraw the unit carefully, to avoid
bending the float arm.
6Recover the sealing ring.
Refitting
7Refitting is a reversal of removal,
remembering the following points.
8Renew the sealing ring.
9Ensure that the marks made on sender unit
and fuel tank before removal are aligned.
10Refit the fuel tank, (Section 16).
18Fuel flow damper - removal
and refitting
3
Note:Refer to Section 2 before proceeding
Removal
1The fuel flow damper is located on the fuel
pump bracket under the rear of the vehicle, on
the right-hand side of the spare wheel well or
in front of the fuel tank, depending on model
(see illustration). The damper is positioned in
the fuel feed line between the fuel pump and
the fuel filter, and its purpose is to reduce
pressure fluctuations in the fuel return line,
thus reducing noise levels.
2Disconnect the battery negative lead.
3Have a container to hand, to catch the fuel
that will be released as the damper is
removed.
4B•8Fuel and exhaust systems - fuel injection models
16.5 Fuel filler pipe securing screw
(arrowed) - models with semi-trailing arm
rear axles17.1 Fuel level sender unit - models with
semi-independent rear axles
18.1 Fuel flow damper - models with semi-
trailing arm rear axles17.4 Vauxhall special tool KM-673 for
removing fuel level sender units
16.8 Fuel tank mounting - models with
semi-trailing arm rear axles
1 Strap securing bolt 2 Vent hose securing
Page 185 of 525
28Air inlet temperature control
check (carburettor models
only)
2
Refer to Chapter 4A for details.
29Fuel filter renewal
3
Fuel filters are fitted in various locations
throughout the range. Some may be ‘in-line’ in
the fuel tank itself, or fitted into the
carburettor.
Refer to Chapters 4A or 4B, as appropriate.
30Spark plug renewal (SOHC)
2
1The correct functioning of the spark plugs is
vital for the correct running and efficiency of
the engine. It is essential that the plugs fitted
are appropriate for the engine. Refer to the
specifications in Chapter 5. If this type is used
and the engine is in good condition, the spark
plugs should not need attention between
scheduled service replacement intervals.
Spark plug cleaning is rarely necessary and
should not be attempted unless specialised
equipment is available, as damage can easily
be caused to the firing ends.
2Identify each HT lead for position so that the
leads can be refitted to their correct cylinders.
Then disconnect the leads from the plugs by
pulling on the connectors, not the leads.
3Clean the area around each spark plug
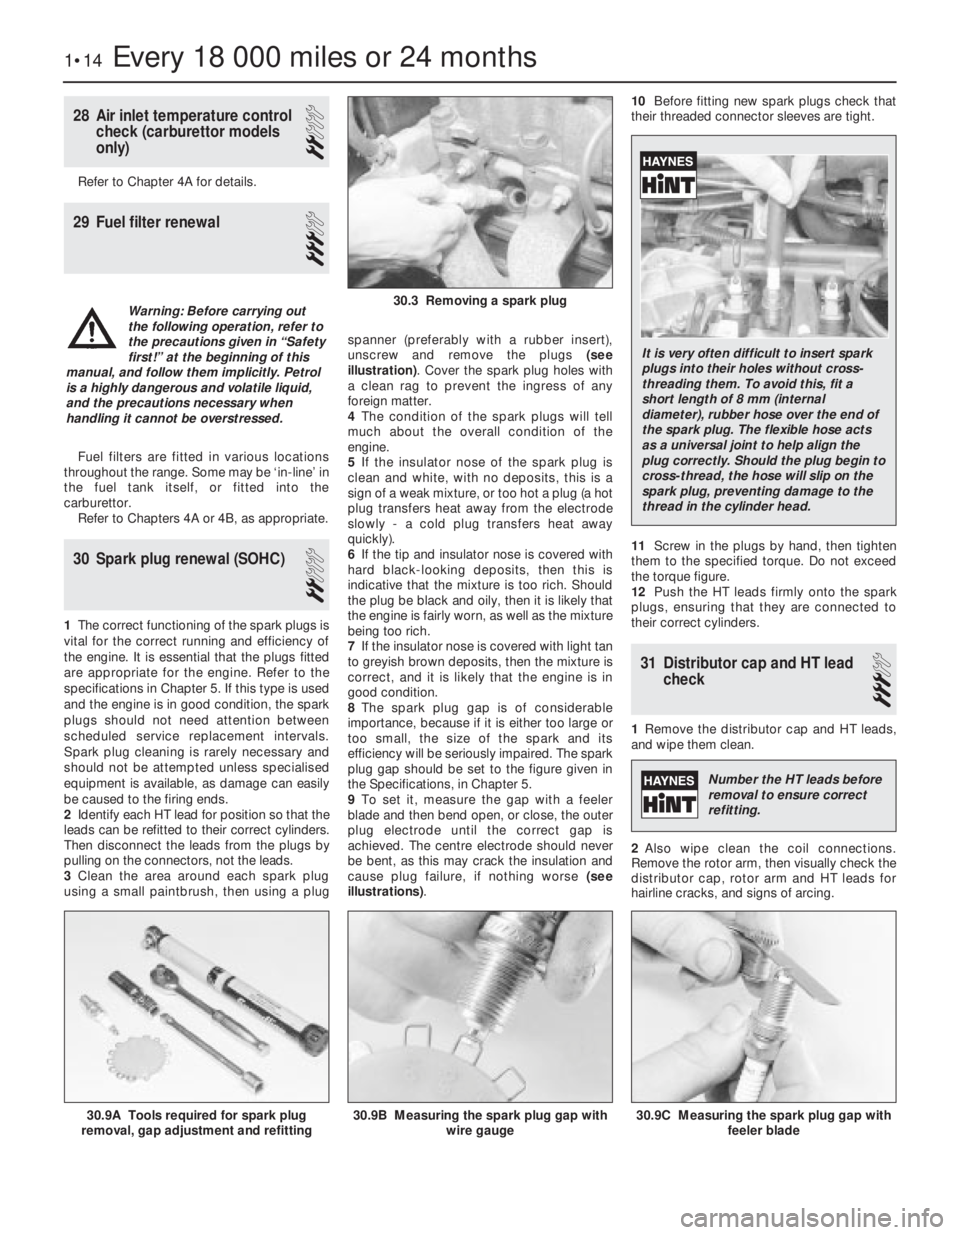
using a small paintbrush, then using a plugspanner (preferably with a rubber insert),
unscrew and remove the plugs (see
illustration). Cover the spark plug holes with
a clean rag to prevent the ingress of any
foreign matter.
4The condition of the spark plugs will tell
much about the overall condition of the
engine.
5If the insulator nose of the spark plug is
clean and white, with no deposits, this is a
sign of a weak mixture, or too hot a plug (a hot
plug transfers heat away from the electrode
slowly -a cold plug transfers heat away
quickly).
6If the tip and insulator nose is covered with
hard black-looking deposits, then this is
indicative that the mixture is too rich. Should
the plug be black and oily, then it is likely that
the engine is fairly worn, as well as the mixture
being too rich.
7If the insulator nose is covered with light tan
to greyish brown deposits, then the mixture is
correct, and it is likely that the engine is in
good condition.
8The spark plug gap is of considerable
importance, because if it is either too large or
too small, the size of the spark and its
efficiency will be seriously impaired. The spark
plug gap should be set to the figure given in
the Specifications, in Chapter 5.
9To set it, measure the gap with a feeler
blade and then bend open, or close, the outer
plug electrode until the correct gap is
achieved. The centre electrode should never
be bent, as this may crack the insulation and
cause plug failure, if nothing worse (see
illustrations).10Before fitting new spark plugs check that
their threaded connector sleeves are tight.
11Screw in the plugs by hand, then tighten
them to the specified torque. Do not exceed
the torque figure.
12Push the HT leads firmly onto the spark
plugs, ensuring that they are connected to
their correct cylinders.
31Distributor cap and HT lead
check
3
1Remove the distributor cap and HT leads,
and wipe them clean.
2Also wipe clean the coil connections.
Remove the rotor arm, then visually check the
distributor cap, rotor arm and HT leads for
hairline cracks, and signs of arcing.
1•14Every 18 000 miles or 24 months
30.9A Tools required for spark plug
removal, gap adjustment and refitting30.9C Measuring the spark plug gap with
feeler blade30.9B Measuring the spark plug gap with
wire gauge
30.3 Removing a spark plugWarning: Before carrying out
the following operation, refer to
the precautions given in “Safety
first!” at the beginning of this
manual, and follow them implicitly. Petrol
is a highly dangerous and volatile liquid,
and the precautions necessary when
handling it cannot be overstressed.
It is very often difficult to insert spark
plugs into their holes without cross-
threading them. To avoid this, fit a
short length of 8 mm (internal
diameter), rubber hose over the end of
the spark plug. The flexible hose acts
as a universal joint to help align the
plug correctly. Should the plug begin to
cross-thread, the hose will slip on the
spark plug, preventing damage to the
thread in the cylinder head.
Number the HT leads before
removal to ensure correct
refitting.
Page 264 of 525

AABS components- 9•2, 9•16
Accelerator cable- 4A•5, 4B•9
Accelerator pedal- 4A•5
Acknowledgements- 0•4
Aerial- 12•17
Air cleaner- 1•3, 1•13, 4A•3, 4B•4
Air box- 4B•5
Air pump/cut off valve- 4C•2
Air temp control- 4B•5
Air vents- 3•8
Airbag- 12•19
Airflow meters- 4B•12
Alternator- 5•5
Alternator V-belt check- 1•12
Anti theft alarm- 12•19
Anti-roll bars- 10•8, 10•13, 10•17
Antifreeze mixture- 0•12, 0•17, 1•2, 3•3
ATF- 0•17, 1•2, 1•11, 7B•3
Automatic choke unit- 4A•9
Automatic transmission- 7B•1 et seq
cooler pipes and hoses - 7B•5
ECU - 7B•5
fault diagnosis - REF•12, REF•16
fluid - 0•17, 1•2, 1•11, 7B•3
kickdown switch - 7B•3
removal and refitting - 7B•6
selector control cable - 7B•4
speed sensors - 7B•6
starter inhibitor switch - 7B•3
temperature sensor - 7B•5
BBattery- 0•6, 0•15, 5•5
Bearings (engine)- 2A•31
Bleeding the brakes- 9•3
Bleeding the power steering- 10•22
Blower motor- 3•7
Body damage- 11•2
Body electrical systems - 12•1 et seq
Bodywork and fittings- 11•1 et seq
Bonnet- 11•4
Bonnet lock/release cable- 11•4
Boot lid- 11•4
Boot lid lock- 11•5
Bores- 2A•33
Brake checks- 1•12,
Braking system- 9•1 et seq
ABS components - 9•2, 9•16
backplate - 9•12
bleeding the brakes - 9•3
brake caliper - 9•8
brake disc - 9•10
brake drum - 9•11
brake fluid pipes and hoses - 9•18
brake lamp switch - 12•5
brake pads - 9•4
brake pedal - 9•21
brake shoes - 9•6
disc shield - 9•13
fault diagnosis - REF•12, REF•17
fluid - 0•13, 0•17handbrake adjustment - 9•18
handbrake cables - 9•19
handbrake lever - 9•20
master cylinder - 9•13
pressure valves - 9•18
vacuum servo unit - 9•15
wheel cylinder - 9•11
Bulbs- 12•2, 12•7, 12•11
Bumpers- 11•11
CCables:
bonnet release - 11•4
clutch - 6•2
handbrake - 9•19
selector automatic transmission - 7B•4
speedometer - 12•18
throttle - 4A•5, 4B•9
Caliper (brake)- 9•8
Camber- 10•1, 10•24
Camshaft- 2A•19, 2B•6
Camshaft housing- 2A•18
Camshaft oil seals- 2A•18
Capacities- 1•2
Carbon canister- 4C•4
Carburettor- 4A•5, 4A•11
Carpets- 11•2
Castor- 10•1, 10•24
Catalytic converter- 4C•3
Central door locking- 12•16
Centre console- 11•18
Cigarette lighter- 12•5
Clock- 12•6
Clutch- 6•1 et seq
cable - 6•2
fault diagnosis - REF•12, REF•15
pedal - 6•3
release bearing - 6•6
removal, inspection and refitting - 6•3
Coil- 5•9
Coil spring (rear)- 10•12, 10•15
Compression test- 2A•8
Computer components- 12•7
Connecting rods- 2A•29
Contents- 0•2
Control units- 4B•16, 7B•5
Conversion factors- REF•2
Coolant- 0•12, 0•17, 1•2, 3•3
Cooling, heating and ventilation systems-
3•1 et seq
blower motor - 3•7
coolant level sensor - 3•5
coolant pump - 3•4
cooling fan - 3•5
draining - 3•2
expansion tank - 3•5
fan switch - 3•6
fault diagnosis - REF•12, REF•15
filling - 3•2
flushing - 3•2
heater control panel - 3•6
heater matrix - 3•7
radiator - 3•3temperature gauge sender - 3•6
thermostat - 3•4
vents - 3•8
Courtesy lamp switch- 12•5
Crankcase ventilation system- 2A•7
Crankshaft- 2A•31
Crankshaft oil seals- 2A•26, 2B•6, 2B•9
Cylinder bores- 2A•33
Cylinder head- 2A•19, 2A•22, 2B•7DDents- 11•2
Depressurising fuel system- 4B•5
Differential bearing oil seal- 7A•3
Dimensions and weights- REF•1
Disc (brake)- 9•10
Distributor- 5•10
Door- 11•6
handle - 11•7
inner trim panel - 11•6
lock key battery - 1•13
mirror - 11•11
Driveshafts- 8•1 et seq
fault diagnosis - REF•12, REF•16
gaiter - 8•4
joint renewal - 8•4
Drum (brake)- 9•11
EEarth fault finding- 12•2
ECU’s - 4B•16, 7B•5
EGR components- 4C•2
Electric windows- 12•15
Electrical fault finding- 12•2
Electrical system (body)- 12•1 et seq
Electrical system- 0•14, 5•2
Electrical system fault diagnosis- REF•12,
REF•18
Electronic control units- 4B•16, 7B•5
Engine:
bearings - 2A•31
camshaft - 2A•19, 2B•6
camshaft housing - 2A•18
camshaft oil seals - 2A•18, 2B•6
codes - 2A•1, 2B•1
compartment - 0•10, 1•5
compression test - 2A•8
connecting rods - 2A•29
crankcase ventilation - 2A•7
crankshaft - 2A•31
crankshaft oil seals - 2A•26, 2B•6, 2B•9
cylinder bores - 2A•33
cylinder head - 2A•19, 2A•22, 2B•7
dismantling - 2A•12
DOHC - 2B•1 et seq
electrical systems - 5•1 et seq
fault diagnosis - REF•12, REF•13
flexplate (automatic transmission) - 2A•26
flywheel - 2A•26
main and big-end bearings - 2A•31
mountings (engine/transmission) - 2A•12,
2B•3
Index REF•25
REF
Note:References throughout this index are in the form - “Chapter number” • “page number”