1988 OPEL CALIBRA spark plugs replace
[x] Cancel search: spark plugs replacePage 162 of 525
4B
4Clamp the fuel hoses on either side of the
damper, to minimise fuel loss when the hoses
are disconnected.
5Loosen the clamp screws, and disconnect
the fuel hoses from the damper. Be prepared
for fuel spillage, and take adequate fire
precautions.
6Unscrew the securing nut, and withdraw
the damper from the bracket.
Refitting
7Refitting is a reversal of removal.
8Run the engine and check for leaks on
completion. If leakage is evident; stop the
engine immediately, and rectify the problem
without delay.
19Throttle cable - removal,
refitting and adjustment
3
Removal
1This procedure is basically the same as
described in Chapter 4A, but note the
following.
2Not all models are fitted with an air box.
Ignore references to it, if not applicable.
3For “carburettor” substitute “throttle body”,
and note that the cable bracket is bolted to
the inlet manifold.
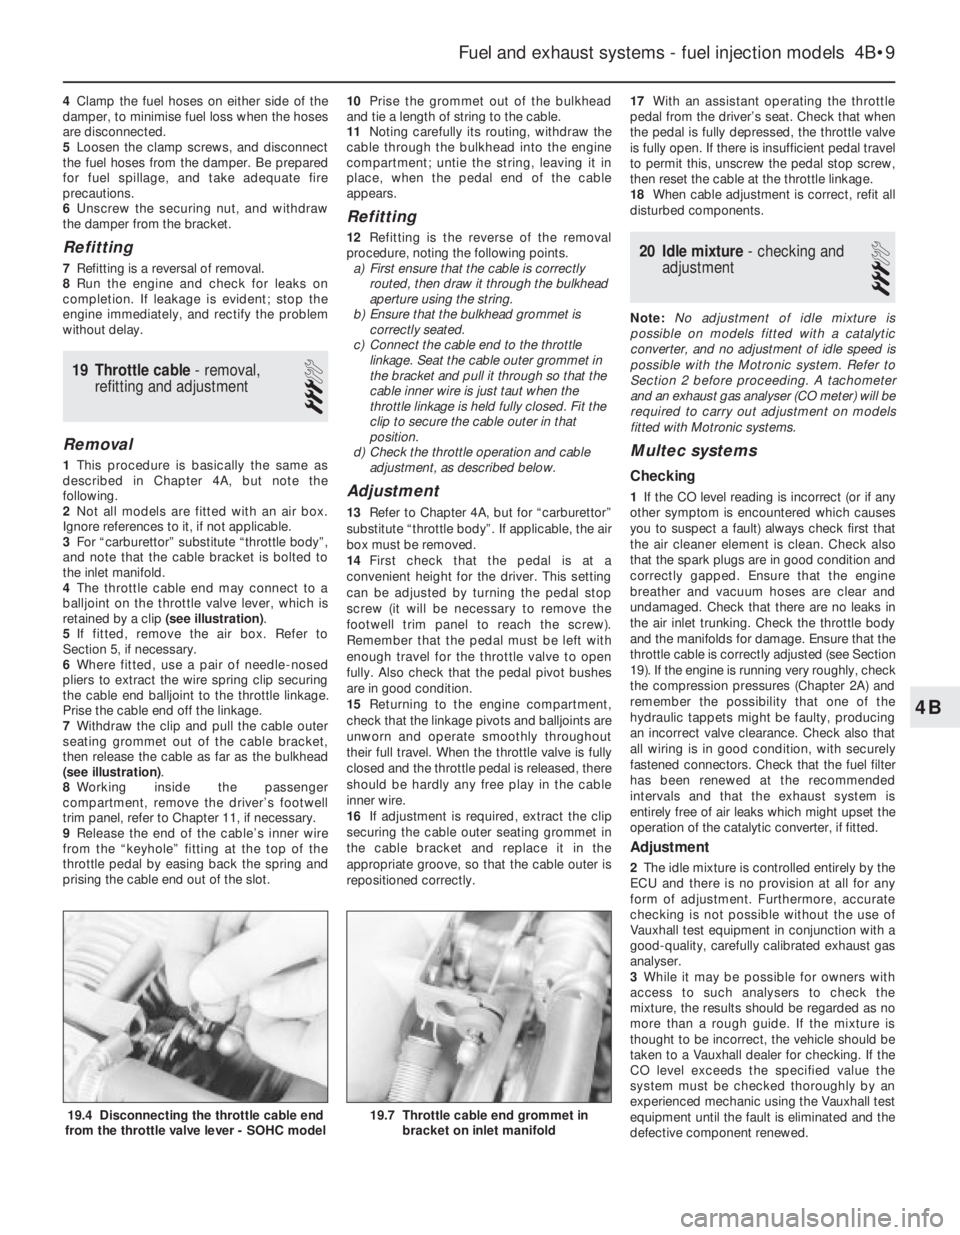
4The throttle cable end may connect to a
balljoint on the throttle valve lever, which is
retained by a clip (see illustration).
5If fitted, remove the air box. Refer to
Section 5, if necessary.
6Where fitted, use a pair of needle-nosed
pliers to extract the wire spring clip securing
the cable end balljoint to the throttle linkage.
Prise the cable end off the linkage.
7Withdraw the clip and pull the cable outer
seating grommet out of the cable bracket,
then release the cable as far as the bulkhead
(see illustration).
8Working inside the passenger
compartment, remove the driver’s footwell
trim panel, refer to Chapter 11, if necessary.
9Release the end of the cable’s inner wire
from the “keyhole” fitting at the top of the
throttle pedal by easing back the spring and
prising the cable end out of the slot.10Prise the grommet out of the bulkhead
and tie a length of string to the cable.
11Noting carefully its routing, withdraw the
cable through the bulkhead into the engine
compartment; untie the string, leaving it in
place, when the pedal end of the cable
appears.
Refitting
12Refitting is the reverse of the removal
procedure, noting the following points.
a)First ensure that the cable is correctly
routed, then draw it through the bulkhead
aperture using the string.
b)Ensure that the bulkhead grommet is
correctly seated.
c)Connect the cable end to the throttle
linkage. Seat the cable outer grommet in
the bracket and pull it through so that the
cable inner wire is just taut when the
throttle linkage is held fully closed. Fit the
clip to secure the cable outer in that
position.
d)Check the throttle operation and cable
adjustment, as described below.
Adjustment
13Refer to Chapter 4A, but for “carburettor”
substitute “throttle body”. If applicable, the air
box must be removed.
14First check that the pedal is at a
convenient height for the driver. This setting
can be adjusted by turning the pedal stop
screw (it will be necessary to remove the
footwell trim panel to reach the screw).
Remember that the pedal must be left with
enough travel for the throttle valve to open
fully. Also check that the pedal pivot bushes
are in good condition.
15Returning to the engine compartment,
check that the linkage pivots and balljoints are
unworn and operate smoothly throughout
their full travel. When the throttle valve is fully
closed and the throttle pedal is released, there
should be hardly any free play in the cable
inner wire.
16If adjustment is required, extract the clip
securing the cable outer seating grommet in
the cable bracket and replace it in the
appropriate groove, so that the cable outer is
repositioned correctly.17With an assistant operating the throttle
pedal from the driver’s seat. Check that when
the pedal is fully depressed, the throttle valve
is fully open. If there is insufficient pedal travel
to permit this, unscrew the pedal stop screw,
then reset the cable at the throttle linkage.
18When cable adjustment is correct, refit all
disturbed components.
20Idle mixture - checking and
adjustment
3
Note: No adjustment of idle mixture is
possible on models fitted with a catalytic
converter, and no adjustment of idle speed is
possible with the Motronic system. Refer to
Section 2 before proceeding. A tachometer
and an exhaust gas analyser (CO meter) will be
required to carry out adjustment on models
fitted with Motronic systems.
Multec systems
Checking
1If the CO level reading is incorrect (or if any
other symptom is encountered which causes
you to suspect a fault) always check first that
the air cleaner element is clean. Check also
that the spark plugs are in good condition and
correctly gapped. Ensure that the engine
breather and vacuum hoses are clear and
undamaged. Check that there are no leaks in
the air inlet trunking. Check the throttle body
and the manifolds for damage. Ensure that the
throttle cable is correctly adjusted (see Section
19). If the engine is running very roughly, check
the compression pressures (Chapter 2A) and
remember the possibility that one of the
hydraulic tappets might be faulty, producing
an incorrect valve clearance. Check also that
all wiring is in good condition, with securely
fastened connectors. Check that the fuel filter
has been renewed at the recommended
intervals and that the exhaust system is
entirely free of air leaks which might upset the
operation of the catalytic converter, if fitted.
Adjustment
2The idle mixture is controlled entirely by the
ECU and there is no provision at all for any
form of adjustment. Furthermore, accurate
checking is not possible without the use of
Vauxhall test equipment in conjunction with a
good-quality, carefully calibrated exhaust gas
analyser.
3While it may be possible for owners with
access to such analysers to check the
mixture, the results should be regarded as no
more than a rough guide. If the mixture is
thought to be incorrect, the vehicle should be
taken to a Vauxhall dealer for checking. If the
CO level exceeds the specified value the
system must be checked thoroughly by an
experienced mechanic using the Vauxhall test
equipment until the fault is eliminated and the
defective component renewed.
Fuel and exhaust systems - fuel injection models 4B•9
19.7 Throttle cable end grommet in
bracket on inlet manifold19.4 Disconnecting the throttle cable end
from the throttle valve lever - SOHC model
Page 175 of 525
1•4Maintenance schedule
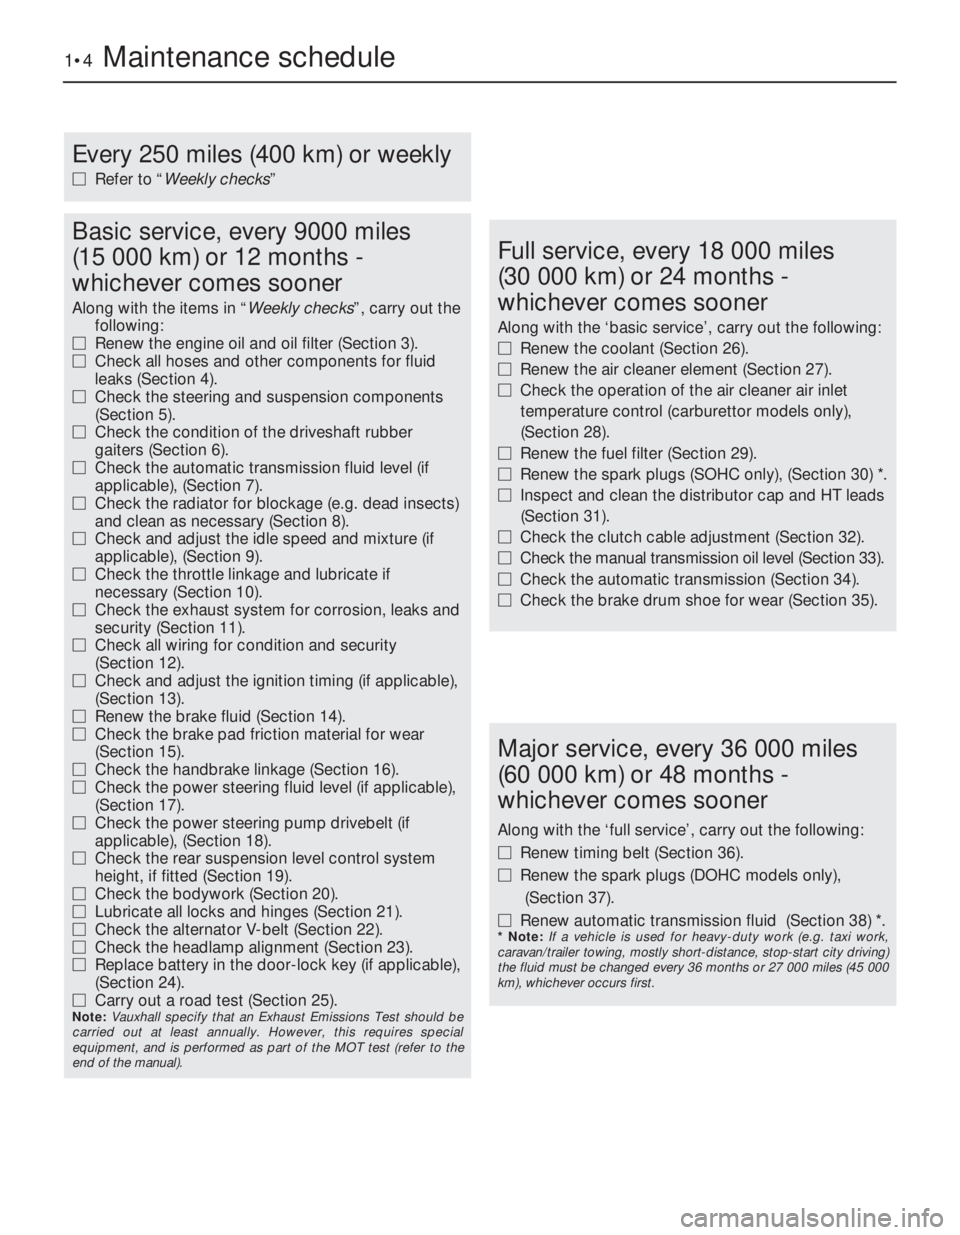
Every 250 miles (400 km) or weekly
MRefer to “Weekly checks”
Basic service, every 9000 miles
(15 000 km) or 12 months -
whichever comes sooner
Along with the items in “Weekly checks”, carry out the
following:
MRenew the engine oil and oil filter (Section 3).
MCheck all hoses and other components for fluid
leaks (Section 4).
MCheck the steering and suspension components
(Section 5).
MCheck the condition of the driveshaft rubber
gaiters (Section 6).
MCheck the automatic transmission fluid level (if
applicable), (Section 7).
MCheck the radiator for blockage (e.g. dead insects)
and clean as necessary (Section 8).
MCheck and adjust the idle speed and mixture (if
applicable), (Section 9).
MCheck the throttle linkage and lubricate if
necessary (Section 10).
MCheck the exhaust system for corrosion, leaks and
security (Section 11).
MCheck all wiring for condition and security
(Section 12).
MCheck and adjust the ignition timing (if applicable),
(Section 13).
MRenew the brake fluid (Section 14).
MCheck the brake pad friction material for wear
(Section 15).
MCheck the handbrake linkage (Section 16).
MCheck the power steering fluid level (if applicable),
(Section 17).
MCheck the power steering pump drivebelt (if
applicable), (Section 18).
MCheck the rear suspension level control system
height, if fitted (Section 19).
MCheck the bodywork (Section 20).
MLubricate all locks and hinges (Section 21).
MCheck the alternator V-belt (Section 22).
MCheck the headlamp alignment (Section 23).
MReplace battery in the door-lock key (if applicable),
(Section 24).
MCarry out a road test (Section 25).
Note: Vauxhall specify that an Exhaust Emissions Test should be
carried out at least annually. However, this requires special
equipment, and is performed as part of the MOT test (refer to the
end of the manual).
Full service, every 18 000 miles
(30 000 km) or 24 months -
whichever comes sooner
Along with the ‘basic service’, carry out the following:
MRenew the coolant (Section 26).
MRenew the air cleaner element (Section 27).
MCheck the operation of the air cleaner air inlet
temperature control (carburettor models only),
(Section 28).
MRenew the fuel filter (Section 29).
MRenew the spark plugs (SOHC only), (Section 30) *.
MInspect and clean the distributor cap and HT leads
(Section 31).
MCheck the clutch cable adjustment (Section 32).
MCheck the manual transmission oil level (Section 33).
MCheck the automatic transmission (Section 34).
MCheck the brake drum shoe for wear (Section 35).
Major service, every 36 000 miles
(60 000 km) or 48 months -
whichever comes sooner
Along with the ‘full service’, carry out the following:
MRenew timing belt (Section 36).
MRenew the spark plugs (DOHC models only),
(Section 37).
MRenew automatic transmission fluid (Section 38) *.
* Note: If a vehicle is used for heavy-duty work (e.g. taxi work,
caravan/trailer towing, mostly short-distance, stop-start city driving)
the fluid must be changed every 36 months or 27 000 miles (45 000
km), whichever occurs first.
Page 185 of 525
28Air inlet temperature control
check (carburettor models
only)
2
Refer to Chapter 4A for details.
29Fuel filter renewal
3
Fuel filters are fitted in various locations
throughout the range. Some may be ‘in-line’ in
the fuel tank itself, or fitted into the
carburettor.
Refer to Chapters 4A or 4B, as appropriate.
30Spark plug renewal (SOHC)
2
1The correct functioning of the spark plugs is
vital for the correct running and efficiency of
the engine. It is essential that the plugs fitted
are appropriate for the engine. Refer to the
specifications in Chapter 5. If this type is used
and the engine is in good condition, the spark
plugs should not need attention between
scheduled service replacement intervals.
Spark plug cleaning is rarely necessary and
should not be attempted unless specialised
equipment is available, as damage can easily
be caused to the firing ends.
2Identify each HT lead for position so that the
leads can be refitted to their correct cylinders.
Then disconnect the leads from the plugs by
pulling on the connectors, not the leads.
3Clean the area around each spark plug
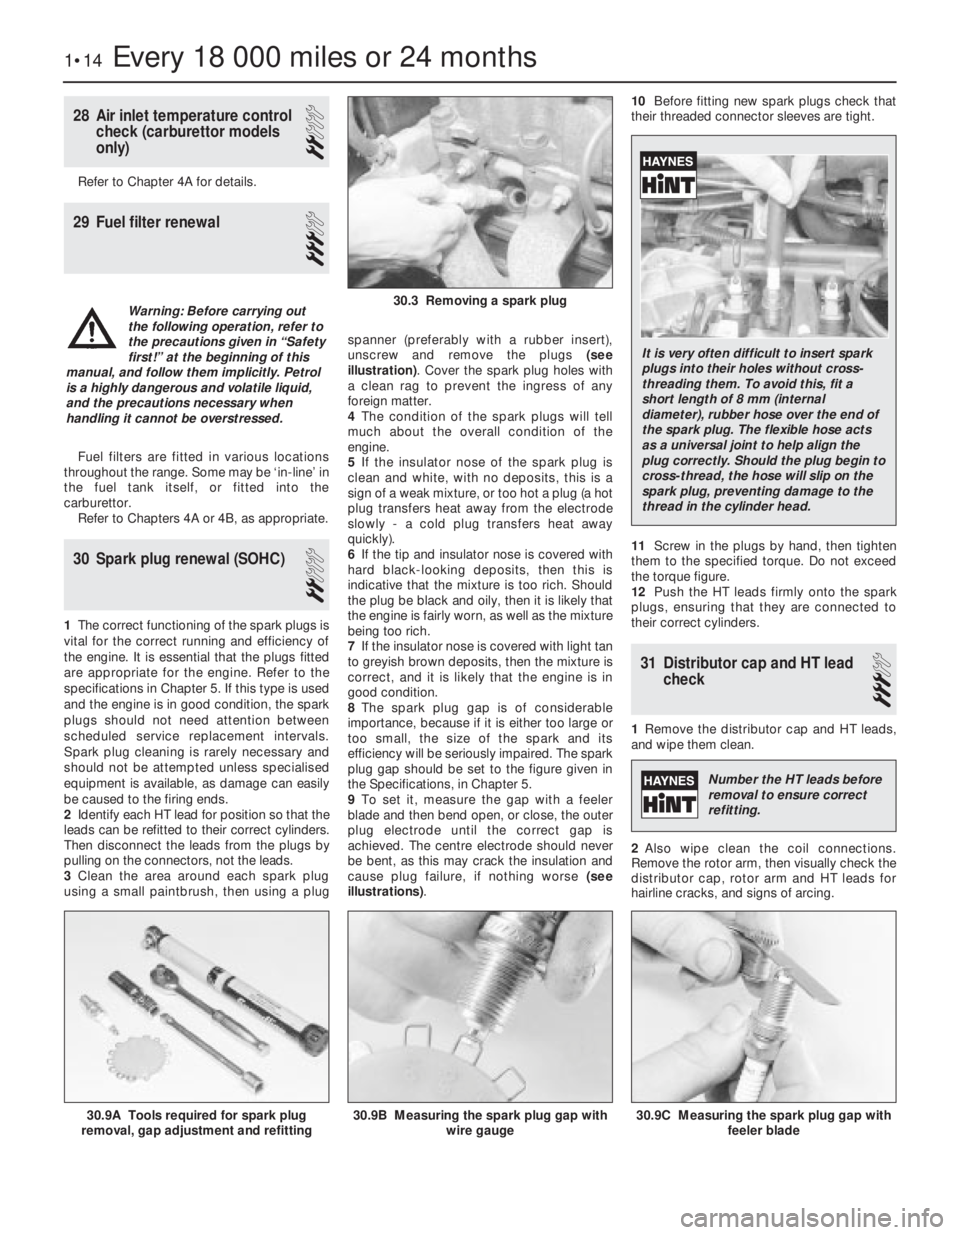
using a small paintbrush, then using a plugspanner (preferably with a rubber insert),
unscrew and remove the plugs (see
illustration). Cover the spark plug holes with
a clean rag to prevent the ingress of any
foreign matter.
4The condition of the spark plugs will tell
much about the overall condition of the
engine.
5If the insulator nose of the spark plug is
clean and white, with no deposits, this is a
sign of a weak mixture, or too hot a plug (a hot
plug transfers heat away from the electrode
slowly -a cold plug transfers heat away
quickly).
6If the tip and insulator nose is covered with
hard black-looking deposits, then this is
indicative that the mixture is too rich. Should
the plug be black and oily, then it is likely that
the engine is fairly worn, as well as the mixture
being too rich.
7If the insulator nose is covered with light tan
to greyish brown deposits, then the mixture is
correct, and it is likely that the engine is in
good condition.
8The spark plug gap is of considerable
importance, because if it is either too large or
too small, the size of the spark and its
efficiency will be seriously impaired. The spark
plug gap should be set to the figure given in
the Specifications, in Chapter 5.
9To set it, measure the gap with a feeler
blade and then bend open, or close, the outer
plug electrode until the correct gap is
achieved. The centre electrode should never
be bent, as this may crack the insulation and
cause plug failure, if nothing worse (see
illustrations).10Before fitting new spark plugs check that
their threaded connector sleeves are tight.
11Screw in the plugs by hand, then tighten
them to the specified torque. Do not exceed
the torque figure.
12Push the HT leads firmly onto the spark
plugs, ensuring that they are connected to
their correct cylinders.
31Distributor cap and HT lead
check
3
1Remove the distributor cap and HT leads,
and wipe them clean.
2Also wipe clean the coil connections.
Remove the rotor arm, then visually check the
distributor cap, rotor arm and HT leads for
hairline cracks, and signs of arcing.
1•14Every 18 000 miles or 24 months
30.9A Tools required for spark plug
removal, gap adjustment and refitting30.9C Measuring the spark plug gap with
feeler blade30.9B Measuring the spark plug gap with
wire gauge
30.3 Removing a spark plugWarning: Before carrying out
the following operation, refer to
the precautions given in “Safety
first!” at the beginning of this
manual, and follow them implicitly. Petrol
is a highly dangerous and volatile liquid,
and the precautions necessary when
handling it cannot be overstressed.
It is very often difficult to insert spark
plugs into their holes without cross-
threading them. To avoid this, fit a
short length of 8 mm (internal
diameter), rubber hose over the end of
the spark plug. The flexible hose acts
as a universal joint to help align the
plug correctly. Should the plug begin to
cross-thread, the hose will slip on the
spark plug, preventing damage to the
thread in the cylinder head.
Number the HT leads before
removal to ensure correct
refitting.
Page 187 of 525
36Timing belt renewal
3
1To minimise risk of major damage to the
engine the timing belt (or cambelt, as it is
sometimes called), needs replacing at least,
on every major service.
2It is good practise however, not only to
renew the belt whenever major engine work is
carried out, but also if you buy a used car with
unclear service history.
3Some models are fitted with an inspection
cover to view the condition of the belt. Whilst
others involve a lot more work.
4Full details on checking and replacement
are shown in Chapters 2A or 2B, as
appropriate.
37Spark plug renewal (DOHC)
2
1This procedure is basically the same shown
in Section 30. However on these models, a
spark plug cover needs to be removed from
the camshaft cover before the plugs can be
removed.
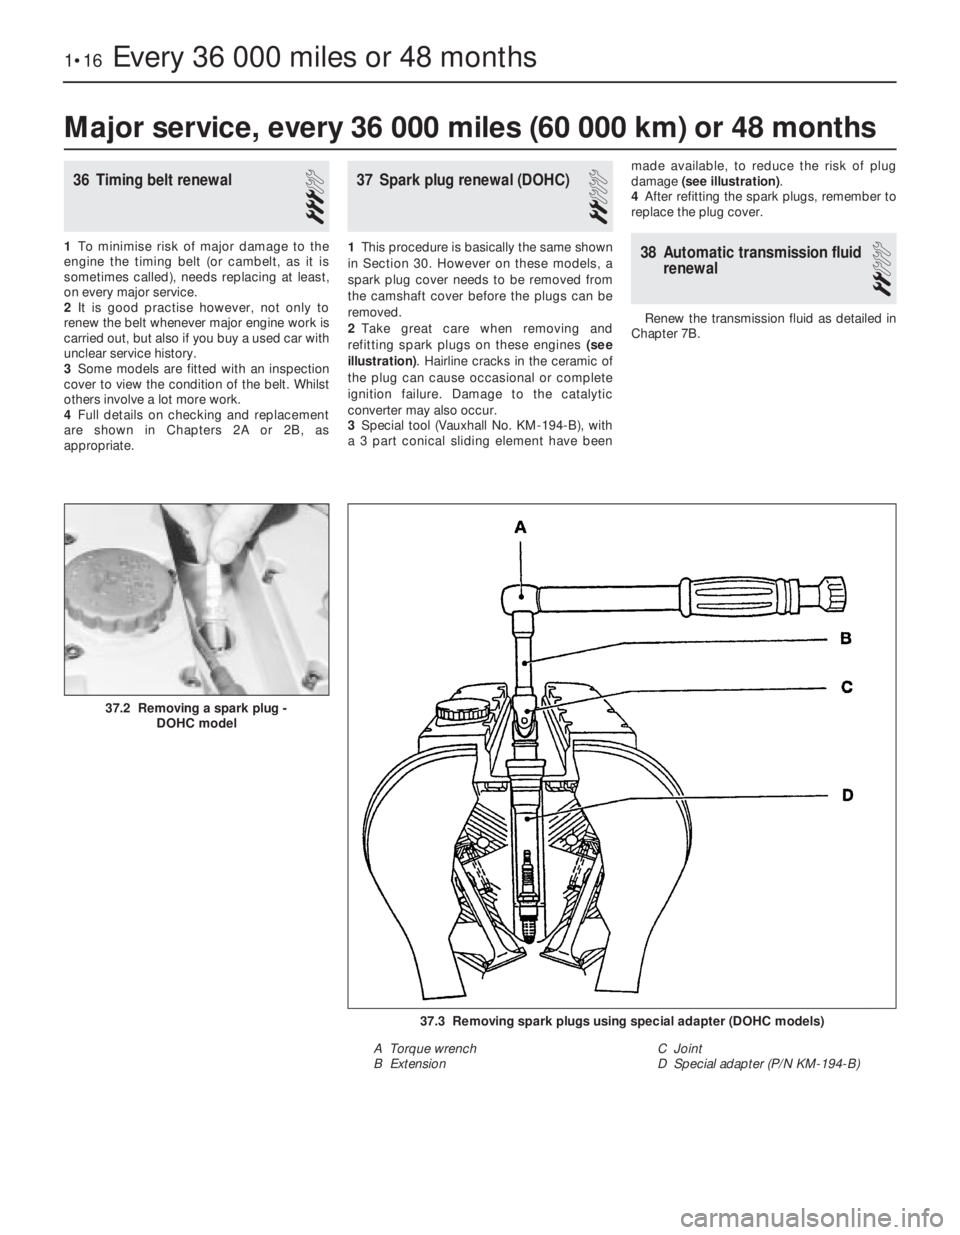
2Take great care when removing and
refitting spark plugs on these engines (see
illustration). Hairline cracks in the ceramic of
the plug can cause occasional or complete
ignition failure. Damage to the catalytic
converter may also occur.
3Special tool (Vauxhall No. KM-194-B), with
a 3 part conical sliding element have beenmade available, to reduce the risk of plug
damage (see illustration).
4After refitting the spark plugs, remember to
replace the plug cover.38Automatic transmission fluid
renewal
2
Renew the transmission fluid as detailed in
Chapter 7B.
1•16Every 36 000 miles or 48 months
37.3 Removing spark plugs using special adapter (DOHC models)
A Torque wrench
B ExtensionC Joint
D Special adapter (P/N KM-194-B)
37.2 Removing a spark plug -
DOHC model
Major service, every 36 000 miles (60 000 km) or 48 months
Page 251 of 525
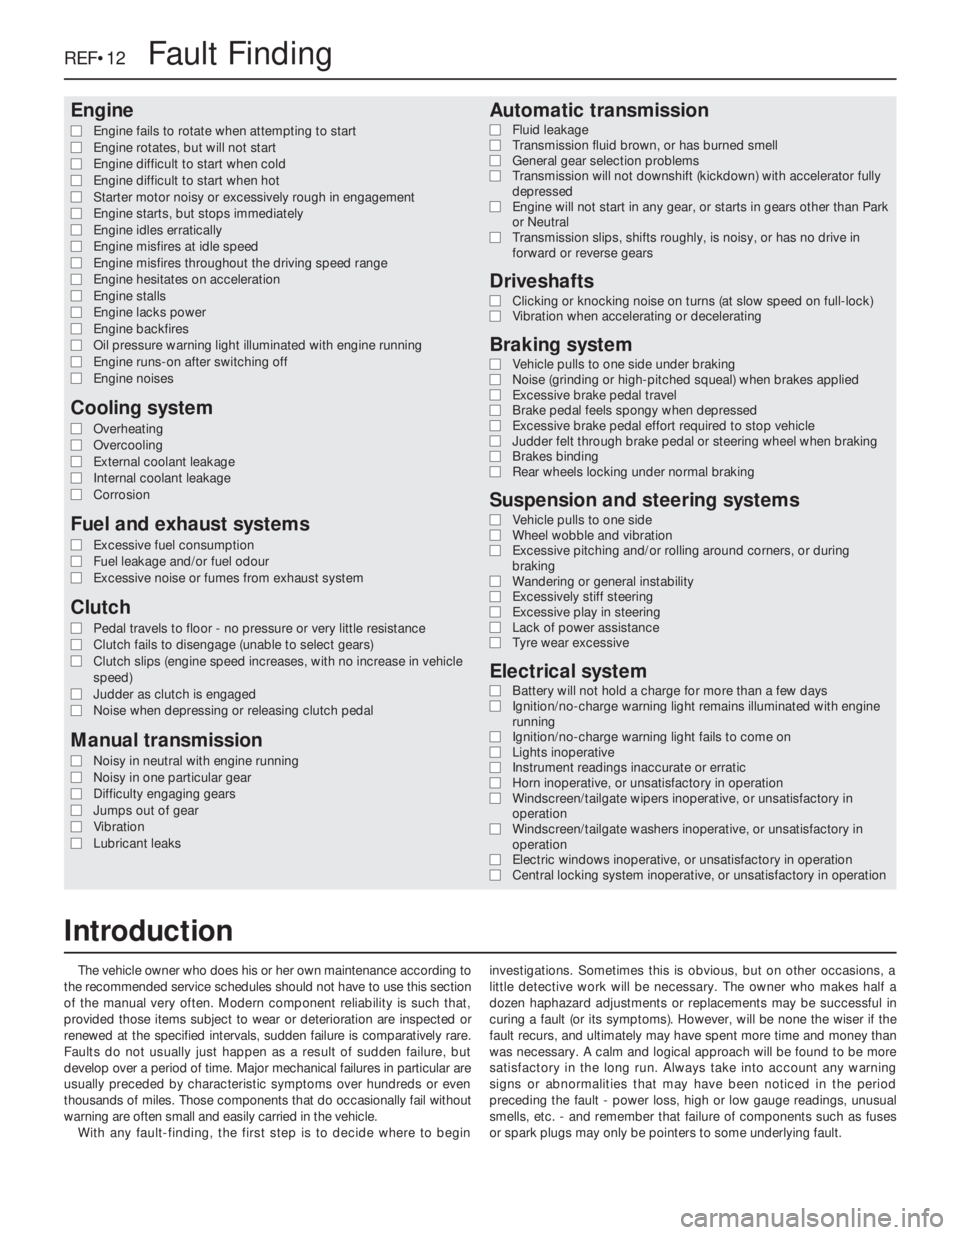
Engine
m mEngine fails to rotate when attempting to start
m mEngine rotates, but will not start
m mEngine difficult to start when cold
m mEngine difficult to start when hot
m mStarter motor noisy or excessively rough in engagement
m mEngine starts, but stops immediately
m mEngine idles erratically
m mEngine misfires at idle speed
m mEngine misfires throughout the driving speed range
m mEngine hesitates on acceleration
m mEngine stalls
m mEngine lacks power
m mEngine backfires
m mOil pressure warning light illuminated with engine running
m mEngine runs-on after switching off
m mEngine noises
Cooling system
m
mOverheating
m mOvercooling
m mExternal coolant leakage
m mInternal coolant leakage
m mCorrosion
Fuel and exhaust systems
m
mExcessive fuel consumption
m mFuel leakage and/or fuel odour
m mExcessive noise or fumes from exhaust system
Clutch
m
mPedal travels to floor - no pressure or very little resistance
m mClutch fails to disengage (unable to select gears)
m mClutch slips (engine speed increases, with no increase in vehicle
speed)
m mJudder as clutch is engaged
m mNoise when depressing or releasing clutch pedal
Manual transmission
m
mNoisy in neutral with engine running
m mNoisy in one particular gear
m mDifficulty engaging gears
m mJumps out of gear
m mVibration
m mLubricant leaks
Automatic transmission
m
mFluid leakage
m mTransmission fluid brown, or has burned smell
m mGeneral gear selection problems
m mTransmission will not downshift (kickdown) with accelerator fully
depressed
m mEngine will not start in any gear, or starts in gears other than Park
or Neutral
m mTransmission slips, shifts roughly, is noisy, or has no drive in
forward or reverse gears
Driveshafts
m mClicking or knocking noise on turns (at slow speed on full-lock)
m mVibration when accelerating or decelerating
Braking system
m
mVehicle pulls to one side under braking
m mNoise (grinding or high-pitched squeal) when brakes applied
m mExcessive brake pedal travel
m mBrake pedal feels spongy when depressed
m mExcessive brake pedal effort required to stop vehicle
m mJudder felt through brake pedal or steering wheel when braking
m mBrakes binding
m mRear wheels locking under normal braking
Suspension and steering systems
m
mVehicle pulls to one side
m mWheel wobble and vibration
m mExcessive pitching and/or rolling around corners, or during
braking
m mWandering or general instability
m mExcessively stiff steering
m mExcessive play in steering
m mLack of power assistance
m mTyre wear excessive
Electrical system
m
mBattery will not hold a charge for more than a few days
m mIgnition/no-charge warning light remains illuminated with engine
running
m mIgnition/no-charge warning light fails to come on
m mLights inoperative
m mInstrument readings inaccurate or erratic
m mHorn inoperative, or unsatisfactory in operation
m mWindscreen/tailgate wipers inoperative, or unsatisfactory in
operation
m mWindscreen/tailgate washers inoperative, or unsatisfactory in
operation
m mElectric windows inoperative, or unsatisfactory in operation
m mCentral locking system inoperative, or unsatisfactory in operation
The vehicle owner who does his or her own maintenance according to
the recommended service schedules should not have to use this section
of the manual very often. Modern component reliability is such that,
provided those items subject to wear or deterioration are inspected or
renewed at the specified intervals, sudden failure is comparatively rare.
Faults do not usually just happen as a result of sudden failure, but
develop over a period of time. Major mechanical failures in particular are
usually preceded by characteristic symptoms over hundreds or even
thousands of miles. Those components that do occasionally fail without
warning are often small and easily carried in the vehicle.
With any fault-finding, the first step is to decide where to begininvestigations. Sometimes this is obvious, but on other occasions, a
little detective work will be necessary. The owner who makes half a
dozen haphazard adjustments or replacements may be successful in
curing a fault (or its symptoms). However, will be none the wiser if the
fault recurs, and ultimately may have spent more time and money than
was necessary. A calm and logical approach will be found to be more
satisfactory in the long run. Always take into account any warning
signs or abnormalities that may have been noticed in the period
preceding the fault - power loss, high or low gauge readings, unusual
smells, etc. - and remember that failure of components such as fuses
or spark plugs may only be pointers to some underlying fault.
REF•12Fault Finding
Introduction