1987 PORSCHE 944 turn signal bulb
[x] Cancel search: turn signal bulbPage 3 of 66

INDEX
A
ABS Acceleration diagram Accelerator pedal Air Bag System Air - cleaner
- conditioner
- filter
Alternator warning light Antifreeze Antilock, Brake system Anti-theft alarm Ashtray Automatic- garage door
- speed control
- transmission
- transmission fluid B
Battery
Boost pressure gauge
Brake - booster
- fluid
- fluid warning light
- pads
- parking
- pedal
- system
- warning light
Break-in hints
Bulb replacing
Buzzer 28,39
118-129
55
20, 21, 38, 3980, 8144-4680,81 39
74,75,11028, 39
11
42, 98
25
29
53-55
78,110,128
90-9234
27
39,79,11039
27,37,47,79,80 26
26, 27
26,27,11537
47
93-98
10,18,24,30
C/D
CASIS
Capacities
Car care instructions
Casis
Catalytic Converter
Cautions
Central locking
Central warning light
Cigarette lighter
Cleaning
Clock
Clutch pedal
Collapsible spare tire
Control warning light system
Coolant Temperature Gauge
Cooling system
Corrosion prevention
Dashboard
Defogging/defrosting
Dimensions
Doors
Driving hints
E/F
Electrical system
Emergency- flasher
- starting
Emission Control System
Engine - cooling
- exhaust
- hood
- number
- oil checking & changing
- oil
-speed, max 35
110
61-66
35
50,10267
13
37
41
61-66 40
27
85
36-39 36
74-77
65-66
24
44-46 114
12,138-9, 48, 49
89-92
41
92
100-103 74-77
48
586
69-72
69,110,111,128
34,47,52,106-
108
Fan control switch knob
Fan, radiator
Filling capacities
Fog lights
Fuel - economy
- evaporation control
- gauge
- recommendation
- tank
Fuses and relays
G/H
Gas Station Information
Gasohol
Gasoline
Gear ratio diagram
Gearshift lever
Glove compartment
Hatchback
Headlights
Headlight- dimmer
- flasher
- switch
- washing system
Heater/ventilation controls
Hood - front
- rear
Horn
I/J
Ignition/steering lock
Instrument illumination
Instruments
Interior ligh 44
36, 74 110
30, 96, 97
49
103 37
50, 51
50,110
89,126
126-129 51
50,51
122-125 52-55
42
56
30,95,99 30
30
30
31,32,81,11044-4658
56,57
21,24
24
30
33-40
43, 98
4
Jack
- supports
K/L
Keys
Kickdown
Lane changer
Leather
License plate light
Light switch
Lights - ashtray
- fog
- interior
- license plate
- parking
- turn signal
Locks - doors, wheels
Loudspeakers
Lubricants
Luggage compartment
M/O
Manual transmission
- oil
Mirrors
Oil- change
- consumption
- filter changing
- pressure gauge
- pressure warning light
Octane rating
Oxygen Sensor
P/R
Paint code number 68
87, 88, 129
10-11,86 55
30
65
98
30
98
30, 96, 97
43, 9898
30, 37, 93, 94
30,93,94
10-13, 86 89
110,111 57
52,122-125 77,11022,43
71,72
47, 69
71, 72 38
38
50, 51,106-108 101,102
7
Parking- brake
- lights
Performance
Power assisted steering
Power train
Power windows
Prop-up roof
Radiator fan
Rear - hood
- view mirrors
- window defogger
- wiper
Recirculation Switch
Refrigerant
Relays
Rims
Roof racks
Roof, removable S
Safe driving hints
Safetybelts
Safety belt warning light
Safety compliance sticker
Seat heating System
Seats
Sekuriflex windshield
Shift indicator
Shift points
Side marker lights
Ski racks
Snow- chains
- tires
Spare tire, collapsible
Spark plugs
Specifications, engine
26, 3730,37,93,94116731091259, 6036, 7456,572241424446,11089,12664,112,11357,11459, 60
8-9
17-21,6518,3771514-1631, 63, 643552-559457,11483, 84,112,113
83,84, 111,113
85106-108106-109
Speedometer
Starting procedures
Sun visors
T/U
Tachometer
Technical data
Tirepressure
Tires
Tool kit
Trip odometer
Transmission oil
Trunk
Turn signal lights
Undercoating
Unleaded fuel
V/W
Vehicle identification
Ventilation
Voltmeter
Warning/indicator lights
Washer reservoir
Washing
Water temperature gauge
Weatherstrips
Weights
Wheel alignment
Wheel nuts, lockable
Wheels
Wheel changing
Windows
Windshield- washer reservoir
- wiper/washer lever 3324, 2543
34, 35105-12582,112,113,12947,82-87,112,113683377, 78,11056,5730, 37, 93, 9465, 66,10050, 51,106-108,110
6-744-463835-4081,11061-6636641141158647,64,82-87,11285-8812,63,6481,11031
5
Page 13 of 66

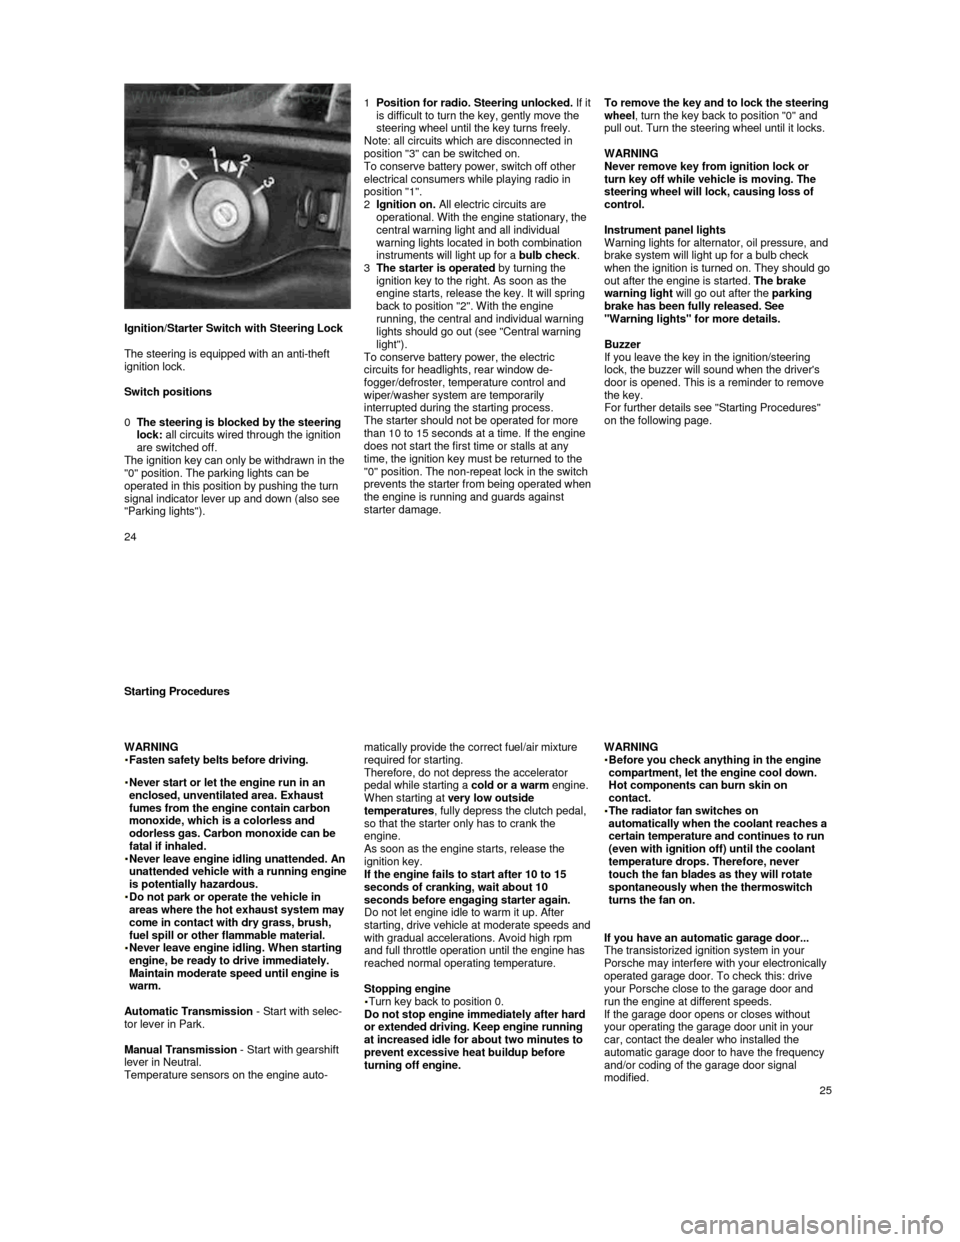
Ignition/Starter Switch with Steering Lock
The steering is equipped with an anti-theft
ignition lock.
Switch positions
0
The steering is blocked by the steering lock: all circuits wired through the ignition
are switched off.
The ignition key can only be withdrawn in the
"0" position. The parking lights can be
operated in this position by pushing the turn
signal indicator lever up and down (also see
"Parking lights").
1 Position for radio. Steering unlocked. If it is difficult to turn the key, gently move the
steering wheel until the key turns freely.
Note: all circuits which are disconnected in
position "3" can be switched on.
To conserve battery power, switch off other
electrical consumers while playing radio in
position "1".
2
Ignition on. All electric circuits are
operational. With the engine stationary, the
central warning light and all individual
warning lights located in both combination
instruments will light up for a bulb check.
3
The starter is operated by turning the
ignition key to the right. As soon as the
engine starts, release the key. It will spring
back to position "2". With the engine
running, the central and individual warning
lights should go out (see "Central warning
light").
To conserve battery power, the electric
circuits for headlights, rear window de-
fogger/defroster, temperature control and
wiper/washer system are temporarily interrupted during the starting process.
The starter should not be operated for more
than 10 to 15 seconds at a time. If the engine
does not start the first time or stalls at any
time, the ignition key must be returned to the
"0" position. The non-repeat lock in the switch
prevents the
starter from being operated when the engine is running and guards against
starter damage.
To remove the key and to lock the steering
wheel
, turn the key back to position "0" and
pull out. Turn the steering wheel until it locks.
WARNING
Never remove key from ignition lock or
turn key off while vehicle is moving. The
steering wheel will lock, causing loss of
control.
Instrument panel lights
Warning lights for alternator, oil pressure, and
brake system will light up for a bulb check
when the ignition is turned on. They should go out after the engine is started. The brake
warning light will go out after the parking
brake has been fully released. See
"Warning lights" for more details.
Buzzer
If you leave the key in the ignition/steering
lock, the buzzer will sound when the driver's
door is opened. This is a reminder to remove
the key.
For further details see "Starting Procedures"
on the following page.
24
Starting Procedures
WARNING
Fasten safety belts before driving.
Never start or let the engine run in an enclosed, unventilated area. Exhaust
fumes from the engine contain carbon
monoxide, which is a colorless and
odorless gas. Carbon monoxide can be
fatal if inhaled.
Never leave engine idling unattended. An unattended vehicle with a running engine
is potentially hazardous.
Do not park or operate the vehicle in areas where the hot exhaust system may
come in contact with dry grass, brush,
fuel spill or other flammable material.
Never leave engine idling. When starting engine, be ready to drive immediately.
Maintain moderate speed until engine is
warm.
Automatic Transmission - Start with selec-
tor lever in Park.
Manual Transmission - Start with gearshift
lever in Neutral.
Temperature sensors on the engine auto- matically provide the correct fuel/air mixture
required for starting.
Therefore, do not depress the accelerator
pedal while starting a cold or a warm engine.
When starting at very low outside
temperatures , fully depress the clutch pedal,
so that the starter only has to crank the
engine.
As soon as the engine starts, release the ignition key.
If the engine fails to start after 10 to 15
seconds of cranking, wait about 10
seconds before engaging starter again.
Do not let engine idle to warm it up. After
starting, drive vehicle at moderate speeds and with gradual accelerations. Avoid high rpm
and full throttle operation until the engine has
reached normal operating temperature.
Stopping engine
Turn key back to position 0.
Do not stop engine immediately after hard
or extended driving. Keep engine running
at increased idle for about two minutes to
prevent excessive heat buildup before
turning off engine.
WARNING
Before you check anything in the engine compartment, let the engine cool down.
Hot components can burn skin on
contact.
The radiator fan switches on automatically when the coolant reaches a
certain temperature and continues to run
(even with ignition off) until the coolant
temperature drops. Therefore, never
touch the fan blades as they will rotate
spontaneously when the thermoswitch
turns the fan on.
If you have an automatic garage door...
The transistorized ignition system in your
Porsche may interfere with your electronically
operated garage door. To check this: drive
your Porsche close to the garage door and
run the engine at different speeds.
If the garage door opens or closes without
your operating the garage door unit in your
car, contact the dealer who installed the
automatic garage door to have the frequency
and/or coding of the garage door signal
modified.
25
Page 16 of 66

Lane changer
To indicate your intention when changing
lanes on the highway, slightly push the turn
signal switch lever up or down to the point of
resistance. The lever will return to the OFF
position when released.
Headlight dimmer
With the light switch at stage 2, high beam is
switched on by pressing the lever towards the
instrument panel, and low beam is switched
on by pulling the lever towards the steering
wheel. When high beams are on, the blue indicator light between the tachometer and the right instrument cluster will light up.
You can flash signal other motorists by
repeatedly pulling and releasing the lever just
up to the point of resistance.
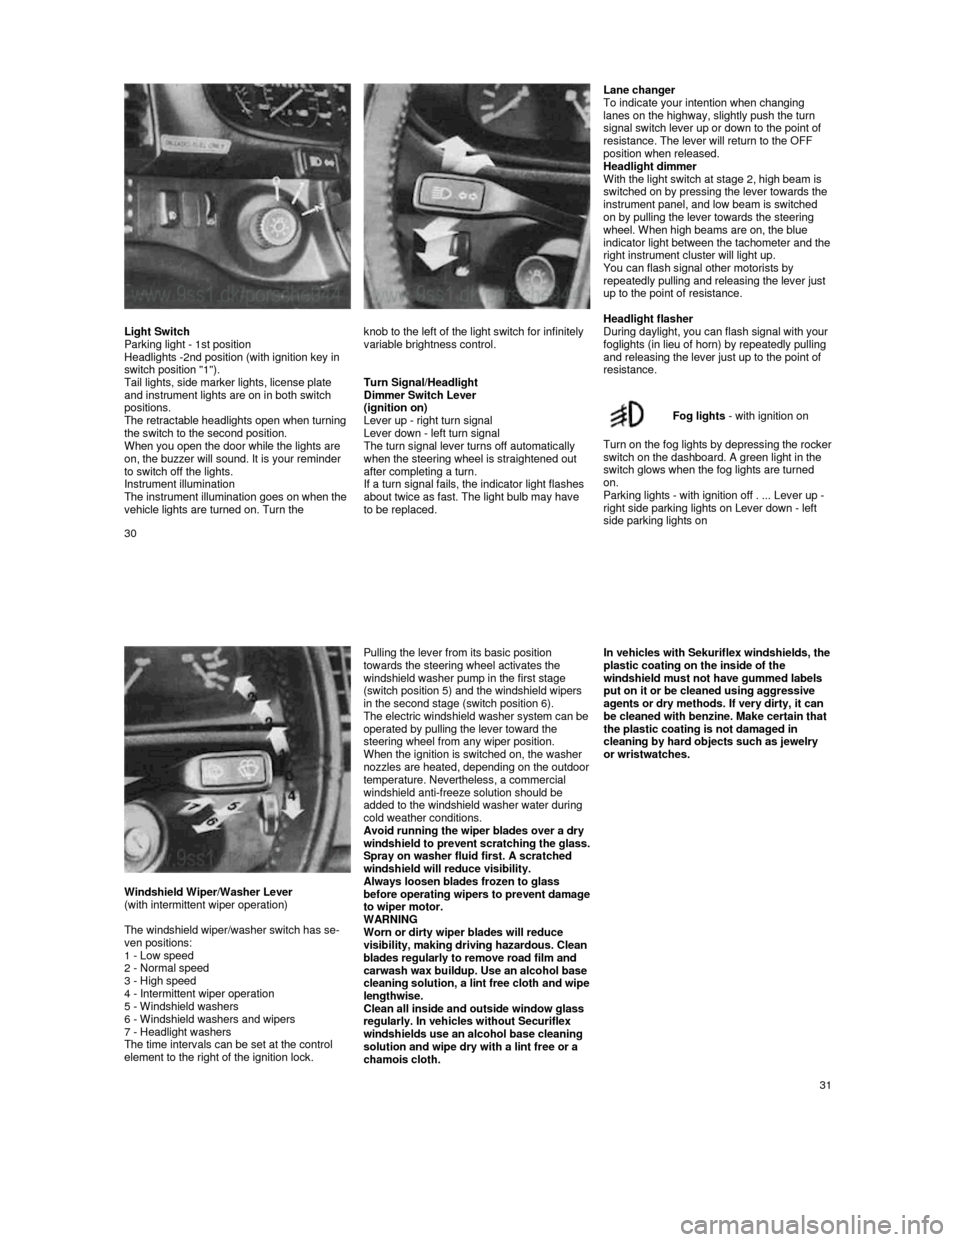
Light Switch
Parking light - 1st position
Headlights -2nd position (with ignition key in
switch position "1").
Tail lights, side marker lights, license plate
and instrument lights are on in both switch
positions.
The retractable headlights open when turning
the switch to the second position.
When you open the door while the lights are
on, the buzzer will sound. It is your reminder
to switch off the lights.
Instrument illumination
The instrument illumination goes on when the
vehicle lights are turned on. Turn the
knob to the left of the light switch for infinitely
variable brightness control.
Turn Signal/Headlight
Dimmer Switch Lever
(ignition on)
Lever up - right turn signal
Lever down - left turn signal
The turn signal lever turns off automatically
when the steering wheel is straightened out after completing a turn.
If a turn signal fails, the indicator light flashes
about twice as fast. The light bulb may have
to be replaced.
Headlight flasher
During daylight, you can flash signal with your
foglights (in lieu of horn) by repeatedly pulling
and releasing the lever just up to the point of
resistance.
Fog lights
- with ignition on
Turn on the fog lights by depressing the rocker switch on the dashboard. A green light in the
switch glows when the fog lights are turned
on.
Parking lights - with ignition off . ... Lever up -
right side parking lights on Lever down - left
side parking lights on
30
Windshield Wiper/Washer Lever
(with intermittent wiper operation)
The windshield wiper/washer switch has se-
ven positions:
1 - Low speed
2 - Normal speed
3 - High speed
4 - Intermittent wiper operation
5 - Windshield washers
6 - Windshield washers and wipers
7 - Headlight washers
The time intervals can be set at the control
element to the right of the ignition lock.
Pulling the lever from its basic position
towards the steering wheel activates the
windshield washer pump in the first stage
(switch position 5) and the windshield wipers
in the second stage (switch position 6).
The electric windshield washer system can be operated by pulling the lever toward the
steering wheel from any wiper position.
When the ignition is switched on, the washer
nozzles are heated, depending on the outdoor temperature. Nevertheless, a commercial windshield anti-freeze solution should be
added to the windshield washer water during
cold weather conditions.
Avoid running the wiper blades over a dry
windshield to p
revent scratching the glass. Spray on washer fluid first. A scratched
windshield will reduce visibility.
Always loosen blades frozen to glass
before operating wipers to prevent damage to wiper motor.
WARNING
Worn or dirty wiper blades will reduce
visibility, making driving hazardous. Clean
blades regularly to remove road film and
carwash wax buildup. Use an alcohol base
cleaning solution, a lint free cloth and wipe lengthwise.
Clean all inside and outside window glass
regularly. In vehicles without Securiflex
windshields use an alcohol base cleaning
solution and wipe dry with a lint free or a
chamois cloth.
In vehicles with Sekuriflex windshields, the plastic coating on the inside of the
windshield must not have gummed labels
put on it or be cleaned using aggressive
agents or dry methods. If very dirty, it can
be cleaned with benzine. Make certain that
the plastic coating is not damaged in
cleaning by hard objects such as jewelry
or wristwatches.
31
Page 48 of 66

Replacing Bulbs
944 / 944 S
944 Turbo To avoid short circuits, turn off the respective
electrical components when changing light
bulbs.
Keep bulbs free of grease and dirt. Hold
them only with a clean cloth or soft paper.
Do not use chemical cleaning agents on
the plastic lenses. Plastic lenses should
only be cleaned with water or a mild soap/
water solution.
We recommend that you have an assortment
of spare bulbs in the car.
When traveling abroad don't forget that some
countries require spare bulbs as part of the
safety equipment.
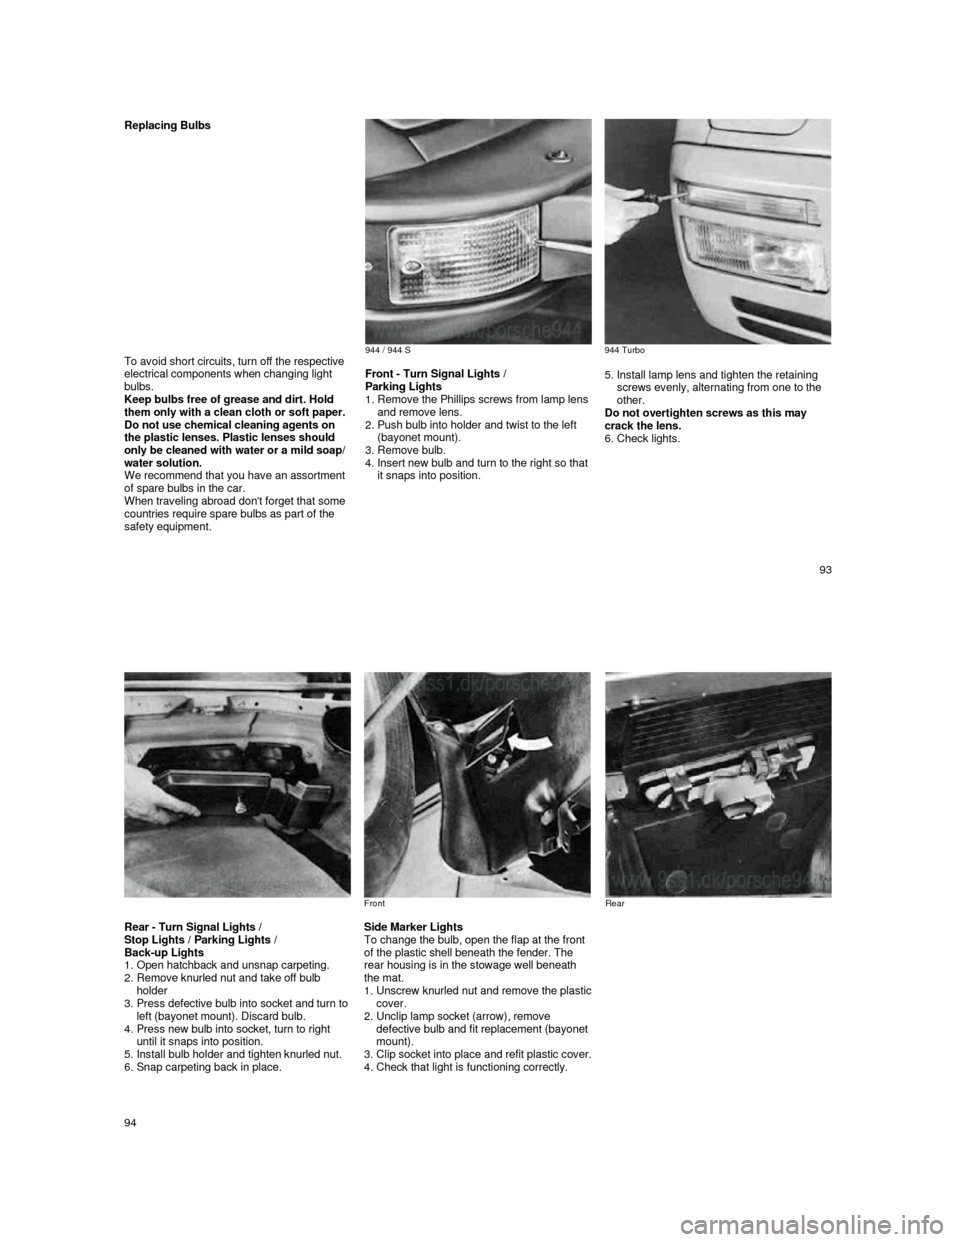
Front - Turn Signal Lights /
Parking Lights
1. Remove the Phillips screws from lamp lens
and remove lens.
2.
Push bulb into holder and twist to the left
(bayonet mount).
3.
Remove bulb.
4. Insert new bulb and turn to the right so that
it snaps into position.
5. Install lamp lens and tighten the retaining screws evenly, alternating from one to the
other.
Do not overtighten screws as this may
crack the lens.
6. Check lights.
93
Front
Rear Rear - Turn Signal Lights /
Stop Lights / Parking Lights /
Back-up Lights
1. Open hatchback and unsnap carpeting.
2.
Remove knurled nut and take off bulb
holder
3.
Press defective bulb into socket and turn to
left (bayonet mount). Discard bulb.
4.
Press new bulb into socket, turn to right
until it snaps into position.
5.
Install bulb holder and tighten knurled nut.
6. Snap carpeting back in place.
Side Marker Lights
To change the bulb, open the flap at the front
of the plastic shell beneath the fender. The
rear housing is in the stowage well beneath
the mat.
1.
Unscrew knurled nut and remove the plastic cover.
2. Unclip lamp socket (arrow), remove
defective bulb and fit replacement (bayonet
mount).
3.
Clip socket into place and refit plastic cover. 4. Check that light is functioning correctly.
94