1987 NISSAN PULSAR body
[x] Cancel search: bodyPage 31 of 238

Engine Tune-up
View of the engine timing marks showing the 10 deg
BTDC crankshaft notch aligned with the pointer on the
front of the engine.
(5) If adjustment is necessary, loosen the distrib-
utor body retaining nuts and turn the distributor body
until the correct setting is obtained.
(6) Tighten the distributor body retaining nuts
and ensure that the timing is still correct.
(7) Remove the jumper lead from the diagnostic
link connector.
(8) Disconnect the timing light from the engine.
TO ADJUST IDLE SPEED AND MIXTURE
The idle speed and mixt ure are not adjusted as
normal service procedure. However, should the per-
formace of the vehicle indicate that the mixture is
incorrect, refer to the Fuel and Engine Management
section for the procedures to test for faulty compo-
nents in the engine management system.
Page 33 of 238
Roadside Trouble Shooting
(5) Place the vent caps loosely over the cell
apertures.
(6) Connect one end of the red jumper lead to
the positive ( + ) battery terminal of the booster
battery and the other end of the red lead to the
positive (+) battery terminal of the discharged bat-
tery.
NOTE: The battery emits hydrogen gas
which is explosive. Do not expose the battery
to naked /lames or sparks.
Do not lean over the battery when con-
necting the jumper leads.
Do not allow the ends of the jumper leads
to touch one another or any part of the
engine.
(7) Connect one end of the black juniper lead to
the negative (-) battery terminal of the booster
battery and the other end of the black lead to a good
earthing point on the engine of the vehicle with the
discharged battery.
NOTE: Do not connect the jumper lead
directly to the negative (-) battery terminal
of the discharged battery.
(8) Start the engine on the vehicle with the
booster battery and run the engine at a moderate
speed. (9) Start the engine on the vehicle with the
discharged battery.
(10) If possible, leave the engines of both vehi-
cles running for 10 minutes.
(11) Disconnect the jumper leads in the reverse
order of the sequence in which they were connected.
2. TO CHECK IGNITION AND ELECTRICAL SYSTEM
(1) Switch on the ignition and check for warning
lamp illumination on the dashboard. (2) Operate the starter and check that the starter
rotates the engine at a steady speed.
(3) Switch on the headlamps and check for good
light intensity. Should the lamps not illum inate or the starter
motor not turn the engine, carry out the following
steps:
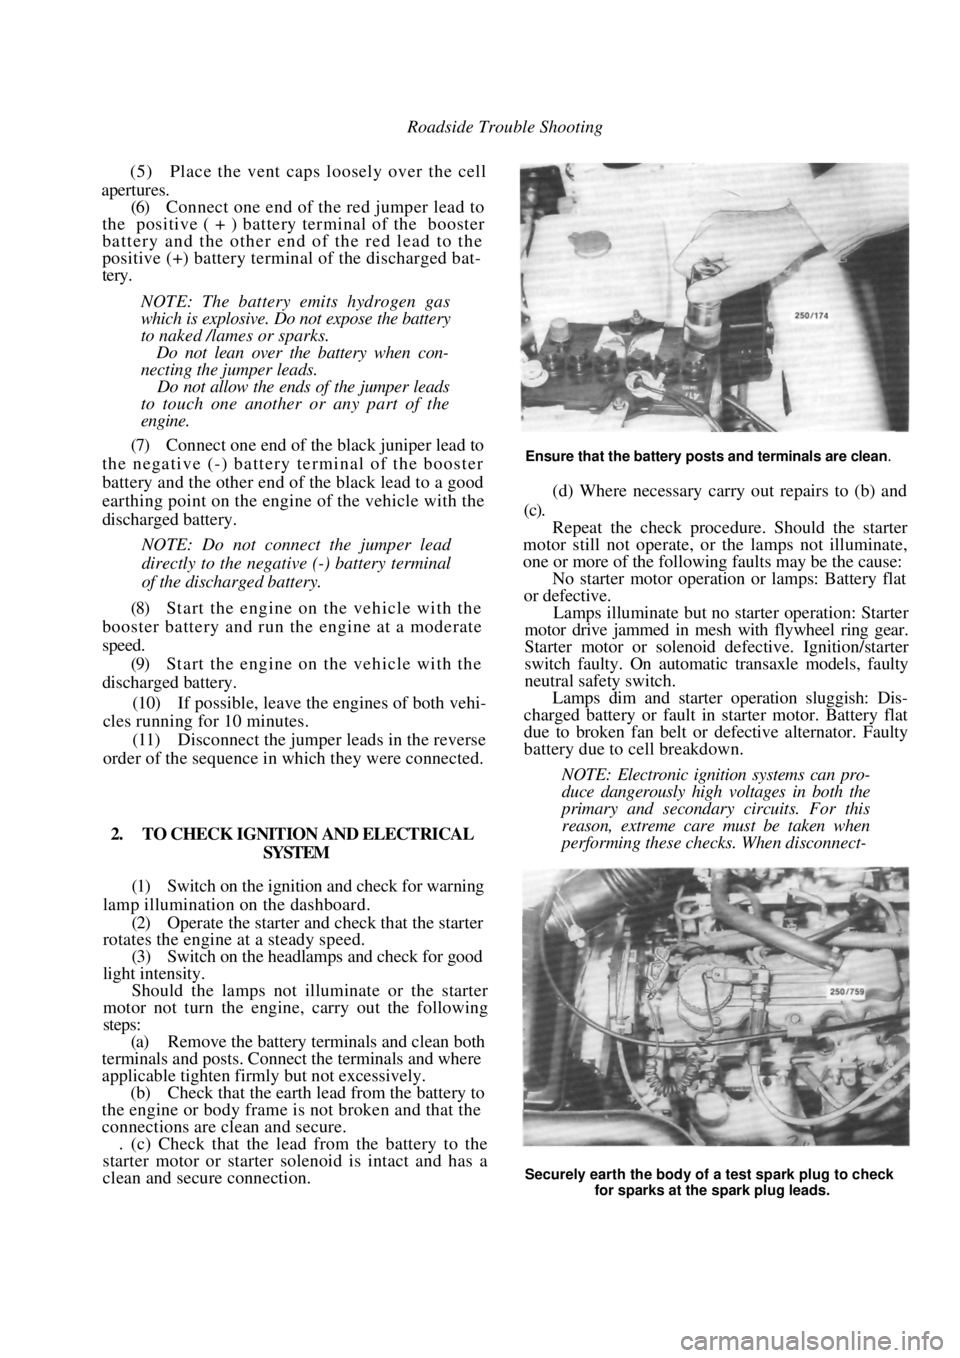
(a) Remove the battery terminals and clean both
terminals and posts. Connect the terminals and where
applicable tighten firmly but not excessively.
(b) Check that the earth lead from the battery to
the engine or body frame is not broken and that the
connections are clean and secure. . (c) Check that the lead from the battery to the
starter motor or starter solenoid is intact and has a
clean and secure connection.
Ensure that the battery posts and terminals are clean.
(d) Where necessary carry out repairs to (b) and
(c).
Repeat the check procedur e. Should the starter
motor still not operate, or the lamps not illuminate,
one or more of the following faults may be the cause:
No starter motor operation or lamps: Battery flat
or defective.
Lamps illuminate but no starter operation: Starter
motor drive jammed in mesh with flywheel ring gear.
Starter motor or solenoid defective. Ignition/starter
switch faulty. On automatic transaxle models, faulty
neutral safety switch.
Lamps dim and starter operation sluggish: Dis-
charged battery or fault in starter motor. Battery flat
due to broken fan belt or de fective alternator. Faulty
battery due to cell breakdown.
NOTE: Electronic ignition systems can pro-
duce dangerously high voltages in both the
primary and secondary circuits. For this
reason, extreme care must be taken when
performing these checks. When disconnect-
Securely earth the body of a test spark plug to check
for sparks at the spark plug leads.
Page 38 of 238

38 Engine
*Piston skirt to cylinder bore clearance:
1.6 liter .....................................0. 020-0.040 mm
1.8 liter .....................................0. 010-0.030 mm
Gudgeon pin length:
1.6 liter ...................................................... 53 mm
1.8 liter .................................................. 61.5 mm
Gudgeon pin diameter.................20.990-20.995 mm
Gudgeon pin clearance in piston:
1.6 liter .....................................0. 010-0.020 mm
1.8 liter ..................................0. 0055-0.0115 mm
Gudgeon pin offset in piston:
1.6 liter......... 0.35-0.65 mm towards thrust side
1.8 liter................... 0.8 mm towards thrust side
*Measured 9 mm from the bottom of the piston skirt
for 1.6 liter models and 6 mm from the bottom of the
piston skirt for 1.8 liter models.
PISTON RINGS
Rings per piston:
Compression .......................................................2
Oil contro l .......................................................... 1
End gap:
Compression ................................ 0.30-0.50 mm
Oil control —
1.6 liter ......................................... 0.33-1.10 mm
1.8 liter ......................................... 0.40-1.40 mm
CONNECTING RODS AND BEARINGS
Connecting rod side clearance............ 0.07-0.24 mm
Maximum connecting rod weight variation..8 grams
Crankpin bearing oil clearance ....... 0. 019-0.063 mm
CRANKSHAFT AND MAIN BEARINGS
Number of bearings .................................................. 5
End float taken at ...................... No. 3 main bearing
End float .......................................... 0.070-0.302 mm
Bend limit ...................................................0.03 mm
Main bearing oil clearance .............0. 015-0.040 mm
Main bearing journal diameter.. .57.982-57.995 mm
Crankpin diameter .......................48.971-48.987 mm
FLYWHEEL
Ring gear run out limit.................................. 0.3 mm
Clutch face regrind limit .............................. 0.3 mm
CAMSHAFT
Drive ...................................................... Toothed belt
End float .............................................. 0.04-0.14 mm
Bend limit ................................................... 0.03 mm
Bearings ...........................................Direct in housing
Journal diameter:
Standard —
No. 1 ..................................... 42. 455-42.470 mm
No. 2 ..................................... 42. 705-42.720 mm
No. 3 ..................................... 42.955-42.970 mm
No. 4 ..................................... 43.205-43.220 mm
No. 5 ..................................... 43.455-43.470 mm
Undersize —
No. 1 .....................................42.355-42.370 mm
No. 2 ......................................42.605-42.620 mm
No. 3 .....................................42.855-42.880 mm
No. 4 ......................................43.105-43.120 mm
No. 5 .....................................43. 355-43.370 mm
*An undersize camshaft can be identified by a violet
flash between the inlet and exhaust lobes of No. 2
cylinder.
Housing diameter;
Standard —
No. 1 .....................................42. 500-42.525 mm
No. 2 .....................................42.750-42.775 mm
No. 3 .....................................43.000-43.025 mm
No. 4 ......................................43.250-43.275 mm
No. 5 .....................................43.500-43.525 mm
*Undersize —
No. 1 .....................................42.400-42.425 mm
No. 2 .....................................42.650-42.675 mm
No. 3 .....................................42.900-42.925 mm
No. 4 ......................................43.150-43.175 mm
No. 5 .....................................43.400-43.425 mm
*An undersize camshaft housing can be identified by
a violet flash on the centre camshaft bearing support.
LUBRICATION
Oil pump type .......................................Involute gear
Filter type................................... Full flow disposable
Oil pressure at 4 000 rpm .....................480-620 kPa
Rotor assembly end float .................. 0.03-0. 010 mm
Rotor teeth backlash ......................... 0.010-0.20 mm
TORQUE WRENCH SETTINGS
*Cylinder head bolts:
Initial torque ............................................. 25 Nm
1st stage ......................................... + 60 degrees
2nd stage ........................................ + 60 degrees
3rd stage......................................... + 60 degrees
4th stage, engine at operating
temperature .............................. + 30-50 degrees
Exhaust manifold nuts .................................... 22 Nm
Exhaust manifold flange nuts ......................... 22 Nm
Inlet manifold nuts.......................................... 22 Nm
Throttle body to inlet manifold nuts ..............12 Nm
Camshaft liming gear bolt ...............................45 Nm
Camshaft retainin g plate bolts ......................... 7 Nm
Camshaft cover bolts......................................... 8 Nm
Thermostat cover bolts ....................................15 Nm
*Main bearing bolts..................60 Nm + 45 degrees
Connecting rod bearing
cap nuts ................................... 35 Nm + 45 degrees
* Crankshaft timing
gear bolt.................................. 145 Nm + 35 degrees
*Flywheel bolts
(microencapsulated) ................ 60 Nm + 30 degrees
*Drive plate bolts (microencapsulated)........... 60 Nm
Water pump bolts............................................ 25 Nm
Page 42 of 238

42 Engine
The cylinder block is a cast iron alloy, deep skirt
design and the crankshaft is supported in the cylinder
block by five precision insert replaceable main bear-
ings. Crankshaft end float is controlled by the flanged
centre main bearing. Connecting rods are I section
forgings equipped with precision insert replaceable big
end bearings. The gudgeon pins are an interference fit
in the connecting rod and a floating fit in the piston.
The cast aluminum pistons are equipped with
two compression rings and one oil control ring.
The twin rotor, involute gear oil pump is mounted
directly to the front face of the cylinder block. The
inner rotor is internally driven by the crankshaft. The
oil pump pressure relief valve is not adjustable, and
consists of a plunger and spring mounted in the oil
pump body.
The pump draws oil through a screen in the sump
and delivers it, via a full flow replaceable oil filter, to
the oil gallery from where it is distributed to the
hydraulic tappets, camshaft and crankshaft bearings
and to the overhead rocker and valve mechanism.
3. ENGINE AND TRANSAXLE ASSEMBLY
Special Equipment Required:
To Remove and Instill — Suitable lifting tackle,
extra long chassis stands, suitable trolley
TO REMOVE
NOTE: Due to the high residual pressure
within the fuel system, it will be necessary to
depressurize the system before removing any
fuel supply components. Refer to the Fuel
and Engine Management section for the
correct procedure.
(1) Disconnect the negative battery terminal.
(2) Mark around the bonnet hinges with a soft
lead pencil Co facilitate correct installation. With the
aid of an assistant, remove the bonnet retaining bolts
and remove the bonnet from the vehicle.
(3) Drain the engine and transaxle lubricant.
(4) Open the coolant drain tap located on the
lower radiator pipe and drain the coolant. (5) Loosen the hose clips and disconnect the
heater hoses from the heater pipes at the bulkhead.
NOTE: Do not use excessive force to remove
the heater hoses from the heater pipes or the
heater core will become dislodged from the
heater unit. If necessary, cut the heater
hoses from the pipes using a sharp knife.
(6) Loosen the hose clamps and disconnect the
radiator hoses from the engine assembly. (7) Disconnect the positive lead from the bat-
tery. (8) On 1.8 liter models, disconnect the air inlet
duct.
(9) On 1.6 liter models, remove the air cleaner
assembly. Refer to the Fuel and Engine Management
section if necessary. (10) Disconnect the throttle cable from the throt-
tle body and from the camshaft housing top cover
bracket, if applicable. (11) Disconnect the fuel supply and return hoses.
Mark the hoses as an aid to installation. (12) Suitably mark and disconnect the charcoal
canister hoses. (13) Disconnect the injector wires from the injec-
tors. On 1.6 liter models, slide the wiring out from the
throttle body. (14) Disconnect the wiring fr om the throttle po-
sition sensor (TPS), idle air control (IAC) valve,
oxygen (O
2) sensor wire, coolant temperature sensor,
coolant sender and on 1.8 liter models, the manifold
air temperature (MAT) sensor. (15) Disconnect the wiring connector adjacent to
the top heater hose, the wiring from the alternator and
the two earth wires from underneath the cylinder head
bolts. (16) Lay the wiring loom over on the passenger
side of the engine compar tment, clear of the work
area.
(17) On manual transaxle models, loosen the
clutch cable adjusting nuts and remove the cable
through the slot in the lever. Remove the clutch cable
bracket from the transaxle after removing the retain-
ing bolts and place the cable to one side.
(18) Disconnect the wiring from the starter mo-
tor, speedometer sender and on manual transaxle
models, the reverse lamp switch wiring.
(19) If applicable, disconnect the power steering
lines from the pump and drain the fluid into a
container. Suitably plug the lines and the pump to
prevent the entry of dirt.
(20) On automatic transaxle models, disconnect
the selector cable and bracket from the transaxle
assembly.
Disconnect the transaxle oil cooler lines from the
transaxle. Plug the lines and fittings to prevent the
entry of dirt etc.
(21) Loosen the front wheel nuts, raise the front
of the vehicle and support it on extra long chassis
stands. Ensure that the vehicle is high enough to allow
removal of the engine from underneath. (22) Remove the front wheels and the engine
splash guards from the vehicle.
(23) On manual transaxle models, remove the
stay rod and control rod bolts and nuts and disconnect
the rods from the transaxle.
(24) Remove the lower control arm to steering
knuckle ball joint nuts and separate the ball joints
from the steering knuckle by holding a dolly or a
hammer against one side of the steering knuckle and
hitting the other side with a hammer. The taper on the
ball joint will release fr om the steering knuckle.
(25) Pull the steering knuckles outward swiftly to
Page 43 of 238

Engine 43
CAMSHAFT HOUSING TOP COVER
Front view of the 1.8 liter engine and automatic transaxle assembly removed from the vehicle.
release the driveshafts from the transaxle. Tie the
driveshafts to the underbody of the vehicle using wire
and ensuring that excessive st rain is not placed on the
joints.
NOTE: If the driveshafts will not release
from the transaxle, a lever can be used
between the driveshaft and the transaxle.
Care must be taken when using the lever not
to damage the transaxle oil seals.
(26) Remove the engine pipe from the engine.
Refer to the procedure at the end of this section if
necessary.
(27) Remove the engine crossmember retaining
bolts and nuts and remove the crossmember from
beneath the vehicle. (28) Attach the lifting tackle to the engine and
raise the engine slightly to take the weight off the
engine mountings. (29) Remove the front, rear, left and right engine
mounting bolts and nuts. Withdraw the mountings
from the engine compartment. (30) Slowly lower the engine and transaxle assem-
bly from the engine compartment. On air conditioned vehicles, remove the air
conditioning compressor an d hoses after the engine
has been lowered slightly. Secure the compressor to
one side, clear of the work area, with wire or similar.
NOTE: Do not disconnect the hoses from
the air conditioning compressor. Escaping
refrigerant can cause frostbite and eye dam-
age.
( 3 1 ) Lower the engine and transaxle assembly
onto a suitable trolley and maneuver the engine from
beneath the vehicle.
TO INSTAL
Installation is a reversal of the removal procedure
with attention to the following points:
(1) Position the engine and transaxle assembly
beneath the front of the vehicle.
(2) Install the lifting tackle and raise the engine
assembly into position in the engine compartment.
NOTE: On air conditioned models, ensure
that the air conditioning compressor is in-
stalled to the engine as the engine is in-
stalled to the engine compartment.
(3) Install the engine and transaxle
assembly
mounting nuts, bolts and washers finger tight before
the full weight of the assembly is taken by the
Page 44 of 238

44 Engine
Rear three quarter view of the 1.8 liter engine and automatic transaxle assembly.
mountings. Lower the assembly onto the mountings
and tighten the mounting nuts and bolts.
(4) Install a new exhaust flange gasket.
(5) Fill the engine and transaxle with the correct
quantity and grade of lubricant. (6) Fill the cooling system as described in the
Cooling and Heating Systems section. (7) On models with power steering, fill the power
steering reservoir with the recommended fluid.
(8) Start and run the engine until it reaches the
normal operating temperatur e and check for fuel, oil
and coolant leaks.
4. MANIFOLDS
INLET MANIFOLD - 1.6 Liter Models
To Remove and Install
NOTE: Due to the high residual pressure
within the fuel system, it will be necessary to
depressurise the system before removing the
fuel supply components. Refer to the Fuel
and Engine Management section for the
correct procedure.
(1) Disconnect the negative battery terminal.
(2) Remove the wingnuts retaining the air
cleaner to the throttle body, lift the air cleaner
upwards slightly and disconnect the vacuum hoses. (3) Drain the cooling system as described in the
Cooling and Heating Systems section. (4) Loosen the hose clamps and disconnect the
engine coolant hoses from the rear of the manifold.
(5) Disconnect the small branch of the engine
ventilation hose from the rear of the inlet manifold. (6) On automatic transaxle models, disconnect
the kickdown cable from the throttle lever by releasing
the wire spring clip and re moving the cable end socket
from the ball.
(7) Turn the throttle lever to the full throttle
position. Using the slack in the throttle cable, release
the throttle cable end thr ough the slot provided.
Page 45 of 238

Engine 45
Installed view of the inlet manifold. 1.6 liter models. Air
cleaner removed.
(8) Remove the bolts retaining the throttle cable
bracket to the inlet manifold and place the bracket
with cable(s) attached to one side.
(9) Suitably mark the supply and return fuel
hoses and disconnect them from the throttle body.
(10) Suitably mark and disconnect the air pre-
heat, map sensor, charcoal canister and brake booster
vacuum hoses from the throttle body. (11) Disconnect the electrical connector from the
throttle body. (12) Remove the inlet manifold nuts and with-
draw the inlet manifold assembly. Discard the gasket. Installation is a reversal of the removal procedure
with attention to the following points:
(1) Ensure that all the carbon and old gasket
material is cleaned from the manifold and cylinder
head faces. (2) Check the face of the manifold for distortion
using a straight edge and a feeler gauge. (3) Use a new gasket and ensure that the mani-
fold retaining nuts are tightened to the specified
torque in a spiral pattern from the centre outwards. (4) Connect the vacuum hoses, the throttle cable
and where applicable, the kickdown cable. Adjust the
throttle cable as outlined in the Fuel and Engine
Management section and the kickdown cable as
described in the Automatic Transaxle section. (5) Fill the cooling system as described in the
Cooling and Heating Systems section. (6) Start the engine and check for air, fuel and
water leaks.
INLET MANIFOLD - 1.8 Liter Models
To Remove and Install
NOTE: Due to the high residual pressure
within the fuel system, it will be necessary to
depressurise the system before removing any
fuel supply components. Refer to the Fuel
and Engine Management section for the
correct procedure.
(1) Disconnect the negative battery terminal.
(2) Loosen the hose clamp and disconnect the
air inlet duct from the throttle body. (3) Suitably mark and disconnect the vacuum
hoses from the throttle body. (4) On automatic transaxle models disconnect
the kickdown cable from the throttle lever by releasing
the wire spring clip and re moving the cable and socket
from the ball. (5) Turn the throttle lever to the full throttle
position. Using the slack in the throttle cable, release
the throttle cable end thr ough the slot provided.
(6) Remove the bolts retaining the throttle cable
bracket to the inlet manifold and place the bracket
with cable(s) attached to one side. (7) Disconnect the wiring connectors from the
idle air control (IAC) valve and the throttle position
sensor (TPS).
(8) Disconnect the wiring connectors from the
fuel injectors and manifold air temperature (MAT)
sensor.
NOTE: A small screwdriver or similar tool
can be used to release the wire spring clips
on the injector connectors.
(9) Suitably mark and disconnect the fuel supply
and return lines from the fuel rail. (10) Remove the inlet manifold nuts and with-
draw the inlet manifold assembly. Discard the gasket. Installation is a reversal of the removal procedure
with attention to the following points:
View of the inlet manifold removed from the engine.
Page 50 of 238

50 Engine
(4) Ensure that the tappet assemblies are full of
clean engine oil and insert the tappets in their
respective bores in the cylinde r head. Install the thrust
pads to the top of each valve assembly ensuring that
they are returned to their original location.
(5) Coat the contact surfaces of the rocker arms
with molybdenum disulphide grease and install the
rocker arms to their origin al locations on the cylinder
head. (6) Clean the mating surfaces of the camshaft
housing and cylinder head. Apply a bead of Loctite
515 to the cylinder head and camshaft housing mating
surfaces. Take care that no sea lant is forced into the
oil passages and install the camshaft housing to the
cylinder head.
(7) Install new cylinder head bolts and lubricate
the bolts and washers with oil.
(8) Apply an initial torque to the cylinder head
bolts of 25 Nm in the corr ect sequence as shown in
the illustration under the Cylinder Head heading.
Further tighten the head bolts in the correct sequence,
in three separate 60 degree stages. Refer to Specifica-
tions. (9) Install the bolts securing the camshaft
drive
belt inner cover to the camshaft housing. (10) Install the camshaft timing gear to the cam-
shaft ensuring that it is correctly located. Tighten the
camshaft timing gear retain ing boll to the specified
torque. (11) Install and adjust the camshaft drive belt as
described under the previous heading. (12) Install the distributor. Refer to the Fuel and
Engine Management section.
(13) Connect the lower radiat or hose and fill the
cooling system with the required coolant. Refer to the
Cooling and Heating Systems section if necessary. (14) Start and run the engine until normal oper-
ating temperature is attained and tighten the cylinder
head bolts another 30-50 degrees in the correct
sequence, ensuring that the tension does not exceed
135 Nm.
TO RENEW CAMSHAFT OIL SEAL,
CAMSHAFT INSTALLED
(1) Remove the camshaft drive belt from the
camshaft timing gear as described under the previous
heading.
(2) Remove the camshaft housing top cover
retaining bolts, remove the cover and discard the
gasket.
(3) Use an open end spanner to hold the cam-
shaft between the inlet and exhaust lobes of number
four cylinder and remove the camshaft timing gear
retaining bolt and the camshaft timing gear. (4) With a pointed drift, tap a small hole in the
front face of the oil seal. Insert a self tapping screw in
the hole and using a pair of pliers, pull on the screw
to remove the oil seal from the housing.
(5) Clean the seal recess and the camshaft sea!
running surface. (6) Lubricate the lip of a new oil seal with engine
oil and slide the seal over the camshaft. Ensure that
the lip of the seal faces to wards the inside of the
camshaft housing. Tap evenly around the edges of the
seal until it is fully seated in the camshaft housing.
(7) Install the camshaft timing gear to the cam-
shaft, ensuring that it is co rrectly located. Tighten the
camshaft timing gear retain ing bolt to the specified
torque. Do not allow the camshaft to rotate while
tightening the bolt. (8) Install and adjust the drive belt as described
under the previous heading. Ensure that the timing
marks are aligned. (9) Install the camshaft hou sing top cover using a
new gasket. Tighten the retaining bolts to the specified
torque.
7. CYLINDER HEAD
Special Equipment Required:
To Dismantle and Assemble — Valve spring com-
pressor
To Inspect — Dial gauge and straight edge
To Install — Drive belt adjusting tool
TO REMOVE AND INSTAL
NOTE: Due to the high residua! pressure
within the fuel system, it will be necessary to
depressurize the system before removing any
fuel supply components. Refer to the Fuel
and Engine Management section for the
correct procedure.
Allow the engine to cool prior to the
removal of the cylinder head to prevent
possible distortion of the cylinder head.
(1) Disconnect the negative battery terminal and
remove the nuts securing the earth wires to the
cylinder head bolts.
(2) Remove the camshaft drive belt as previ-
ously described.
(3) Disconnect the lower radiator hose and drain
the cooling system. Refer to the Cooling and Heating
Systems section if necessary. (4) Remove the alternator adjusting bracket
mounting bolt and insulating washers from the inlet
manifold. Loosen the adjusting bolt at the alternator
and slide the bracket away from the cylinder head. (5) Disconnect the upper radiator hose, coolant
by-pass hose and the heater hose from the thermostat
housing and on 1.6 liter m odels, the coolant hoses
from the inlet manifold. (6) Disconnect the electrica l connectors from the
throttle body, fuel injectors, coil, distributor and on
1.8 liter models, the MAT sensor. (7) Disconnect the oxygen sensor wiring connec-
tor and remove the wiring connectors from the